Endeavor Deep Sea: A Review of the Solo and Cooperative Modes

IMG_7441

Endeavor Deep Sea is a worker placement game from Kickstarter: it was originally up for funding back in May 2023 and promised delivery in May 2024.

IMG_7437

My Kickstarter copy arrived October 1st, 2024 (see above) making it about 5 months late.  Meh, that’s not too late in the grand scheme of Kickstarters.

IMG_7442

I backed this because it is a worker placement game promising both solo and cooperative modes!  That’s right!  Cooperative worker placement games are a rare creature, so I was excited to see what this would bring! (How many can you think of?  Exactly!)

IMG_7444

Let’s take a look below!

Unboxing and Gameplay

IMG_7438

So, my version is the deluxe version (see above: I had to pay extra for that).  Anything you see here will be from the deluxe version: mostly, the deluxe version has nicer components and adds a 5th player.

IMG_7445

This is a pretty big mamba-jamba!  Look how the Coke can is dwarfed by the box!

IMG_7484

There is a LOT of stuff in this box!  See above!  The easiest way to take a look at it is to talk about gameplay and show the pieces as we do, so you can see how everything (so much stuff!) interacts!

IMG_7465

There’s 5 “teams” in the game: each player chooses one of them to operate.  (They are all the same except for the color: there’s no special powers or anything).  Each team has a whole bunch of tokens in their little trays.

IMG_7496

The circular tokens are the worker player disks: these go out to “do actions”.  The hexagonal tokens are special tokens that go on the Impact Board (we’ll discuss more below).  Each team also has a Specialist called the Team Leader … they are a Jack-Of-All-Trades: they can do any of the actions in the game!

IMG_7572

As the game progresses, you acquire more and more Specialists: see above.  Basically, you place a circular “worker placement” token (see above) on a Specialist to activate their ability!  Notice that each of the Specialists can only do certain things!  The Skipper can only MOVE!  The Underwater Photographer can either DIVE or JOURNAL!    So, your choice of Specialists is important, as it shapes what you can do!

IMG_7562

The Specialists come from a special tray (no pun intended).  It’s nice, because at the start of every turn, each player gets a Specialist, no matter what!  So, as the game progresses, players get more and more Specialists to activate with the “worker placement” tokens.

IMG_7514

There’s some real interesting things going on with worker placement in this game!  For example, the “worker placement” tokens tend to placed out in pairs!  Also, you can only do an operation (like DIVE or JOURNAL) if your sub is on a Deep Sea Zone with that action on that board!

IMG_7580

For example: Let’s say you want to JOURNAL!  See configuration above!
1) Your sub has to be on a zone with a JOURNAL action (it is: the sub is in the upper portion)
2) One of  your Specialists would have to have the JOURNAL action as something they can do (the Team Leader can do anything, so he can JOURNAL!)
3) You place one token on the Specialist AND one token on the JOURNAL action on the board! (We have enough tokens: one to activate the Specialist and one to put in the JOURNAL action on the board)

This is a little different than most worker placement games … it took me a game a few rounds to get the gist: some of your worker placement tokens go onto the board and never come back!   The idea is that your tokens on the sea boards score you victory points/achieve some goal.

IMG_7581

For example, in the cooperative solo game, you might need to get 5 JOURNALS on the board!  See GOAL 2 above!  So, that’s why one of your worker placement tokens stays on the board: to denote progress for those Goals!

IMG_7516

Now, lest you think you run out of these tokens quickly, never fear!!! These worker placement tokens are both created (from your supply) and reclaimed  (from your Specialists) every turn!  But it’s your player board determines the rate you get more tokens!

IMG_7517

Each player gets a board like above (all boards are the same except for color; there are no special abilities).  The 5 tracks above help determined the rate of many things!! The higher the track the better!

  1. Orange Bubble: How good a Specialist can you recruit? (Reputation track)
  2. Green Light Bulb: How many worker placement tokens do you create this round? (Inspiration Track)
  3. Yellow Arrow: How many worker placement tokens can you reclaim for specialists this round? (Coordination Track)
  4. Blue Puzzle Piece: How fast can your sub move/How many Subs do you have? (Ingenuity Track)
  5. Black DNA: Research Track … How much Research do you have so you can JOURNAL?

At the start of every turn, you will gain a Specialist, create some worker placement tokens, and reclaim some of them from your Specialists.  

IMG_7511

Once you have all tokens for this round, you put all your tokens in your Staging Area … and you are ready to go for your turn!  Players play an action one at a time, and play until they want to, are out of tokens, or out of Specialists!  Many times, you will find you have more tokens that Specialists that can use them …

IMG_7574

And that is the worker placement part of the game!  Using worker placement, New Zones come out, players explore, players journal, they dive, they conserve, they explore the deep sea! See above for what a completed game might look like, both with new Zones explored, worker placement tokens everywhere, and a bunch of journals!

IMG_7482

There’s significantly more to this game, but it’s got such a different worker placement feel, I wanted to go over that part a little!  I really do like the components! 

IMG_7560

When the seascape is all explored, it looks really cool! 

IMG_7499

Everything is very readable and the trays make it so easy to jump into a game!

Rulebook

IMG_7448

The rulebook has good points and bad points: generally, it’s pretty good.

IMG_7455

It’s does well enough on The Chair Test: it opens up without drooping too much, it stays open, the fonts are big enough, and there are plenty of pictures. It’s about a solid B+ on The Chair Test.

IMG_7448

The front page jumps right into the overall game: it does a nice job “introducing” you to concepts that will permeate the game!  I also like how it mentions there are several ways to play the game! (Play Against your friends, or With them, or without them!)

IMG_7449

The Components pages are pretty great: they show all the components and show the fronts and backs of cards and Specialists.  This is well done.  See above.

IMG_7450

The Set-Up is good.  See above: It shows pictures of everything and has easy-to-read annotations.  I had no trouble getting set-up!

IMG_7452

Generally, this rulebook is very concise.  This is both boon and bane: it keeps the rulebook shorter (which makes it easier to peruse and get through) and generally clear, but there are several places where a few sentences would go a long way.    My friend Sam actually knocked a full half-point of of the score because it was too concise in a few rules!

IMG_7456

One such example of this is the cooperative rules (the last page), where it’s not clear that little blue bubble is considered an optional one of the 7 goals you can achieve!  It clearly looks you must achieve it as well as the other goals … but the more you stare at the components, the rules, and the game, you have to conclude that it has to be optional, or the game is too hard.  A sentence saying “The Impact Mission Goal is one of the optional 7 goals” would have done wonders for my first few solo games.

IMG_7454

This is a pretty good rulebook overall, it just needs a few more edge cases defined and few more sentences for clarification.  Honestly, I really like this game, but this is one of my major complaints.  Concision and precision are worthwhile goals, but not at the cost of clarity.

There is also no index.  Or Table of Contents. You pretty much have to go searching linearly for rules when you need to find them.   This is a big enough game that I think a Glossary or Index would have helped a lot.  

IMG_7452

This is a generally pretty good rulebook, so I don’t want you to think I didn’t like it…. I did like it!!  It has lots of good examples, lots of good pictures, and it teaches the game pretty well.  But the lack of index and lack of some extra clarity were frustrating.   It was pretty good, but it could have easily been a great rulebook.

Solo Play

IMG_7443

Endeavor Deep Sea does support solo play!  Congratulations for following Saunders’ Law!

IMG_7458

All of the solo rules (and cooperative rules) are found on the last page of the rulebook. The rules SAY  there’s only one real change between Solo and Co-operative rules: The Solo player plays 7 rounds instead of 6 rounds… that’s it!!  That’s great!  … well, that’s what the rules SAY … but the solo and cooperative rules really do change the game more!  Instead of victory points, players are trying collectively complete some goals, (and must choose from 7 goals to complete).  The basic rules stay the same, but the victory conditions are VASTLY different!   The game feels very different in solo/cooperative mode, so I don’t 100% buy “only 1 change”. But generally, that’s true.

IMG_7455

Nominally, this is a competitive worker placement game FIRST (as the competitive rules come first), but there’s not too many changes to make the game solo/cooperative.  

IMG_7581

The competitive game is all about victory points on the goal cards (see above)!  But, the cooperative game (and solo) is all about working together to achieve (collectively) a certain number of Goals … 4-7 Goals, depending on your difficulty.  For example, for GOAL 2 (above) JOURNALing, the 1P needs to do 5+ JOURNALS to “achieve” the goal, but 2P need (collectively) 8+ JOURNALS!

IMG_7577

Each scenario you choose will have 3 unchanging goals (as per the scenario) …

IMG_7507

… and then bonus goals you draw (4 in the solo game) …

IMG_7519

.. and finally the Impact Sheet goal!!  (This was the goal we complained about in the rulebook section, which was unclear that it was one of the OPTIONAL goals!)

IMG_7546

You get to choose which of the Goals you want to try to achieve, but you can change you mind mid-game as the game evolves!

IMG_7576

I have currently played about 4+ solo games!  I played two with the starting Scenario, and a few others to get a sense of what other Scenarios do!  I had to play one full game to “get” the game, but after that, the game flows pretty quickly!

IMG_7466

I like this game!  There are about 10 Scenarios, so there is a lot of variability to extend the life of the game.  And the game plays fairly quickly: with only 7 rounds, you find yourself running out of time quickly!  So, your turns are fairly thinky as you try to take the best advantage of the Specialists you have, how to advance your tracks, when to explore, when to move, when to JOURNAL, when to dive, and what regions to explore! 

IMG_7575

This game has a really neat “explore” feel as you SONAR to find new regions of the sea to explore!  But, even cooler, you get to choose which of 2 regions to bring forth!  And each region has different bonuses when discovered! And different special abilities!  And different new Locations!  Remember, Locations get “filled” as you play, so you absolutely have the explore to open up new regions and new Worker Placement Locations!!!  So, you have to balance “Well, I like the bonus I get if I discover this region, but we need these spaces to win!  Which do I choose?”    Every thing you do involves some kind of choice which affects your game!

IMG_7542

I had a really nice time playing this solo.  The plays pretty well once you’ve played it solo.  And you can absolutely teach your friends the game quickly once you know it.

I would absolutely play this again solo.

Two Players

IMG_7554

Sam and I had a good time playing 2-Player.  Because of my solo experiences, I was able to teach the game quickly, and we jumped right in!

IMG_7558

There was a good balance of cooperation and solo agency in the game: every one did what they wanted on their turn, but there was discussion about what Zones to bring out, what Journals to do, what Specialists to focus on.  I don’t think there would be a lot of Alpha Player problems in this game, as each player still has agency.

Generally, the 2-Player game went … swimmingly (pun intended).

The only real problems were more with the rules: both Sam and I felt like the edge cases and some of the cooperative Goals needed more explanation.  Since this is a competitive game first, the co-op explanations get the lesser explanation.

3-4 Player Games

IMG_0918

The three and four player cooperative games went over quite well.

IMG_0912

The only real problems of the 3 and 4-Player game was the downtime between turns.  In the solo and 2-Player games, the game moves much more quickly as the turns bounce back and forth quickly.  In the 4-Player game especially, sometimes it felt you did have to wait a long time for your turn to come around.  There is some analysis paralysis in this game, as you try to find the right Specialists, right actions, and so on, so they gets multiplied out.   This isn’t as bad as you might think because the game is still cooperative—while your friends are thinking, you can be talking about strategies with others, plans on your turn, and generally communicate.   Luckily, there are no communication limitations in this game!  So, even when someone might be taking a longer turn, players can still talk!  

IMG_0914

Another possible negative was that the game was pretty multiplayer solitaire.  Sure, players could talk freely, but none of the actions of the game “really” help others … (some of the Journals help all the other players, but those are few and far-between); mostly, each player is trying to do the best they can on their turn, while trying to keep the cooperative goals in mind. I am not sure that’s too big of a negative, because the multi-player solitaire keeps everyone involved on their own turn.    Even when someone is taking a longer turn, there are still cooperativ things the other players can talk about.

IMG_0917

Generally, the balance of the multiplayer solitaire and the longer turns seemed to balance out: players were either thinking about their own turns or talking to each other about the cooperative goals.   There did seem to be less cooperation and more multiplayer solitaire in the 3 and 4-Player game than the 2-Player game.  Nevertheless, it still seemed to work fine.  Everyone had a good time.

What I Liked

IMG_7574

Exploration: I liked exploring the seas!  It’s a real interesting phenomena in a worker placement game that you have to explore to bring out more location because you keep using them up!  The exploration worked really well because you got to CHOOSE which of 2 tiles comes out!  That choice kept me more involved and interested in the game.

IMG_7548

Components: The components are generally very high quality and easy-to-read.  I liked that the tokens were in a token box … it was so easy to set-up!  I don’t think this game will win best components of the year or anything like that, but I liked what I saw and everything was easy to read. 

IMG_0919

Seas: I did like the look of the seas once you had explored a lot.

IMG_7580

Worker Placement Mechanism: The fact that the worker placement is so different in this game really elevated the play (you have to be in a Location with an open spot, and you have to have a Specialist that can do that action, and tokens are typically placed in pairs).  But it also felt very thematic to the game, with the Specialists!!! Also the fact that worker placement worked so well in a solo, and more impressively, in a cooperative game really made this stand out.

IMG_7484

Variability: There’s quite a bit of gameplay to be had between the variability of the Scenarios, the Zones, the expansions (which were included with our copy), the many Goals, and all the little touches in the game!    That really extends the life of the game.

Continue reading “Endeavor Deep Sea: A Review of the Solo and Cooperative Modes”

Run Run Run! See Cats Run! Run Cats Run! A Review of Run Run Run!

IMG_7037

Run Run Run! is a cooperative game from Kickstarter: it was up on Kickstarter in February 2024 (with several other games) promising delivery in May 2024. It actually delivered in late August 2024, so it was about 3 months late. Eh, that’s pretty good for Kickstarters.

IMG_7041

With a name like Run Run Run!, this sounds like it should be a real-time cooperative game, but it’s mostly cooperative tile-laying game. See our Top 10 Cooperative Tile-Laying Games for more discussion of the tile-laying genre.  Run Run Run! is also a little bit of a boss-battler game.

IMG_7042

This is a light-weight cooperative game for 1-4 players taking about 30 minutes: the game time listed on the box seems accurate enough.

IMG_7128

So, this game was part of an “import Kickstarter” where they found games from around the world and imported them to the USA.  Apparently, this is an older game by Bruno Cathala and Antony Perone.  BoardGameGeek lists the game as a 2021 game, although for some of us here in USA, this is a brand new game (including me).  This is the 2nd Edition of the game, so I guess it’s new in that respect.

Let’s take a look!

Unboxing and Gameplay

IMG_7068

This is a game with a LOT of tiles: more than half the box was filled with punch outs. The first 30 minutes of my unboxing was just punching out all the tiles and other components! We did say this was a cooperative tile-laying game!

IMG_7079

Players assume the roles of one of four explorer cats (Catventurers to use the nomenclature of the game)! See above! Each explorer cat has a special power that is invoked when they roll a ‘?’ on the dice …

IMG_7080

This is also a cooperative boss-battler game: you will face one of the three Final Boss Mummy’s above! To win, you have to take out the Final Boss before it makes it back to the Relic room!

IMG_7081

Along the way, lesser Mummies will be summoned to slow you down. If any of the Mummies ever make it to the room with the Relics of the Pharaoh, all players instantly lose! You need to keep all Mummies OUT of the that room!!

IMG_7105

Players lay out tiles, one at a time, trying to build a maze out.

IMG_7111

To unlock the Final Boss, you have to build three tiles adjacent to each other with different symbols!  And you have to do this three times (or more)!!  See above!  This is the only way to unlock the Final Boss, but every time you do that build, you invoke a “trap”!  See above as the Mummy  summon triggers a “trap” that gives the Final Boss 5 more hit points!

IMG_7106

Torches are an important part of the game: you need to put torches in rooms to see!  You start with 5 collective torches, and if you can’t place a torch, you get closer to summoning a Mummy!

IMG_7096

At the start of the Mummies’ turn, you roll a die (or  more…)! If you roll the monster symbol (see above), you have to move all Mummies closer to the Relic Room AND you also come closer to summoning a new Mummy!

IMG_7108

Every time you roll a monster, you have to put a heart on the current top Mummy tomb!

IMG_7101

If a mummy get 5 hearts, it has been summoned the Mummy and that Mummy goes on the board! Where on the board? Player’s decide!

IMG_7102

Usually you put the mummy as far away from the Relic Room as possible (see above), or right next to a Catventurer so they can fight it!

IMG_7107

Mummies are defeated by rolling dice!  See the attack dice above!  Some symbols give you a successful Attack: note above we do 4 damage to a Mummy with 7 hit points! But since we have have the x2 token, we do all 8 damage and take it out in one shot!

How do we get dice?

IMG_7114

Every exit on a tile you discard give you an attack die!  For example, to get all 6 attack die above, we can discard the one tile with all 6 exits to get all 6 dice (6 is the max).

IMG_7104

How did we get the x2 token?  Whenever we explore a Sarcophagus room (with the little golden coffin, see above), we get a Sarcophagus token … one of which may be a 2x!  See above!

IMG_7112

Oh yes, if we ever run out of torches, we can get new ones in a couple of ways. One: if we build three rooms adjacent (see above) the same symbol, we immediately get 5 torches!

IMG_7345

There’s also a cooperate action which can give more torches (or tiles if needed). See above.

IMG_7195

If we can take out the Final Boss before he reaches the Relic Room, we win! See above as we LOSE as the Mummy enters the Relic Room!

IMG_7078

The production for this game is pretty great with tons of thick cardboard tokens! The art is super cute and the game looks like a high quality, but cute, production!

Oh, and this is a cooperative cat game! It may not be clear at first, but we are all cats working together!

Rulebook

IMG_7059

The rulebook is good.

IMG_7066

The rulebook gets an almost perfect score on the Chair Test with an A!  See above as it fits perfectly on the chair next to me, it stays open, it has readable fonts, and it has good pictures!  This would probably get an A+ on the Chair Test if the fonts were just a little bit bigger.  

IMG_7060

The Components page is great: it shows all the components with annotations. See above.

IMG_7061

The set-up pages are perfect: the entire set-up is pictured and each step is labelled with a relevant number!  I can leave this open, and set-up the entire game from these two pages!

IMG_7063

The rest of the rulebook is pretty good.

IMG_7064

My only real complaint is that they didn’t show/explain all the possible Trap tokens that can come out. I had to “guess” what they meant.   It was mostly intuitive, but not always.

IMG_7067

The last page of the rulebook is useful: this is where I wish they would listed all the trap and Sarcophagus tokens with more description. Still, at least the back of the rules was useful.

There’s no index, but this is a 30 minute game, so I don’t think it needs it.

In general, this is a good rulebook.

Solo Play

IMG_7084

 This has a solo mode! (Congratulations on following Saunders’ Law!).  So, there’s a very small section describing the Solo Mode on the very last page of the rulebook.  See above.  The solo game basically plays true solo: you play one Catventurer (the Cat Explorer) and play the game as-is!  The only rule that needs some “slight” expansion is the COOPERATE action: you can still play the COOPERATE action, but only the solo cat gets the rewards!  This is great!  No real changes: just play the game as-is!

IMG_7120

My first game was a win, as I killed the final Mummy on his way to the end! See above!

IMG_7095

My initial tile selection wasn’t great (as only one room has more than one exit), but I soon got a lot more branching rooms.   I also had a lot of Sarcophagus rooms …

IMG_7099

Those Sarcophagus rooms enabled me to get some great tokens at the start of the game!  I saved those 2x tokens for the end game, because I knew how hard the final Mummy would be!

IMG_7118

I played my first game very well: I kept the Mummy’s under control and I had plenty of tiles going into the final battle, and I was able to build enough space so that the Mummies were far enough back that I could take them out!

IMG_7191

My second game was a close loss: I made the mistake of not having enough of the temple built!  

IMG_7195

I was able to knock the Mummy down to 5 hit points, but he just moved too fast!  He made it to the Relic Room and I lost! See above!

I admit my final loss was depressing because I rolled so poorly; not on the Attack dice but on the Mummy movement!  It’s basically a 50% chance that the Mummy will move every turn, and he moved EVERY TURN after he came out!  The Mummy screamed to the exit and I lost!

Cooperative Play

IMG_7199

Cooperative play went pretty well.

IMG_7198

There was shared workload setting up and playing.  There are enough components in the game (torches, tiles, 5x torch, sarcophagus tokens, mummies, player tokens, etc) that it was nice to share the workload of taking care of the tokens.

IMG_7203

We were able to take out the final mummy!

IMG_7202

Basically, after he came out, were were able to all pounce on him and do as much damage as we could!

IMG_7200

The cooperation in this game was interesting.   We didn’t “love” that you couldn’t talk about the tiles you have, but you were allowed to “point” to to where you were going to build, and that seemed enough to allow us to all move forward.  There was never any “fine-grained” cooperation (“I’ll build this tile, you build this tile”) as we played … because there can’t be!   The cooperation was more “coarse-grained” in that each cat did their own thing on the way to helping the party:  “I’ll take out the light mummy if you can just build!  Oh! I need help with this!”  The game was kind-of multiplayer solitaire with many moments of high-level cooperation.

IMG_7201

If you don’t like cooperative games because of Alpha Player Syndrome (because the Alpha Player tells everyone what to do), then Run Run Run! is game that keeps the Alpha Player at bay pretty well. Because you can’t do any fine-grain cooperation with tiles, the group decides more of the high-level actions together! Everyone stays involved on their turn by choosing the tile to play, but everyone stays involved with the group as they makes high-level decisions together.

With some retrospective, I liked the amount of cooperation the game elicited, even if we did have some communication restrictions.

Communications Restrictions

IMG_7203

My groups don’t tend to like communications restrictions because we get together to play, talk, and strategize together!  We are friends and we want to talk to each other!   Some games with communications restrictions work, and some don’t!  And it’s a razor’s edge of difference.

IMG_7196

Run Run Run! works mainly because it doesn’t stop all communications: you can’t really show your tiles and talk about them precisely.  The rule is (from page 2):

“Also, even though you may openly discuss your intentions, you may not show the tiles from your hand to the other players, nor describe them precisely. You may, however, point a finger to a specific Room, without saying anything…”

The rule is still imprecise (“What does it mean I can’t describe them precisely? Can I tell you it’s a symbol?“), but I think the intent seems to be don’t tell/show others your hand.  Other than that, talk as much as you want!  That seems to work!

IMG_6529

Compare this against the Communications Restrictions in Defenders of the Wild (see our review here):

“At the start of each round, all players must cease communication and maintain silence while choosing a defender card from their hand to play…”

The restriction is much more draconian, and squanders an opportunity to make a multi-player solitaire game even more cooperative!

IMG_6713

What’s the difference?  In Run Run Run!, you simply can’t share your tiles, but in Defenders of the Wild, you can’t talk at all (for that phase)!!  I think this very minor difference makes a world of difference: I liked playing and talking and cooperating in Run Run Run!, and I am annoyed in Defenders of the Wild by the restriction.  (I still don’t think the communications restriction rules work at all in Defenders of the Wild, but maybe the rule should have been simply been “You can’t show/discuss your Defenders“).

It’s a fine line, but the Communications Restriction works in Run Run Run!, but not in Defenders of the Wild.

Try It Out

IMG_7100

Since this game has communication restrictions, one of the things you are NOT allowed to do it show your tiles to any other person.  The problem is, sometimes you want to “try stuff out!” See above as we have a bunch of tiles we want to play with and see what we can do!

IMG_8771

In our review of Race To The Raft (another cooperative cat game with tile-laying), we saw the same problem!  You aren’t allowed to share what you have in your hand in Race To The Raft either, and many times you want to “try” stuff out! 

IMG_8766

In Race To The Raft, we developed the house rule “look away while I try stuff” so we didn’t break the spirit of the game!  That way, you can still try stuff out, while preserving the confidentiality of the tiles.   We ended up doing something like this in Run Run Run!

It’s a shame: neither Run Run Run! nor Race To The Raft nor many of the cooperative tile games games on our Top 10 Cooperative Tile-Laying/Tile-Placement Games have any acknowledgement of this very human phenomenon: People want to try stuff out!  Please, if you make a cooperative tile-laying game, please have some sort of rule for addressing this issue:

“If you wish to try out some tile layout ideas on your turn, please ask others to look away so you don’t overshare your tiles!”

Otherwise, you make people dislike your game because no one feels like they can “play with” and/or “try stuff”! Or people come up with a house rule like the one above anyways.  

Acrylic Standees

IMG_7039

I am a huge fan of acrylic standees!  I loved them in Tokyo Sidekick (see review here) and Kinfire Chronicles (see review here) and Weirdwood Manor (see review here)! So, when this Kickstarter offered a deluxe side of Acrylic Standees, I was in!

IMG_7040

This is a small box full of replacements for the wood standees that come with the game.

IMG_7045

It’s a small box (it turns out, you can fit that box into the final game box with some creative packing).

IMG_7046

See above the the standees!

IMG_7048

They are pretty nice! See above!

IMG_7050

Unfortunately, I had two that were broken.  I think they can be fixed with a little glue, but it was still a bummer. (They had fallen out if their standees, and they really didn’t fit back in).

IMG_7054

My friends and I did a comparison of the Acrylic Standees to the wood meeples: see above and below.

IMG_7057

Which do you prefer?

IMG_7056

In the end … both me and friends preferred the COLORED wooden meeples.  Whaaaattttt???? It’s not that the acrylic standees weren’t gorgeous, but the wooden ones were (1) more HEFTY and  (2) we could distinguish the colors easily from the wooden standees!  The wooden meeples made the game easier to play.

IMG_5465

In our review of Weirdwood Manor, we also loved the Acrylic Standees!  See above!  One of the major differences here as that Weirdwood Manor standees are color-coded ON THE BASE!  See above!  This color-coded base makes it that much easier to distinguish the standees across the table!  I think if Run Run Run! had added color to bases,  that would have made them that much better!

IMG_7085

In the end, my friends preferred the wooden meeples.  And I think I do too.  

IMG_7087

A good compromise might be to mix them: use the wooden meeples for the characters (so you can see each player’s color very easily) and then use the acrylic standees for the mummies!  That way, you get a nice differentiation on the board between the good guys and the bad guys!

IMG_7086

But, you really don’t have to get the Acrylic Standees; the wooden meeples that come the game are very very very good.  

What I Liked

IMG_7196

One: This Is A Little game! This is a fun little cooperative game that’s only 30 minutes.

IMG_7057

Two: Wooden Standees: The wooden standees that come with the game are much better than you think; it is nice that you have the option for Acrylic standees, but you don’t need them.

IMG_7077

Three: High Quality: The components are pretty high-quality, from thick cardboard tiles, wooden standees, and thick readable tokens.

IMG_7197

Four: Limitations Okay: I generally don’t like Communications Limitations in my cooperative games, as they tend to suppress the reason I get together with my friends: to talk!   In this game, the restriction on NOT sharing your tiles didn’t seem to get in the way of us still communicating: we still made plans as a group and had a good time.

What I Didn’t Like

IMG_7088

One: Acrylic Standees: I am slightly annoyed that the Acrylic Standees weren’t better: some of mine were broken, and they really needed colored bases to help distinguish them on the board.   They are still gorgeous, but not as “mind-blowing” as I had hoped.

IMG_7195

Two: Random. The game is pretty random; it all depends on what you roll on the monster dice and what tiles you draw!!!   

Maybe you get terrible starting tiles!! I think there needs to be a Mulligan House Rule at the start of the game where you can redraw your tiles).   

Also, the monster dice gets rolled every turn and there’s a 50-50 chance (greater with more dice) that something bad will happen.   I lost my last solo game because the monster moved EVERY SINGLE TURN when I rolled badly 5 turns in a row!  I simply couldn’t stop him and there’s no dice mitigation for that!

Reactions

IMG_7194

Rich: “I generally liked it.  As I look reflect back on it, I liked it a little better cooperatively than solo. Even though I generally don’t like communications limits, we still strategized as a group and were able to get stuff done, while still having agency on our own turns.  The randomness of the game is a little much (as dice and tile draws control the fate of the party), but since it’s only 30 minute game, it’s not a big deal if you get wrecked.  It’s probably a 6.5/10 for solo, 7/10 for cooperative”

Andrew: “5.5 or 6? It was pretty good. I like cat games.”

Teresa: “6 or 7, it was pretty fun.”

Conclusion

IMG_7058

Run Run Run! is a light cooperative tile-playing game which just so happens to be a boss battler.  The game seems to unfold as multi-player solitaire, as each player cannot share what tiles they have.  But, a higher level cooperation seems to emerge as players take on high-level roles as they play (“You kill the mummy, I’ll build out!“)  If you are looking for a game with mechanisms that tend to suppress Alpha Player Syndrome without losing too much cooperation, Run Run Run! seems to strike a good balance of being cooperative but still giving each player some agency.

IMG_7096

There is some randomness in the game, as it really depends what you roll and draw!  Luckily, this is only a 30 minute game, so even if you get wrecked, it’s a short game.

IMG_7056

I would recommend Run Run Run! if you like the theme and are looking for a light cooperative tile-laying game … with cats!! I am very sad that I can’t recommend the Arcylic Standees: all of my friends (and myself) preferred the wooden meeples that come with the game.  

Run Run Run! would probably make my Top 10 Cooperative Tile-Laying/Tile-Placement Games, just not near the top of the list.

When Calls Galactus, You Gotta Answer The Phone! A Review of Marvel United: The Coming of Galactus

IMG_6265

So, Marvel United: Multiverse was the #1 spot on our Top 10 Anticipated Cooperative Games of 2014: it has so many expansions for Marvel United!  But, let’s get one thing straight!  The main reason we were so looking forward to this was one reason: Galactus.  And his Heralds. 

IMG_6191

The Coming of Galactus: Marvel United was easily our most anticipated game or expansion of 2024!  This expansion is yet another expansion in the Marvel United line;  we have reviewed the base game (see here and here) and the Marvel United: X-Men  (see here and here), and we talked about the Expansion Absorption here.  In general, we have raved about Marvel UnitedMarvel United is a cooperative super-hero game for 1-4 players (there are one vs. many expansions that that player count to 1-5, but we aren’t discussing those here).

IMG_6188

To be clear: you need at least one of the four base Marvel United games to play The Coming of Galactus: This is NOT a stand-alone game.  You need at least one of: Marvel United, X-Men: Marvel United, Spider-Geddon: Marvel United, or the newest Multiverse: Marvel United

See Multiverse: Marvel United above.

Let’s take a look!

Unboxing (Admit It: You Just Want To See The Minis)

IMG_6204

This is a pretty big boy of a box. See the box with a can of Coke for perspective.

IMG_6183

It’s the same width and height of all the other Marvel United expansions, but it’s a very deep box! The Marvel United people have done a good job at keeping all the boxes consistent so it’s a little easier to store.

IMG_6205

This looks pretty cool when you open it up: you can see Galactus peering at you: there’s an 8-page rulebook and some new center locations.

IMG_6207

Admit it, you just want to see the Galactus mini! See above as we he is “swaddled” in a little foam blanket with a wire holding him in. 

IMG_6209

I think Galactus is just invading Earth because he wants a Coke.  See above.

IMG_6210

His heralds are also pretty cool minis (see the wire sticking out from Galactus above). See above and below.

IMG_6211

IMG_6212

IMG_6213

Gabriel: The Air-Walker!

IMG_6214

Terrax!

IMG_6215

Firelord and Nova (aka Frankie Raye)! 

IMG_6216

Each Herald also has his own Villain Sheet. See above.

IMG_6218

The Herald bad guys cards are pretty cool: see above.  Also note that Frankie Ray (Nova) is can be either a bad guy or a good guy!  Did you know Nova was in the Fantastic Four for a short time???

IMG_6219

But, it’s Galactus‘ cards that we care about!! See above.

IMG_6217

This expansion looks fantastic.  I was so excited to get it played! See it all unpacked above!

Gameplay (The Coming of Galactus Mode)

There are basically two gameplay modes in this expansion.  The first one is fighting Galactus; this is called The Coming of Galactus.

IMG_6224

Galactus sits in the middle of 6 regions of Earth: these are all special locations that come in the box.  Note that the game has a funny starting condition: the players start in the region of Earth they are playing the game in!

IMG_6261

Galactus’ Master Plan cards have him rotate (kind of like Thanos rotates in Thanos Rising, if you have ever played that game).  The region he stops on gets hit pretty hard.

IMG_6357

When Galactus BAMS! a region, everyone takes a damage, all civilians and thugs are removed, and all the other BAMS! activate.  It’s pretty brutal if he rotates to your space. See above as the Thing gets KO’d!

IMG_6350

If a region ever gets overfilled OR a hero is KO’d, then a Galactus Master Plan card is put face down in the storyline!  This makes it even harder for the good guys to get anything done, as Galactus is taking away actions!   See above as heroes lose because Galactus just takes over the storyline and the heroes can’t get anything done!

IMG_6237

To win, the players must overcome 8 challenges!  Calm Down Civilians, Steal The Ultimate Nullifier, Take Down Air-walker, etc (see three of them above)!

IMG_6359

The final Challenge is always the same: “Convince Galactus to Spare Earth!”  Yes, you cannot take down Galactus, buy you can reason with him.  This is an interesting new mechanism, as you have to put the tokens down in PAIRS (i.e., no single stars) to succeed on this Challenge.

IMG_6364

If you ever run out of storyline cards, or any hero completely dies, the game is over as Galactus has eaten earth!  Your one chance to win is to “reason” with Galactus!

Solo Play (The Coming Of Galactus)

screenshot-from-2020-10-18-09-45-18

So, Marvel United has two official Solo Modes and one unofficial Solo Mode.  (Thank you for following Saunders’ Law!)  The original Marvel United and X-Men: Marvel United have a fairly contorted solo mode (called S.H.I.E.L.D. solo mode: see SOME of the rules above) which was far too complex; it wasn’t appealing to us at all.  In fact, it became a standard counter-example in our discussion of solo modes: How To Play A Cooperative Game Solo? 

IMG_1624

The newest Spider-Geddon: Marvel United (and Multiverse: Marvel United) has a new solo mode called Commander Mode!  We definitely liked it more than the original S.H.I.E.L.D. solo mode!  Spider-Geddon: Marvel United made our Top 10 Solo Games of 2023 because of the new solo mode!

IMG_6229

But, at the end of the day, I prefer two-handed solo for Marvel United.  Why?   Because it’s easy: there are no special rules, you just play Marvel United the way it’s “meant” to be played!!  Since there are SO MANY NEW THINGS for Marvel United (Team Decks, Items, New Expansions, etc), the last thing I want are new rules that I have to consult for solo mode.  Alternating between two heroes playing is the easiest way to get going so I can concentrate on all the new stuff.

IMG_6231

For The Coming of Galactus first play, I chose Magik and Warlock (see above) from the X-Men: Stretch Goals set (see below).   Those are my favorite two characters!  Since I am learning a bunch of new rules, I wanted to play with characters I already knew.  This is called “change as few things as possible to make it easier to learn“.

IMG_6226

Somehow, it seemed right that a galactic refuge outcast like Warlock and a dimension hopping outcast like Magik would take on Galactus.  The outcasts are the only ones crazy enough to take on the World-Eating Villain!

IMG_6230

So, I ended up playing two games with these heroes: I won the first and just barely lost the second. But I cheated in the first game.

IMG_6237

How did I cheat in my first solo game?  I kept three of the Challenges out all times (see above).  Recall, the only way to win is take get to the last Challenge and defeat that!  But I think the right thing to do is only show a single Challenge at a time!!  So, I think I won the first game because I cheated.  Learn my mistake: only one Challenge is active at a time!

IMG_6243

One of the things that makes the Galactus scenario so hard is that every KO (and overflow) causes Galactus to put a Master Plan face down!  See above as an overflow happens and Galactus clogs the storyline!  This is terrible because you lose a turn (Magik and Warlock only have two plays now before the next Master Plan) AND Galactus is closer to winning!

IMG_6238

My second game was a loss, but a heart-breaking loss as I simply ran out of cards!  This time, I played correctly with the Challenges (only one Challenge up at any time).  

IMG_6263

See above as Warlock and Magik need literally one more card to win!  This was both cool and heart-breaking at the same time!  I think if I had Magik’s Soul Sword (Items are new in the Multiverse expansions), I may been able to pull this off!

IMG_6381

What a blast!  Magik and Warlock were a surprisingly good team against Galactus.  This is partly because their Special Effects don’t matter as much with Galactus (as their special Effects tend to deal with Crisis tokens: see above)!  Why do I say that?

IMG_0836

The two Power Cosmic Threat cards (see above) disable ALL SPECIAL EFFECTS until you defeat them!!!   This game is so tight, you almost never have a chance to disable these Power Cosmic Threats, so all the Special Effects you have become useless! In a game without Crisis tokens, Warlock and Magik didn’t care too much that their “specials” are disabled.  I remember thinking when I first started: “Oh, Magik and Warlock are bad choices, because their specials mostly deal with Crisis tokens“.  Nope! Since they are disabled most of the time (if not the entire game), they didn’t care! 

Overall, I had a great time playing solo.  This was SO MUCH FUN!

IMG_6357

Cooperative Mode (The Coming Of Galactus)

IMG_6347

For cooperative mode, we played a 3-Player game with members of the Fantastic Four.  The Fantastic Four is a special expansion for the base game: we reviewed it here.

IMG_6361

I played Mr. Fantastic, Sara played Invisible Girl, and Teresa played The Thing.

IMG_6349

Over the coarse of one night, we ended up playing The Coming of Galactus three times!

IMG_6350

Our first loss was crushing, as we got KO’d and overflowed so many times that Galactus clogged the storyline.  We learned a lot from this first play: most importantly, don’t let the Civilians or Thugs overflow!  The consequences are too dire!

IMG_6354

It was a crushing defeat (see above), but we all wanted to try again!

IMG_6356

We did significantly better the second time, but still lost as we ran out of time! See above!

IMG_6363

In our third and final play, we were able to win!  We learned a lot about the game: what to do, what NOT to do, what strategies to take!  

IMG_6365

That hardest part of this is that it’s just so easy to be crushed by Galactus if you aren’t careful, but the game is quick enough to reset and play again!  After three plays, we finally eked out a victory.  We had fun, but we all started getting a little loopy:

IMG_6360

When I wasn’t looking, Teresa started playing with the figures. Apparently, Sue Richards ran off with Nova.

Solo Play (The Heralds of Galactus)

IMG_6374

The Heralds of Galactus is a secondary way to play this expansion. 

IMG_6216

 While each of the Heralds has its own board (see above), and you can play each Herald separately as the main Villian, the mode: The Heralds of Galactus has you fighting all the Heralds at once!  See below!

IMG_6396

This is a really interesting way to run the Heralds:  all of them are out on the board, and all of the their dashboards are out as well.  As you play, the Heralds cycle-through each other.   

IMG_6375

There’s a little track at the top that keeps track of which Herald is next.

IMG_6371

This was a fun way to play; the Heralds each got a chance to do their thing, but it wasn’t too overwhelming as each Herald gets their “special” BAM! every 4 turns (as they cycle through).  It’s kind of cool that this mode does seem to work.

IMG_6399

I played this mode solo with .. you guessed it: Magik and Warlock.

IMG_6385

In the The Heralds of Galactus mode, Magik and Warlock are perfect choices!  Why?

IMG_6393

This Scenario focuses quite a bit on the Crisis Tokens.  Both Magik and Warlock manage Crisis tokens VERY WELL!  See Magik’s Mystical Armor above and Warlock’s Techo-Organic Lifeform below!

IMG_6394

IMG_6398

One of the things the Heroes need to worry about is the dwindling supply of Crisis Tokens that come out during play: if they ever all come out, the player’s immediately lose! See above as the S.H.I.E.L.D. Hellicarrier gets a lot of Crisis tokens!

IMG_6373

In my solo game, I was never in danger of losing by running out of Crisis tokens! Warlock’s first card allows him to discard Crisis! And once Magik got her Armor out, she didn’t have to worry about Crisis tokens either.   The Heroes could concentrate on what mattered and mostly ignore the Crisis tokens! Warlock and Magik did a great job taking down the Heralds!

IMG_6388

In the end, this mode (The Heralds of Galactus) is a little more of a by-the-numbers expansion, but I liked it.  I liked thee way the Heralds cycled through to create a unique experience.

Controversy!  What Does Facedown Mean?

IMG_6362

There has been some discussion on BoardGameGeek (see this thread here) about what it means to “put a Villain Master Plan facedown into the Storyline“.   This is especially important to the Galactus scenario, as a Hero getting KO’d forces a Galactus Master Plan to get added  facedown to the storyline … and we know heroes get KO’d all the time with Galactus!

My original stance is that a card facedown takes up space in storyline  and causes the players to have fewer actions.   Other people in the BGG  thread feel that you shouldn’t lose turns because it doesn’t explicitly say that.

Let’s explore this issue.  What does it mean to place a Master Plan card facedown in the storyline?  Let’s take a look at the Point and Counterpoint!

Point: A Facedown card causes the Heroes the lose an action!

1. Simplicity: If the purpose of the facedown rule is  to simply reduce the number of cards in the Villain’s Master Plan deck (and thus end the game earlier), the rule would have been written to be simpler:

   “Discard a card from the Villain’s Master Plan deck”.

If the rule were written like that, I would 100% agree that the players don’t lose an action.  But since the rule states explicitly to place a card facedown in the Storyline, it implies it takes up space!  What does it mean to take up space? To lose an action!

2. Thematic/Cartoon

IMG_0839

Take a look at this snapshot of a cartoon page from a newspaper.

IMG_0838

In this snapshot above, each panel of each cartoon takes up space. If a panel is removed or covered, then there is physically less space!

That lack of space means the cartoons have less space to tell their stories.

IMG_6350

Much like the storyline in Marvel United: reduced space means fewer panels for the players to act and tell their story!

3) Thematic/Game Balance

IMG_6329

It always struck me that a KO should be fairly devastating: a hero has been knocked out, and it feels it should be a big deal!

So, when a KO from Galactus causes “one Master Plan facedown in the storyline”, that feels it should be reasonably devastating!  If we just lose one Master Plan card, but keep all three turns, that feels lame to me!  It doesn’t feel like it is thematic or balanced! In fact, I have seen players gets KO’d on purpose just so they could get  back to full cards!

If the heroes must lose an action (because there’s less space in the story), then it feels more thematic and frankly more balanced.

A KO should be a big event the players try to avoid: it should have grave repercussions.  That leads me to believe the players should lose an action as well as reduce the number of Master Plan cards. (In Galactus especially: there are 18 Master Plan cards, so it’s almost never a problem that you run out of Master Plan cards, at least in my experience!)

4) Symmetry

IMG_0839

Take a look at the cartoon page again. See above.

IMG_6356

Now, take a look at a storyline where the players lose a turn whenever a Master Plan is played facedown to the storyline. It looks symmetric: like a page of a comic. See above.

IMG_6497

Now, take a look at a storyline were players get all three turns; the facedown Master Plan cards cause the storyline to have ragged edges and no longer look like a real comic page.

Humans naturally like symmetry: I would argue that the natural tendency is for humans to want the symmetry of the panels and suggests that the panels should stay symmetric and avoid the ragged edges.

In conclusion, the rule about placing a Villain Master Card facedown in the storyline, both thematically and physically, implies less space and fewer actions for the players.  The fact that the rule is NOT written in the simpler form of “discard a card from the Villain Master Plan” implies there’s more to the rule than just reducing the cards in the Villain Master Plan Deck; it implies reduced space and thus fewer actions.

Counter Point: The facedown card in the storyline should NOT cause players to lose an action!

The rule that says “place a Villain Master Plan card facedown in the storyline” says nothing about losing turns.  Since it’s not said explicitly, players do not lose turns.

—————————————-Choose a side.  Which side do you land on?

If you chose that side that facedown implies fewer actions, the game becomes harder, as the heroes have fewer actions in the game in response to the Villain.

If you choose the side that that says “facedown does NOT imply fewer actions”, the game becomes easier, as the characters always get all three of their actions.

IMG_6492

From my playtesting, I have tried the game with both facedown  interpretations (fewer actions or full actions) … and in both solo and cooperative modes!! And guess what? The game still works either way.

One way is just harder than the other.

What I Liked

IMG_6365

One) The minis are all amazing.  

IMG_6359

Two) The new idea in this expansion (have to place PAIRS of tokens, 8 challenges, cycling through Heralds) keep this game new and fresh.

IMG_6362

Three) I still love how this game looks, especially with the storyline. It feels like you are looking at a comic book storyline!

IMG_6355

Four) I like that the Coming of Galactus mode is hard, but it seems like you can still learn from it to come up with strategies!

IMG_6258

Five) I had such a good time playing this solo (two-handed solo mode).

What I Didn’t Like

IMG_6346

One) My friends didn’t like this nearly as much a I did.  Their main criticism was “the game was too random“.  I agree there is a lot of randomness in the game (Where does Galactus turn to? What cards come out? Where are the Heralds?), but I would argue that, after three cooperative games, we had discovered strategies that worked because we got better every game!  We were able to win!  And I think we could do it again!

IMG_6256

Two)  In The Coming of Galactus mode, you simply have to take damage and get KO’d.  Some Marvel United expansions MIGHT have a player or two get KO’d.  Not here!  Each hero will probably get KO’d at least once or twice or more!  You have to get comfortable with the idea: “you will have to take damage and you will have to get KO’d multiple times”.  If you don’t like that feeling, then this game will not be for you.  Once you sort of “get used” to that, I don’t think it’s that bad.

IMG_6222

Three) I wish the rules were explained just a little better.  A sentence being more explicit and saying “There is only one Challenge active at any time: once you complete the Challenge, flip over the next!”.   This is the problem with so many expansions; sometimes they don’t have time to make things a little clearer.

IMG_0836

Four) The Power Cosmic is the most frustrating Threat in the Coming of Galactus mode!  And there are TWO COPIES of it!  So, for most of the game, you don’t get to take advantage of your Special Effects on your Hero cards!  All the things that make the Heroes “special” are taken from them!  I got “lucky” in my solo games and used two characters (Magik and Warlock) that didn’t really care, but The Fantastic Four were really hampered by this!   But, I think we won our very last cooperative game because we were able to enable the Fantastic Four Special Powers in the very last few rounds! 

This can be very thematic: “The Fantastic Four lost a lot of their powers, but once they got them back, they rocked!!!”  I could see this being  comic book arc: the heroes must overcome obstacles to get their powers back, and then rally in a climactic ending!  BUT this can be very frustrating if you don’t deal with it correctly.  My friends did not like this: they said it made it feel like you couldn’t do very much, and it was frustrating.

Conclusion

IMG_6358

This was a very divisive expansion.  The Coming of Galactus might be my favorite expansion of the year so far at a 9.0/10, Teresa likes it at about a 7/10, but my friend Sara gives it a 4.0/10.    Her thoughts were that the randomness of Galactus, the absolute beating the heroes takes, and Power Cosmic Threat cards take away from the fun.  And I get that.  But I thought that it was all very thematic! Once you get comfortable with the idea that “you will get beaten up a lot“, you can strategize and come up with ways to defeat Galactus … which we did, but it just took us three games.

I will point out that we all WANTED to play three games to defeat Galactus. It was easy enough to replay three games in one night, and very satisfying once we were finally able to defeat the mighty Galactus.

More Cooperative Cats? A Review of Nekojima: A Cooperative Cat Dexterity Game

IMG_5346

This week we take a look at a cooperative cat dexterity game: Nekojima!  It can also be played competitively, but we focus on solo and cooperative play here.

IMG_3068

There’s been a trend recently towards more cooperative cat games: just a few months ago, we saw and liked the cooperative cat game Hissy Fit! See our review here.

IMG_8571

Going back a year to July 2023, we saw and loved the cooperative cat game Race To The RaftSee our review here!  We liked it so much it made our Top 10 Cooperative Games of 2023!

IMG_5352

Will Nekojima fare as well as Hissy Fit and Race To The Raft?  Let’s take a look!

Unboxing And Gameplay

IMG_5353

We got the deluxe wooden Collector’s Edition: see above (it  comes with some extras).  We’ll talk about what’s there, but we will focus on what comes in the base game.

IMG_5387

This is a cooperative dexterity game where players place poles and cats! See above! If the poles ever fall over, players lose!  It’s kind of like cooperative Jenga

IMG_5367

The poles must be placed on the platform above: notice how there are 4 different colored regions!

IMG_5372

Each turn, a player will roll two dice (see above), and the dice will indicate where the two regions to place the poles in!

IMG_5366

There are three different variety of poles: blue, red, and white.  See above. 

IMG_5382

The pole color you draw each turn is chosen by drawing a cube from a bag!  See above as the white cube is drawn, and the two poles have to go between the red and green districts on the platform!

IMG_5385

IMG_5368

If players draw a black cube (see above), they must also place a cat (see below) to hang from the poles!

IMG_5386

The goal of the game is to build your poles as long as you can without toppling them! Like I said, kind of like Jenga! (Well, reverse-Jenga because you add wood blocks here, whereas you takeaway wood blocks in Jenga).

IMG_5391

Every cube you draw is placed in a Level score chart: this shows you what your “score” is at the current stage!

IMG_5389

If a single pole falls over, it’s game over!  Your score is the last level you achieved!  Actually, when one pole falls … generally all of them fall!  See above!

IMG_5365

That’s the basics of Nekojima! See the components above!

Rulebook

IMG_5360

The rulebook describes the basic rules pretty well: see above.  The set-up and components are described above on page 1 in one fell swoop.

IMG_5361

The rules are like 4 pages! You’ll notice (if you look closely above), there are some restrictions on how the poles are placed (you can never touch the wire, you can never wrap the cord, etc).

You’ll also notice how the rulebook commits the cardinal sin as being the same size as the square box: it gets a B- or C+ on The Chair Test as the rulebook flops around and hangs over the edges,

IMG_5362

The rulebook is short: the game is easy to describe!  The only difference (really) between cooperative and competitive is in the focus: play still keep building poles and adding cats until everything falls down.  In the cooperative game, all players worked together to get the best score and win/lose together! In the competitive game, the person who knocked the poles over is the loser … only one loser and everyone else wins!   The mode changes the unfolding of the game a little, as the cooperative players will try to set-up their compatriots for easier moves, but the competitive players will try to set-up their foes for harder moves! 

Solo Mode

IMG_5363

The solo mode is described on the last page of the rulebook: see above.  Thank you for following Saunders’ Law and having a solo mode for this cooperative game!

IMG_5387

Basically, the solo player just keeps adding blocks and cats as long as possible  …

IMG_5392

… until the poles fall over.  Whatever the highest level is (see above) is the solo player’s score!

Solo mode worked great for learning the game: it was basically the same set of rules as the cooperative game!   The solo player does the best he can to set-up the next player (who just happens to be himself) for easier placements!   

I mean, from scratch, I learned the game and played the game in 15 minutes. It was very easy to get this to the table.

Cooperative Mode

IMG_5397

Cooperative mode works great.

IMG_5402

The first game ended quickly in heartbreak as the poles fell over.

IMG_5404

Undeterred, my friends wanted to play again to do better!  THIS time, we stood up!  We stood away from the table so as not to shake it!  We did everything we could to prevent any “accidental mishaps!”

IMG_5405

We made it much farther in the second playthrough! See above. But alas, the poles will always fall!

IMG_5399

The great thing about the cooperative play is that people seemed to want to play again!  

Too Many Expansions?

IMG_5358

There are waaaaaaay too many ways to play this game!  See 4 variants above!

IMG_5355

There’s another two variants that comes with the Collector’s Edition as well!

IMG_5353

But in the end, my friends and I were happy with just the base game.  I am not convinced we will ever play anything beyond the base game.  It’s nice that all these expansions are in the box, but the extra expansions seem to “muddy up” the experience.

Abstract or Thematic?

IMG_5379

This is a fun cooperative dexterity game, but it’s probably more an abstract game … that just happens to have cats.  Nekojima seems to really lean try to lean into the cat theme!  See the cat placemat that came with the game!  The cat tokens are nice!

IMG_5401

But, at the end of the day, this is probably an abstract cooperative game. Just don’t tell the cat lovers.

Some Issues

IMG_5395

The Collector’s Edition BARELY fits in the box: in fact, it strains the clasp on the wooden box.  And the stuff that came with it? 

IMG_5353

The extra dice tray is problematic as the dice bounce right out! And the extra game mode with the arches (see above) … ??? I will probably never play that mode, as cool as it looks.

If you find yourself interested in this game, I don’t think it’s worth getting the Collector’s Edition: just pick up the base game.  You’ll be happier for it and have saved a little more money.

Conclusion

IMG_5377

I got Nekojima delivered from Kickstarter sometime in 2023.  Unfortunately, because I get so many games, this one just kinda slipped through the cracks.

IMG_5383

Nekojima is a fun, cooperative dexterity game that leans pretty heavily into the cat theme … but it’s still pretty much an abstract game.  The cats do make it cuter though.

IMG_5371

Nekojima would probably make my Top 10 Cooperative Dexterity Games if I ever redo that list.  This is probably a solid 7 out of 10 overall, with the cooperative game being more fun than the solo game.

I suspect Nekojima will be played quite a bit at RichieCon 2024 this year: there are a number of people who love their cat games and this game just looks so great set-up on the table.

IMG_5386

Appendix: Furoshiki

IMG_5373

One of the things that “seems” to be in the base box is a cat placemat.

IMG_5374

I thought it was just a placemat for the game.  Nope!

IMG_5394

Nope! Apparently, it’s for Furoshiki! See the back of the pamphlet above! It’s about the art of folding and carrying things.

IMG_5377

I thought it looked nice as a cat placemat.

Taking Cats To The Vet: Really? This is the Theme? A Review of Hissy Fit!

Welcome back to Cooperative Surprise Month! After being surprised (in a good way) by Sammu-Ramat a few weeks ago (see our review here), and finding an old review of Chainsomnia (see our review last week), we take a look at a quirky cooperative game with a surprisingly unique theme! Let’s take a look at Hissy Fit!

Really, the theme of this game, Hissy Fit!, is taking cats to the veterinarian. I am not making this up!

Hissy Fit! is a cooperative card game for 1-4 players that plays in about 20 minutes. Hissy Fit! was on Kickstarter back in January 2023; it promised delivery in November 2023, but it didn’t deliver to me until late February 2024. So it was about 3-4 months late; that’s not a big deal in Kickstarter land.

IMG_3073

I picked Hissy Fit! up because it looked cute, and it was cheap: it was only $20 on Kickstarter (plus shipping).  Did I get my money’s worth?

Unboxing

IMG_3074

Hissy Fit! is a small cooperative card game in smallish box: see the Coke Can for  perspective above.

IMG_3096

There are 58 cards in this game (see many above) and some supporting tokens and sheets (see below).

IMG_3144

IMG_3088

If you are a cat fan (which is probably why you are here), you have a myriad of choices for “what cat sticker” goes on the cat meeple: see above.

IMG_3078

This game is cute, everything is very readable, and it’s very cute (I know, I said that already).  If you like cats, you will probably like this game.  If you don’t like cats … you may still like this game: keep reading!

Rulebook … I mean … Pamphlet.

IMG_3073

The rulebook is a pamphlet. Sigh.

IMG_3075

It folds out, and it’s quite readable, despite it’s largish footprint.

IMG_3118

It even gets a decent grade on the Chair Test (maybe a B): it basically fits and has a good size font with a lot of good pictures and examples.

IMG_3090

The set-up is good: it has a picture (with annotations! see above) and is very well done.

IMG_3078

This rulebook is better than I expected.  It teaches the rules pretty well and it’s pretty easy to read.  Its major sin is  that “it’s just a pamphlet”, but it surprisingly good.  (There’s no index or chapters, but it doesn’t need one: this is a relatively simple game).

Gameplay

IMG_3099

The humans need to get the cat to the vet, but of course, the cat uses all its wiles to not go! The Cat Tracker card (see above) show how much you need to do to get the cat to the vet! Basically, this is a race! You are trying to move the cat meeple from the start to the cat carrier (see above)! If players can cooperatively move the cat meeple to the end, they win! Huzzah!

IMG_3081

There are 4 difficulties to the game, depending on how hard you want the game! There’s  Kitten mode, Cat mode, Fierce Mode, and Feral mode! See two Cat Tracker cards above for Cat mode and Feral Mode!!

Feral mode (above right) is the hardest mode, as you have fewer scratches you can can endure and further to go!

IMG_3115

Players win if they get the cat meeple to the end, but if the players ever get too many scratches (the red cube at the maximum number of scratches), they lose!

IMG_3083

Players also lose if the cat has three hissy fits! 

IMG_3113

Every hissy fit icon on the cards will advance the hissy fit card … if you ever get three tokens on the card, the hissy fit happens!

The game has a fairly typical cooperative game arc: “bad news” cards start the round, and players play “good news” cards to help. The “bad news” cards are the Cat Cards (see above). As these cards come out, they cause continual bad stuff to happen! For example: In the white panel above is a backward paw: it causes the cat meeple to go backwards unless you get rid of that Zoomies card!

The players play Human Cards to help deal withe Cat Cards.  When you play a Human Card, you choose one of the good effects (in the white strip) on the card.  The rightmost effect (see above) would move the cat meeple forward three spaces!  The leftmost effect would give two resources of each type of Cat Attitudes: you place cubes on the Cat Cards appropriately.

IMG_3145

If you get enough Cat Attitude resources, you can get rid of the Cat Card!  For example, when we play the Tuna Can card to stop the Zoomies (see above), we only have 2 Angry Cat resources (brown), so we can only partly stop the Zoomies: we need to play another human card with the Angry cat (brown) symbol: we use the clear cubes to note what we have already played.  Unfortunately, the Zoomies stays out another turn.

IMG_3096

Turns are pretty quick and easy: the current player draws a Cat Card and suffers its bad effects, then that current player gets to do 2 things: play a Human Card or draw a Human card!  You can choose any Human Card in the display, or you can blindly draw the top.   Once you are done, move left to the next player! Play continues until the cats win or the humans win!

IMG_3094

One of the most important rules in the game is playing combos: when any player plays a card, another player can follow and play a card with the same symbol!  See the example above (from the rules) with the yarn ball symbol allowing the players to play three cards!  

This combo rule is critical to winning the game: it allows you to play many cards in one shot if you really need to!

Solo Game

IMG_3091

The solo game is well-specified and very simple (thank you for following Saunders’ Law): there is only one player, but he starts the game with 5 Human Cards.  The solo player simply keeps taking his turn over and over, basically rotating back to himself.  Cat Card, Two Actions, Cat Card, Two Actions, repeat!

IMG_3095

The victory and loss conditions are exactly the same: the only thing that really changes depending on the number of players is how many cards the player(s) starts with! 

IMG_3117

I was able to learn, then play the game twice in the same night as my friends came over!   I lost my first solo game and won my second (on Kitten Mode).  I started groking it pretty quickly.

IMG_3119

I lost my first game because I didn’t take the rulebook/pamphlet seriously!  The game is all about playing combos to win!  See above as I play three Human Cards that all have the mouse icon! Yep, you gotta play combos to win!

IMG_3123

This is a light solo game that plays in 20 minutes.  It’s pretty fun. If I am waiting for someone and just want to kill 20 minutes, this would be a fun and easy game to play: it’s not too thinky, but it’s still very engaging.

Cooperative Game

IMG_3133

The cooperative game flowed well.  After I learned the game, I was able to teach everyone the game fairly quickly: part of that is because the solo game is still the main game!  It’s really easy to get into it!

IMG_3137

This game is smooth and easy to play cooperatively.  There’s a lot of engagement as players realize “we need to play this combo!!!” See above as Sara and Andrew try to figure out how to combo to take out the 3 Cat Cards!

IMG_3136

The game was still about 20-25 minutes and moved quickly.  This game was easy to learn and pretty fun to play.

What I Liked

IMG_3108

The art is adorable.  And the cards are easy to read.

IMG_3104

The game is super easy to set-up and understand.

IMG_3134

It worked well as both a cooperative game and a solo game.

IMG_3138

In the end, the gameplay was just so smoooooth and easy. Anyone can play this.

IMG_3119

The combo mechanism is fantastic: it reminds of the “follow” mechanism that so enchanted us from the Plum Island Horror (see our review here).  By allowing ANY player to play a Human Card that matches the current symbol, everyone can stay engaged even when it’s not their turn!  This one mechanism made this fairly standard cooperative game stand out for me: it kept everyone engaged!

What I Didn’t Like

IMG_3120

There aren’t enough Human Cards. You will see all of them in your first game! There needs to be quite a bit more for better variety.

IMG_3114

I don’t love the cover, but I was absolutely in the minority on this. I think the art is so cute in the game (see the Ball With Bell above), but I don’t think the cover captured just how cute this game is! Again, I am in the minority: all my friends disagree with me on this.

IMG_3138

I don’t love the pamphlet form factor. Whatever, it’s still a pretty good set of rules.

IMG_3100

It’s not super deep. You’ll get it pretty quickly: that may limit its replayability.

Conclusion

IMG_3105

Hissy Fit! is surprisingly fun! It’s a light game that’s easy to teach: you can teach and start playing right away! This is a quick solo and cooperative game that plays in about 20 minutes! Are you looking for a light and quick solo/cooperative game? Hissy Fit! might be right for you!

IMG_3112

And you don’t have to love cats to like this game: the gameplay is solid, especially with the combo mechanism keeping everyone engaged as they play!   The gameplay is just smooth.

IMG_3097

I give this a solid 7.5/10 and Teresa gives this a 7/10. Andrew and Sara would give it a 7, but the small number of Human Cards reduces some of the replayability for them, so they give it a 6.5/10. I think an expansion which added a lot more Human Cards would move this to a 7/10 for them.

IMG_3107

This small game has a sense of humor and a wacky theme, but it plays so smoothly.  It’s a surprise to me how much I liked Hissy Fit! given how weird and quirky it is.  Yes, I got my money’s worth for $20.

Wait, A Cooperative Euro Wargame? A Review of Sammu-ramat The Board Game

Welcome to the Start of Cooperative Surprise Month!  This month, we take a look at some of the surprises we have encountered recently in our cooperative game journeys! We start this month with a cooperative game called Sammu-ramat, which ended up being a huge surprise!

Wait, what just happened?  I just spent five days straight playing Sammu-ramat! This was a cooperative game on Gamefound back in November 2021, and it finally delivered to my  house just a few days ago (Wednesday, February 15th, 2024).  I have been playing it non-stop since it arrived at my door!

IMG_2698

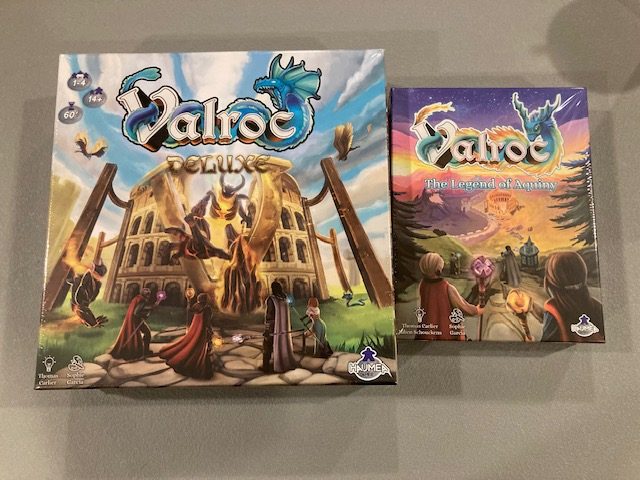
This obsession is really weird, because I was on the fence for Sammu-ramat when it was on Gamefound. The game didn’t look “great”, but the idea of this cooperative resource-driven war game looked interesting, so I backed it.

IMG_2700

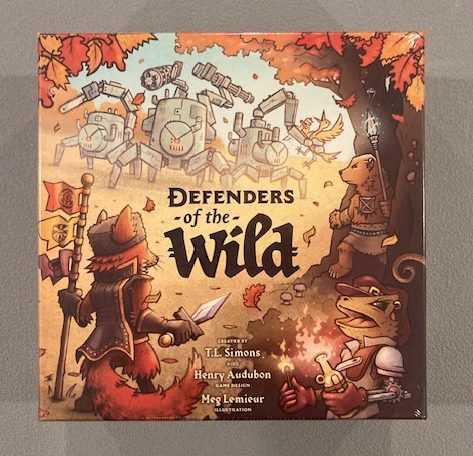
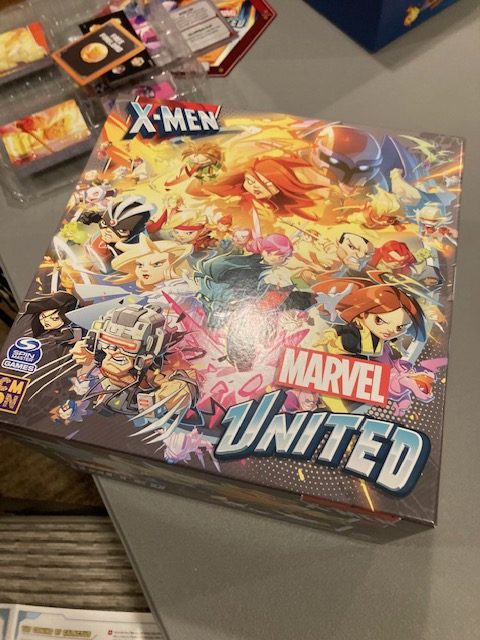
I have to admit: I wasn’t wowed by the production.  The cover isn’t great and this box was just okay.  If I were to see Summu-rammat at a game store, I might pass right over it.  It doesn’t look like anything special.

IMG_2855

But at the risk of giving away my thoughts early, it would be a crime to pass up this game!  Despite a lot of issues with components, production, and the rulebook, this is a very good game!  I adored it and couldn’t stop playing it for five days!

Let’s take a closer look!

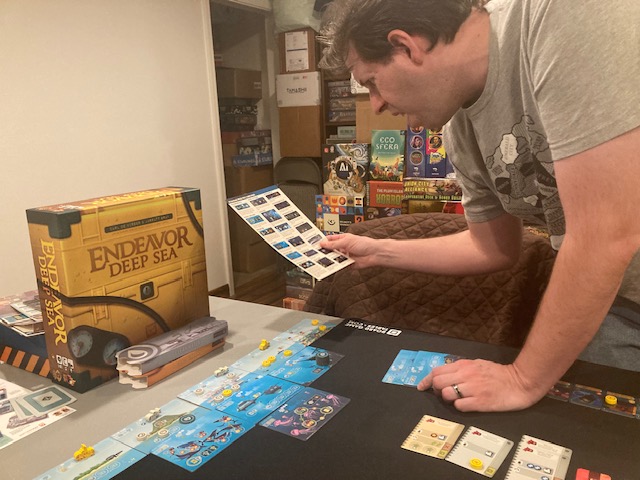
Unboxing and Plutorial

IMG_2705

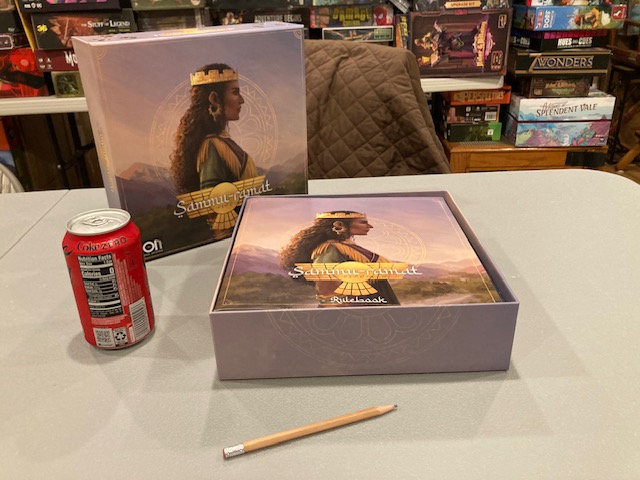
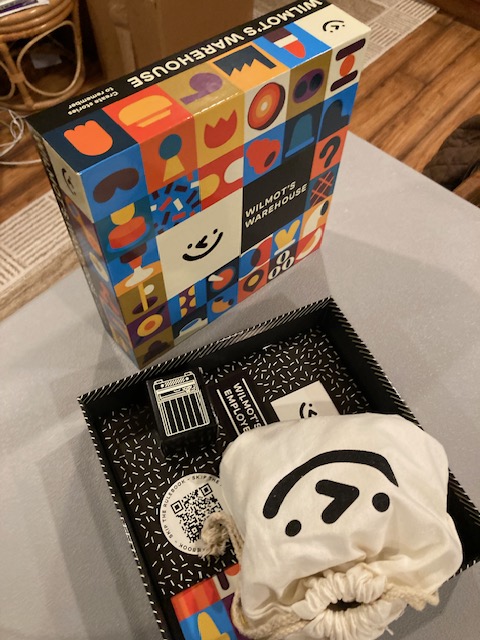
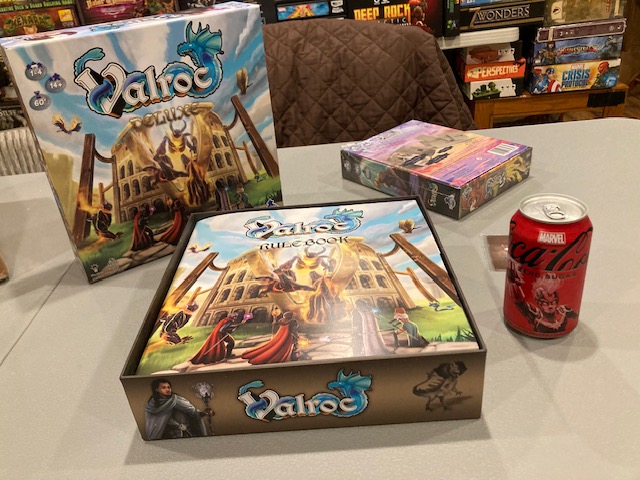
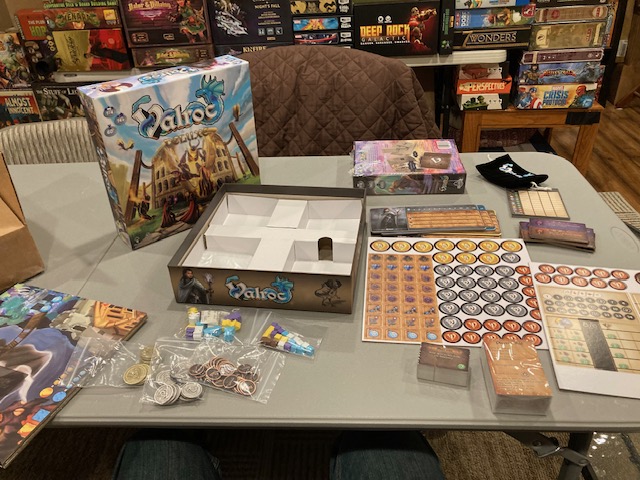
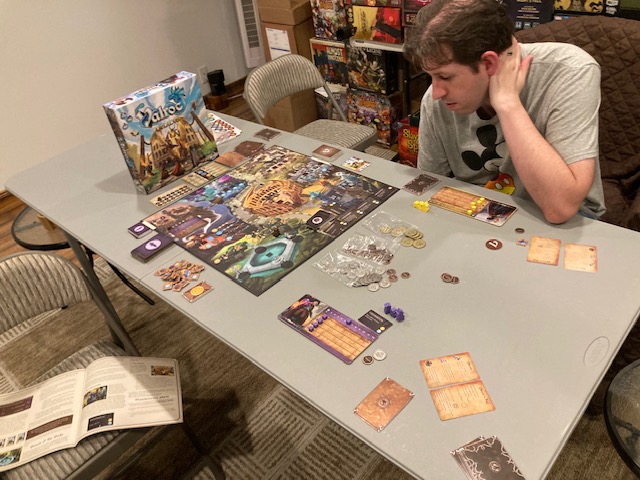
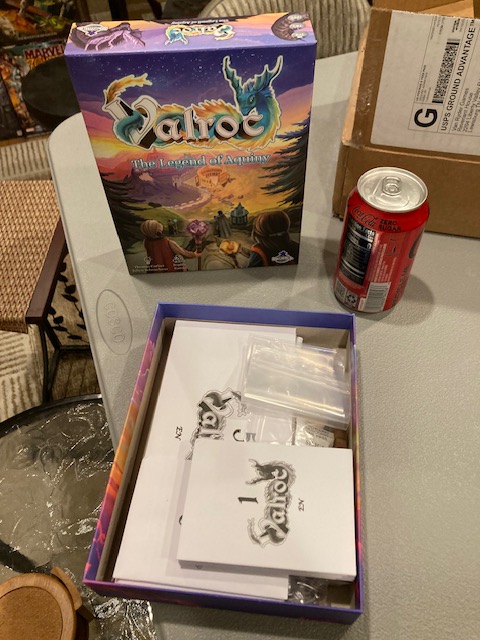
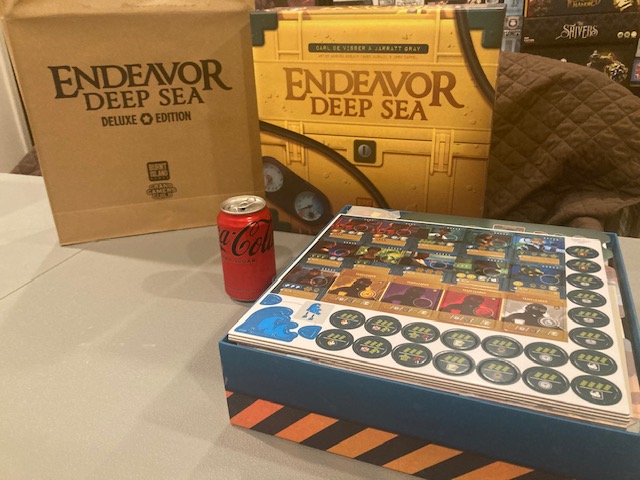
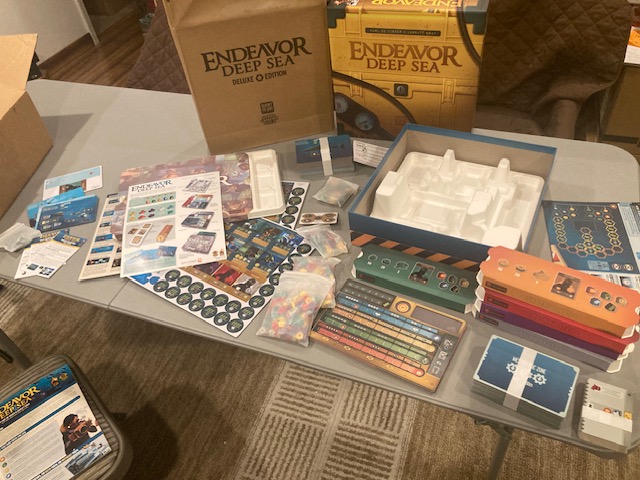
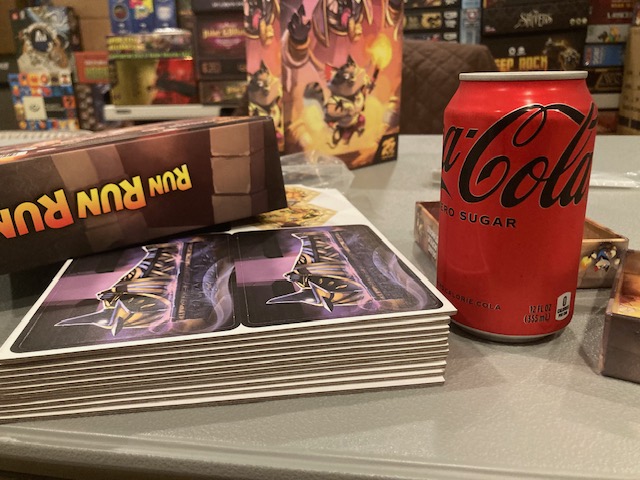
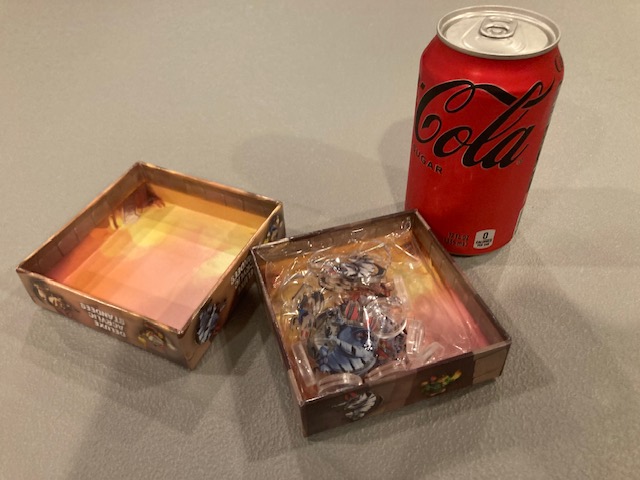
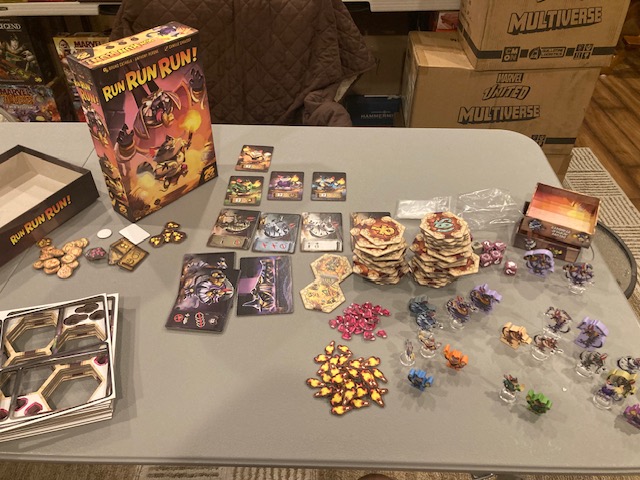
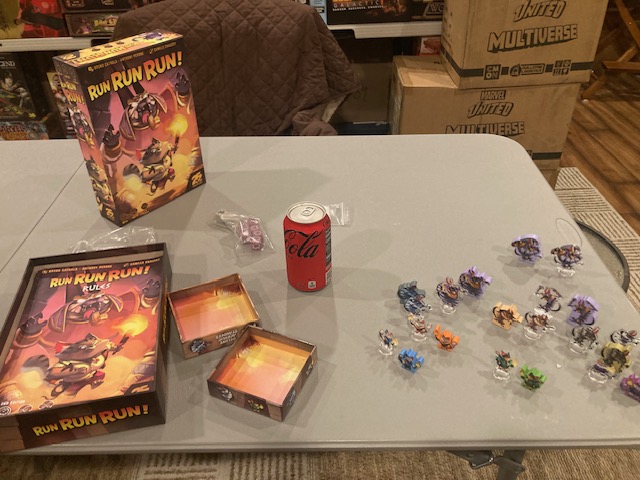
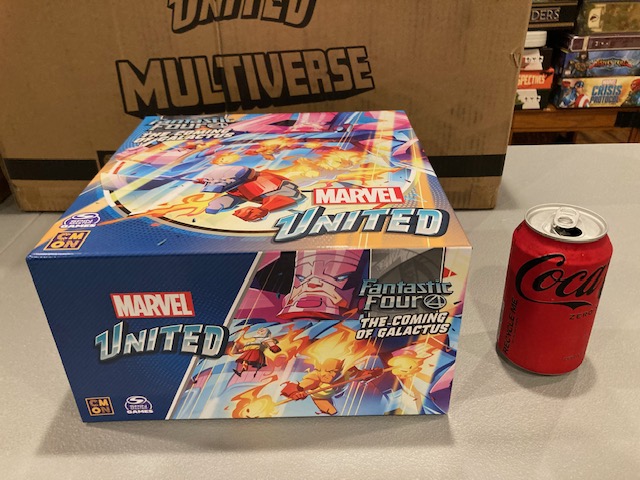
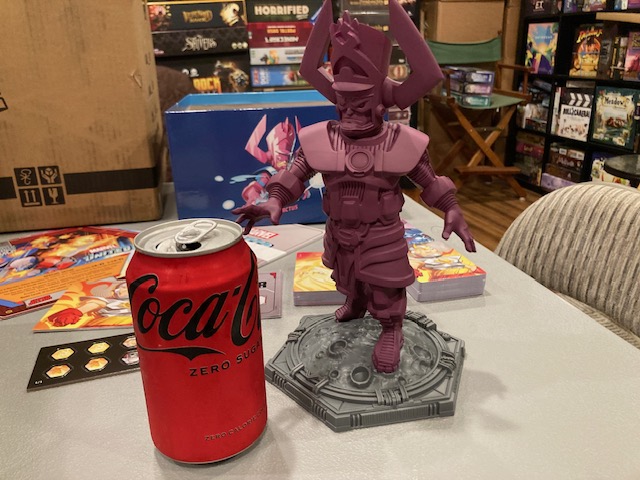
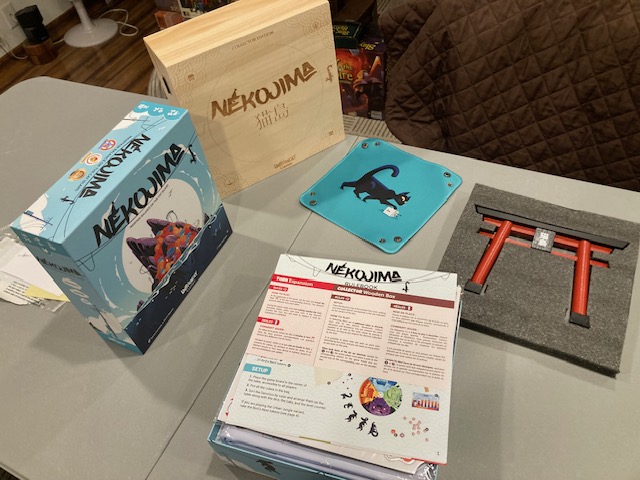
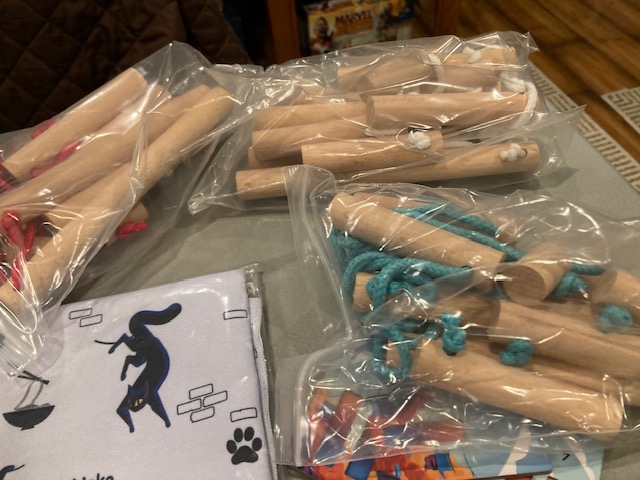
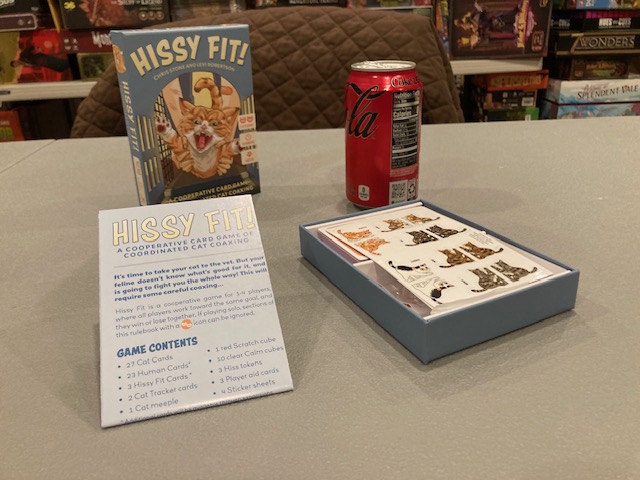
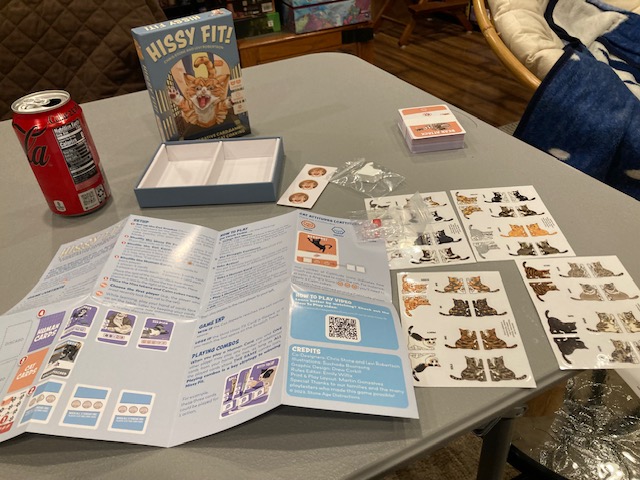
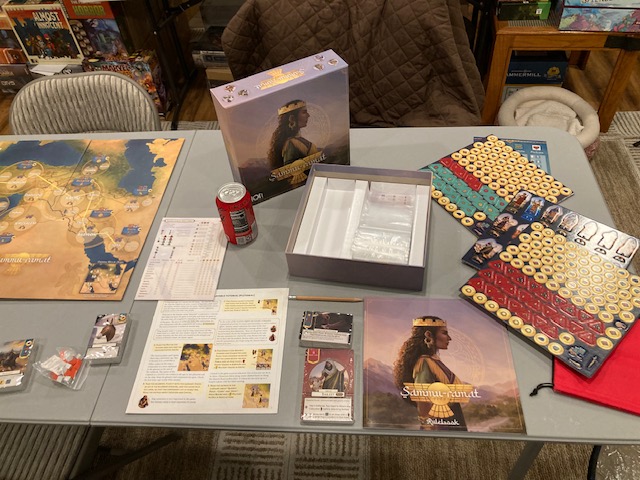
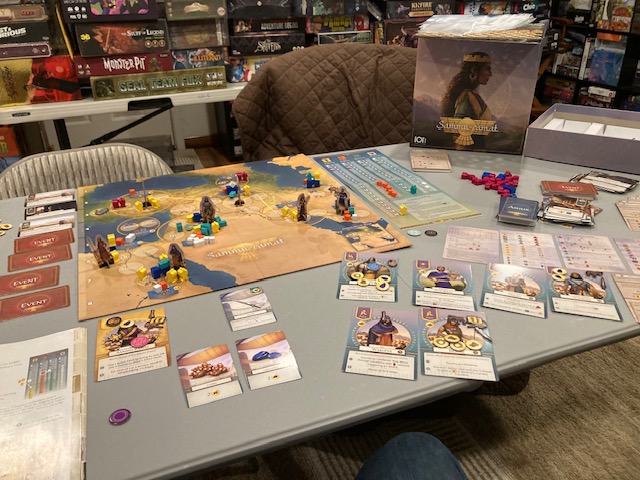
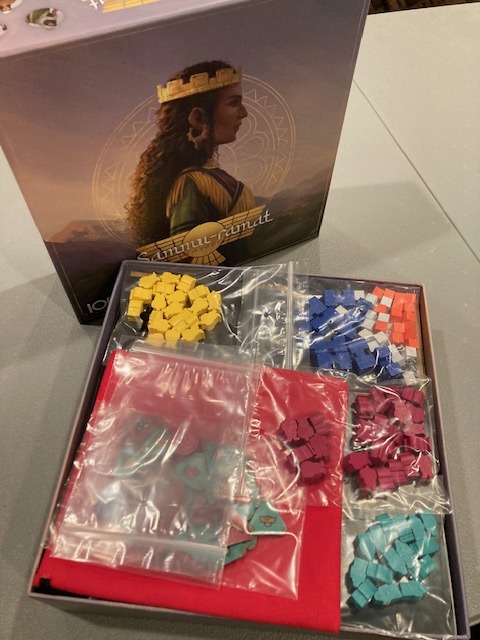
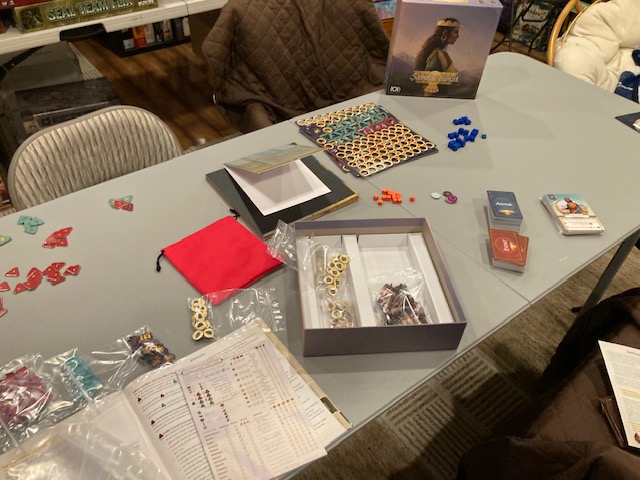
The first day the game came in, I unboxed it.  It’s a little smaller than a Ticket To Ride style box.  See the Coke can and #2 pencil for perspective (see above).

IMG_2706

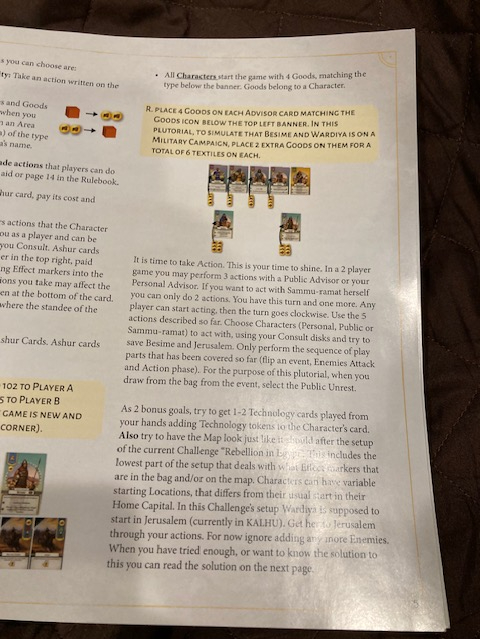
Just under the rulebook is the Summu-ramat Plutorial. What’s a Plutorial you may wonder? A playable tutorial!

IMG_2707

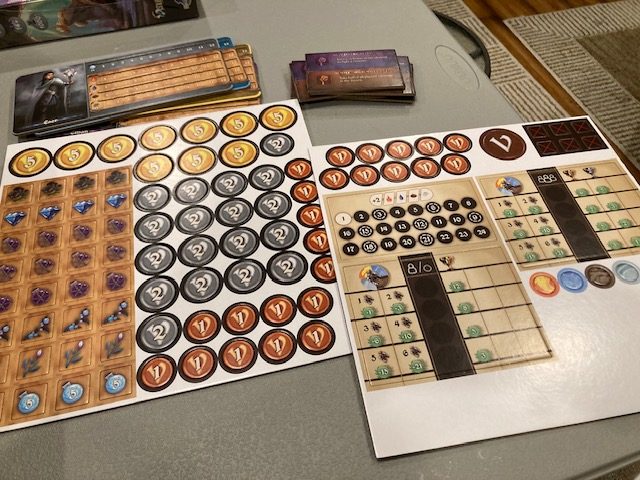
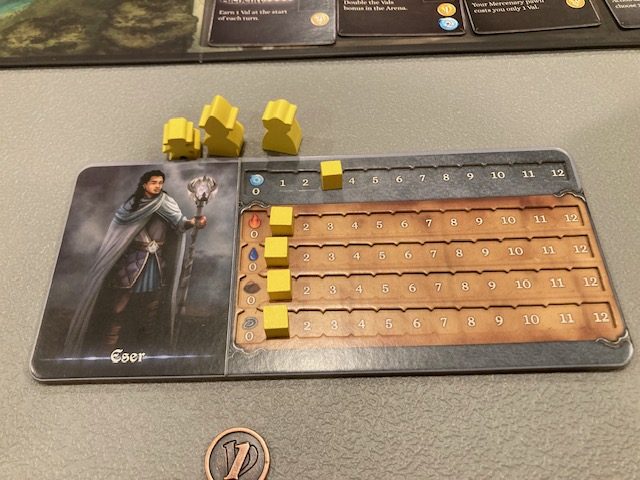
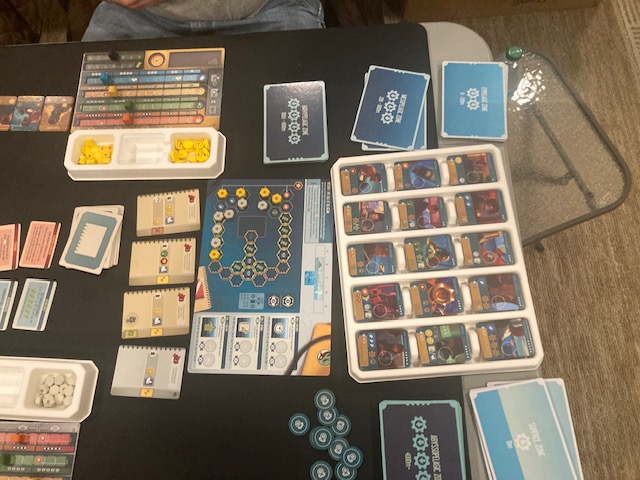
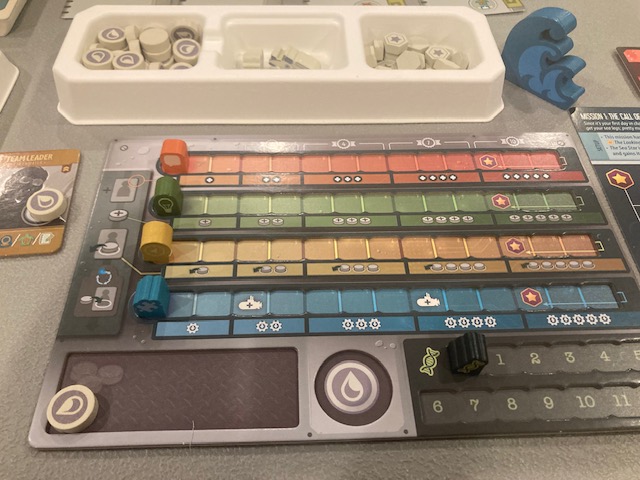
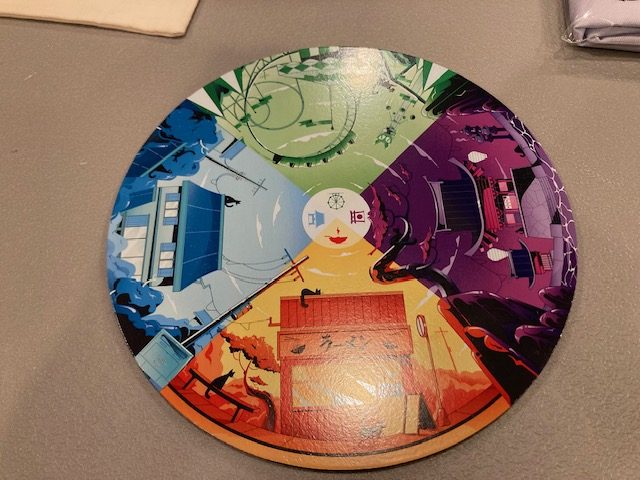
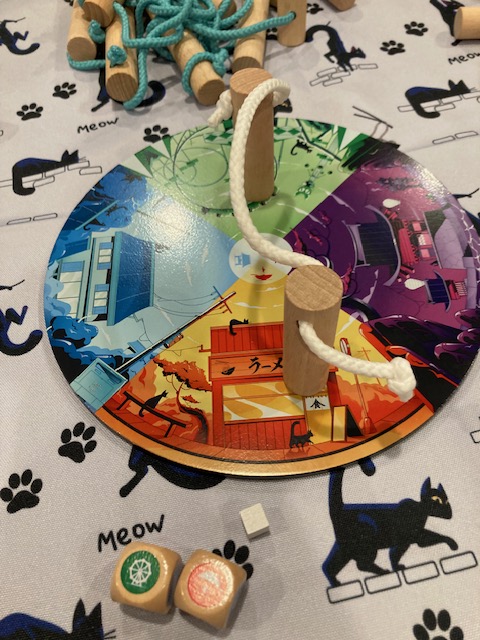
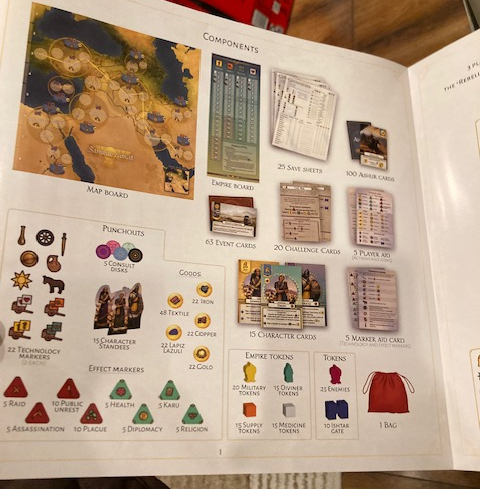
The Empire Board is a way to track resources.

IMG_2708

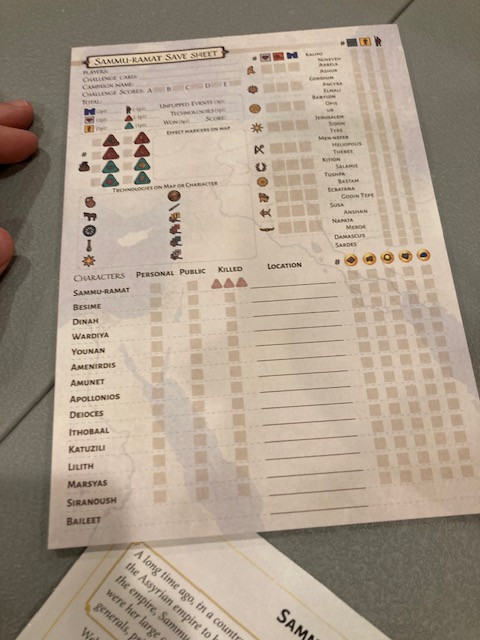
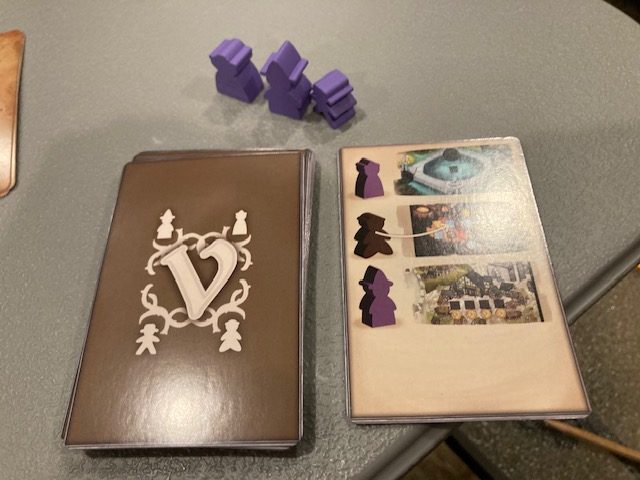
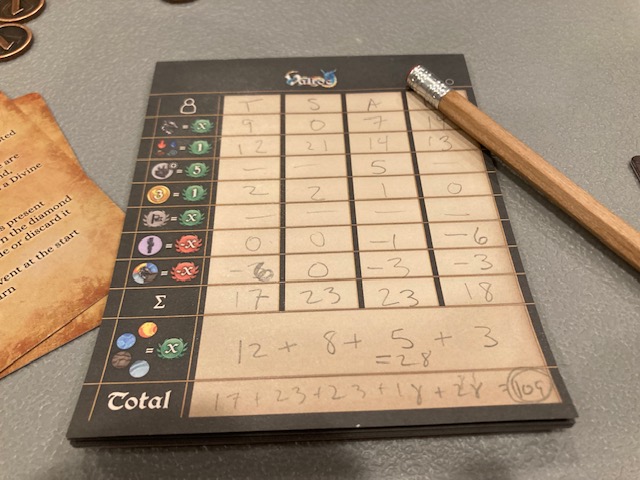
The “save state” pad is useful for the campaign mode: Spoiler! The game comes with many campaigns!  But don’t worry, you can still easily play one-off games.

IMG_2710

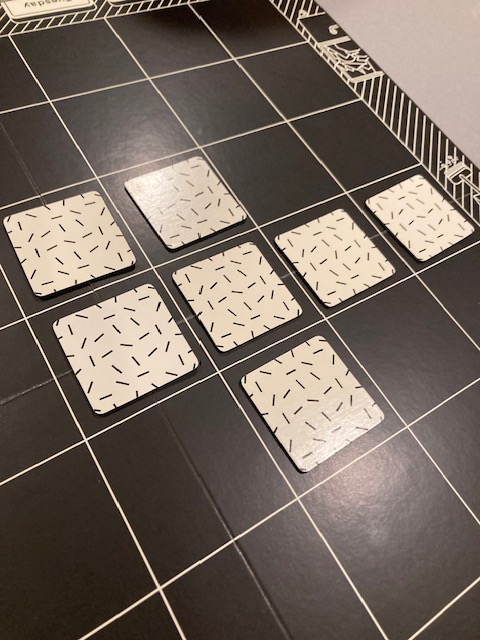
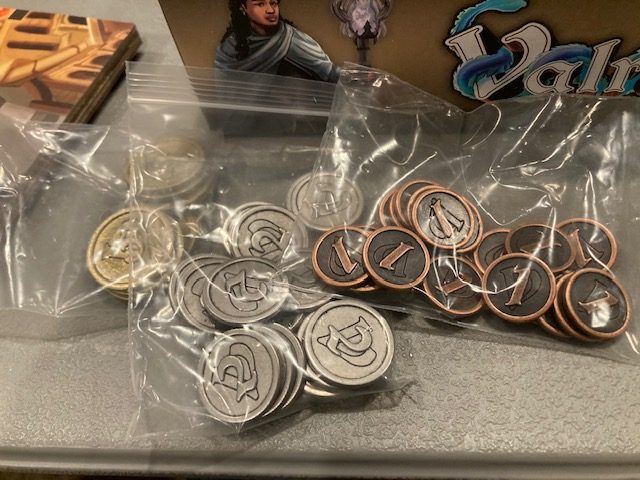
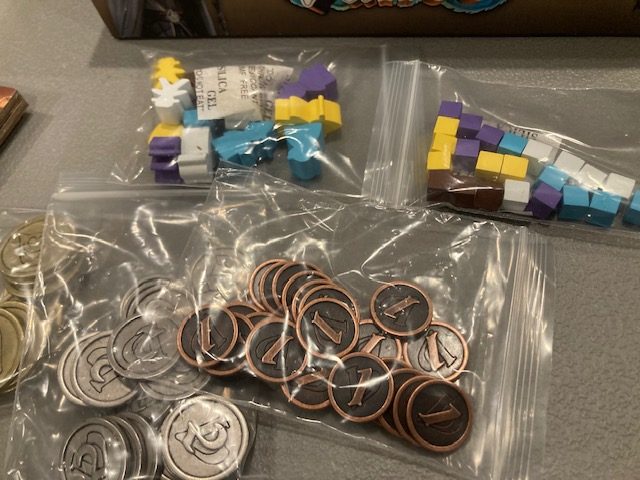
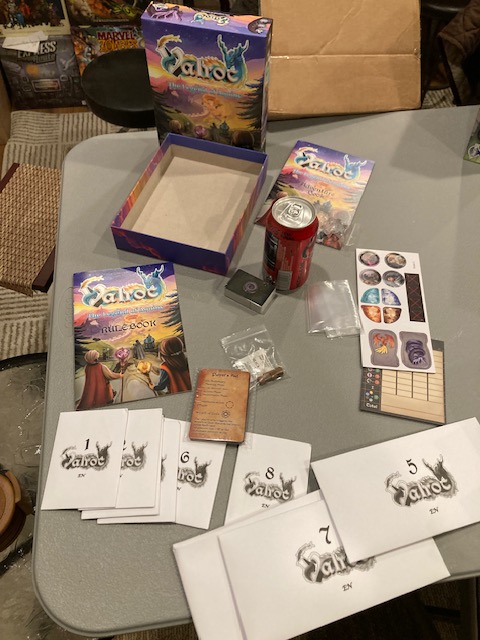
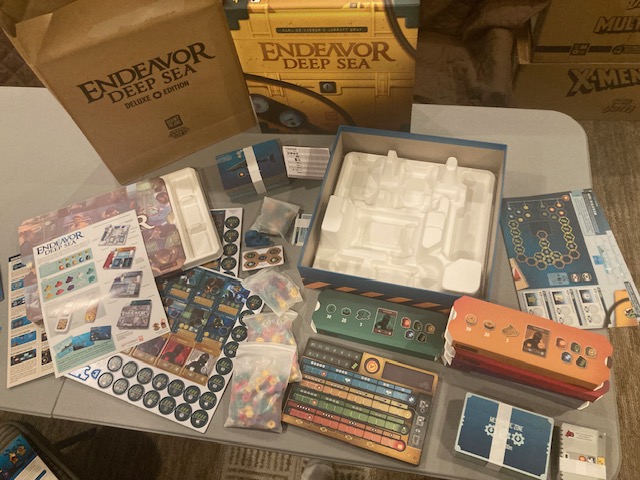
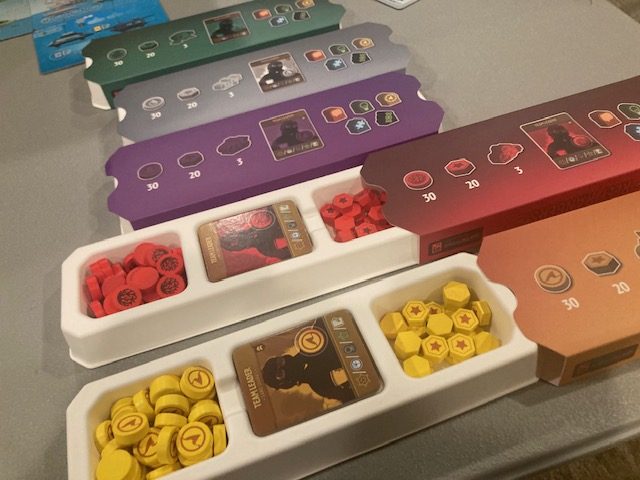
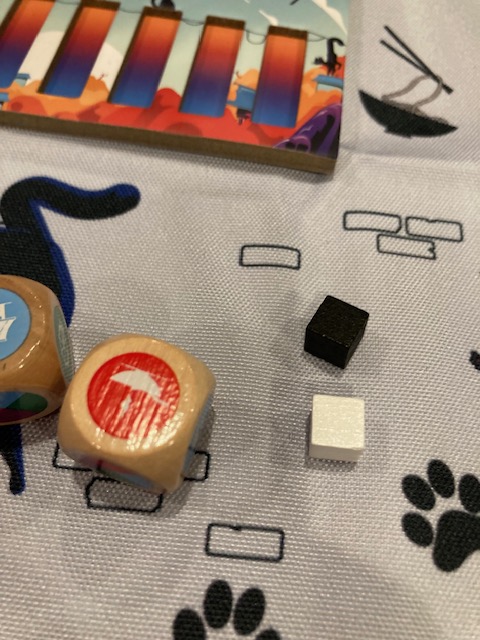
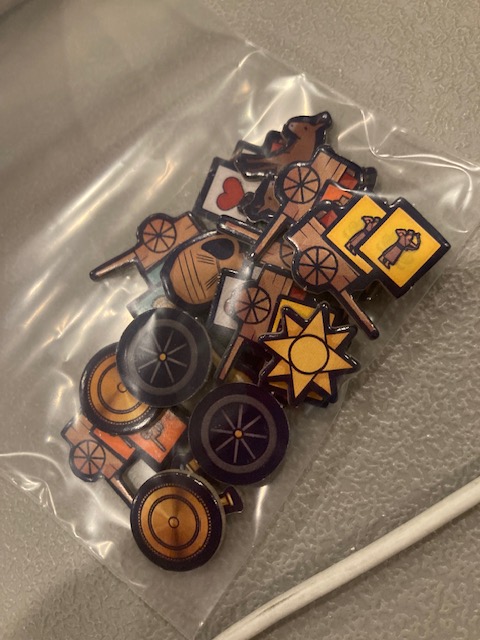
There are quite a number of punchouts.  Most of the tokens are Goods tokens (yellow resources), good (green) tokens, or bad (red) tokens for the token bag,

IMG_2765

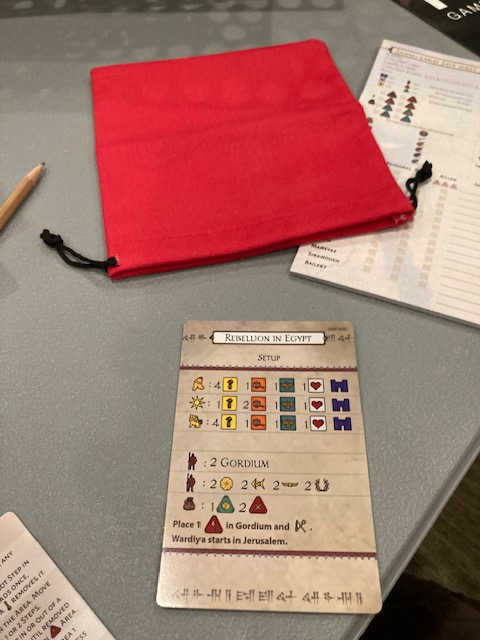
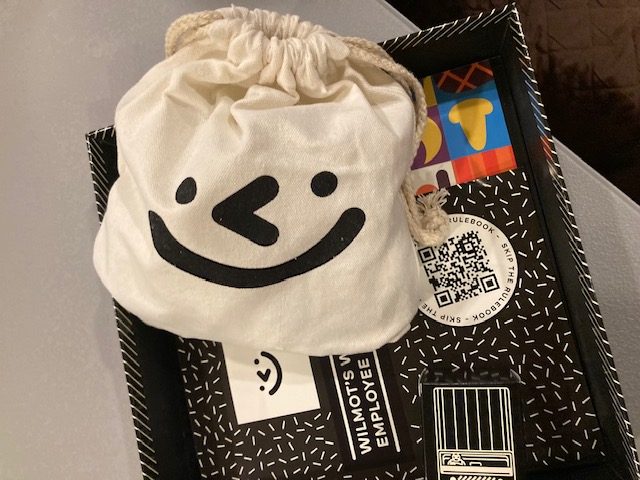
There is a pretty nice token bag: it’s not a main mechanic in the game, but there are times throughout the game when you will put/pull tokens (good green or bad red).

IMG_2711

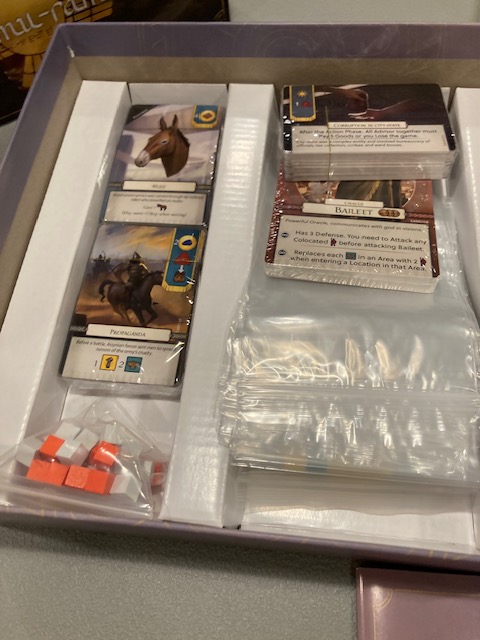
There are a ton of plastic bags (for bagging the game up later), and some cards.  We’ll see these cards later!

IMG_2763

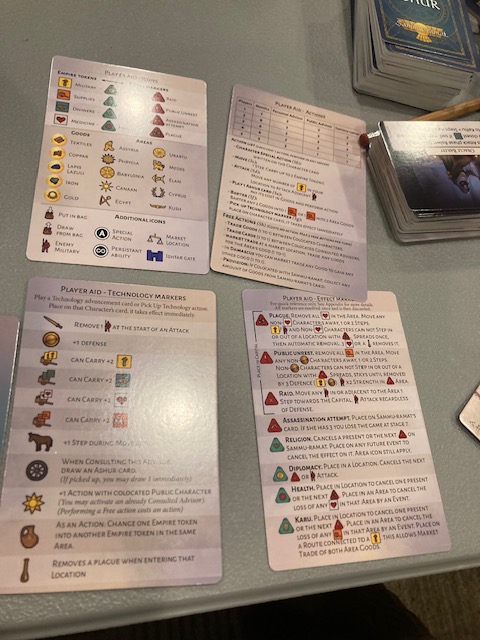
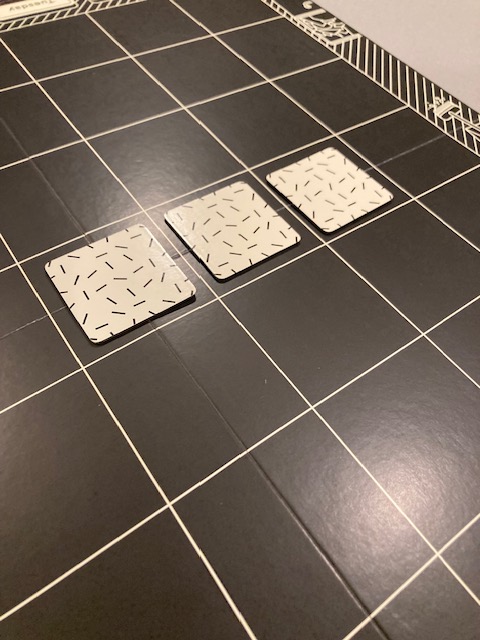
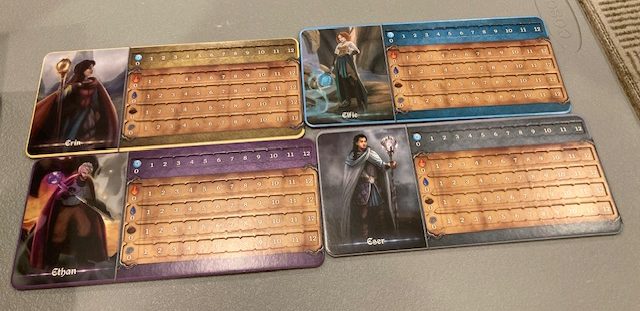
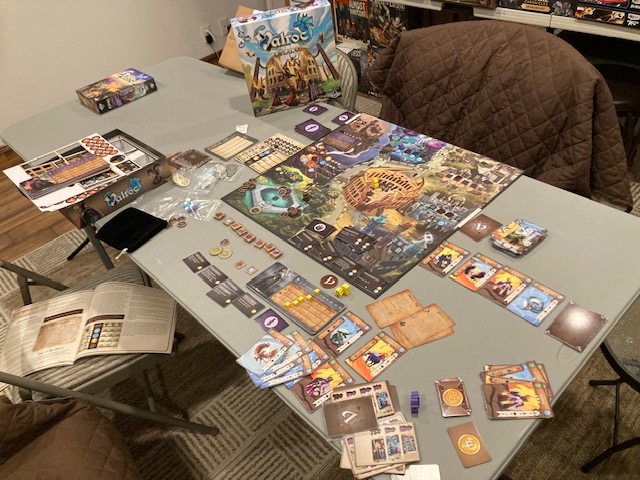
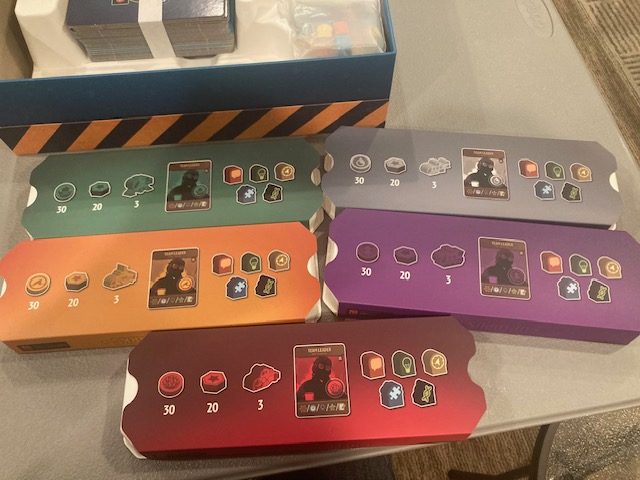
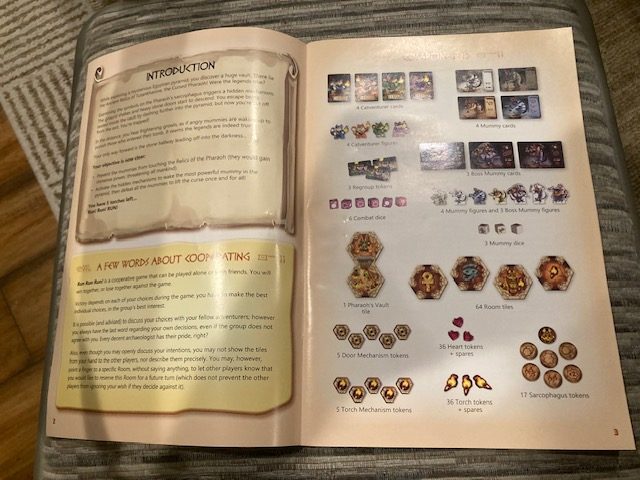
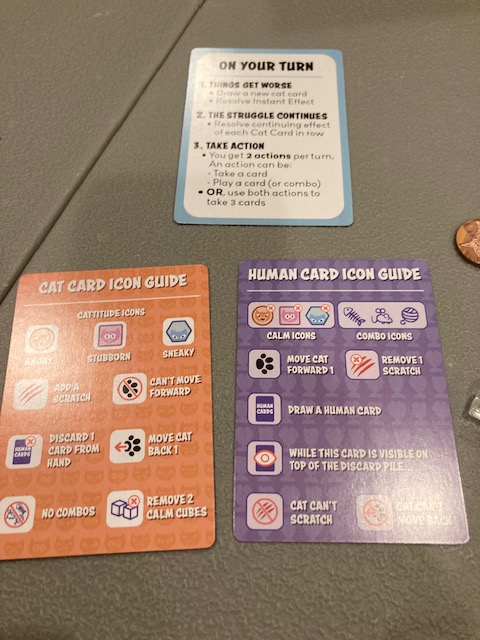
It’s important to point out that the game has a fairly extensive set of player aid cards for all players! See above.

.IMG_2740

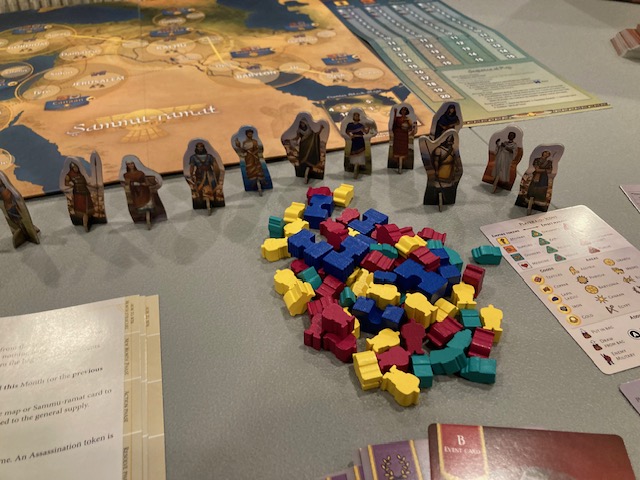
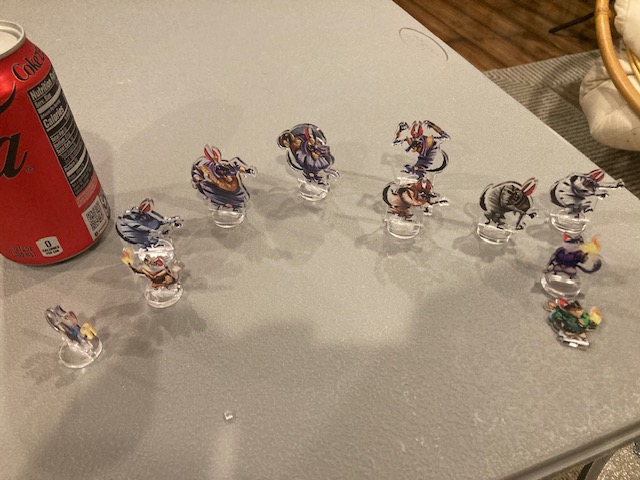
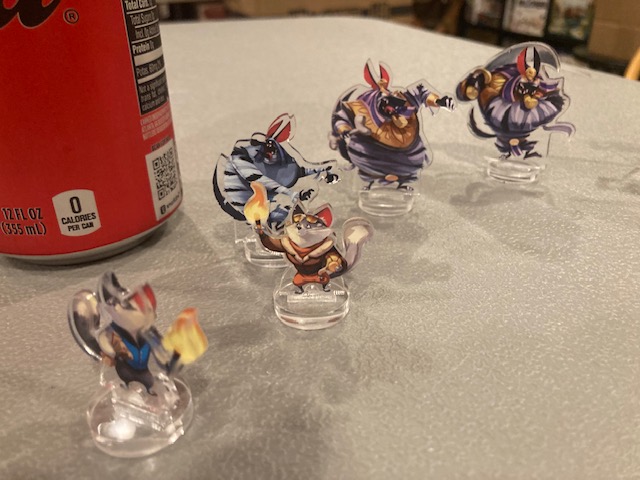
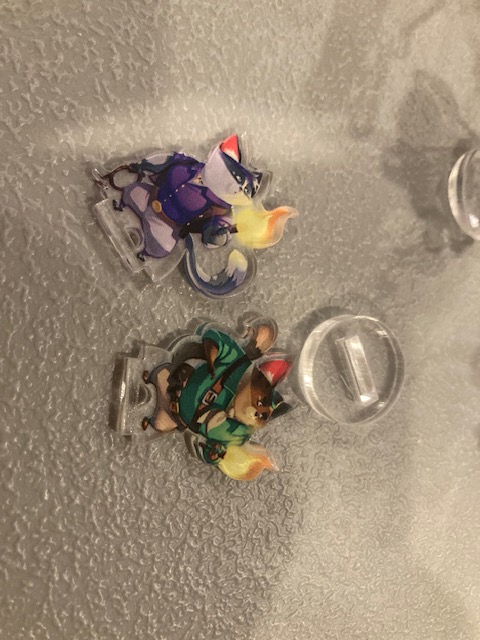
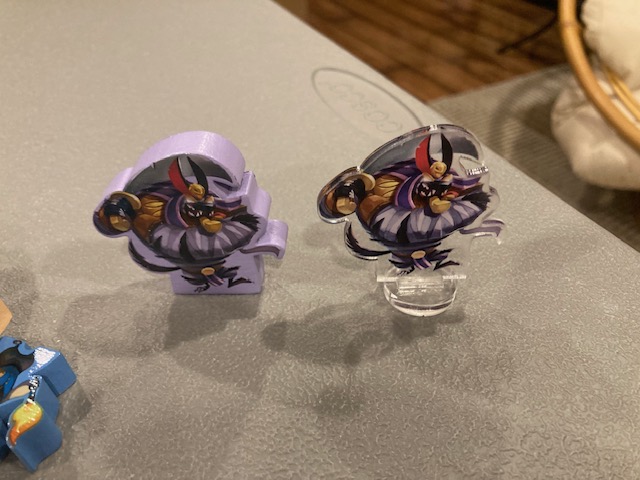
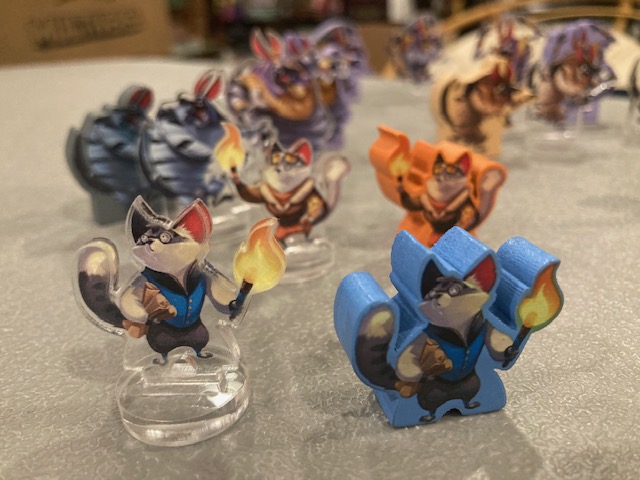
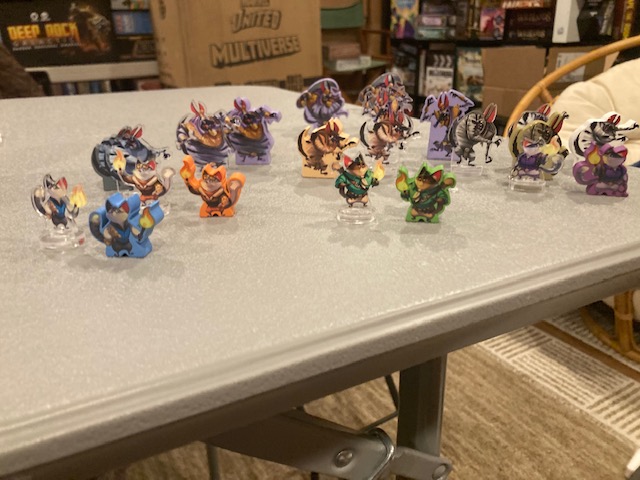
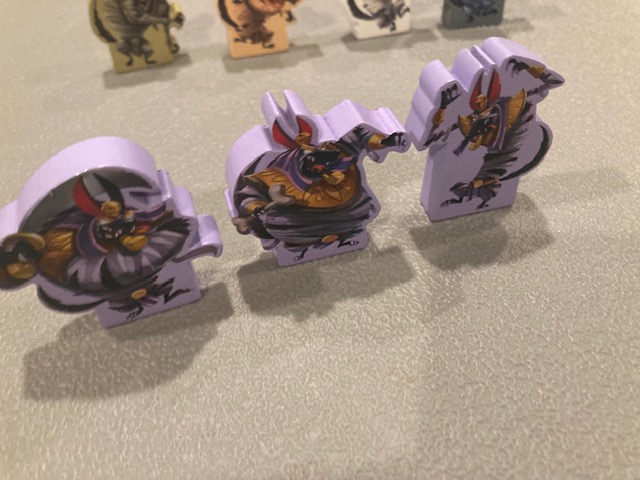
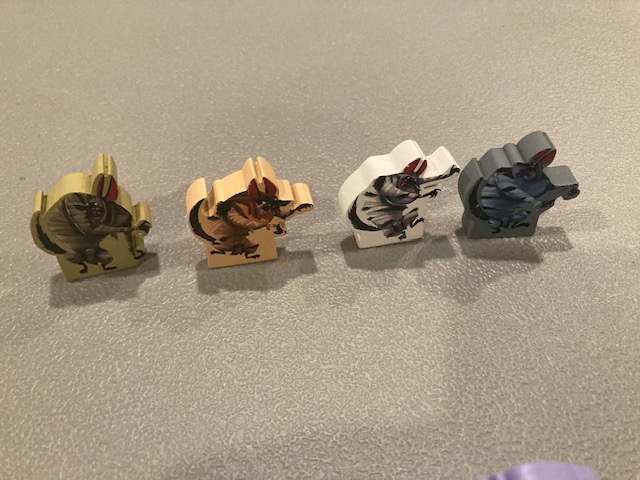
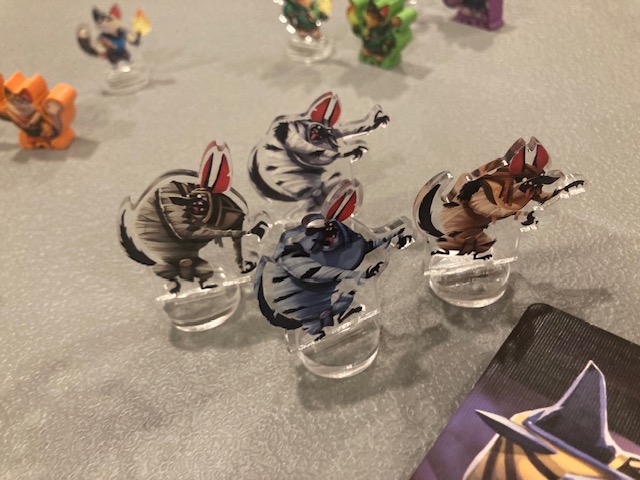
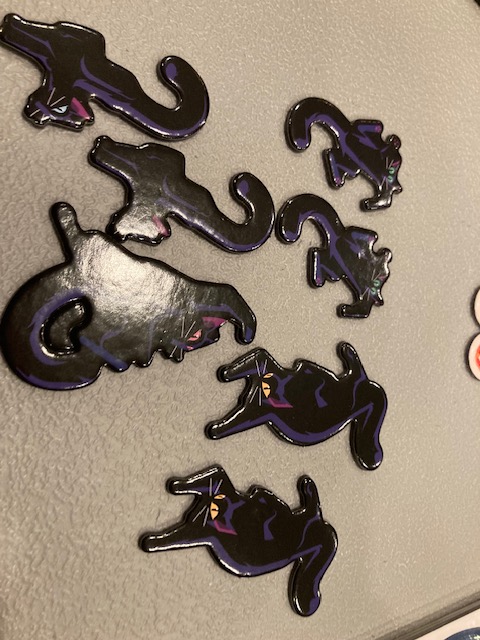
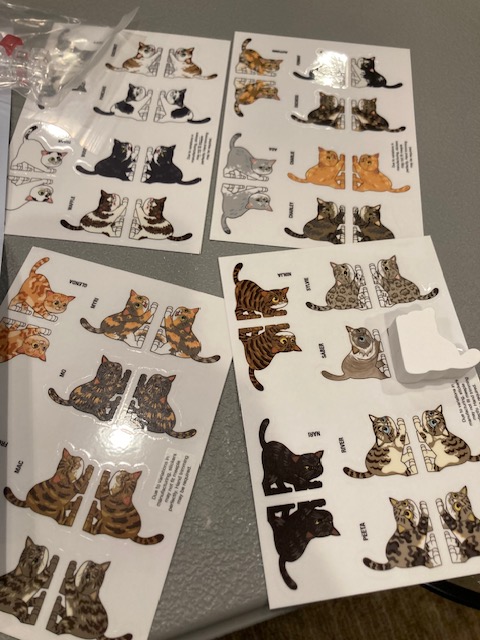
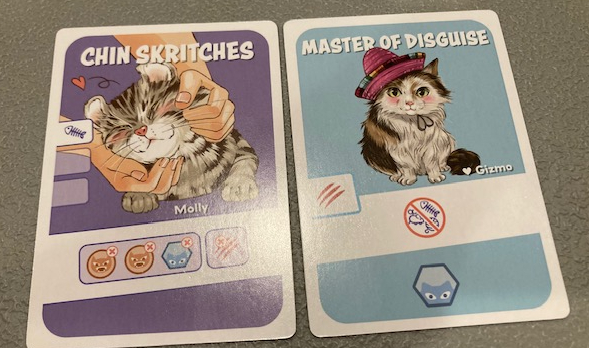
A lot of the punchouts are also characters you can play.  See above.   The meeples are generally military (red bad guys, yellow good guys). 

IMG_2713

Overall, the game production looks pretty good. There are a few issues we’ll point out later.


Plutorial: Playthrough and Tutorial

IMG_2706

This introduction shows the first few turns of a game, as it teaches you some of the core rules.  The Plutorial is well-notated and clear (modulo a few sections) as it takes you through some of the major pieces of the game: combat, characters, gathering resources, the Empire Board, the player aids, the maps, Areas vs Locations, and even reading the Glossary at the end of the rulebook!

IMG_2748

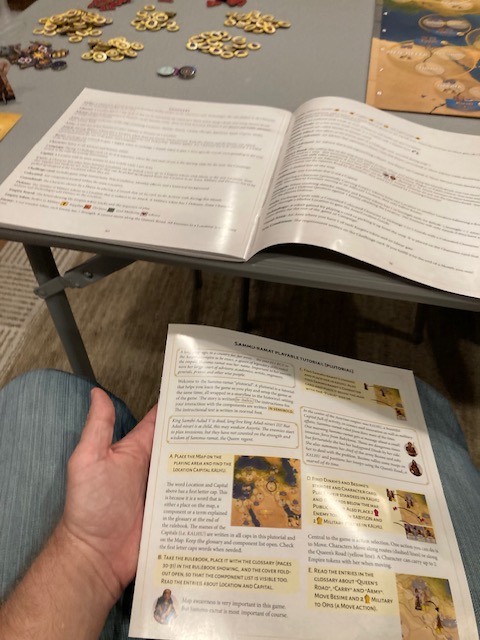
This Plutorial is absolutely essential to starting the game off on the right foot.  There are a lot of rules to Sammu-ramat, and I could have very easily lost interest in the game if I didn’t have this to guide me into the game.   

IMG_2751

The game is just complex enough that just reading the rulebook might turn off a lot of people (the rulebook of 32 pages and fairly technical).

IMG_2774

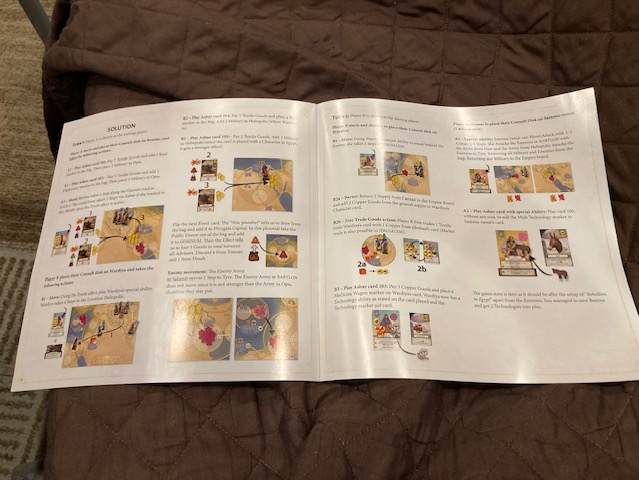
The Plutorial very clearly notates why things happen in the game, and even sets-up a little “puzzle” for you to solve (with a clear solution at the end). I think after I finished the Plutorial, I felt like I knew enough to jump into Sammu-ramat feet first. This Plutorial made me feel like I could understand enough to start playing the game … and that’s a win for a game this complex.
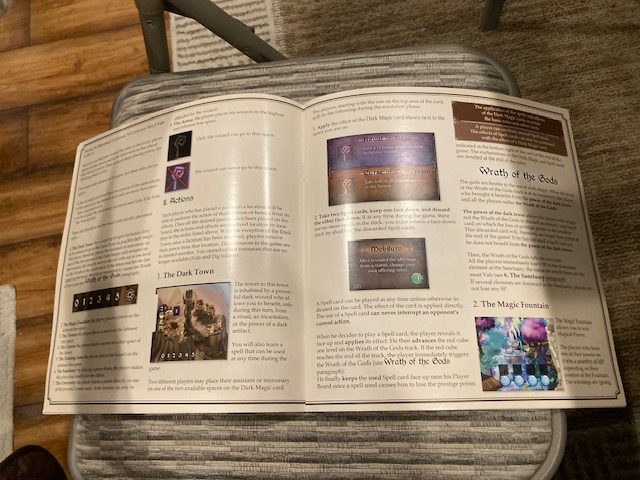
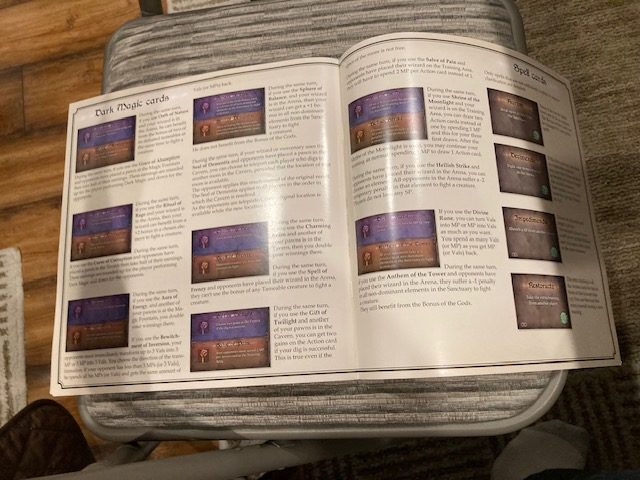
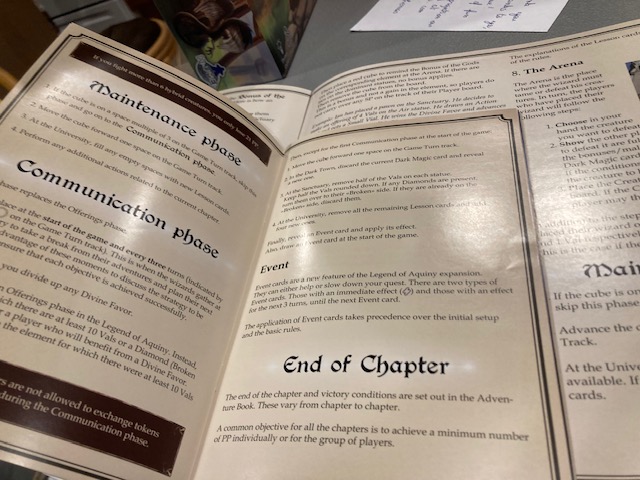
Rulebook

IMG_2884

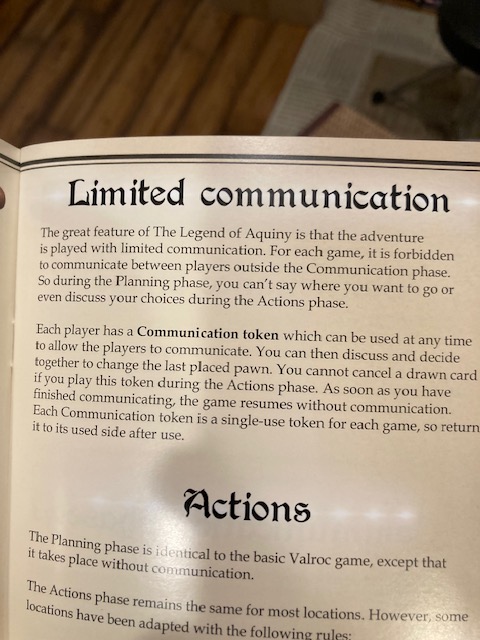
This rulebook is okay.  It taught the rules, but it had a few problems.

IMG_2734

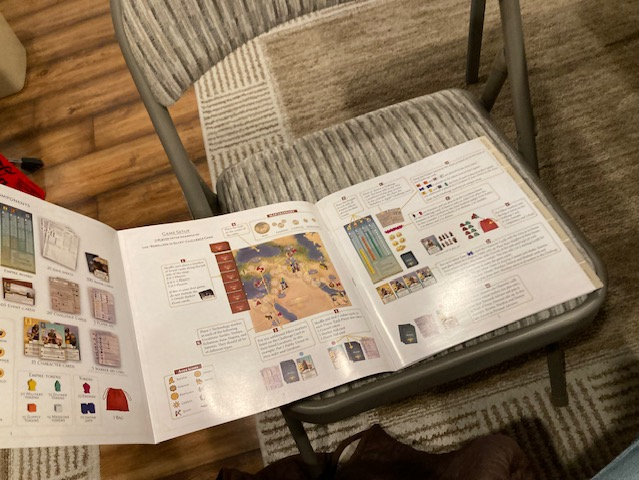
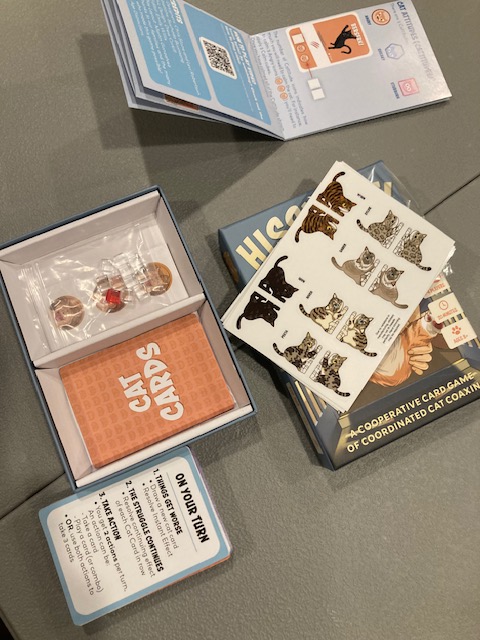
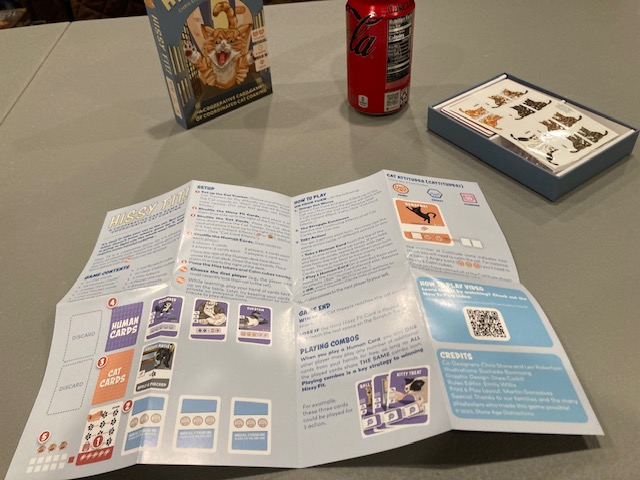
The first was the trifold nature in the first few pages.  I think this might be a clever way to have the components page always available while reading the rest of the rulebook, but it’s simply too unwieldy in real life.  I applaud them trying something new: I really like the basis of the idea!  I really like having the components page always available.  In the end, they would have been better served having the components list of a separate sheet that wasn’t awkwardly attached to the rulebook.

IMG_2718

The rulebook would probably get a B or B- on the Chair Test.  It doesn’t quite fit on the chair next to me.  In the end, it ended up on the table the entire time I played, taking up valuable table space.  I really wish the form factor had been a little smaller.

IMG_2721

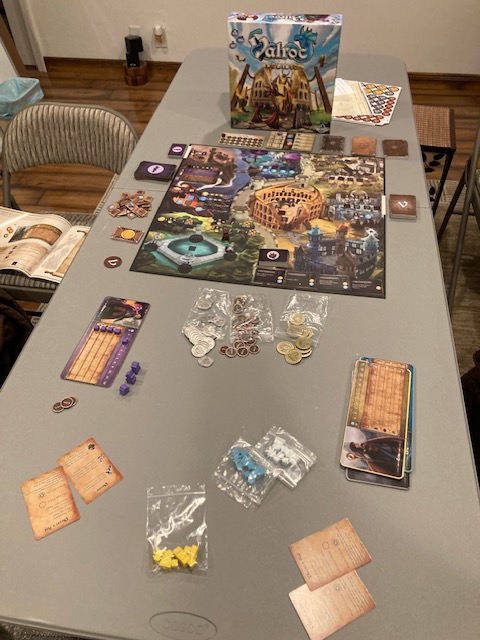
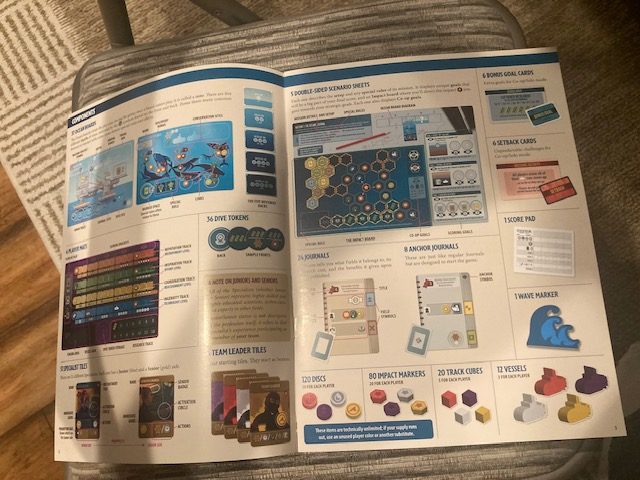
The game had a nice components page, despite the form factor.

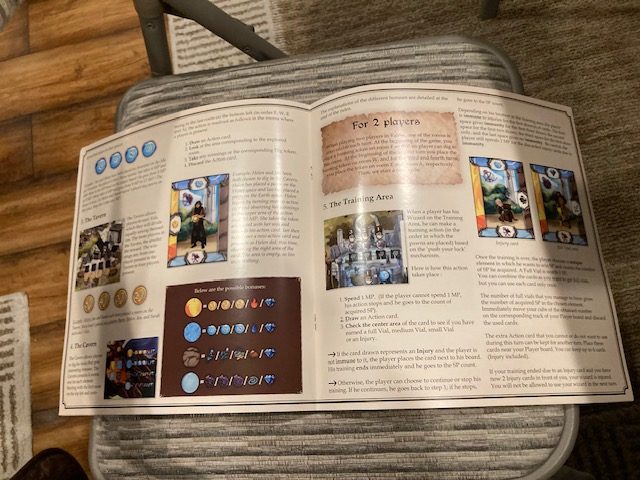
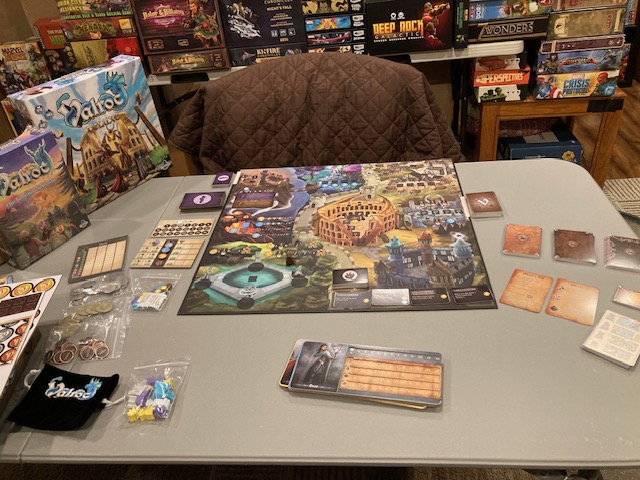
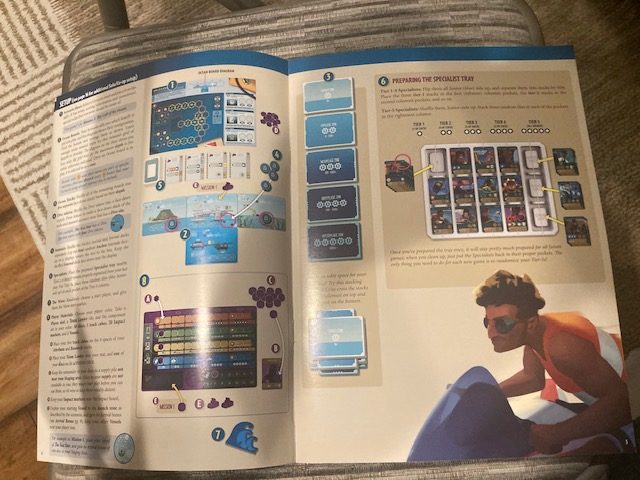
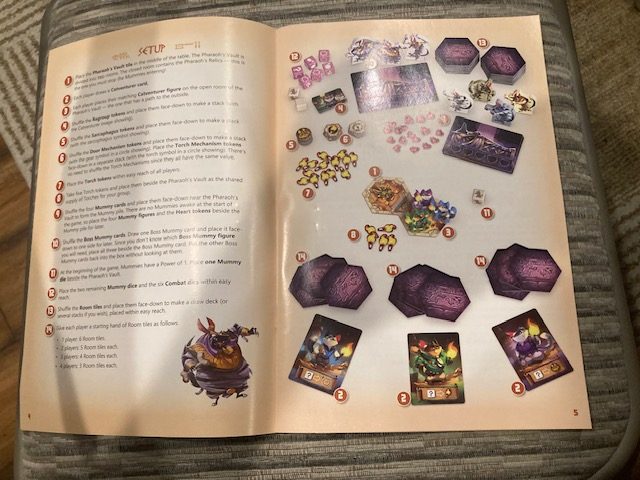
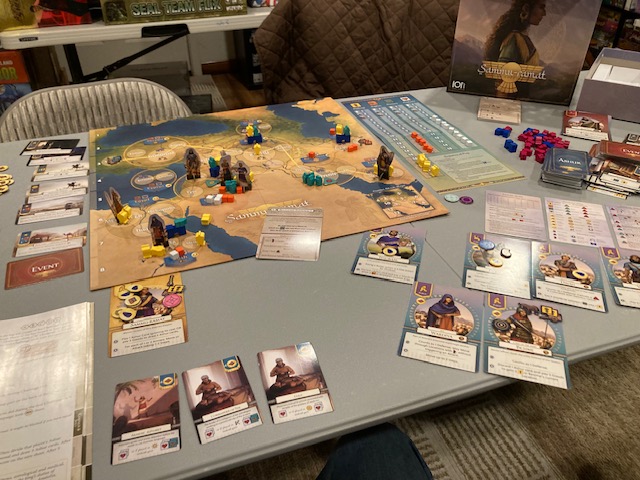
The set-up was also very well notated: see above.

IMG_2768

In general, the rulebook was okay, but it did read like a technical manual.  Without the Plutorial, this rulebook would have been much more difficult to get through.

IMG_2736

I think the rulebook must be also a translation: there were several points where the verbs seem misconjugated (that’s usually a dead giveaway of a translation) in number and/or tense. 

IMG_2782

The fact that the rulebook had a glossary was a major plus!  I just wish it had an index.

The back of the rulebook was used for something kind of useful: I wish it had been an icon summary, but at least it was something kind of useful.

IMG_2827

Overall, this rulebook needed just a few points of clarification, a better form factor, an index, and another pass by an editor.  Having said that, it was decent at presenting the rules.

IMG_2867

You can learn the game from the rulebook.  Just be aware that you will have to hunt for rules a few times.  I have played the game probably 10 times by the time you read this, and I still find myself searching the rulebooks for clarifications.

IMG_2737

But, the rulebook worked.

What Is This Game?

IMG_2841

At the end of the day, Sammu-ramat is a puzzle.

IMG_2757

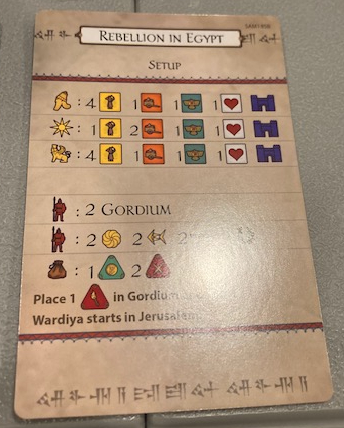
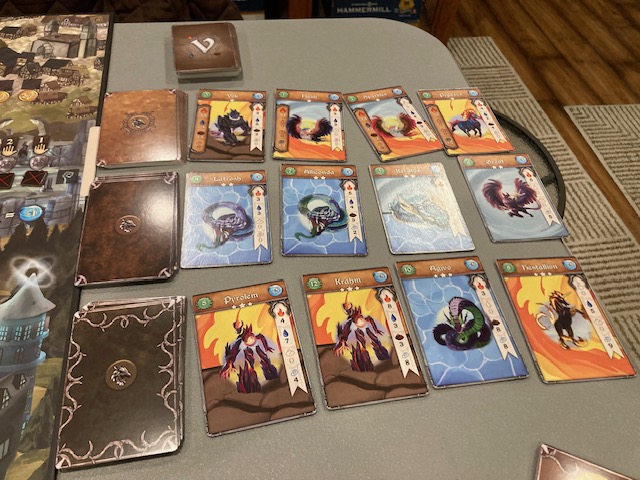
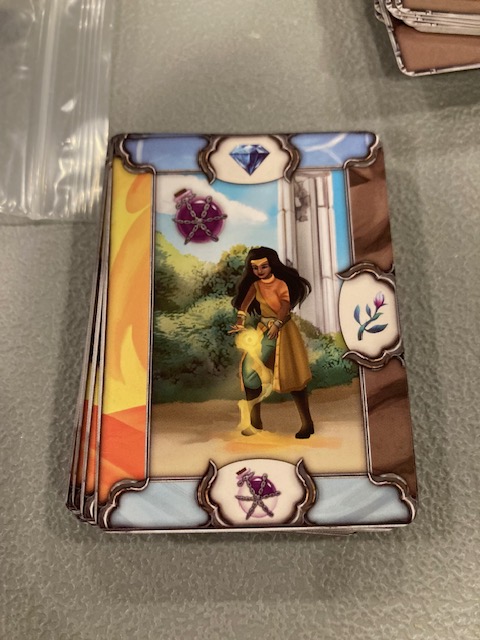
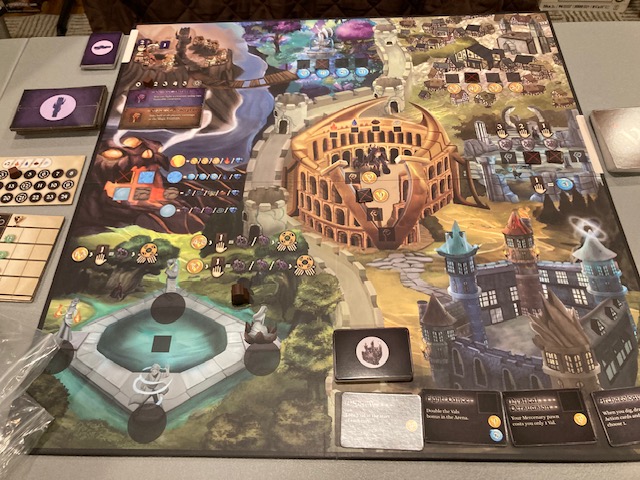
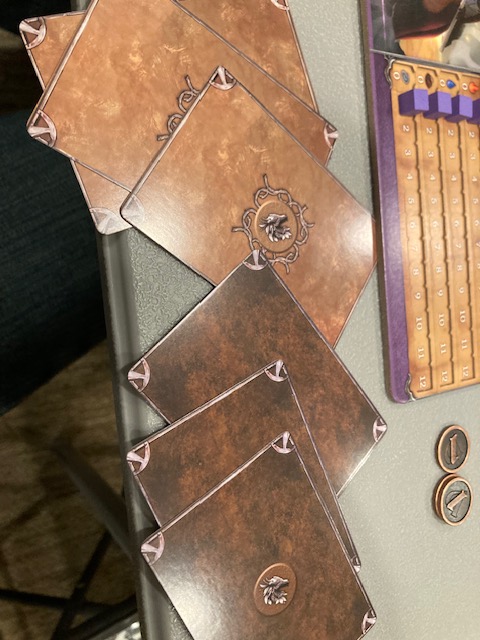
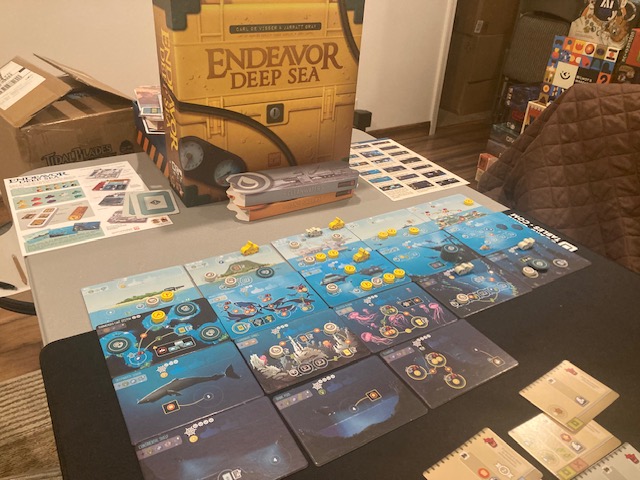
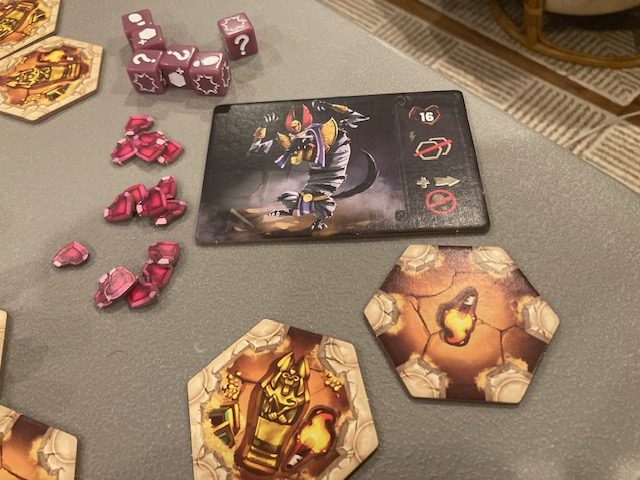
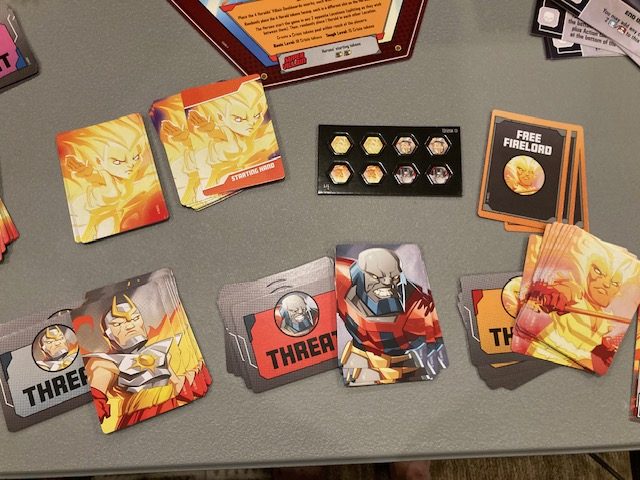
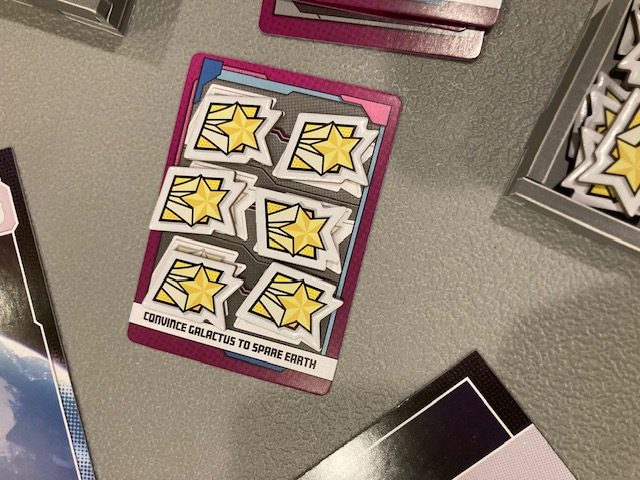
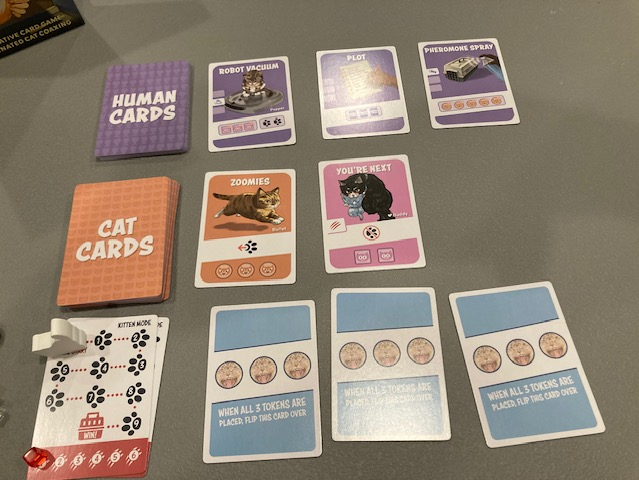
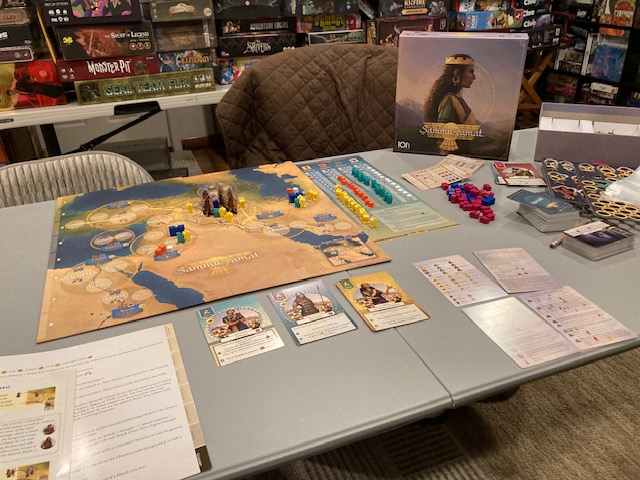
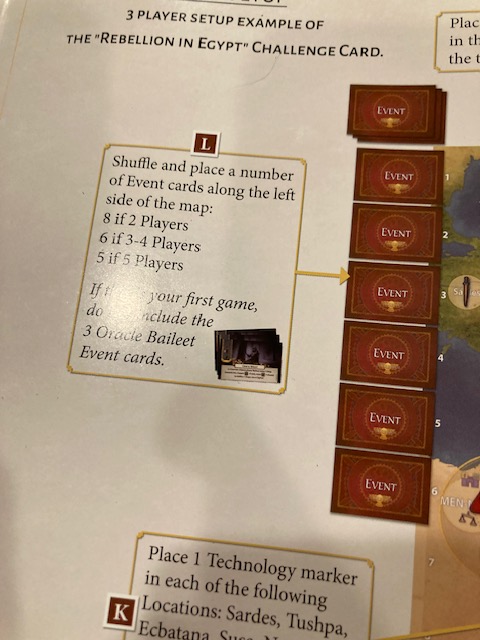
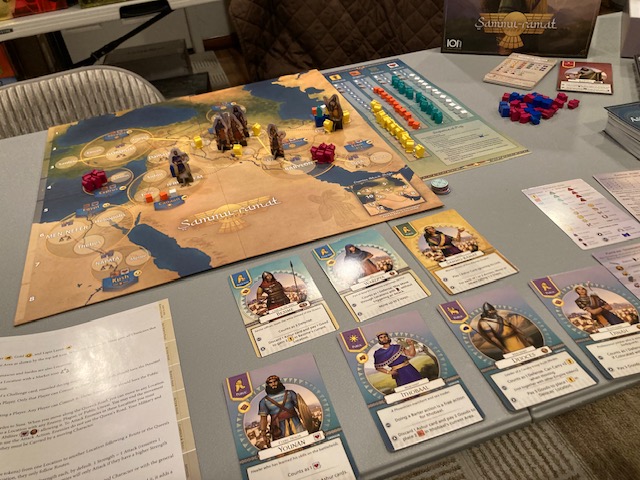
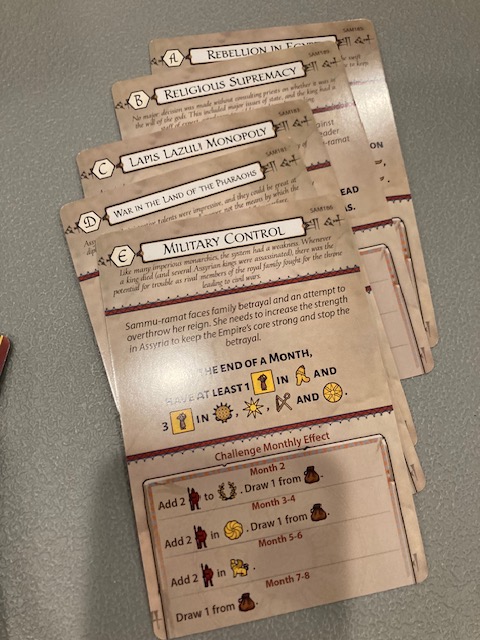
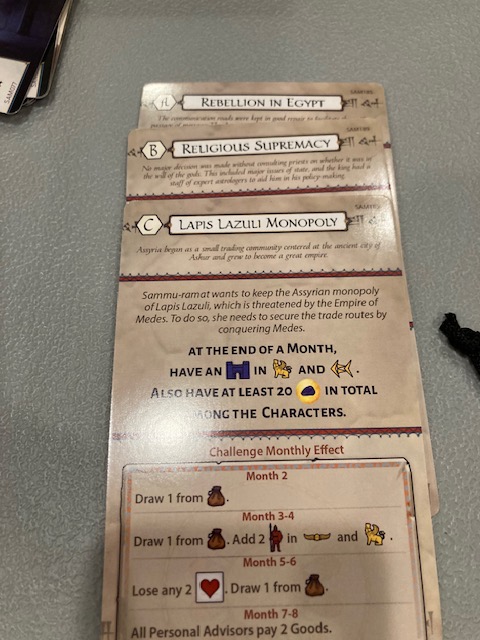
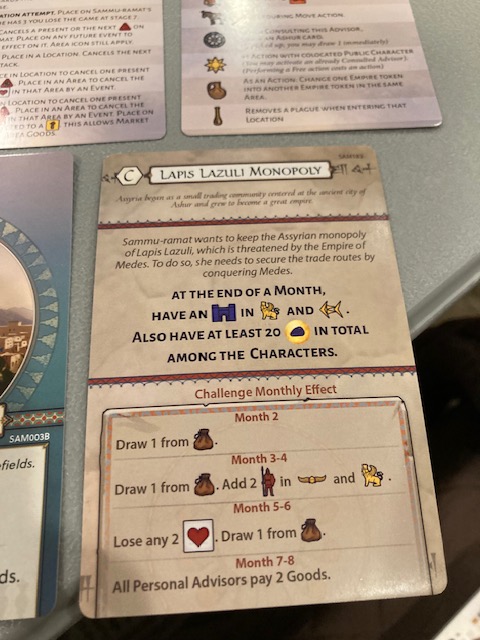
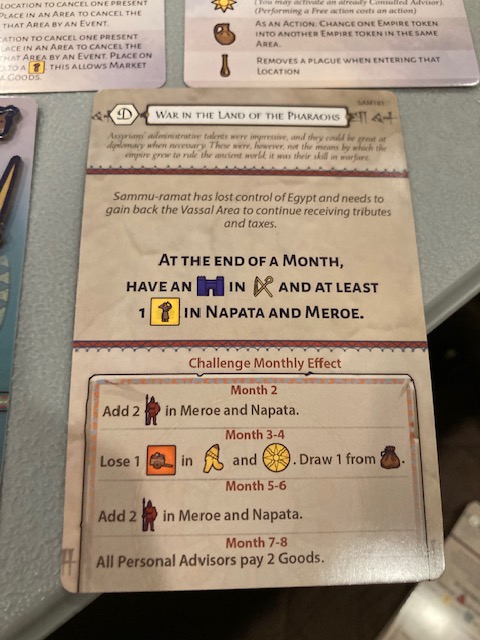
The Challenge Cards (see above) define the puzzle for you.  The front side tell you how to set-up the puzzle: where to put Goods and Empire pieces for the players, as well as starting locations for the bad guys and “bad tokens” in the game.

IMG_2882

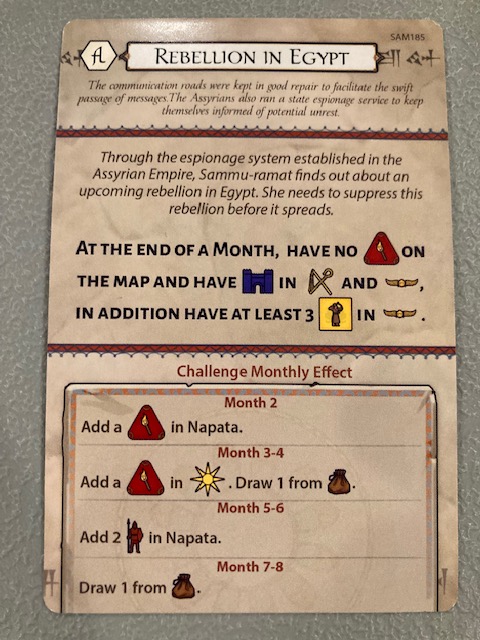
The back side of the Challenge Card then tells you what to do to win, as well as the bad things that will happen as you play!  To be clear, you know what some of the bad news that will happen before you play!

IMG_2797

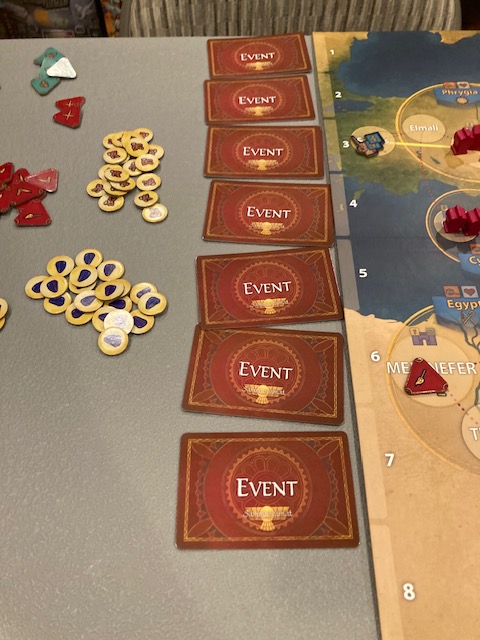
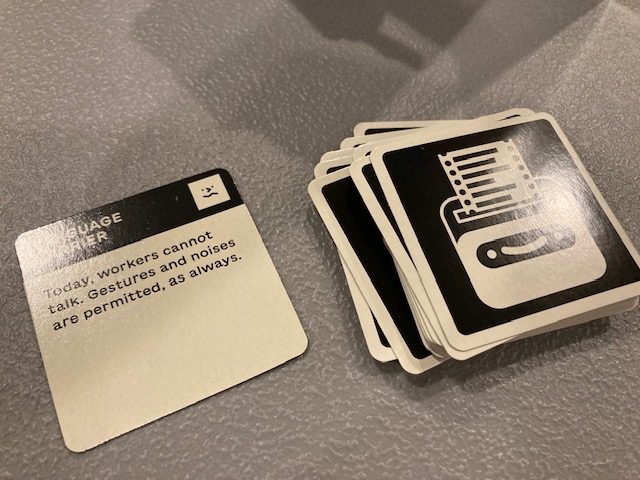
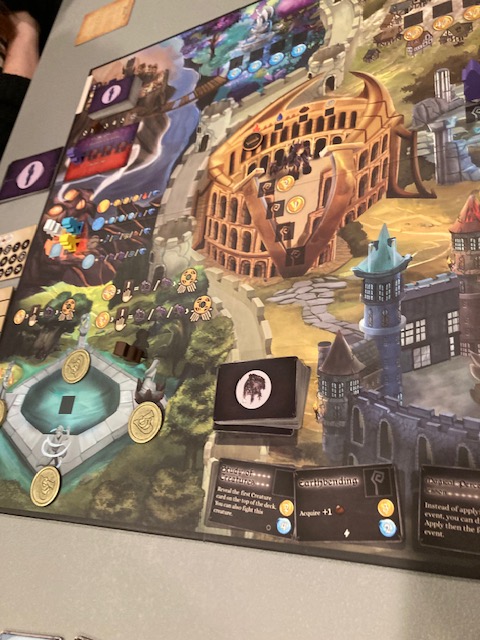
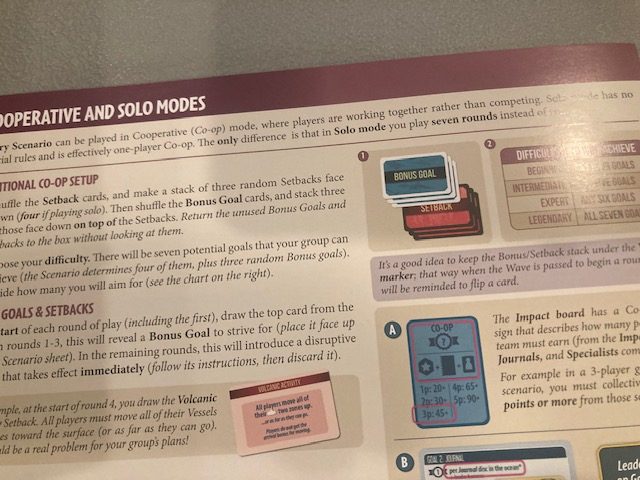
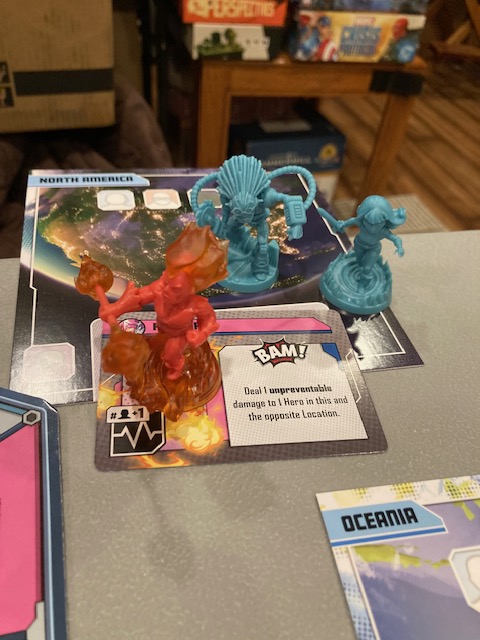
The game proceeds over 8 rounds (7 for solo and other adjustments for different player counts).  The event cards usually are usually bad things, but occasionally helpful.   Most of the game, you know what’s coming, but the events are probably the most random part of the game.  (It has been my experience over about 10 games that there is usually one event that usually completely messes you up, but the rest are manageable).

IMG_2738

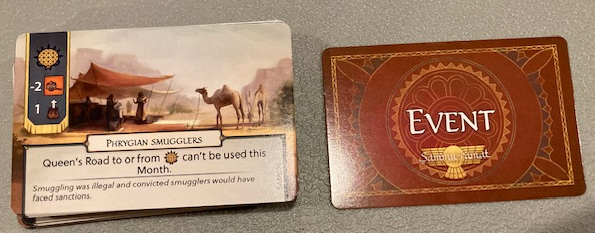
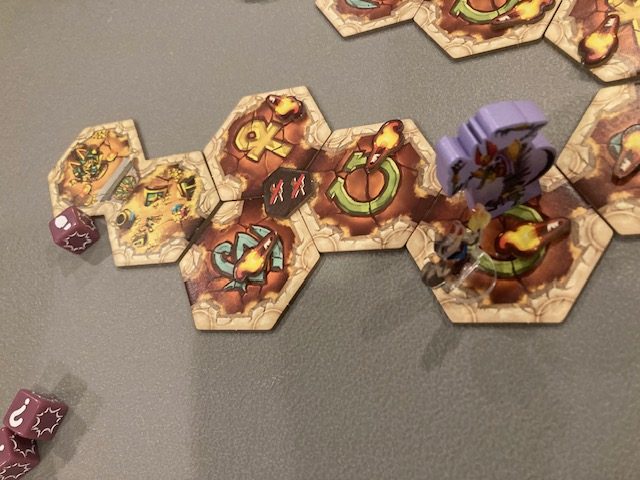
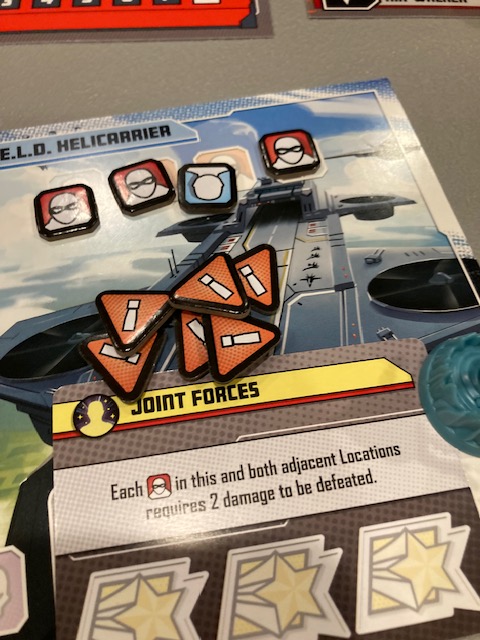
The event cards effects are notated in the upper left.  For example, for the event card above, the effects are localized to Phrygia (the spiky ball at the stop left), losing 2 Supplies in that area (orange cart), and drawing one token the bag (1 and arrow up from bag).

IMG_2761

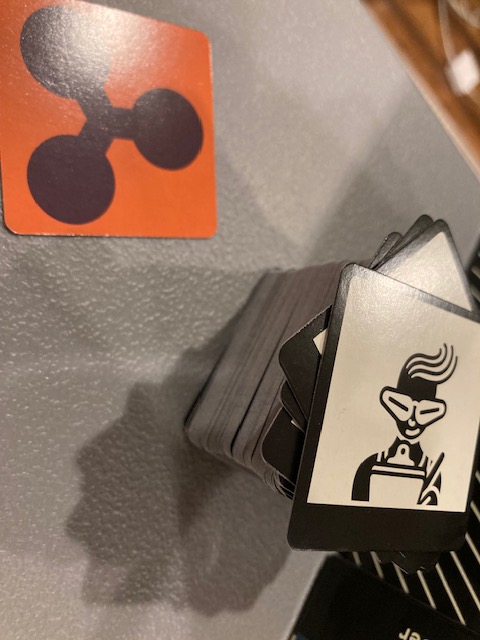
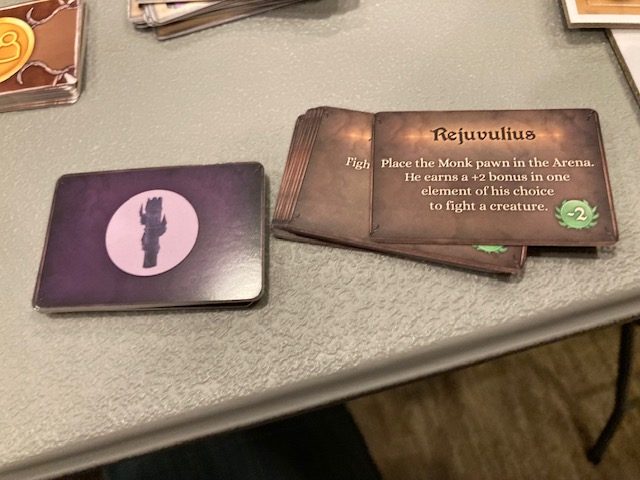
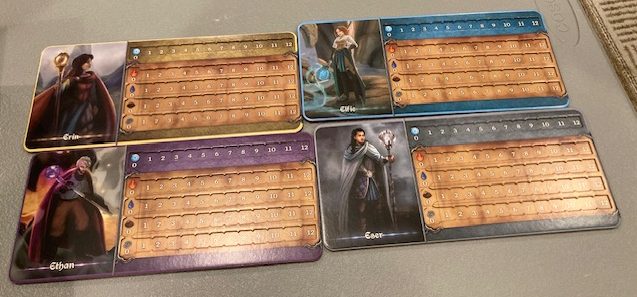
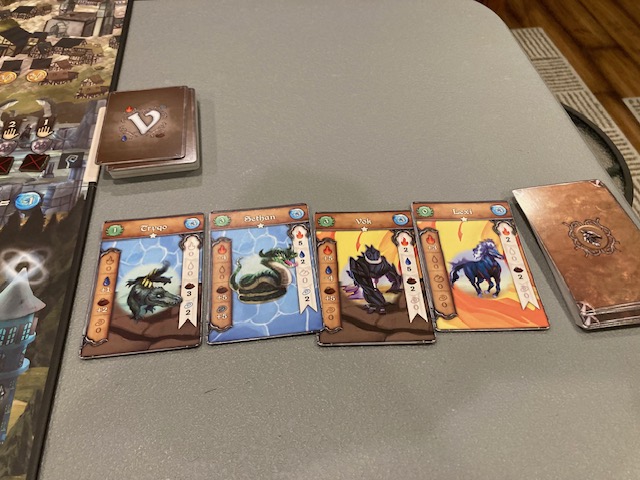
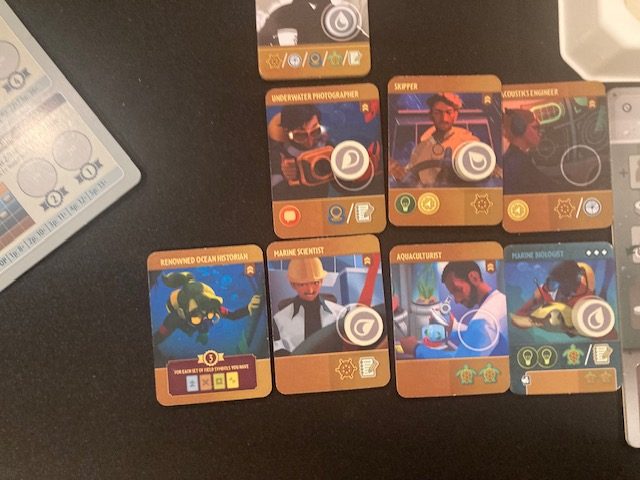
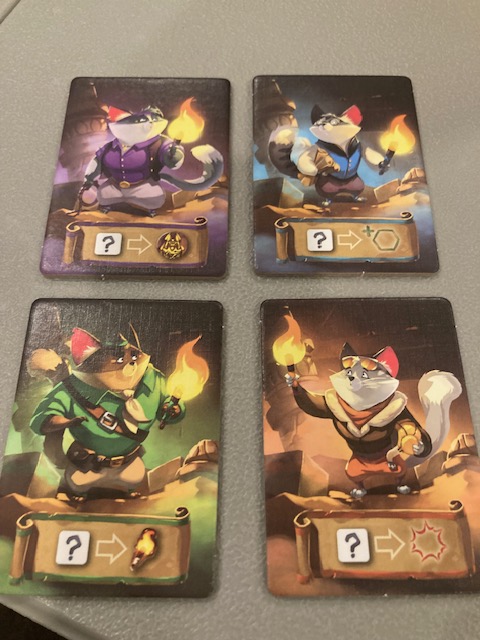
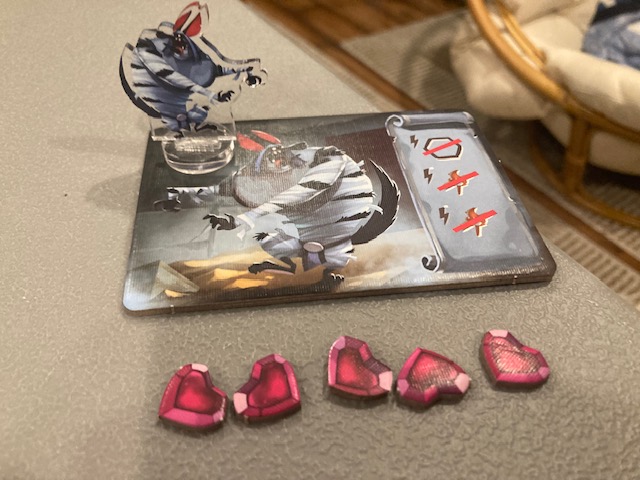
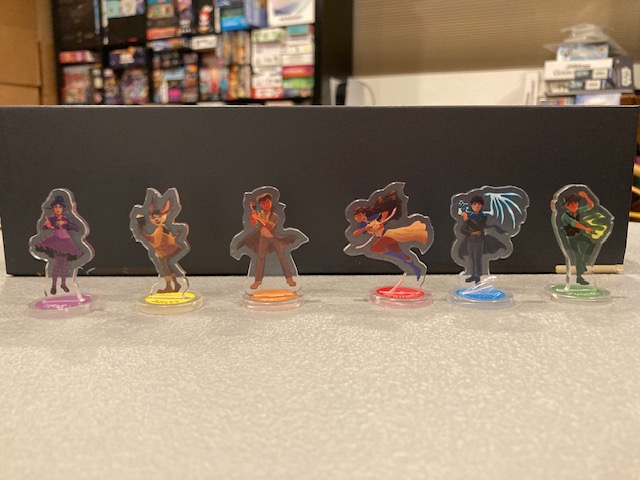
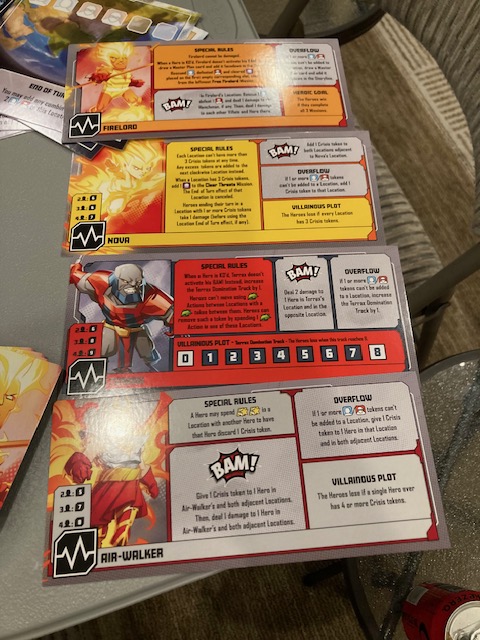
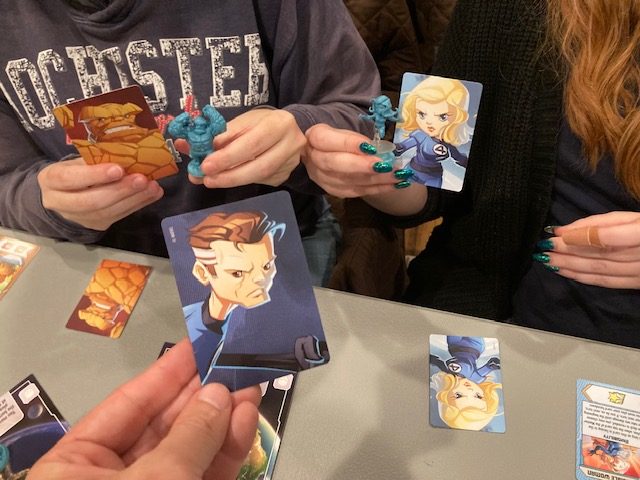
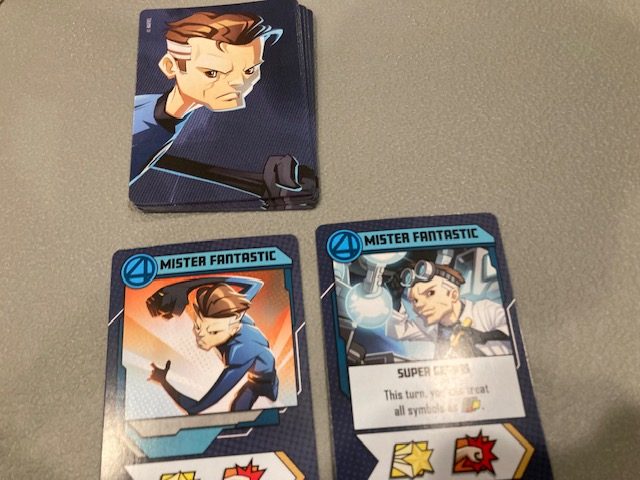
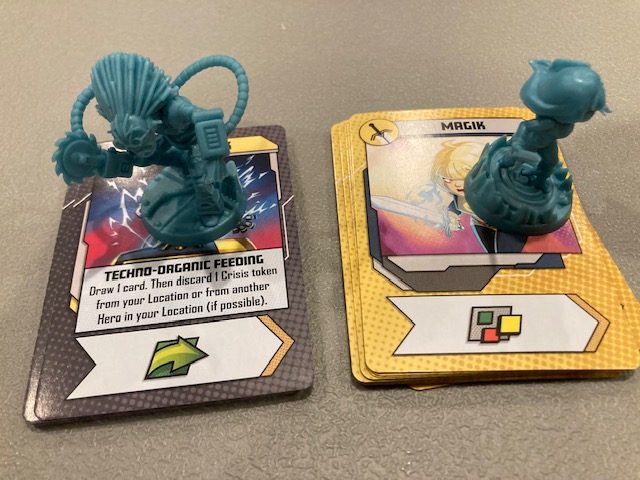
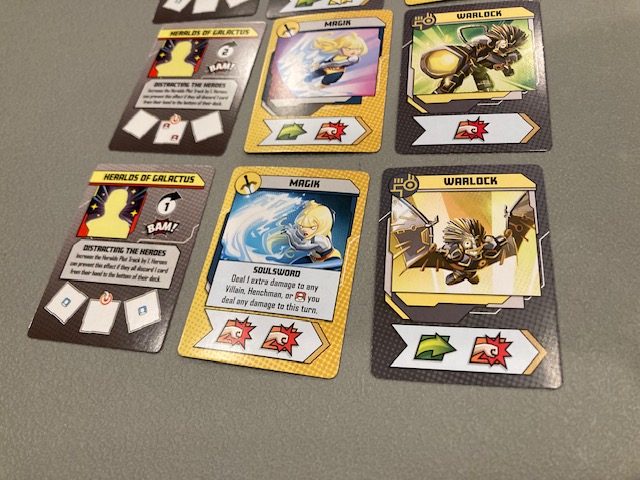
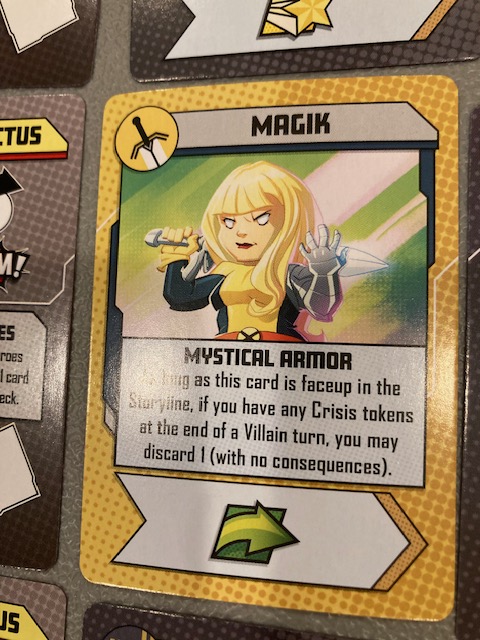
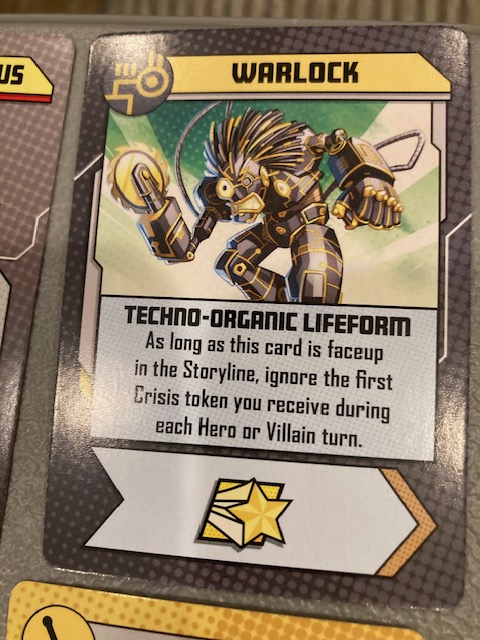
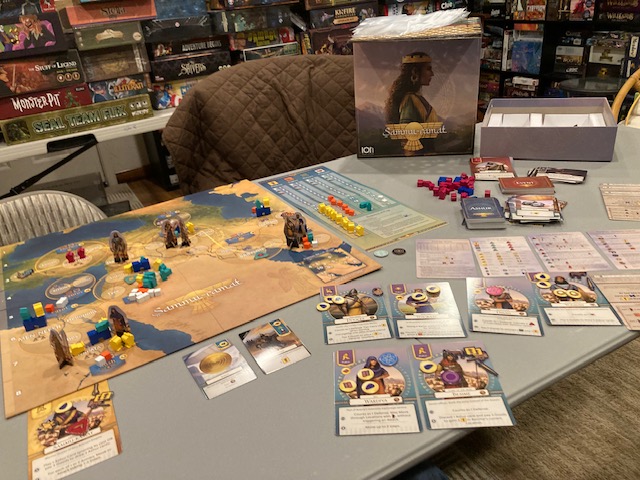
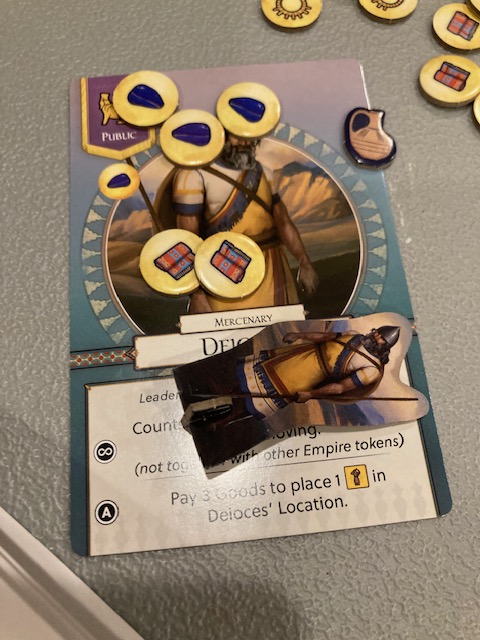
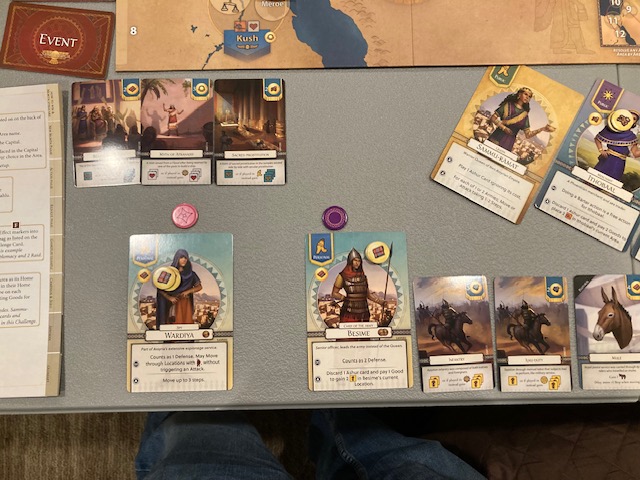
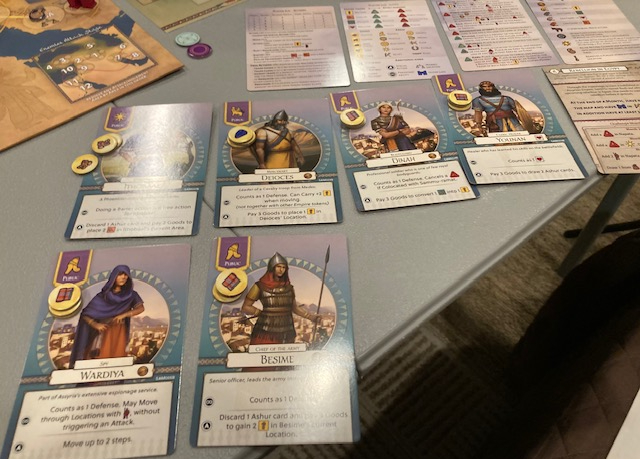
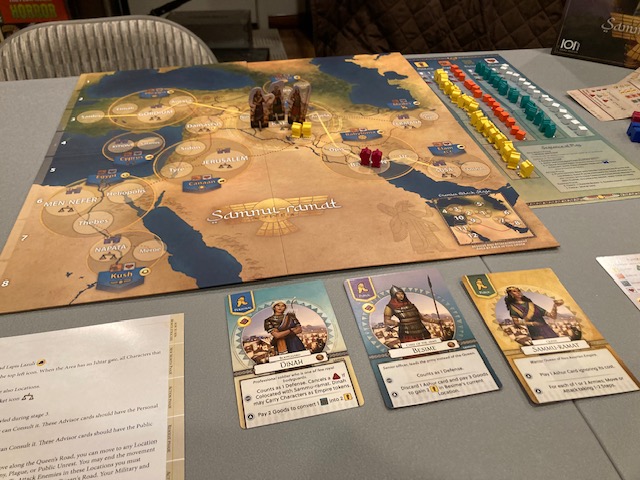
Each player assumes the role of a single advisor (putting the personal side up), and then other advisors are revealed (based on where Ishtar Gates are at the start), who will be helpful as well.  Only the solo player may play Sammu-ramat directly.   Note that each advisor has their own powers: one that’s always on (infinity symbol) and an action only that advisor can take (A).  

IMG_2756

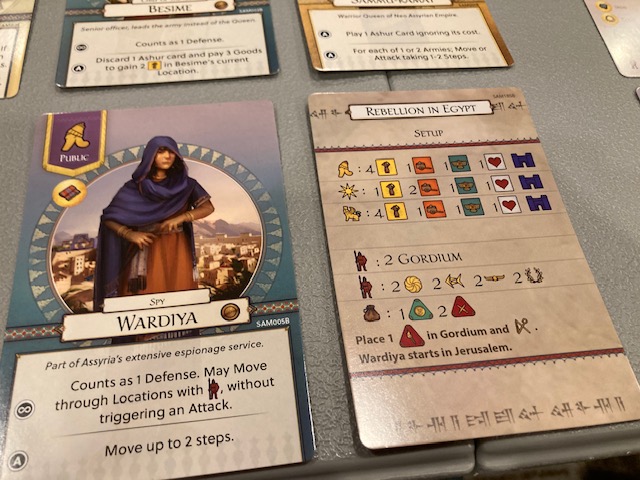
Interestingly, you don’t always have to play your character on your turn: you may choose to activate a different advisor (maybe they are closer to a problem that needs solving), but usually it’s in your best interesting to activate your personal character, as they typically have an exra action per turn.

IMG_2739

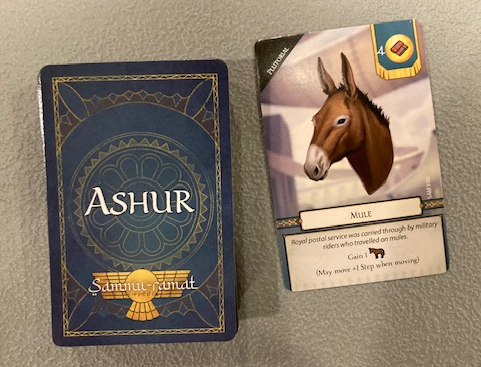
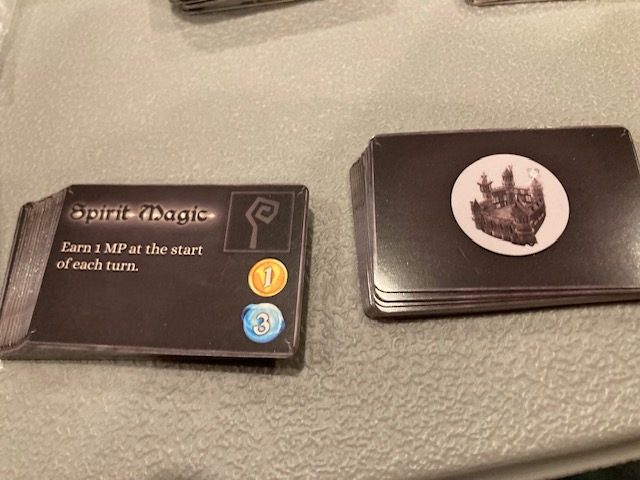
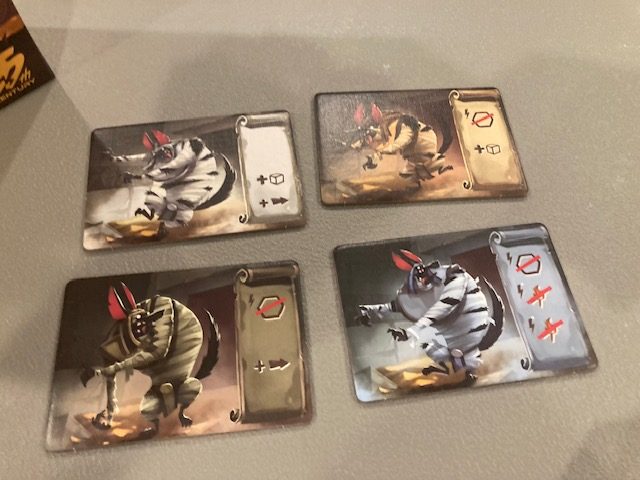
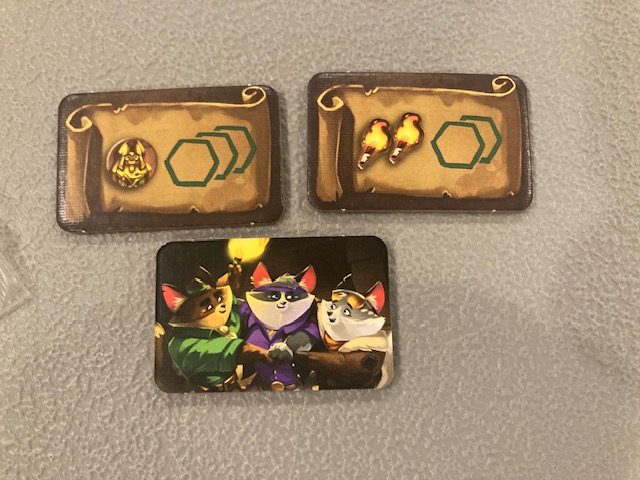
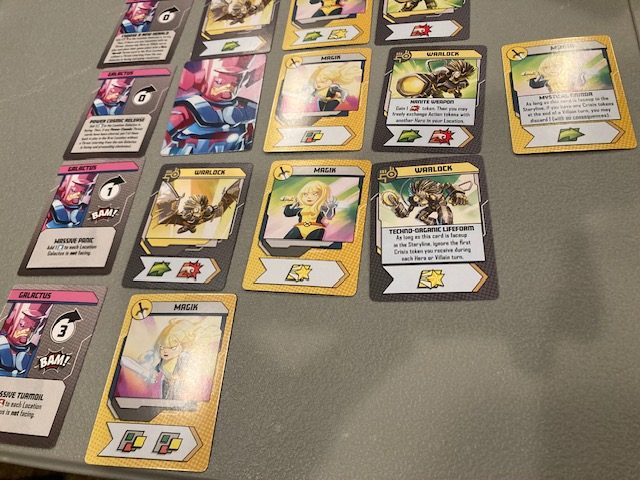
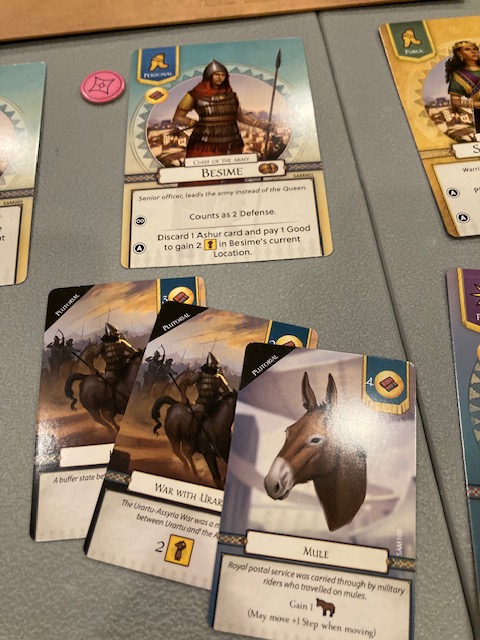
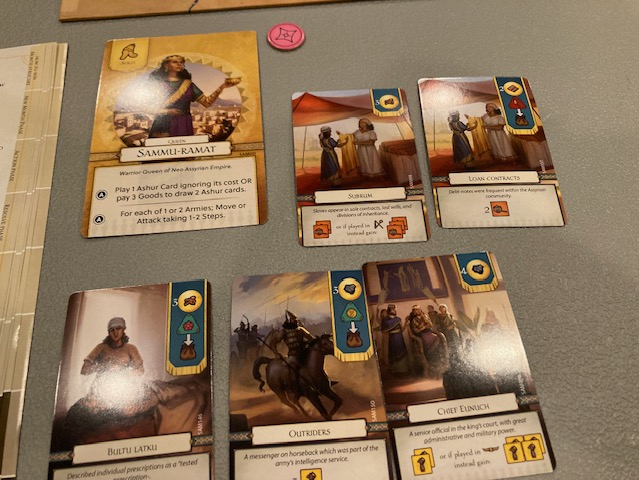
To help the players, they have Ashur card, which are all good news cards.  They all have a resource prerequisite on the upper right.  For example, the mule above needs 4 textiles in order to be bought.   The Ashur cards are key to the game: they help you do special actions, get resources, move further, get technology and so many other things!  

IMG_2844

This game is a euro because a major theme to the game is getting Goods (resources) to power your actions.   By playing a Ashur card, or activating a special action, or trading goods, or bartering, the players need to assimilate Goods!  The Goods power so many important actions in the game: For example, you need 4 Goods (the Textiles) to buy the Mule (Ashur Card from above)!  Sammu-ramat is a Euro because it’s all about turning Goods into other Goods for the problem at hand!  

IMG_2777

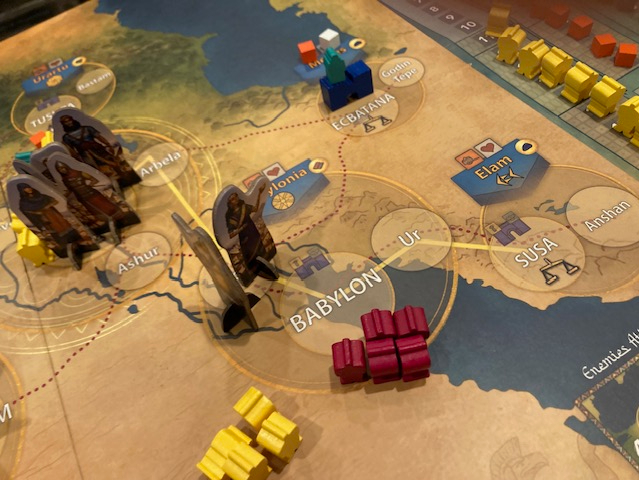
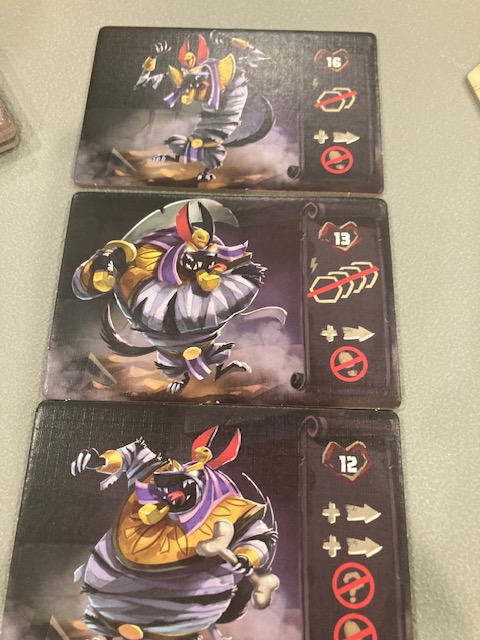
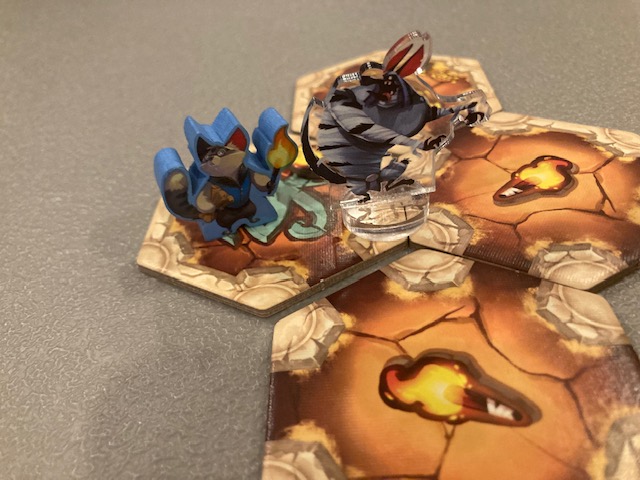
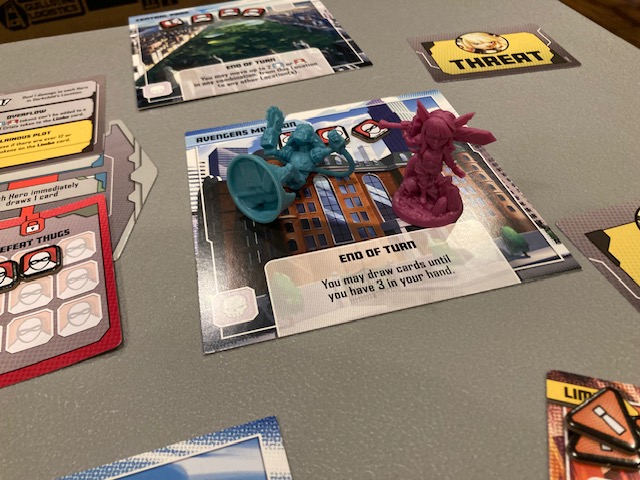
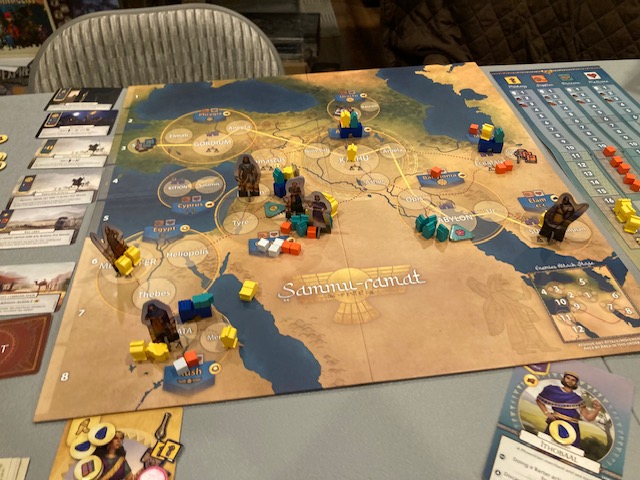
This game is a wargame because you need to make sure you stop the advancing troops that all heading to seat of power: Assyria!  The red meeples (above) are the bad guy troops, or the enemies: when they appear on the map, their job is to take over Capitols along the way, but head to Kalhu!  You can only stop the enemies with the military (the yellow meeples).   There is no randomness to the fighting in this game: when you initiate a fight, it’s a 1:1 battle: each side loses 1 enemy/1 military until one side wins!!   Before you head into a fight, you should know if you will win or not!!  Military is one of the resources you buy with special actions, Goods, or Ashur cards!

IMG_2846

This is a cooperative game: all players work together to decide on the best actions to win the puzzle! 

IMG_2863

Putting all this together: Sammu-ramat is a cooperative, euro, wargame!  But it’s really a puzzle: how can you work together to solve the objective on the Challenge Card?
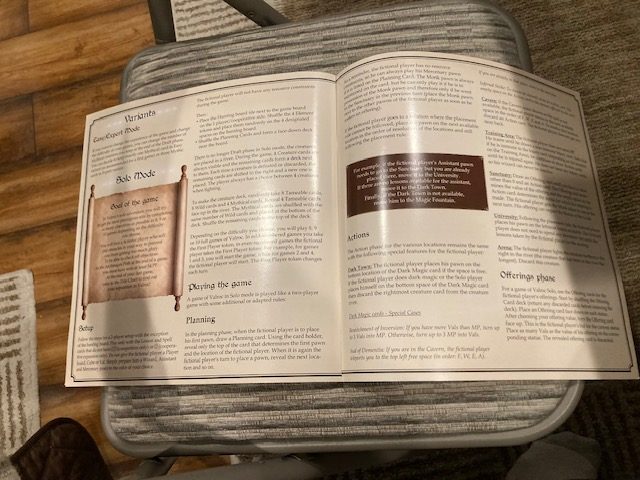
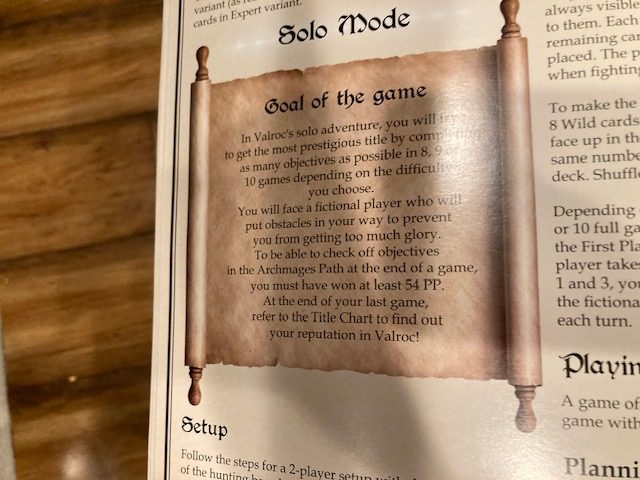
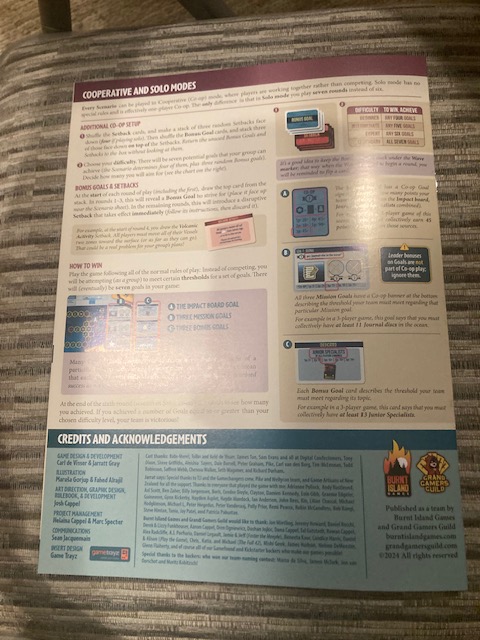
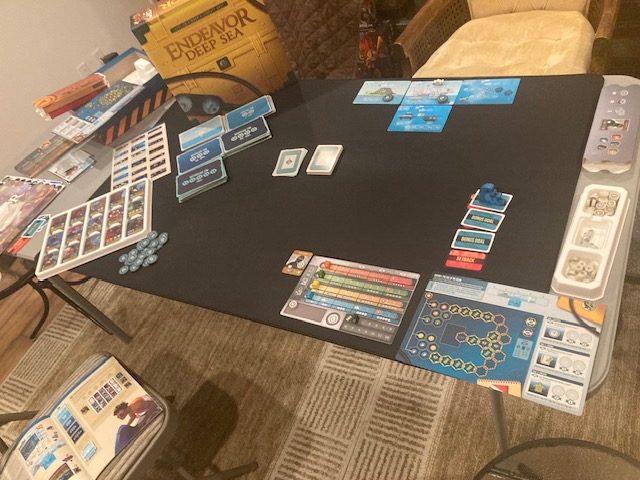
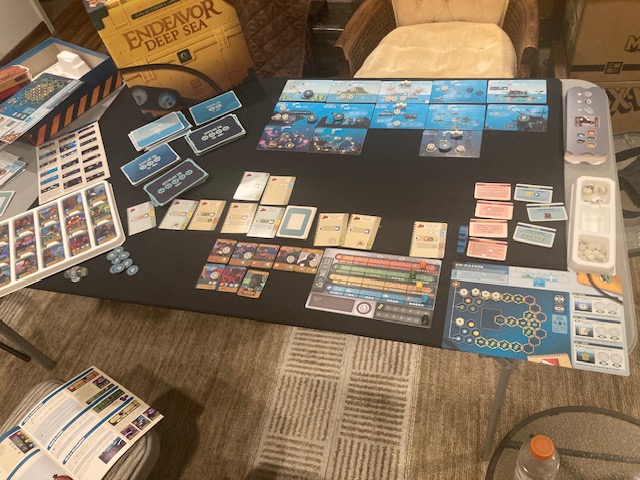
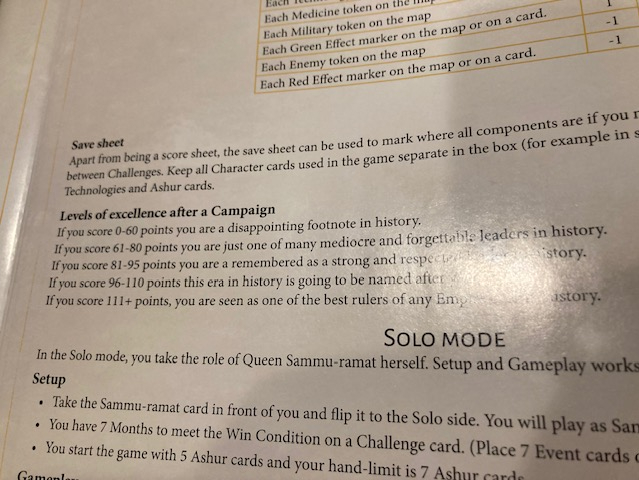
Solo Mode

IMG_2881

So, the game comes with a built-in solo mode (thank you for following Saunders’ Law).  

IMG_2798

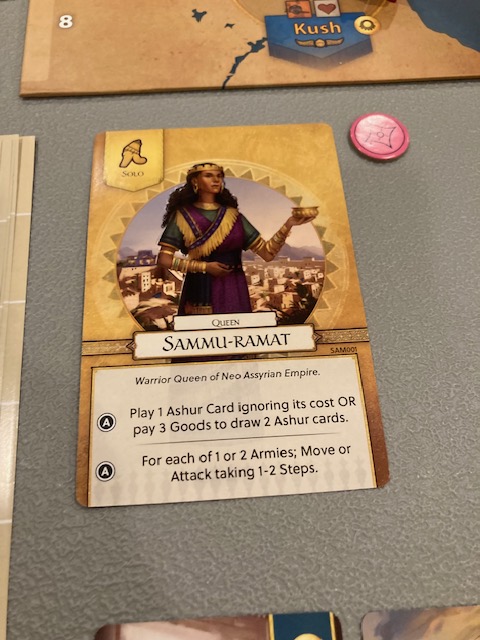
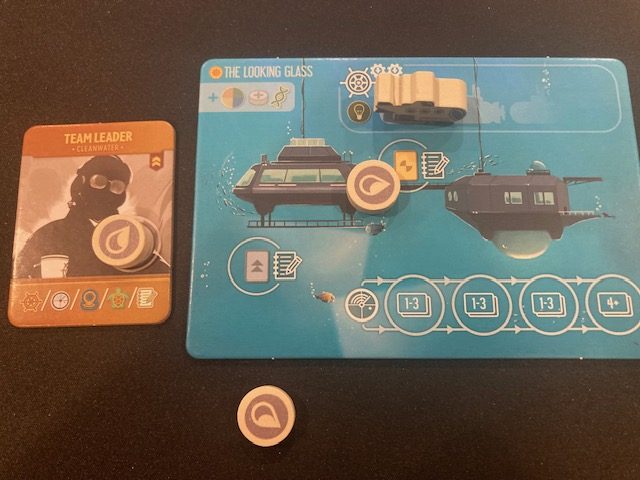
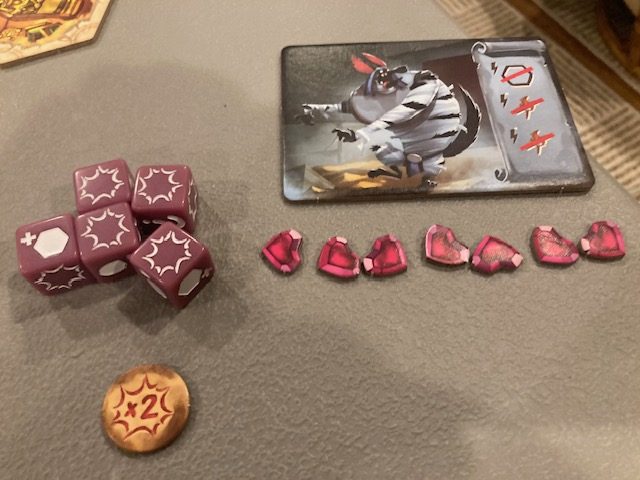
In the solo mode, the solo player takes  Sammu-ramat card as their player card and flips it to the solo side.

IMG_2796

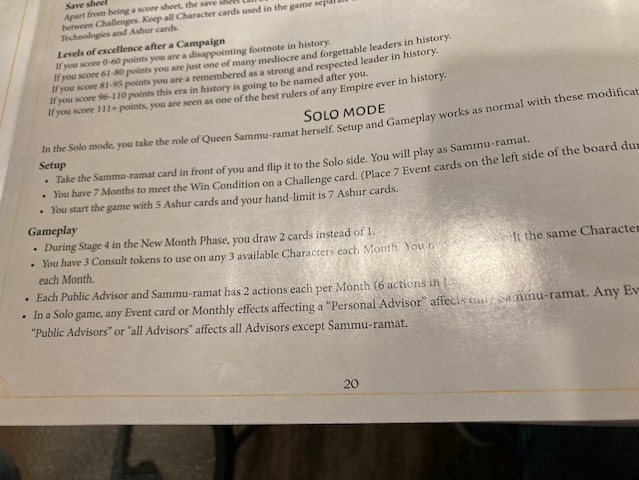
There is about a half a page description on page 20 of the rulebook.  There are a couple of changes, mostly pretty straight-forward.   The one change I forgot multiple times was that Stage 4 draws 2 cards instead of 1: you will forget this rule! The only place it’s notated in the entire game is on page 20.   It’s way too easy to forget this rule, and I wish there had been a way to notate that (maybe on the Sammu-Rammut solo card).

IMG_2842

Most of the of games of Sammu-ramat I have played were solo … and they were excellent.  There is so much thought and consideration that goes into every action!  Everything you do matters!  That’s what makes this solo game so great: you feel like your choices really do matter.  It’s also great as a solo game because you can spend as much time as you want considering and reconsidering your choices.   Many times, I would start out a few actions, but then realized I had to do it a different way, so I would rewind … I would only rewind in Phase 5 and redo the player actions.  I don’t consider this cheating because I was only “trying” my actions to see what the effects were … I never let a rewind cross out of Phase 5 to use information I didn’t have.  And that’s the great thing about the solo mode: you can just try stuff out.  It’s a puzzle!

IMG_2759

Now, there is another way to play so: pretend you are playing a two player cooperative game and operate two characters!  Even though I have played most of my solo games with the official solo rules (playing Sammu-ramat), I think the two-handed solo game might be better … why?  Why, you ask?  Because there’s no exceptions! The official solo mode described on page 20 of the rulebook has about a third of a page of “new rules” (with the 4th stage extra card being the most persnickety).  If you play two-handed solo, you are just playing the base game with no exceptional rules: the game is as it was meant to be played. 

IMG_2784 

The two-handed solo definitely feels different, mostly because each character usually has about 3 actions per phase, whereas the solo player in the offficial solo game has 2 actions for three characters. Both essentially get 6 actions per turn, but there’s something more satisfying about getting to do three actions on your turn: you feel like you can “complete” things you need to do.

Two-handed solo also has to worry more about card management, as there’s more work to manage two hands of Ashur cards.  So there’s that: it’s a little more maintenance.   But, if you are just going to learn Sammu-ramat solo just to teach the game to others to play cooperatively, I recommend using the two-handed solo mode: it feels more like how the game will flow cooperatively.  

IMG_2773

It might also be easier to learn the solo game two-handed because that’s what the Plutorial teaches!   My first game was two-handed solo to learn the game, and then I went to the official solo mode for my first campaign (as there is slightly less maintenance in the official solo mode).

It’s up to you: both solo modes work well!  Two-handed solo reflects more what the game feels like cooperatively, at cost of a little more maintenance.  The official solo mode has less maintenance per turn, but has enough exceptional rules to occasionally throw you for a loop.
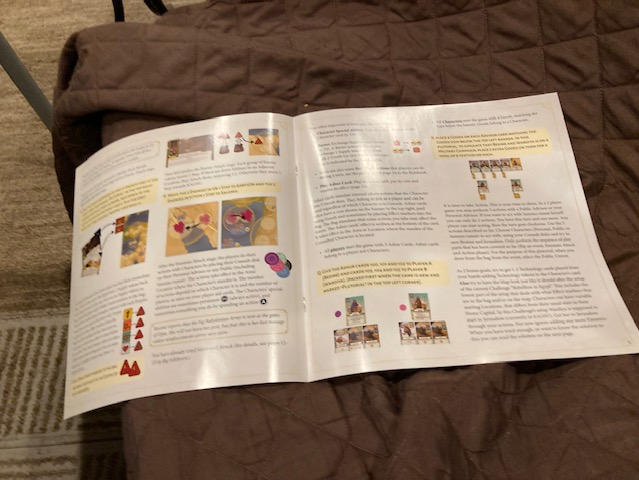
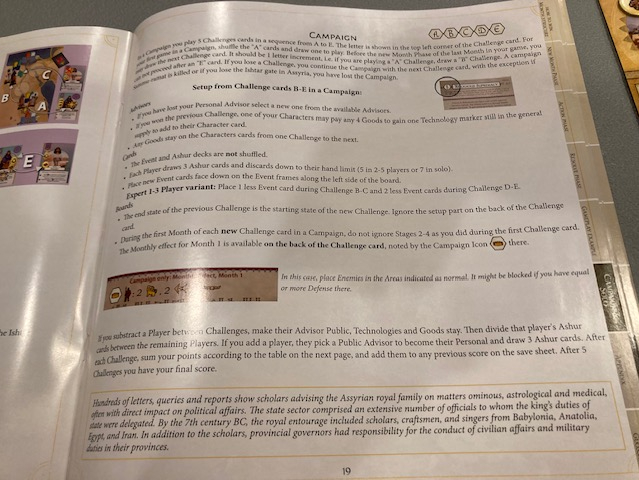
Campaign

IMG_2877

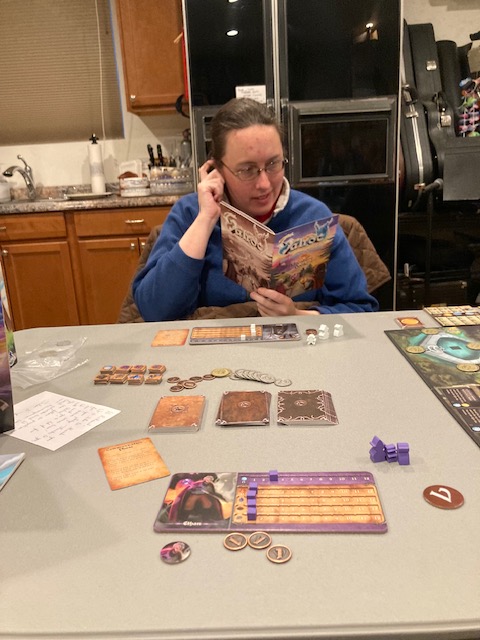
Although you can play just a one-off game of Sammu-ramat, there’s a lot of fun to trying one of the campaigns.  Basically, the campaign is 5 games in a rows from Challenge Cards labelled A,B,C,D,E (there are multiple of each letter to give the campaign some variety).  

IMG_2820

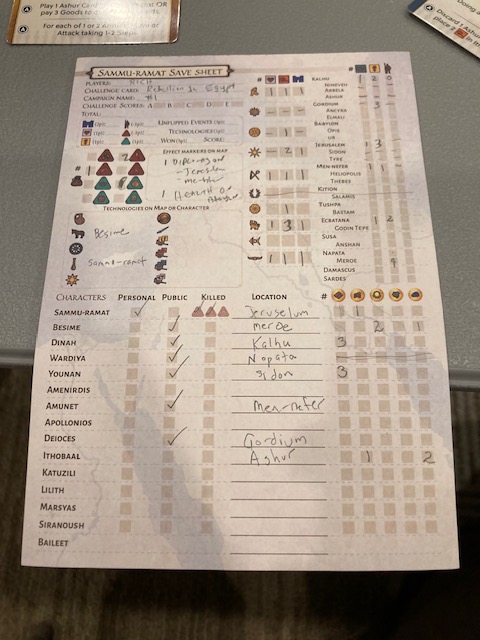
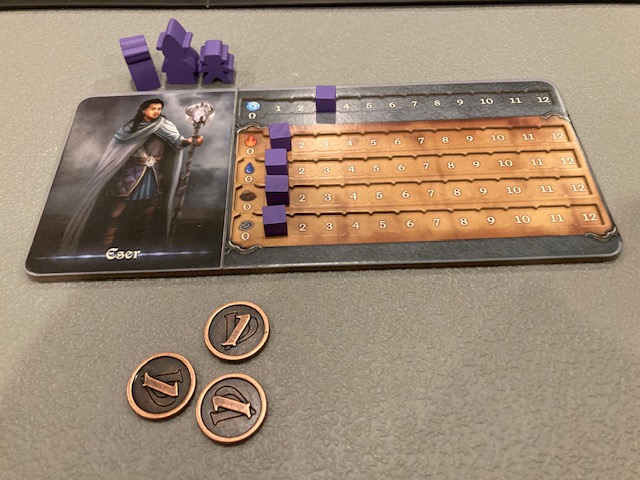
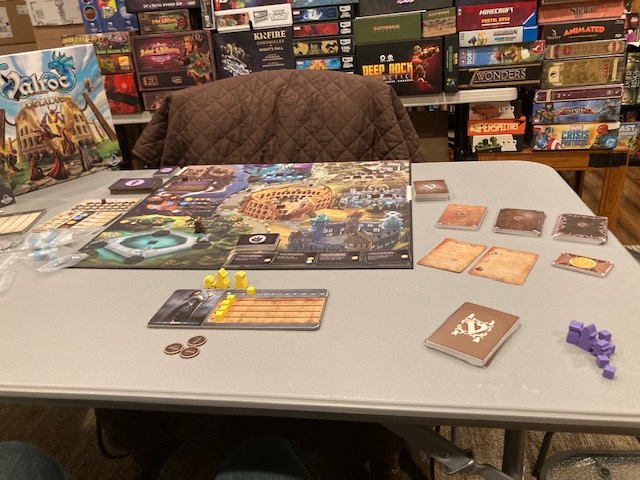
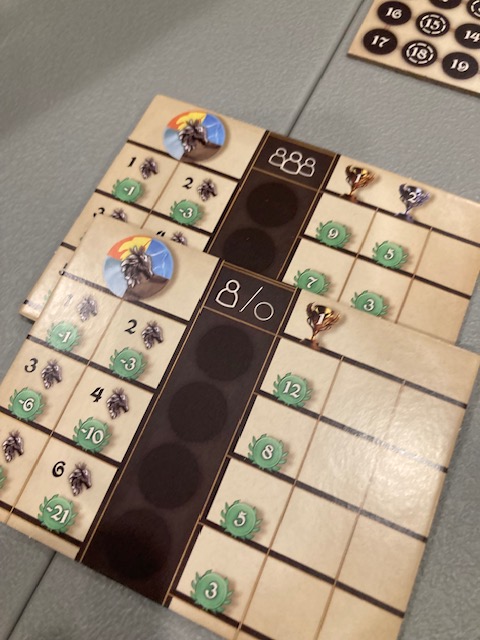
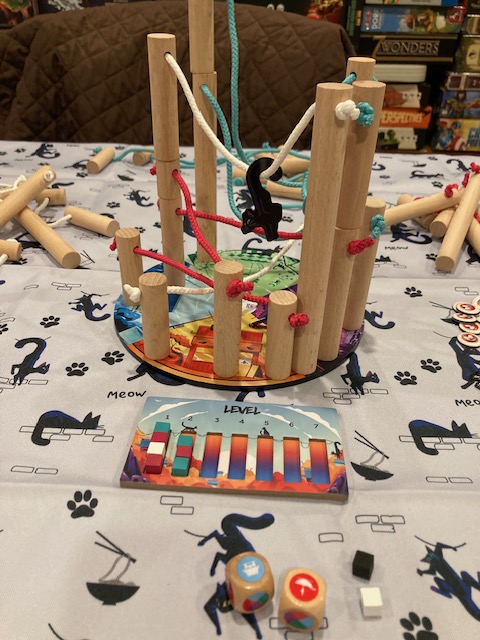
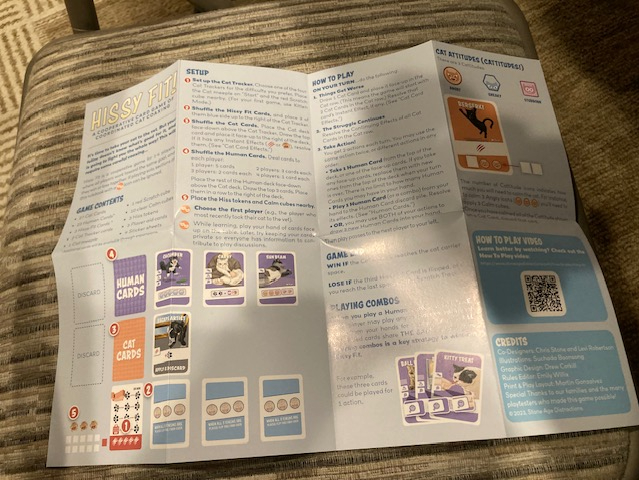
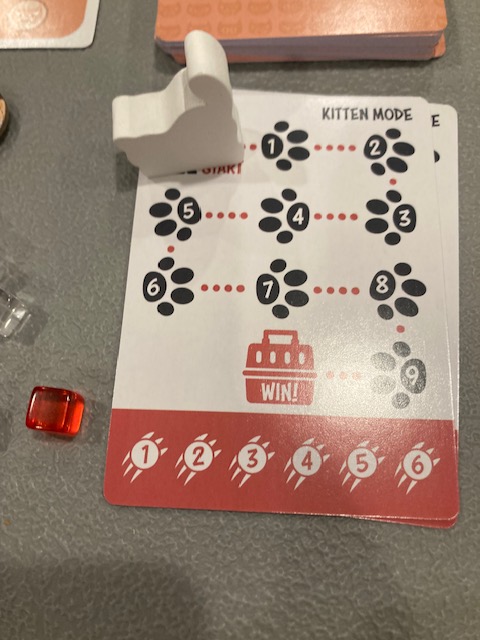
What’s different is that you save state between games!  See above as I record the state of the my game at the end of Challenge A.  To start the next game, you start in “whatever state you left the game in”, and continue!

IMG_2867

After each Challenge card is complete, you score that gives you a sense of how well you did: yes, this is a “score-based” assesment.  

IMG_2837

I didn’t do great, but I did make it to mediocrity at the end of my full campaign.  I guess it’s better than being a forgotten ruler.

IMG_2850

What’s great about the campaign is that it’s only 5 puzzles (5 challenges), but what you do matters even more, as you set yourself up for he next game!  Maybe you’ll spend an extra turn to win so you can set-up something great in the next game!  

IMG_2869

I spent the entire weekend playing through the campaign as a solo player (official mode), and I had a blast.
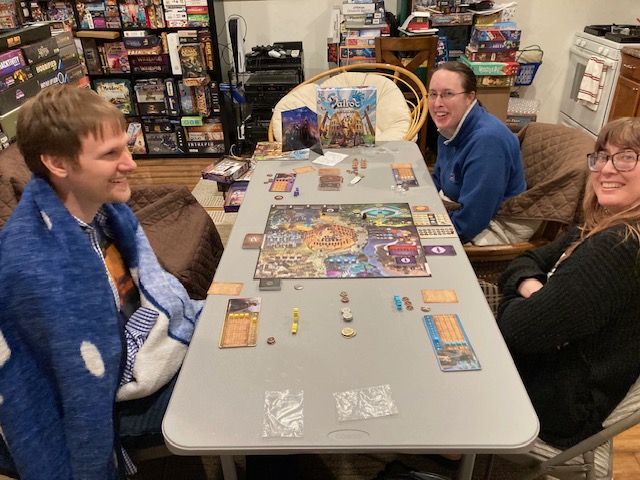
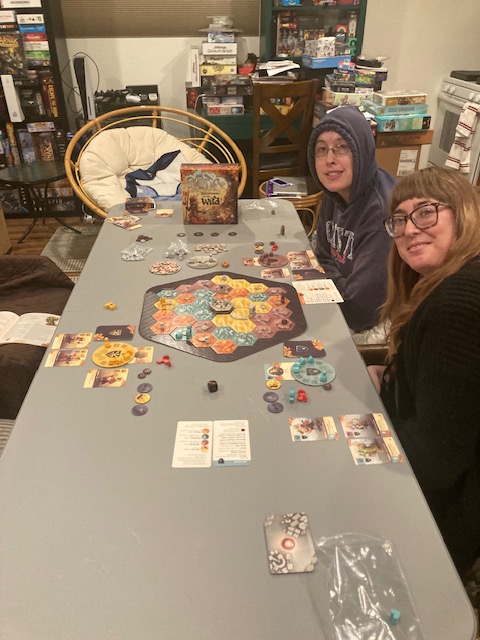
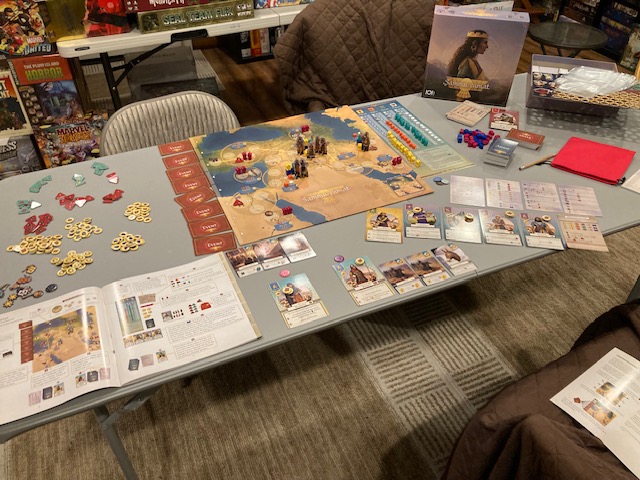
Cooperative Play

IMG_2905

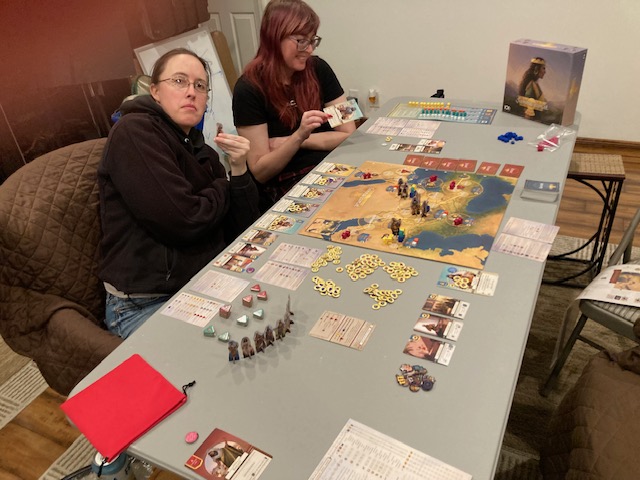
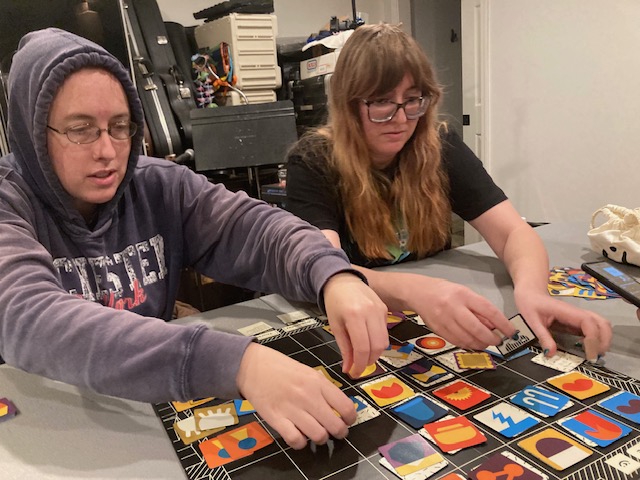
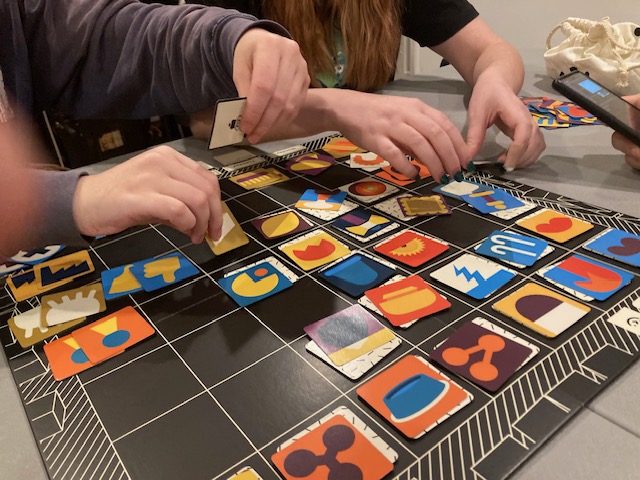
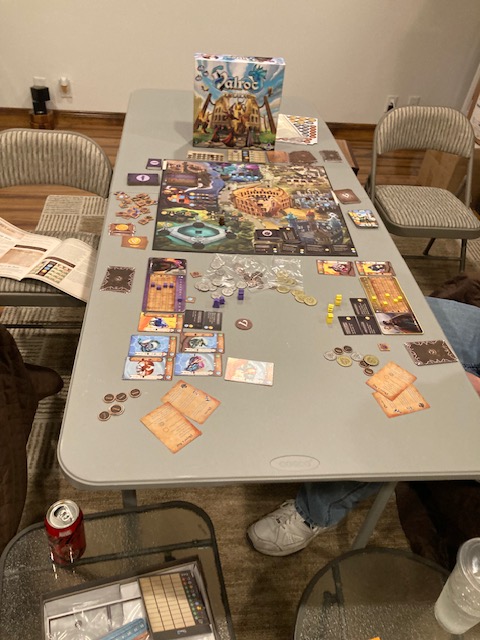
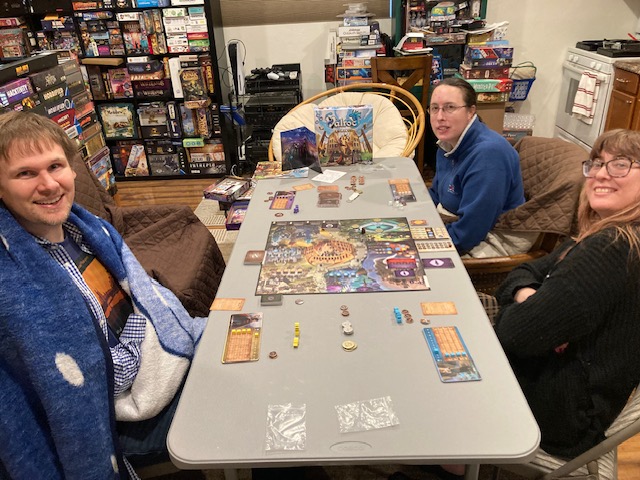
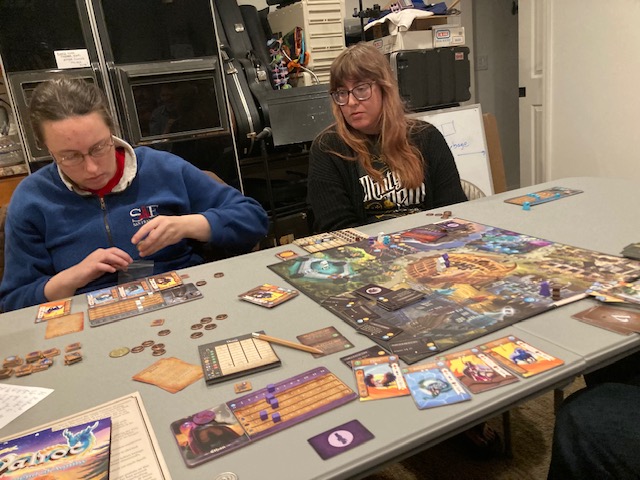
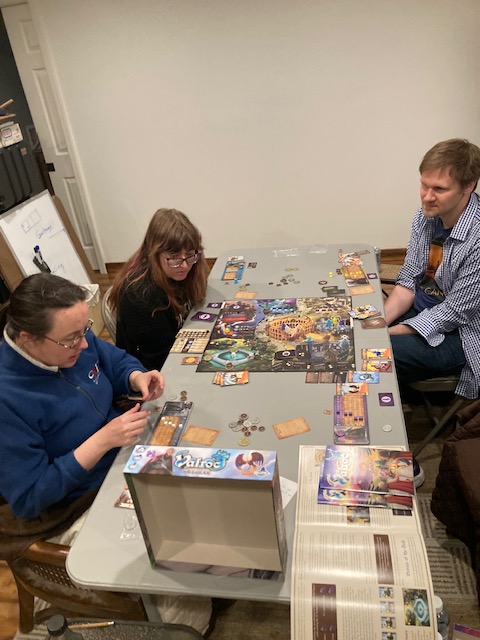
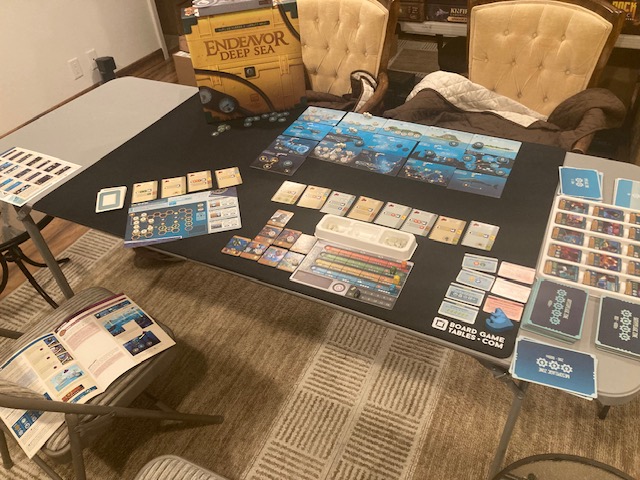
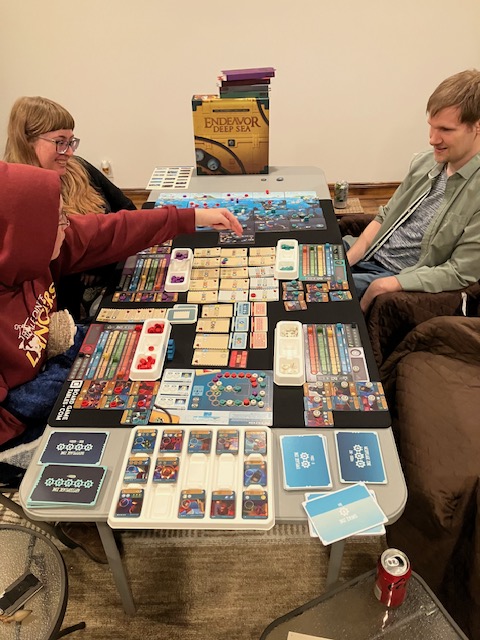
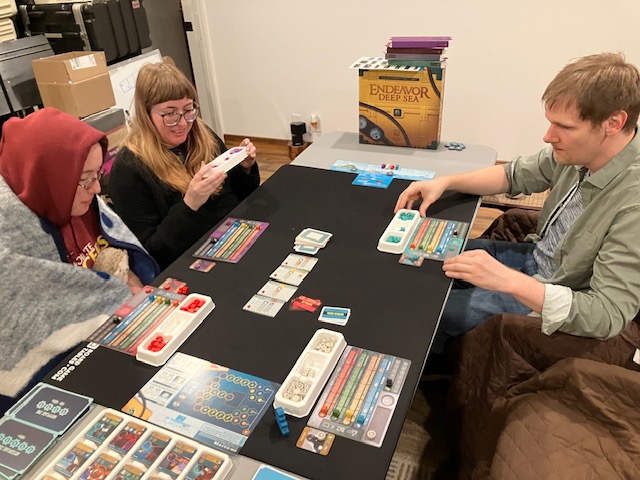
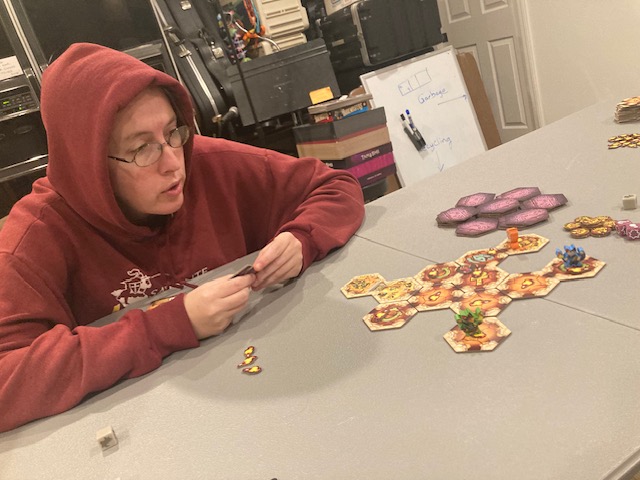
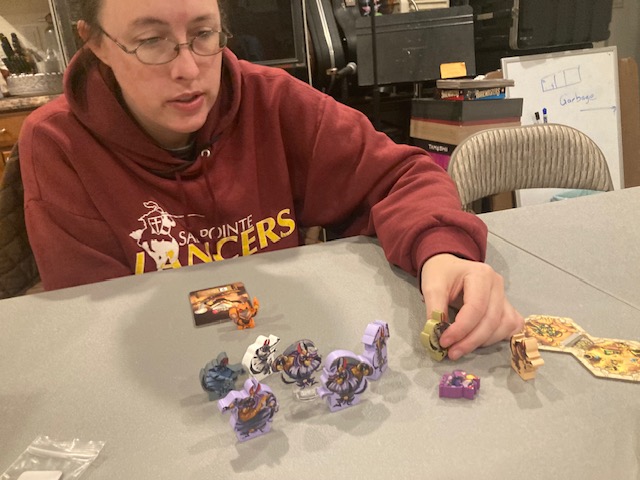
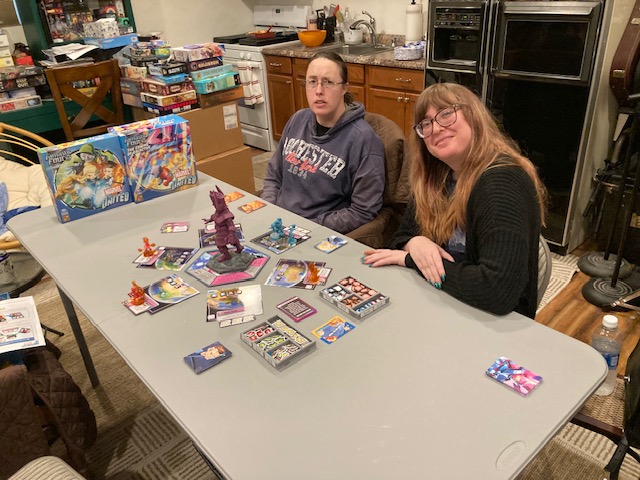
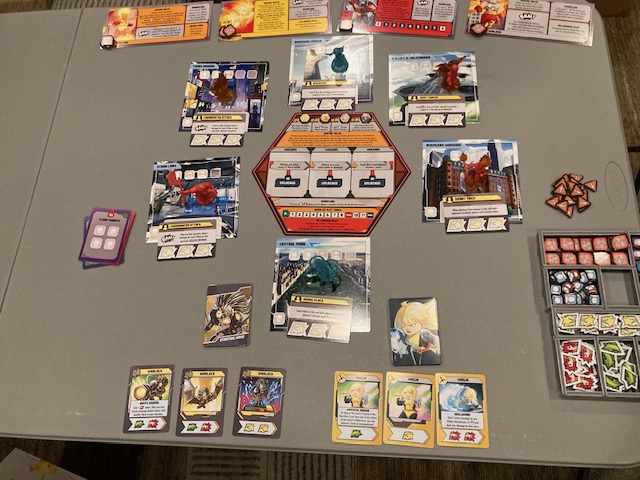
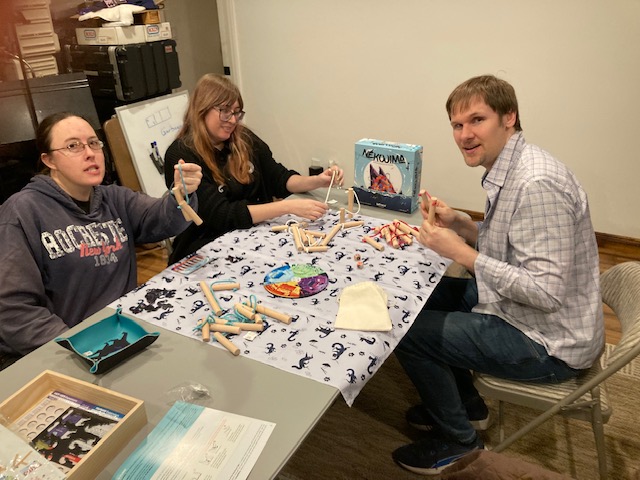
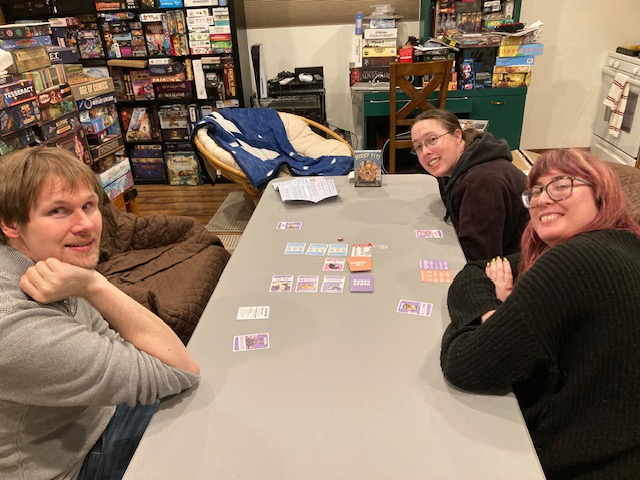
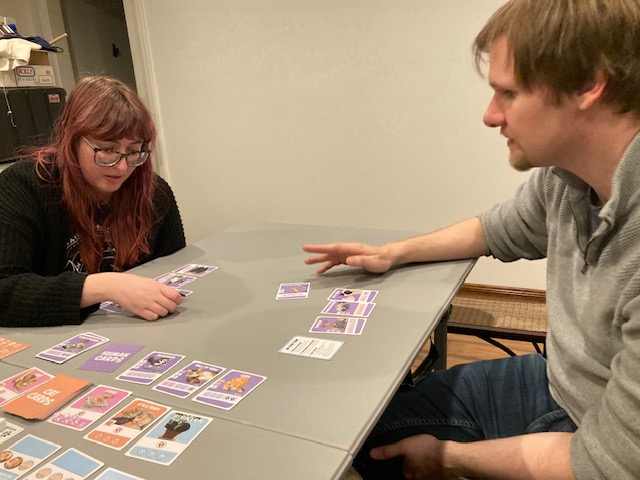
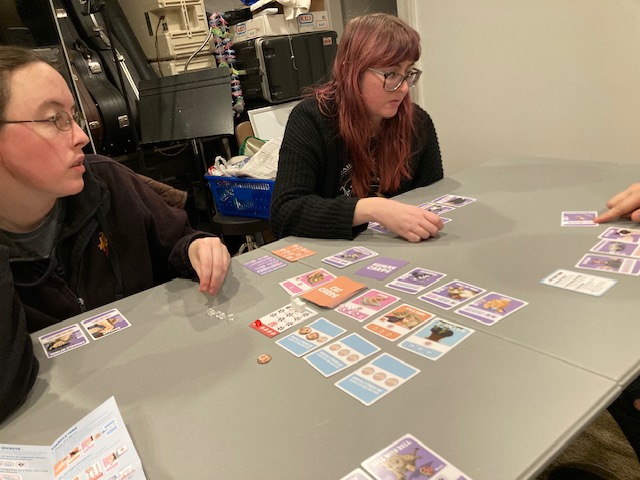
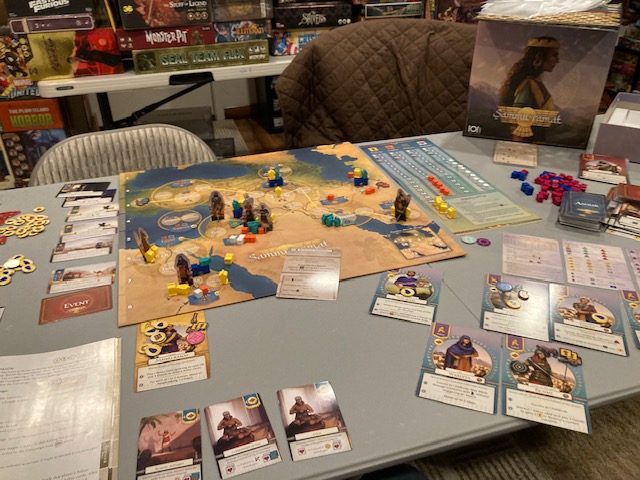
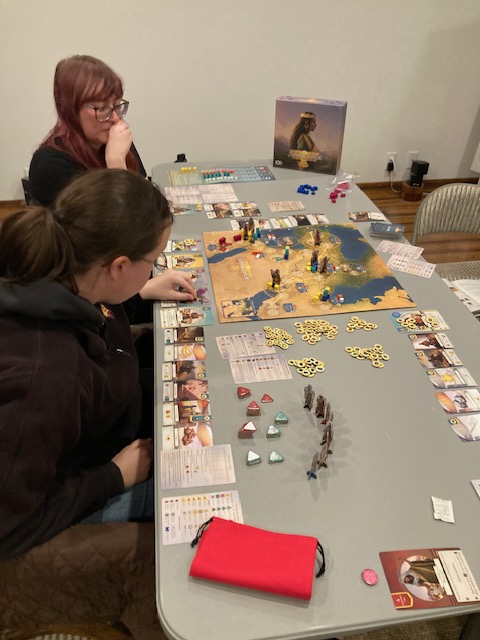
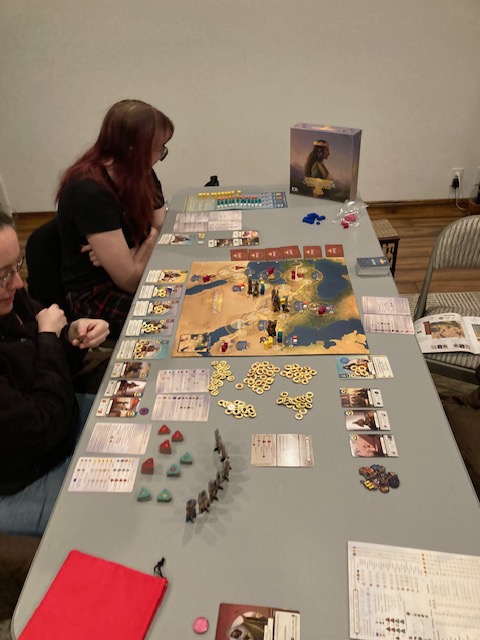
Although most of my plays have been solo and/or the campaign, I was able to get the game to the table with game group: we got a 3 player game going and had a good time.

IMG_2910

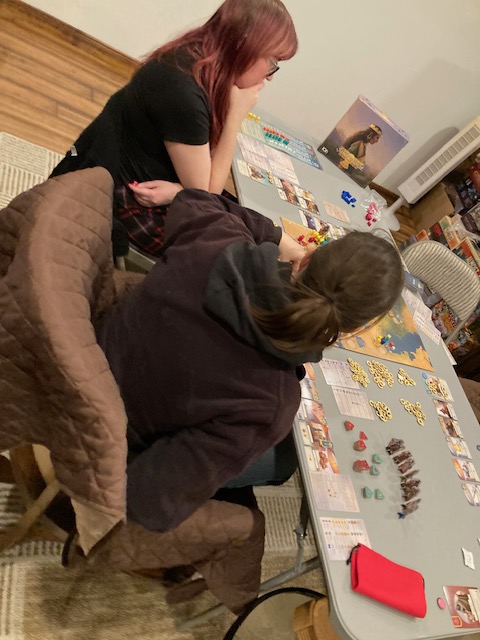
We did play with full Player Selected Turn Order (see below for more discussion), as Sara pointed out that it makes you feel more involved: each player chooses a character, and by allowing us to go in whatever order we want, we are more engaged and invested in our character (“I chose this character, and I can’t play it in the right order??!!?”)

IMG_2909

Unfortunately, we did lose, but it was because we were too concerned for keeping all the Ishtar Gates, as opposed to the servicing the goals!  I think the plan is to try again. 

IMG_2908

We had fun playing even though we lost!  We talked, discussed what we needed to do, and executed our plans!  This game could easily go sideways with an Alpha Player, if someone really knows the game.  Luckily, there are so many moving systems, it does mitigate that a little. 

IMG_2905

It was a good, engaging, cooperative game.  It’s clear, this game needs a good teacher though: I think going into this game without someone knowing the game is a recipe for disaster.  There’s too many systems to lean this game “on-the-fly”.   if you do want to play this game cooperatively, make sure someone shepherds you into the game for the best experience.

Randomness

IMG_2843

There isn’t much randomness in this game.  Combat is predictable: there’s no dice.  The “bad news” that comes from the Challenge Cards is completely known to you at the start of a Challenge: you know what’s coming.

IMG_2797

The greatest source of randomness was the Event Cards. There is no way (that I’ve seen at least) to predict what Event will come out, so you just have to deal with it.  In general, the events were’t devastating, but they did cause things to be dealt with.  It did seem, once per game, one event would just completely screw you!  But, it always felt you could come back from it!  The randomness did NOT seem debilitating by any means. 

IMG_2771

The other source of randomness was the Ashur Cards, as you didn’t know what you would get from turn to turn. But, the randomness there was usually not an issue: you could either use a Ashur card to power an ability, or you could draw extra Ashur Cards if you really needed something.  In general, the Ashur cards were more of a resource that was sometimes more or less useful, but it didn’t seem too random.

IMG_2863

All of this goes to say: I don’t think the randomness of this game is untethered.  Most of the actions have known outcomes (combat, Challenge Card bad news, actions), but there’s just enough randomness to keep the game spicy (between the random Events and the much less random Ashur cards).   Sammu-ramat is not a wargame with lots of dice and randomness; it is a fairly explicit puzzle.

Some House Rules To Consider

IMG_2799

This game uses a stilted version of Player Selected Turn Order (PSTO) (see our discussion of PSTO here to learn more).  On the first turn of each month, players talk and figure out which player goes first: hurray!  Players select the order for the first player … but then, play rotates clockwise!!   So, the players only get Player Selected Turn Order for the beginning of the turn!

IMG_2798

This is a strange decision to limit the PSTO because the (official) solo game has full selected Player Turn Order: the solo player gets to activate three characters in whatever order he wants every turn!  So, this seems a strange decision to limit the PSTO. Usually, it’s because many people aren’t used to PSTO and it can sometimes be harder to notate (see more discussion here).  I suspect adding full PSTO to the cooperative game would be more fun, as it would make the players feel like they have more choice?  It’s already been play-tested in the solo mode, so why not add it to the cooperative mode?

IMG_2883

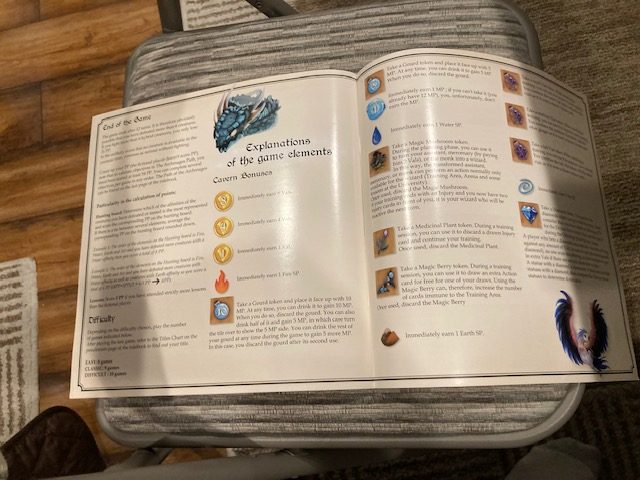
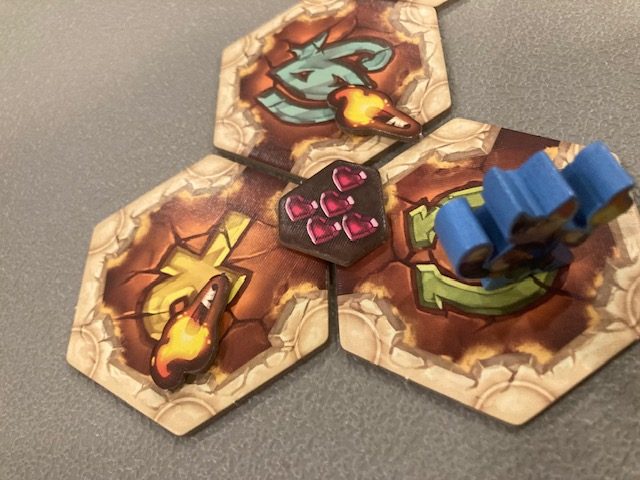
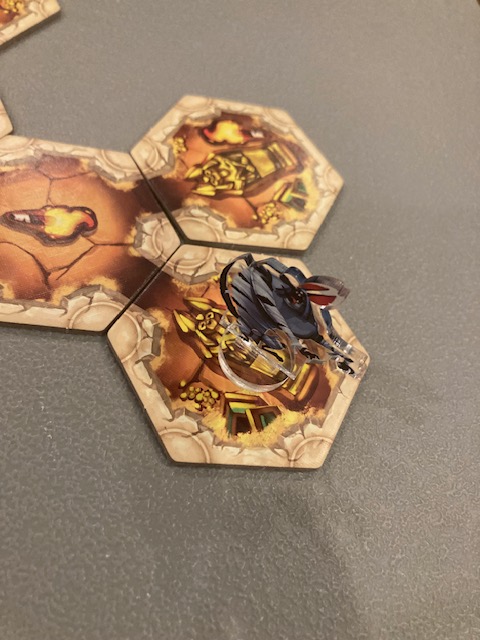
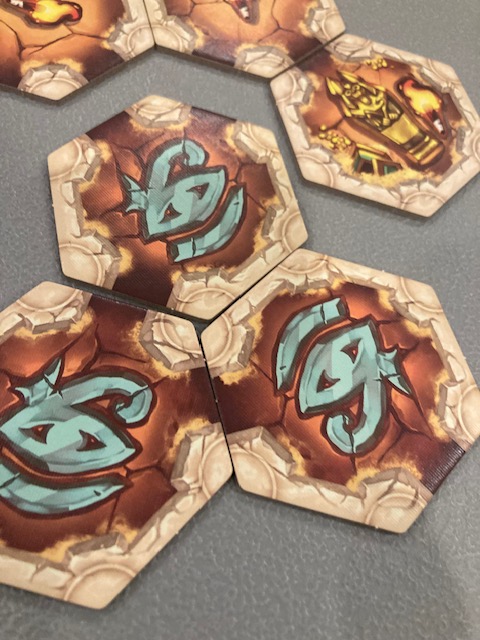
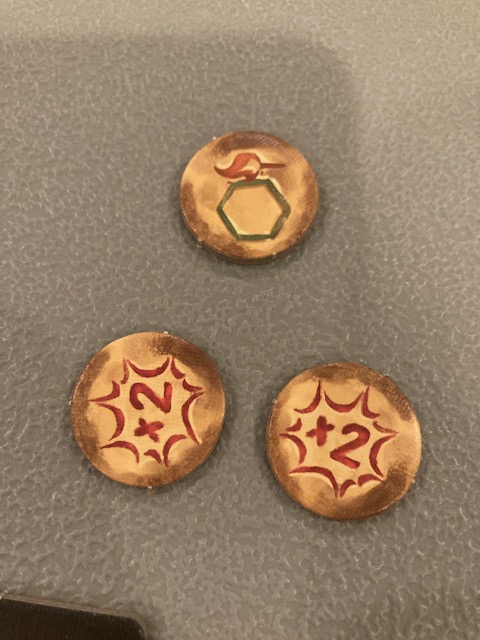
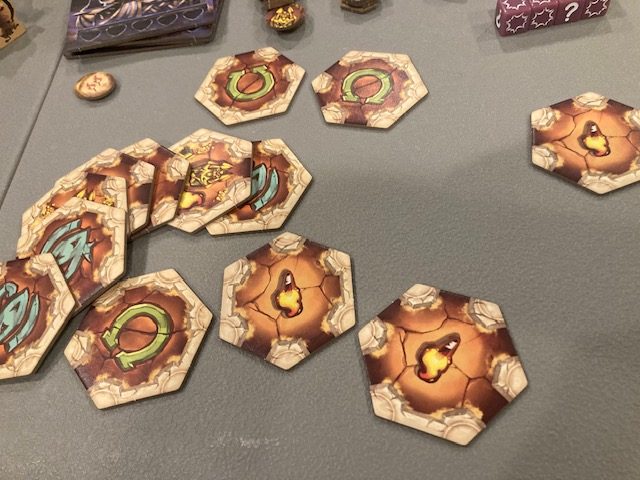
One tool the players have to help them is technology.  The technology tokens are lain around the board, and players can pick them up as they explore the map. See a bunch above of technology above: the shield gives +1 defense, the mule gives +1 movement, etc.

IMG_2844

You can see Deoices has picked up the Amphora (vase) above (with 5 Goods as well) and it’s on his character card!  He can now use it!  It’s got a cool ability … but it can’t be traded.  Almost everything else can be traded (Ashur cards,  goods) …why not technology?  From a game perspective, all the technology pieces are physical things that should be able to traded (sword, vial, shield, etc), so it makes sense from that perspective that they can be traded.  BUT, by not mentioning explicitly that you can trade technology, it’s clear that the rules don’t allow it.   The physical nature makes me think they should be, so thematically it makes sense. In fact, you might accidentally trade if you don’t look too closely at the rules!  

IMG_2803

I would suggest two minor house rules to make the game more consistent:

  1. Allow trading of technology as Goods and Ashur cards (so it’s more consistent with other trading rules).  If you are worried about balance with this rule, you can make a trade of technology a full action rather than a free action.
  2. Allow full Player Selected Turn Order (so it’s more consistent with the solo game)

Of course, caveat emptor: both of these rules might change playtesting and balance.  The game is pretty hard as it is, so I don’t think these minor changes will do anything except make the game more fun: it’s a more consistent application of rules and gives the players more choice!

What I Loved

IMG_2838

I loved the puzzle of this game.  There were always enough options (between Ashur cards and special abilities) that I always felt I could solve the puzzle.  

IMG_2851

There’s quite a bit of variety in here on the Challenge cards!  There’s always a different kind of puzzle to solve even if you master one Challenge!

IMG_2877

The campaign is a really good way to extend the replayability of the game.  I love that you can start from scratch and play a game, but it’s such an interesting puzzle to see what happens if you leave the game state between Challenges!  The Campaign will be very different every time!

IMG_2865

I love this game as a solo game.  The fact that you can play solo two ways is also great, depending on what you are in the mood for.

IMG_2749

The Plutorial (Playthough and Tutorial) really drew me into the game.  I am very worried I would not have suffered through the rulebook without the Plutorial.  I love that this exists, and I wish more heavy games would have very explicit set-up and playthroughs like this!

Component Issues

IMG_2879

As much as I like this game, there were a number of physical component issues.

IMG_2795

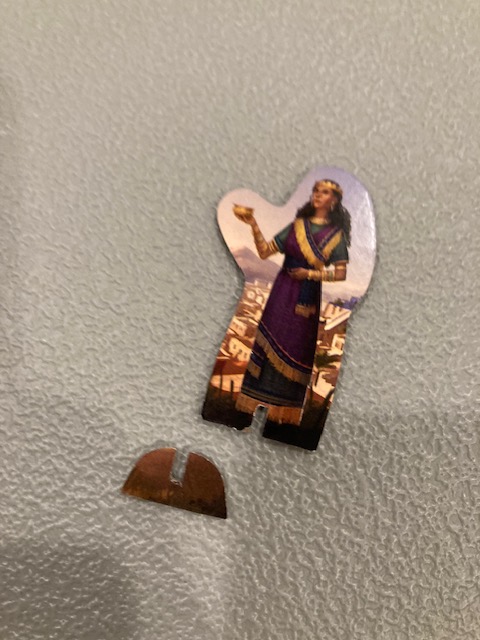
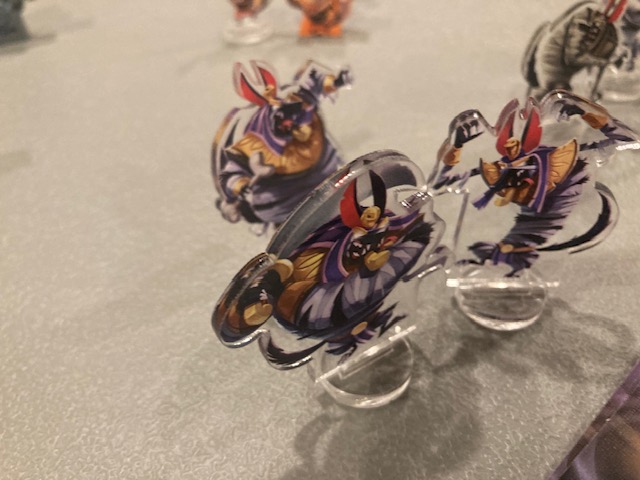
A very minor component issue is that the little cardboard stands fell off all the time: the cardboard bases really needed to be plastic bases.

IMG_2872

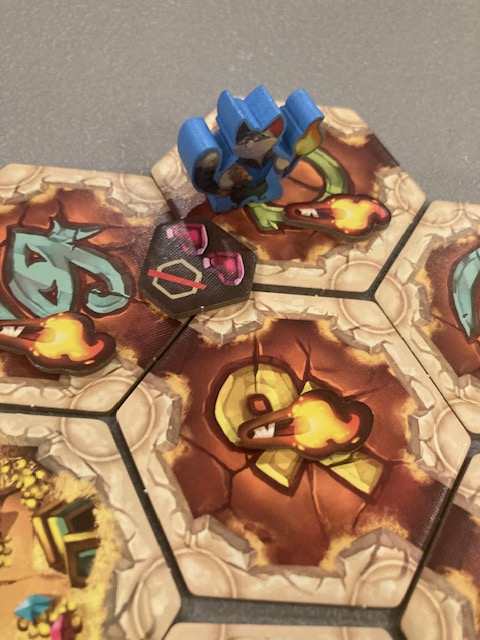
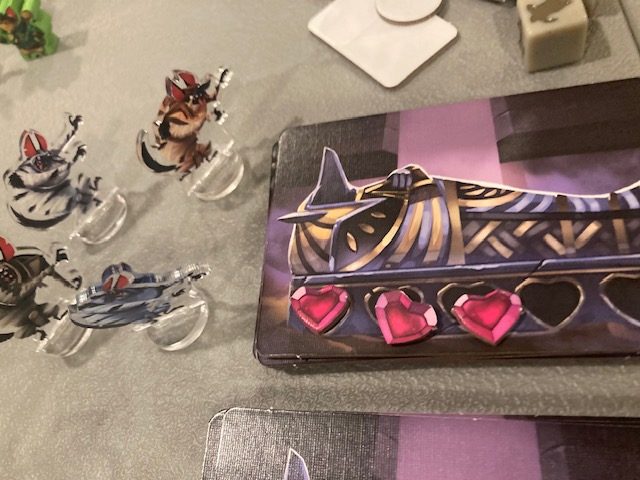
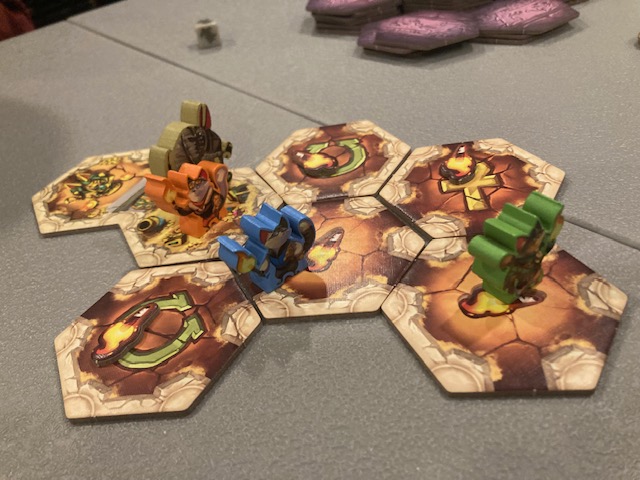
You are supposed to put a military and a diviner on top of the Ishtar Gate, but they frequently fell off, especially when you were moving around other tokens near it (see above). The corrugated tops of the Ishtar Gates was a nice effect, but it made the tops even more precarious.

IMG_2865

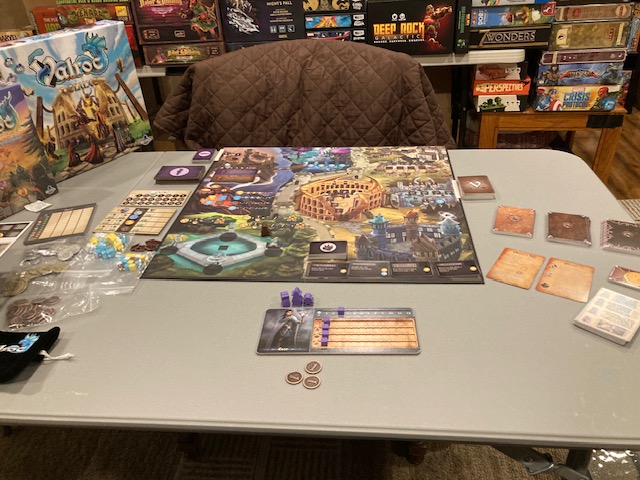
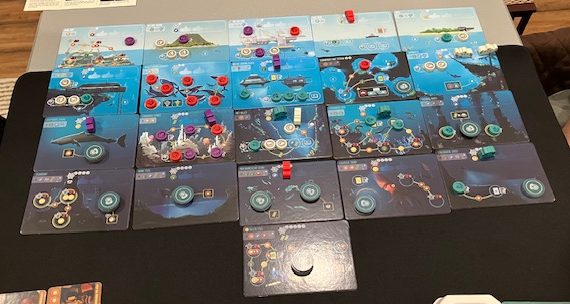
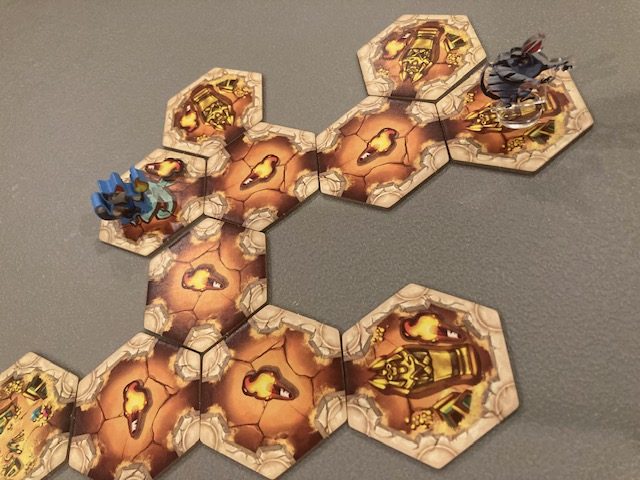
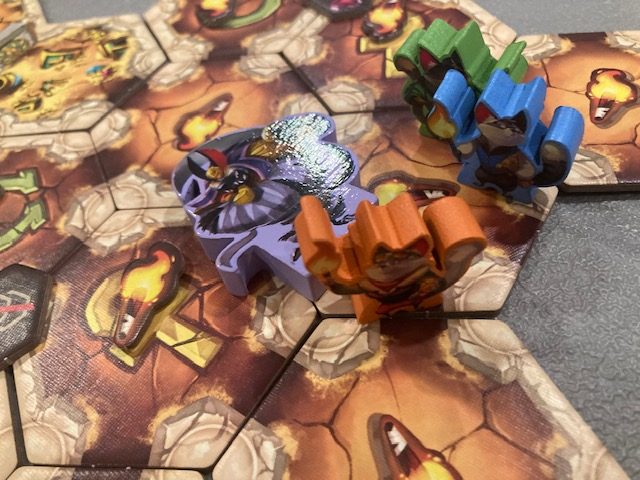
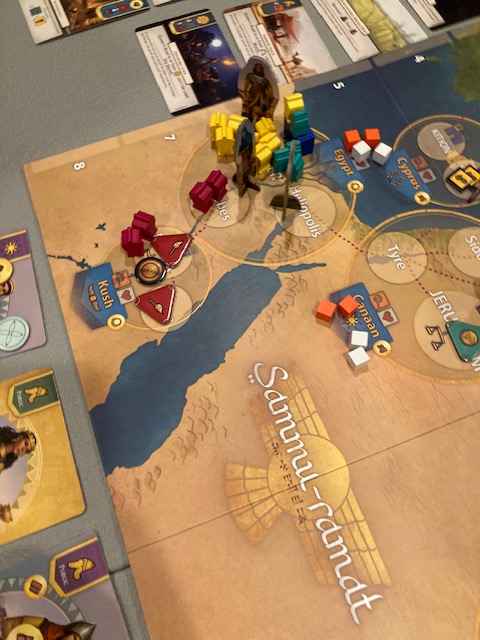
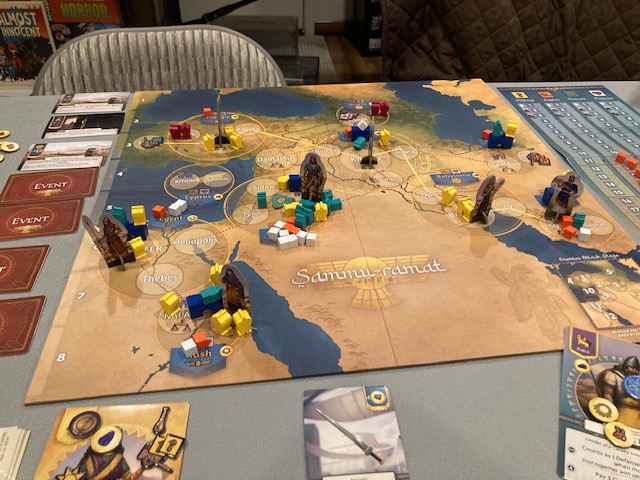
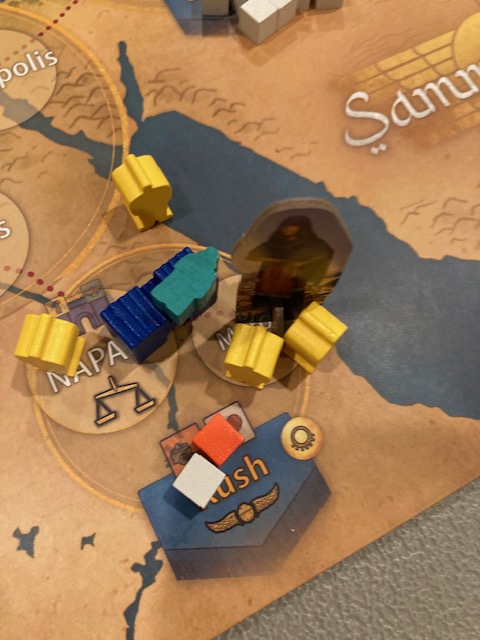
The board is reasonably sized and looks decent, but it doesn’t take good advantage of space! The is a ton of “empty space” near the top and the bottom (middle) that is never used for anything! There are two obvious things it could have been used for: One would be useful charts and info (technology descriptions for instance). A second, better use, would have to have made each area and location bigger! I can’t tell you how many times I would move or knock over tokens because there were so many in one area! See above as Canaan was just overrun and had too many tokens.

IMG_2809

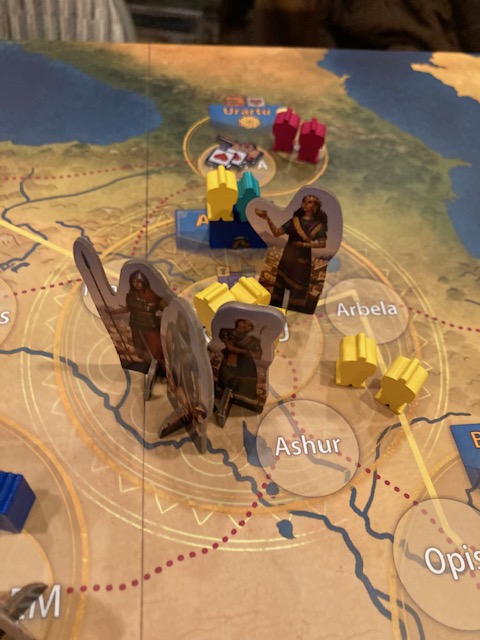
For example, at the start of the game especially, you might have 4 characters in Kahlu (see above) and they just barely fit! I would have loved to somehow made the areas and location on the board bigger to take advantage of the unused space at the top and bottom of the board. I suspect part of the issue was trying to make the area more geographically correct, which makes sense since this game a educational bent as well. Games like Pandemic: World of Warcraft, however, have solved the map issue by simply having an expanding magnifying glass view expanded “away” from the location. Take a look at the map from Pandemic: World of Warcraft below:

IMG_8874

Notice how the boards spaces the Locations fairly consistently, even if the actual map location is pointed to by the area? I suspect the usability of the Sammu-ramat map could have been helped by some technique like this.

IMG_2809

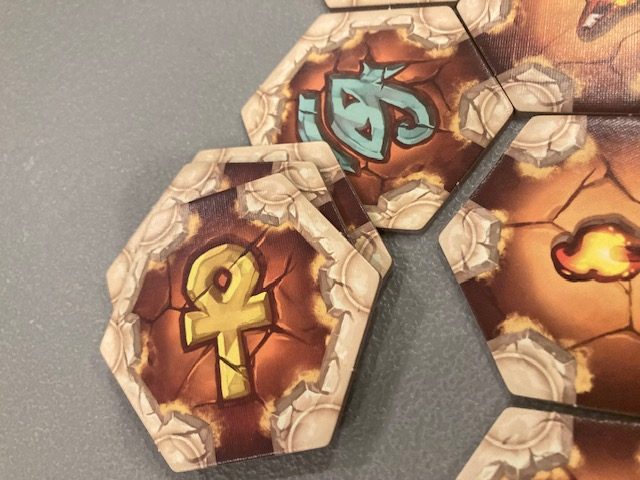
Related to that, sometimes you couldn’t see what Goods were produced by a Area because of the labelling as behind all the tokens!  What Goods does Assyria produce?  You can’t see, but it’s Textiles!

Honestly, the smaller areas/locations is my biggest problem with the game: Sammu-ramat could have played so much smoother if the areas/locations were even bigger! There’s a lot of rules to absorb in this game, and anything that helps facilitate that play experience makes it easier to absorb those rules.

Theme

IMG_2700

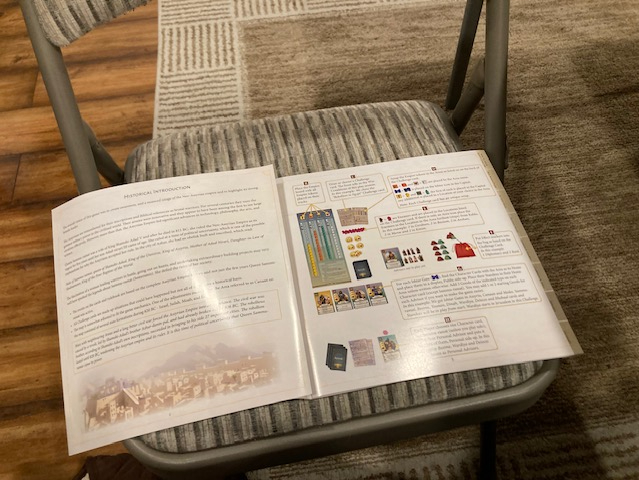
So, this game has an educational bent: it immerses the players into Queen Sammu-ramat’s rule of Assyria in 9th century BC, as guided by her advisors.

IMG_2805

Near the end of the rulebook are backstories for each of the advisors.

IMG_2885

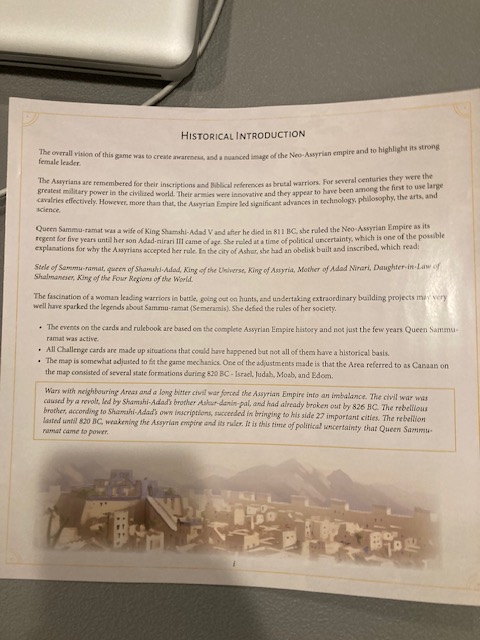
Also, the Historical introduction (at the very front of the rulebook) gives a quick discussion of this world.

For me, the theme does nothing. Let’s be clear: the research and historical basis in this game is to be commended! I suspect a lot of time was put into the research and history of this game: that’s very clear and impressive.

I feel like I did learn a little geography and some history from the characters of the time. In general, I probably wouldn’t have picked this up if something didn’t grab me on Gamefound originally. I am really glad I picked it up, but I think I would have preferred a re-theming:

bp2

I would have loved for this to be a Superhero game based in the DC Universe! Instead of Assyria, have the setting be the streets of Arkham! Imagine if this were a Birds of Prey series! It would still preserve the role of the women being in charge, but perhaps the DC theme would be more engaging for more people! Oracle would be Sammu-ramut, trying to orchestrate the heroes to keep the streets of Arkham under control! The advisers would be the heroes: Black Canary as Dinah (her secret identity is even Dinah in the comic books), Commissioner Gordon as Deoices, Nightwing as Wardiya, … just to name a few! Getting an Ishtar Gate would be like cleaning up a neighborhood: getting a hospital (medical), food (supplies), protection (police), and good samaritans (diviners) makes a neighborhood safe again!

birdsofprey

I’m telling you, it would be so easy to re-theme this game, and I’ll bet you Kickstarter would go crazy for this game if it were called Birds of Prey: Arkham Nights! There is a fantastic core game with the base of Sammu-ramat. I’m not trying to be disrespectful of all the amazing work here, I am just saying a theme that would perhaps be more accesible: I’d love to see a version of this emerge called Birds of Prey: Arkham Nights (A Sammu-ramat game)!

Conclusion

IMG_2870

Despite my having no connection to the theme, there being some component quality issues, and some issues relating to clarity in the rulebook, I could see this being one of my top games of the year! Sammu-ramat is a fantastic puzzle! It somehow manages to be a cooperative euro game (gathering scarce resources) while also being a cooperative wargame (keeping bad guys under control)! The puzzles set-up by Sammu-ramat with its Challenges cards offer endless variety to keep me coming back for more!

IMG_2907

The cooperative game is good: my friends gave it a 6.5 or 7/10: we had fun.  We definitely recommend embracing full PSTO for the cooperative game.  The more important thing is to make sure someone shepherds you into the cooperative game: there’s too much game to learn this “on the fly”.

IMG_2752

As a solo game, this is either a 8.5/10 or even 9/10 for me! I think I would like this game even more if they fixed the production issues and had a retheming to Birds of Prey: Arhkham Nights: I think that would bump this to a 9.5 or even 10/10 for me. This game is that good.

IMG_2878

The game had a very small Gamefound campaign: $12,461 crowdfunded by 235 backers. This game is fantastic and deserves a much bigger release!