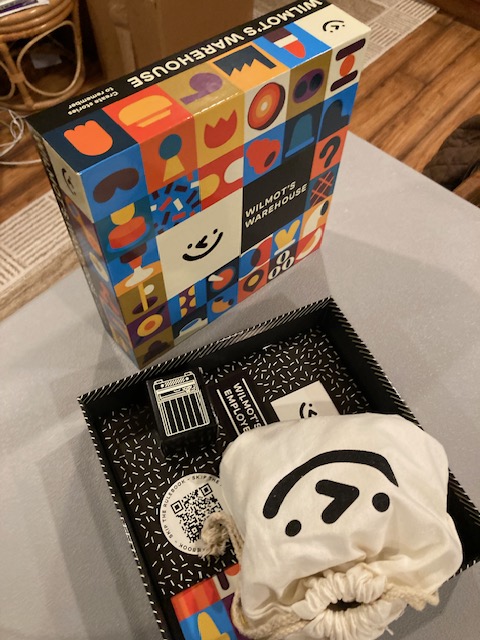
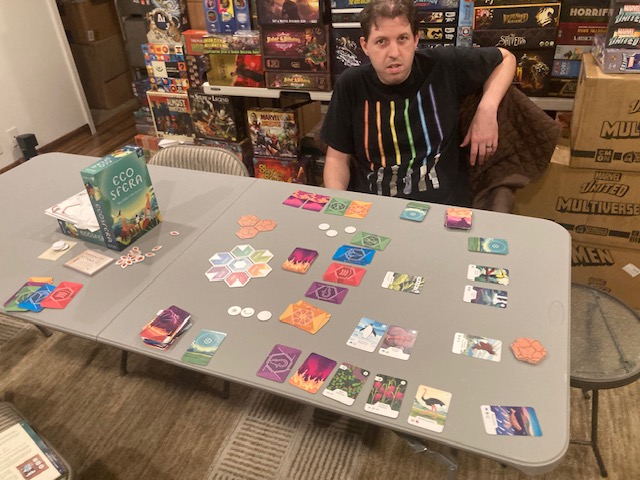
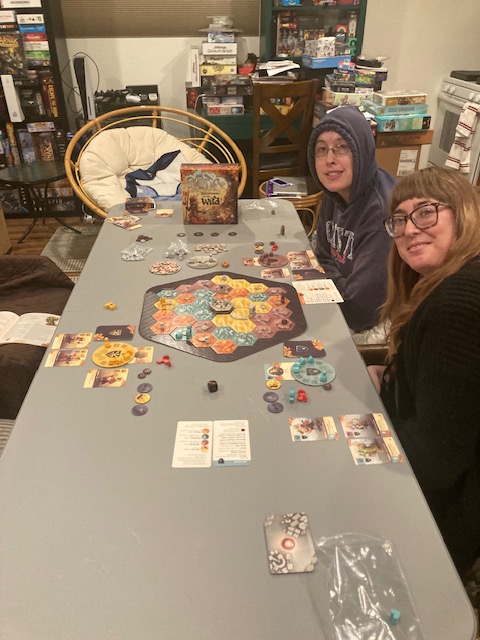
Wilmot’s Warehouse is a cooperative memory game for 2-6+ players; it also has some real-time aspects as well.
Wait! Don’t run away yet! Despite it being both a memory game and a real-time game, it’s actually pretty good. Really. I’m not kidding. Keep reading! Please!
Gameplay
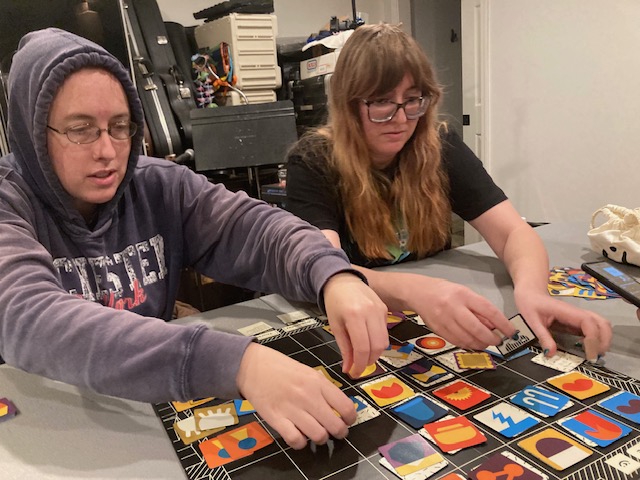
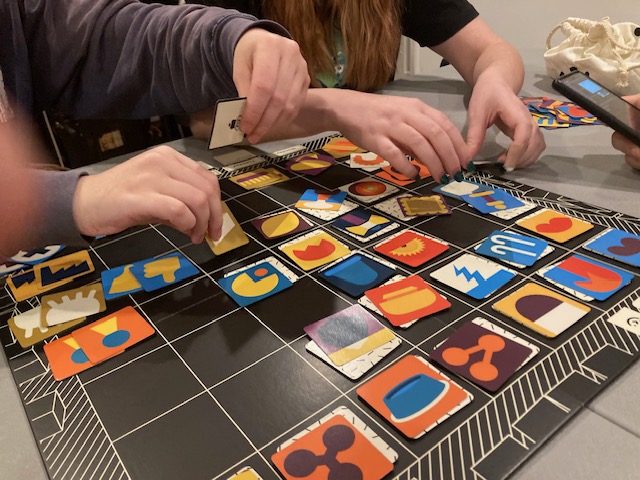
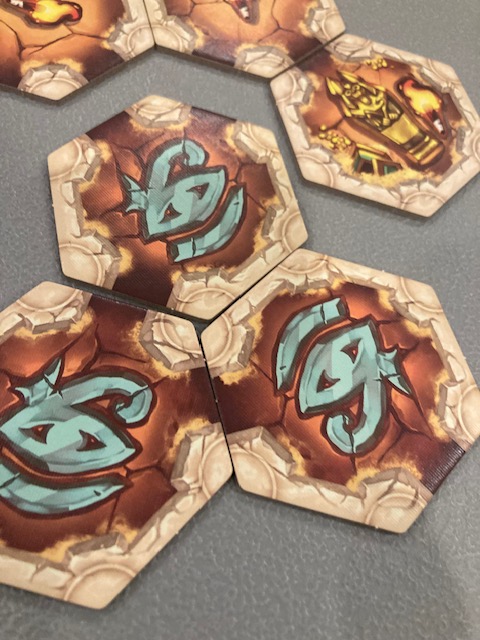
There’s not much to the game: as a group, you place tiles down “cooperatively” down on a board: this board is the warehouse in Wilmot’s Warehouse. (And I have no idea who or what Wilmot is).
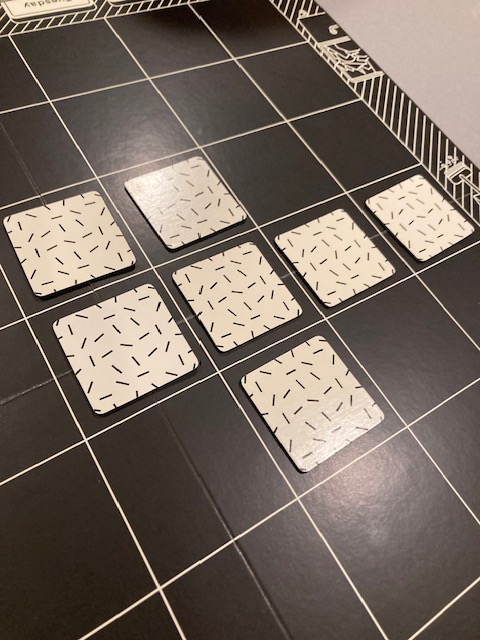
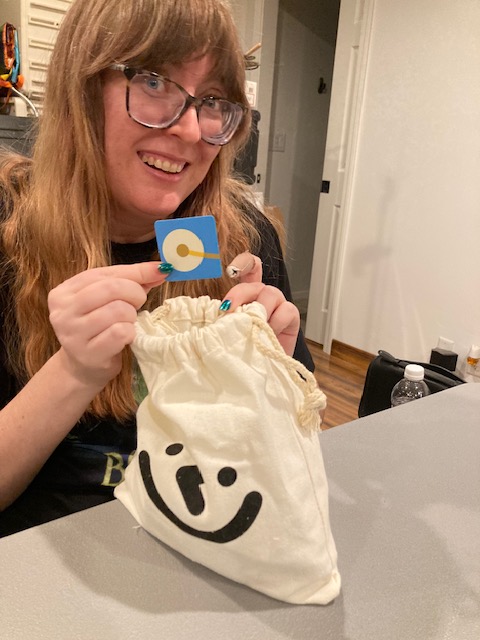
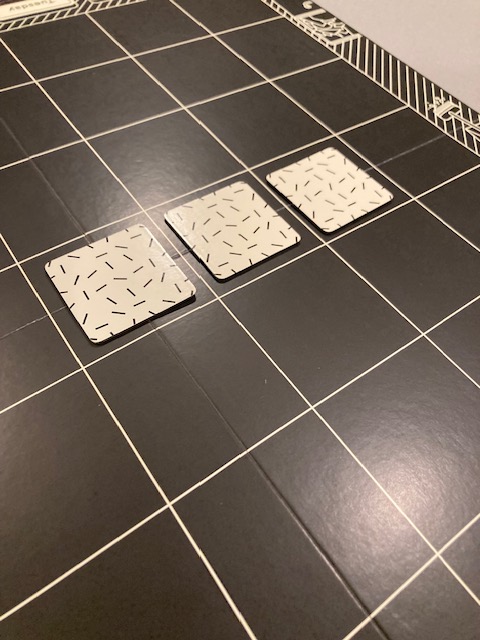
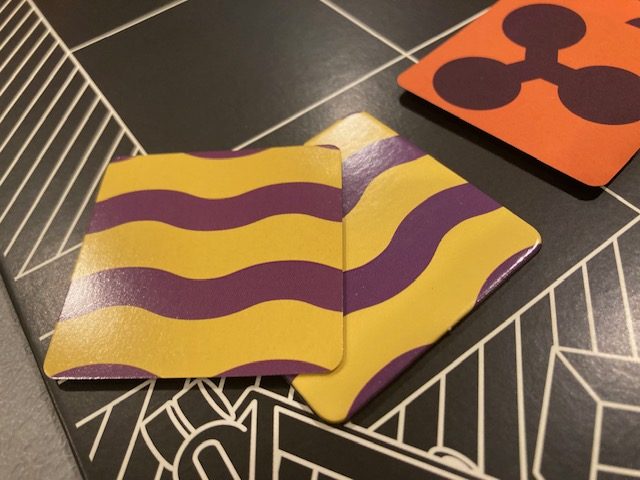
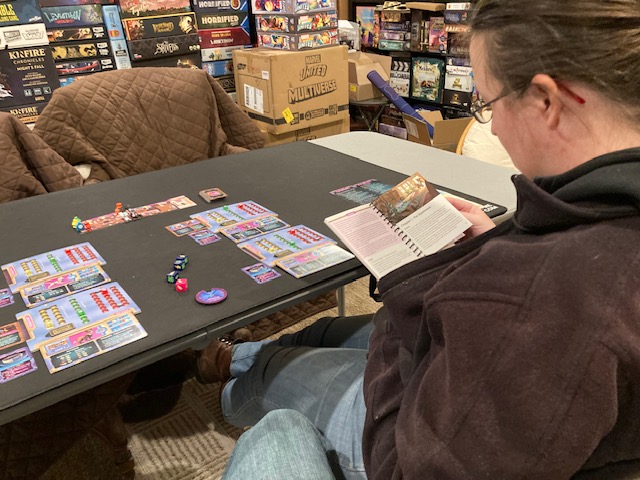
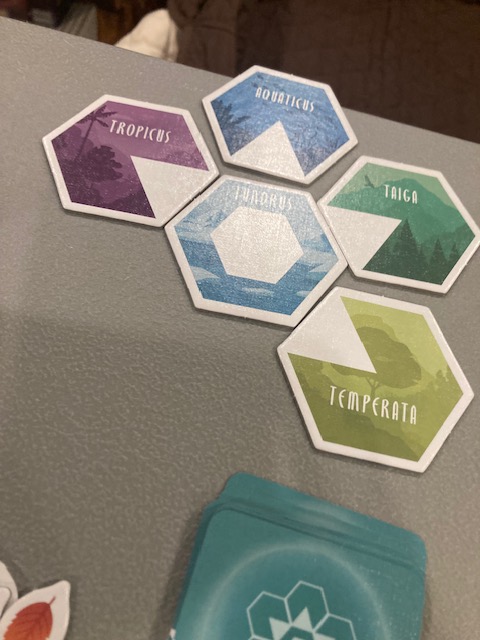
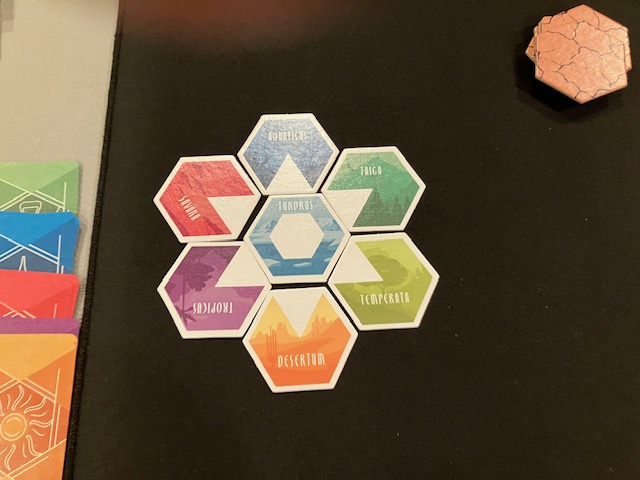
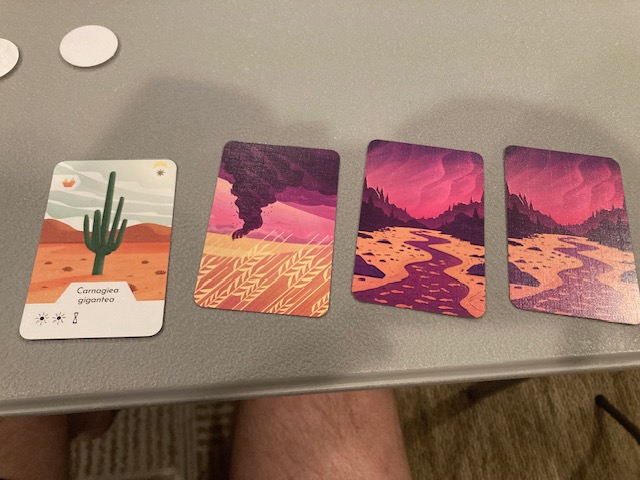
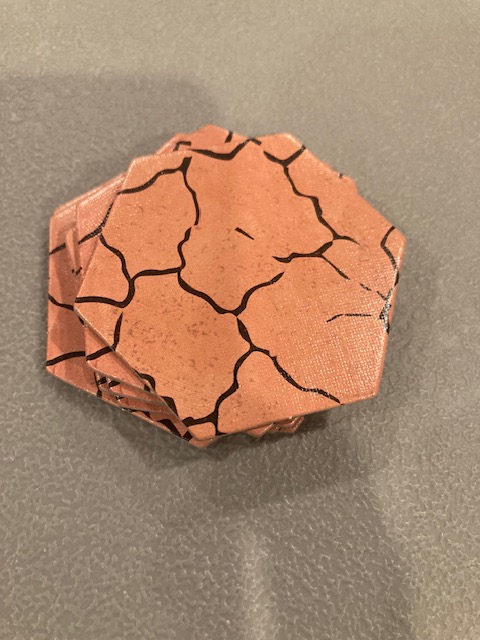
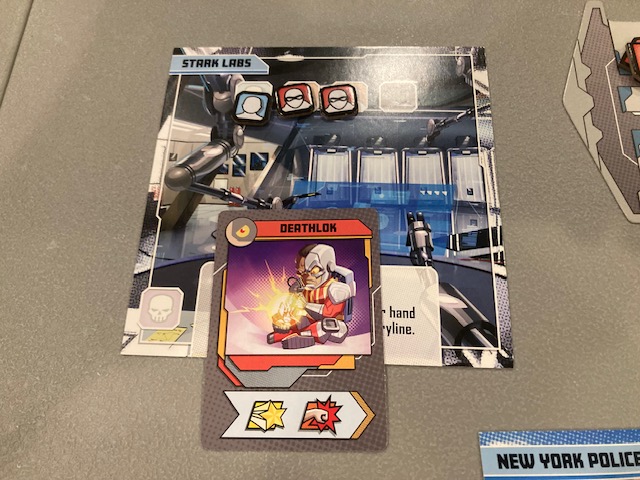
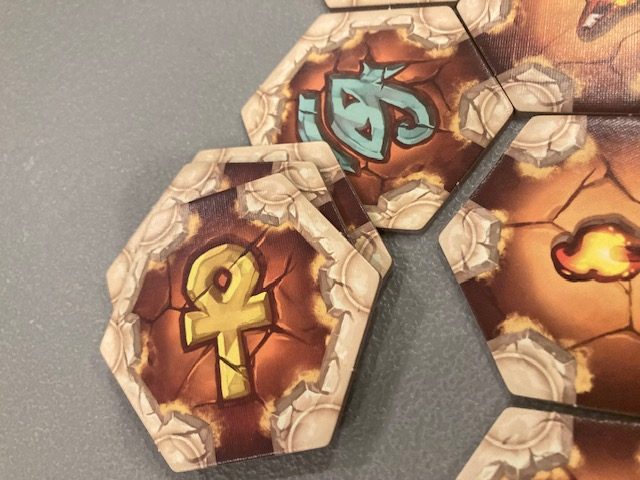
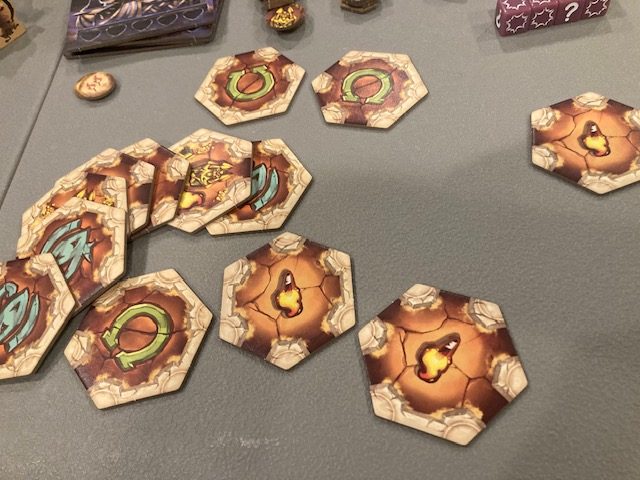
Players have some random tiles (see above) that originally come out of a bag. Players, as group, get to look at the tile and decide cooperatively what it is! See tile above: “What is this? A yo-yo? A Coffee cup?“
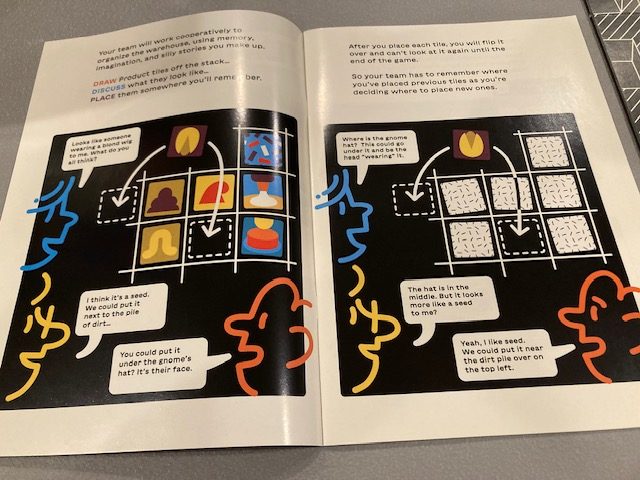
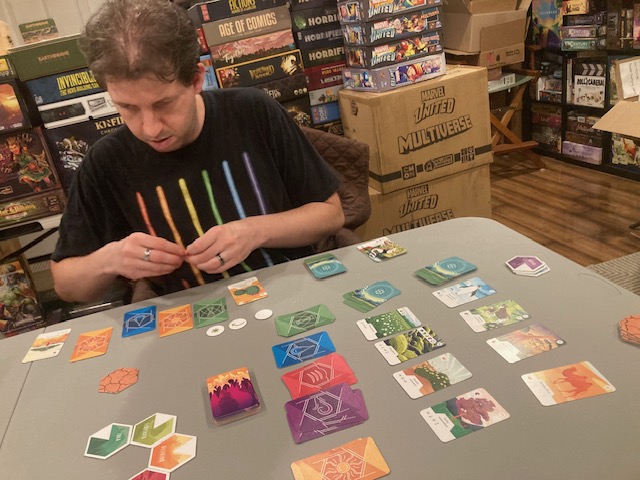
Once players, as a group, have decided “what it is”, they place it facedown on the board. To help remember it, players (as a group) are coming up with a “story” or “theme” to help remember WHAT IT IS and where they placed it!! There will be 35 facedown tiles(!) by the end of the game (7 cards “per day” over 5 days), so players need something to help remember what’s what.
For example, we had a row which was “food stuff”. And some stories about Mario.
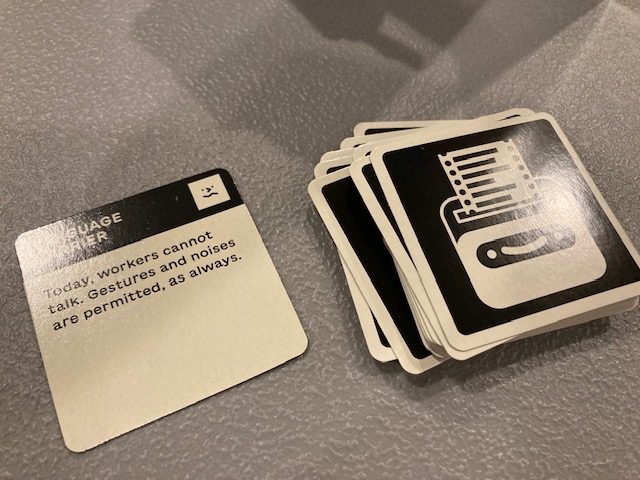
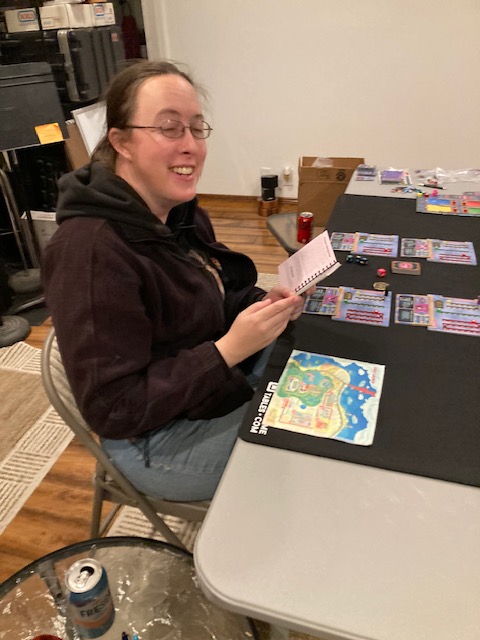
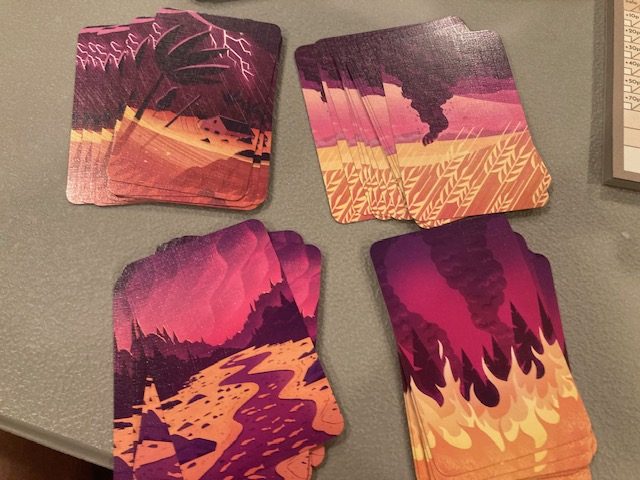
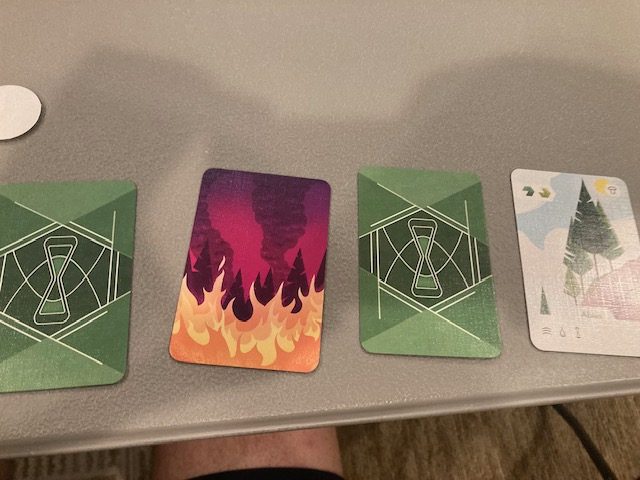
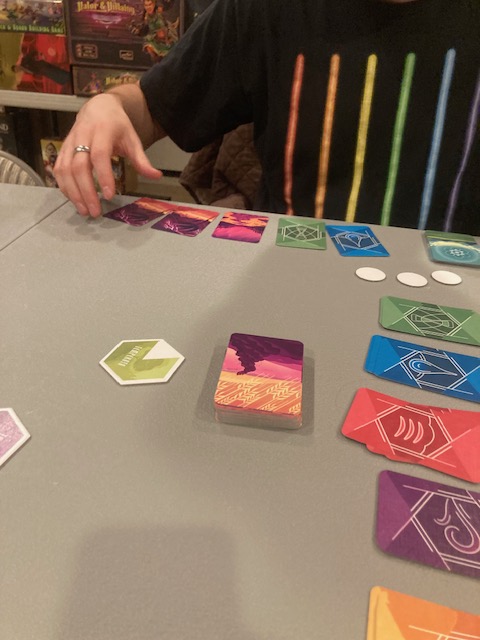
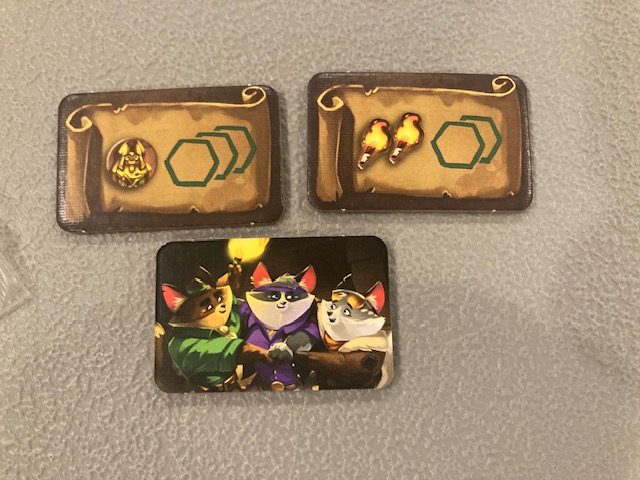
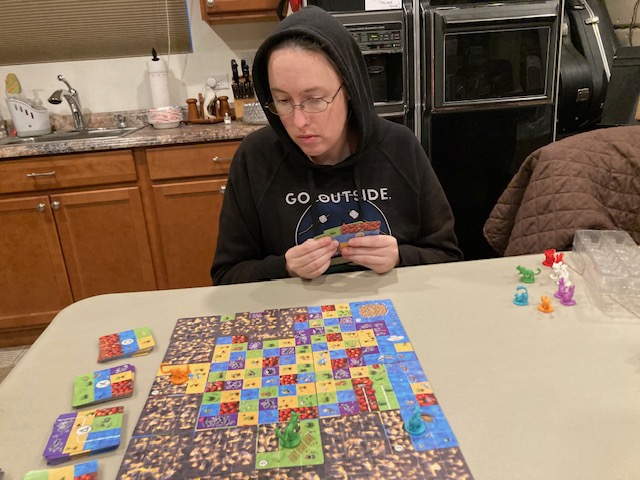
The first 7 tiles (Monday) are easy, but the each day, management has “new requirements” that make the game sillier and harder. For example, Language Barrier is what we drew (see above): we couldn’t talk, but we could grunt and point. Yes, we became cavemen. Yes, this sounds stupid, and it was. But it was surprisingly fun.
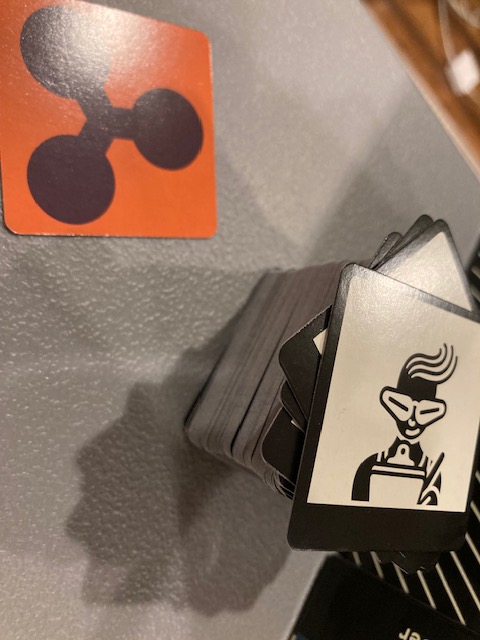
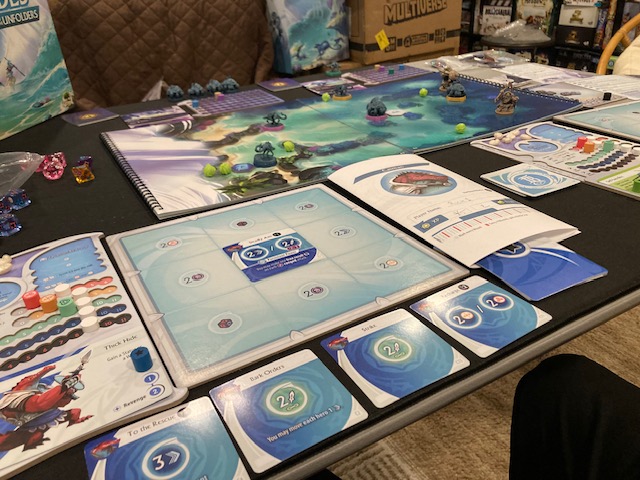
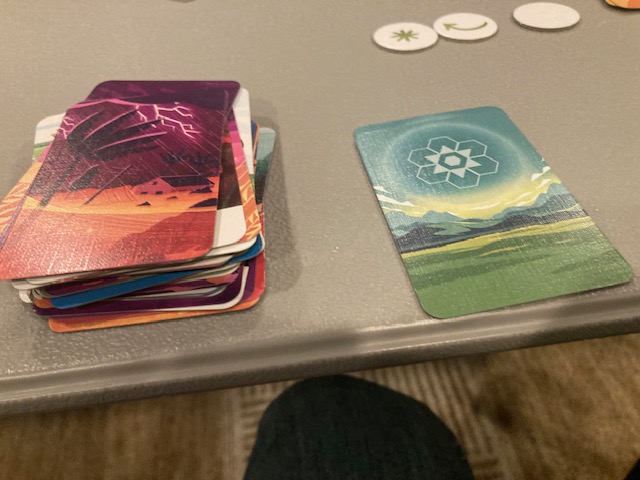
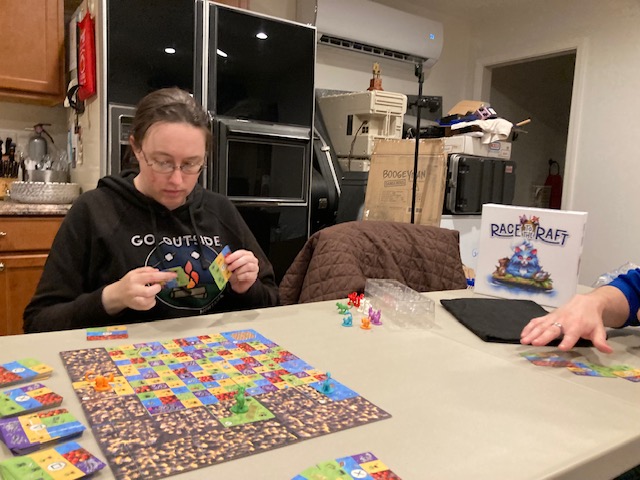
After all 35 tiles have been placed facedown, there’s a real-time phase where players take “customer cards” and have to match them to the facedown tiles!
There’s a lot of these customer cards: some of them will be on the board, but most of them won’t! As a group, you are going through these cards AS FAST AS YOU CAN to find the cards you are using, while tossing the ones you aren’t.
The object is to memory-match the real customers to the real facedown tiles. I KNOW! I KNOW! This doesn’t sound fun. But it was really was!
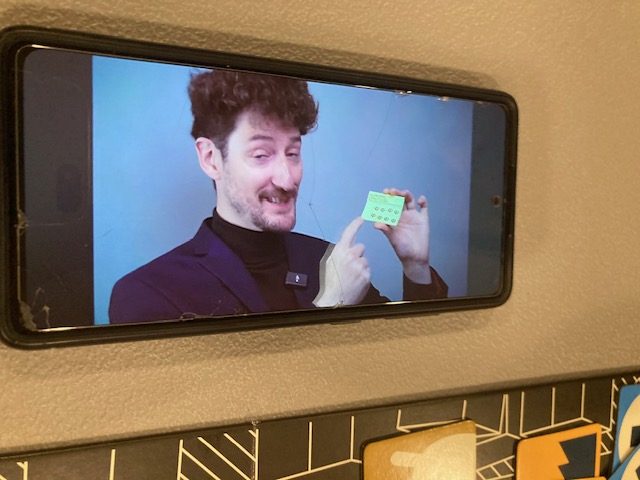
Your “score” is based on how fast you matched, as well as how many you mismatched (you gain a penalty of like 10 seconds for each failed match). Then, you can lookup a video telling you how well you did: see Matt from Shut-Up and Sit-Down telling us how well we did!
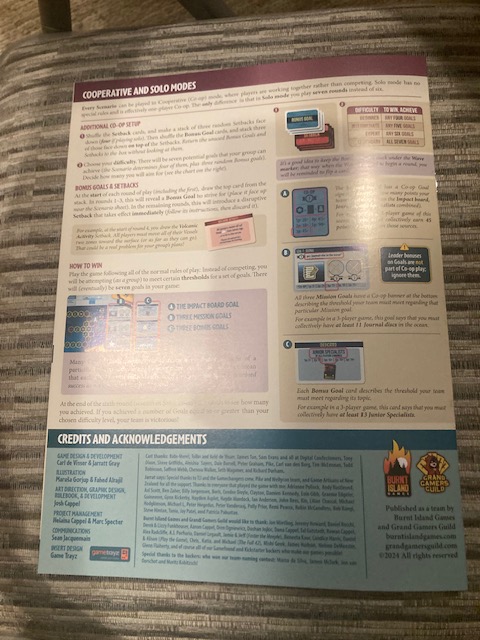
Solo and Cooperative
This game is officially for 2-6+ players (with the + implying you can play more). We found that it worked great for 4 players. Could you play it solo? I think you could, as a way to “explore your memory palace”, but, it would get a bit “samey” solo. What keeps the game silly and fun are the limitations cards!
In a solo game, the Language Barrier (above) would have no effect (“I can’t talk to myself, ok”) and wouldn’t make the game more fun .. and most limitation cards are something that affects how the players may communicate with each other. In a solo game, these limitation cards would have no effect: It would just make each round about the same … which is not a bad thing, but the variety of these cards made the game quite fun. (One limitation made us only be able to talk with words that started with one of W I L M O or T. Very silly!)
As a cooperative experience, this game really shined! We all talked (well, when we could talk) and explored ideas together as we had to “classify” and “organize” the tiles. This game felt very cooperative: everyone participated and had fun.
Conclusion
Wilmot’s Warehouse is easy to describe and easy to jump into. I was very skeptical of this game at first (“A cooperative memory/real-time game? I don’t know …“), but my group had a surprisingly good time playing this. In the end, this feels like a heavier party game: it’s silly enough that you could classify it as a party game, but it’s heavier than you might expect, as you have to spend some real brain-power to play the game.
Pretty unanimously, this would get a 7/10 from my game group! They liked it, and they would play it again. The only real major problem is that you can only really play Wilmot’s Warehouse once a night: the memory overhead makes it a little cumbersome to try multiple times in one night. “That’s it! My brain is full!”
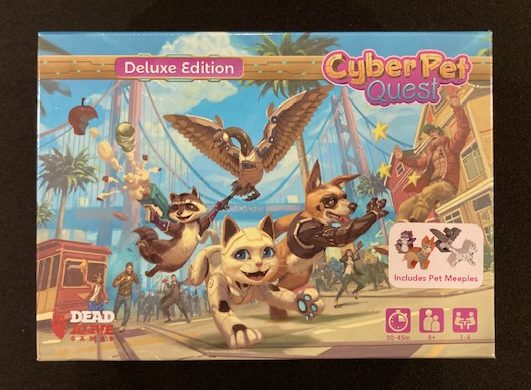
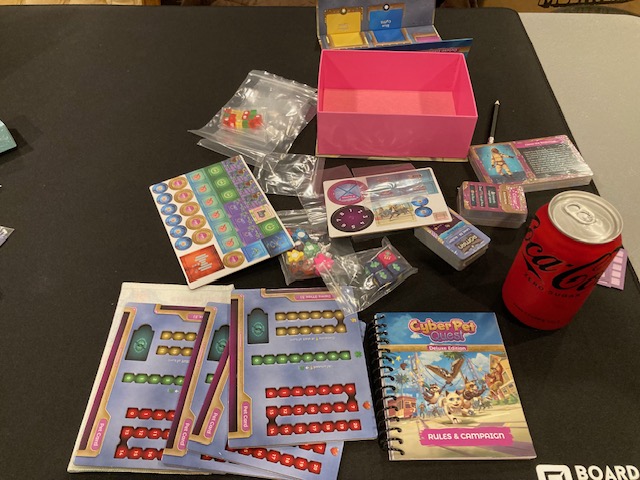
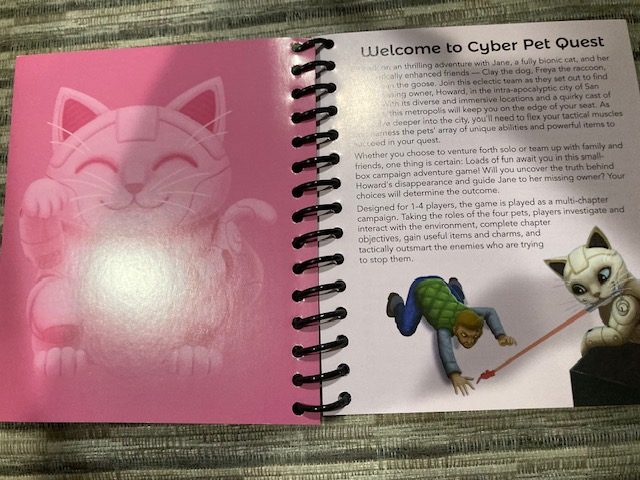
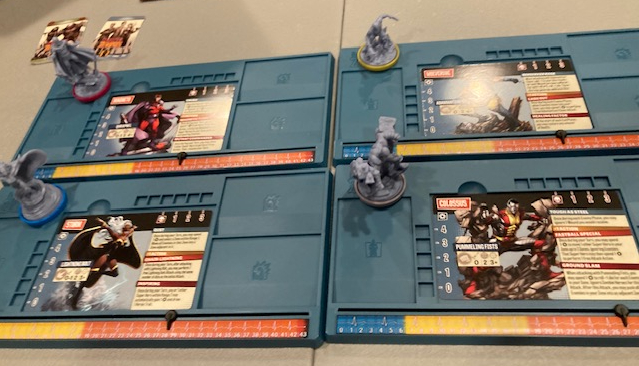
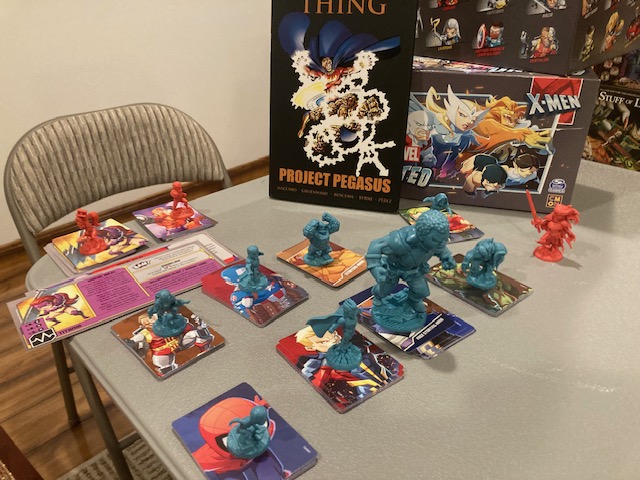
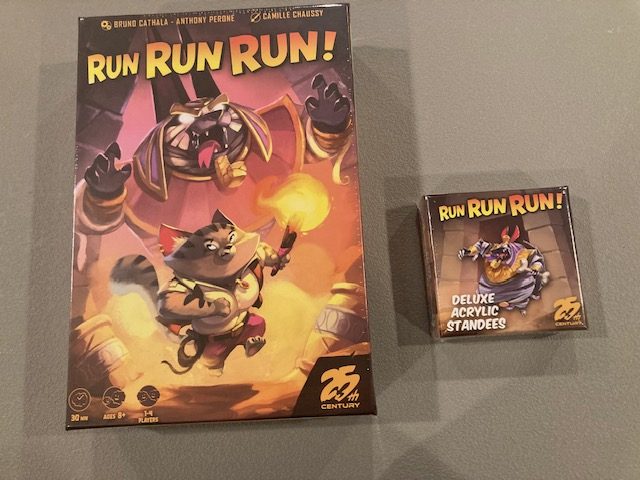
Cyber Pet Quest is a cooperative boss-battler campaign game. This game was on Kickstarter back in April 2024, and it promised delivery in October 2024. My copy arrived late October just before Halloween, so it arrived right on time! Congratulations to Dead Alive Games for shipping on time!
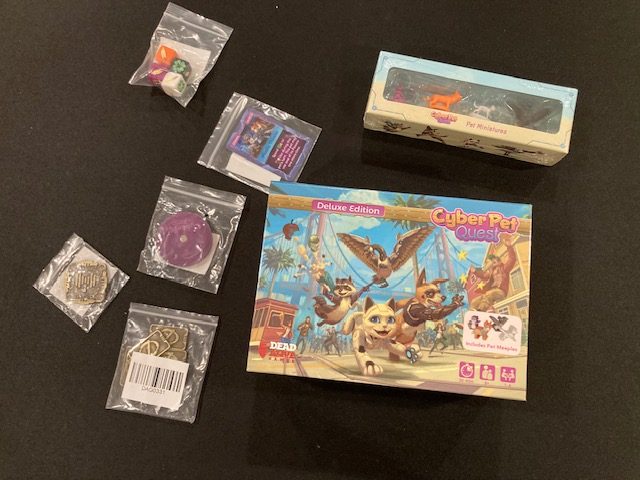
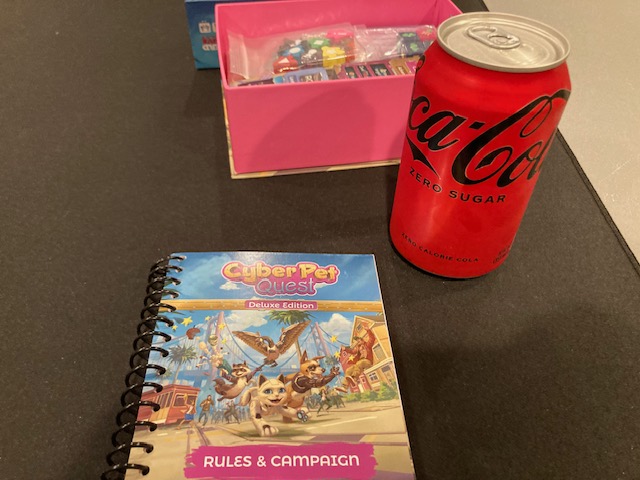
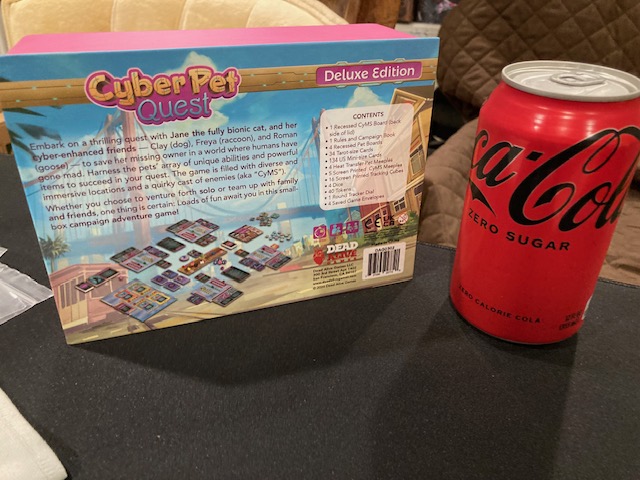
My version is the deluxe version with lots of little Kickstarter extras (see above).
This is a smallish game, but it still has a 6+ chapter campaign game contained therein!
Let’s take a look!
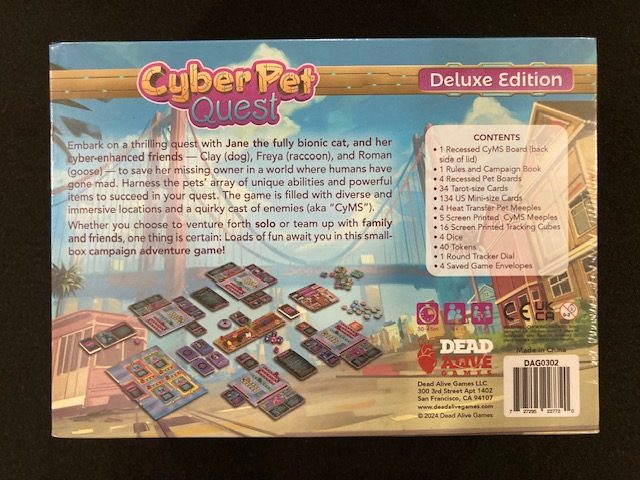
Unboxing
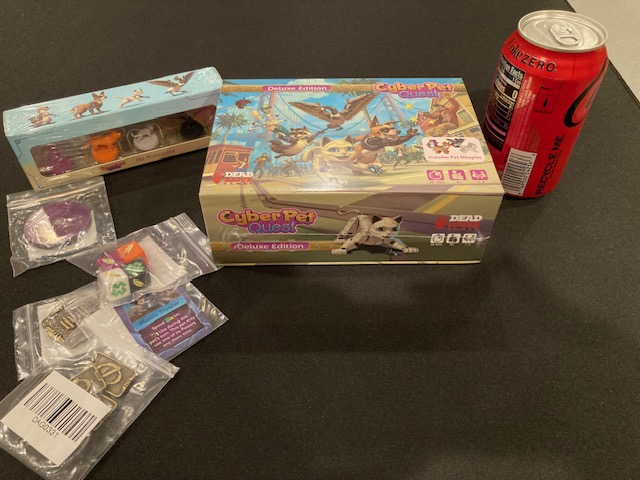
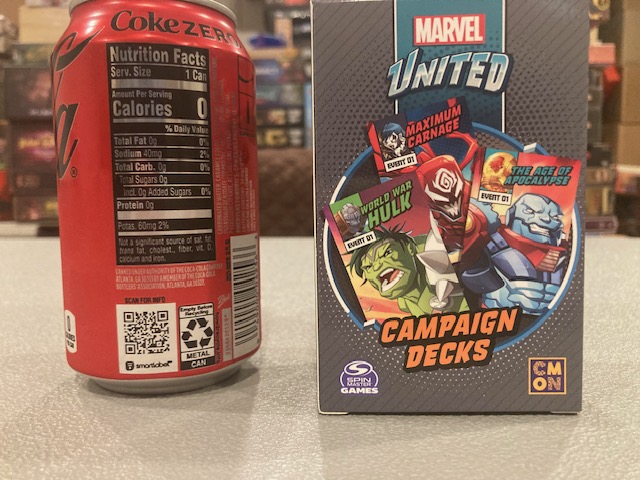
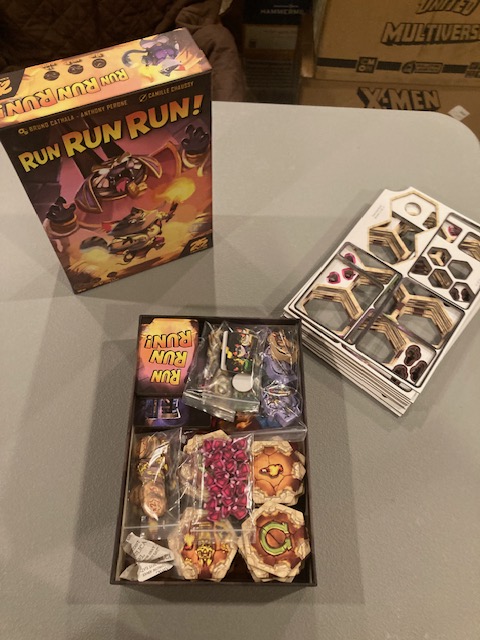
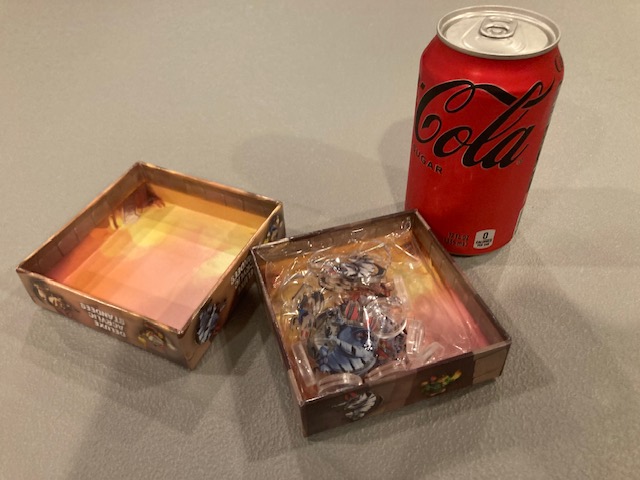
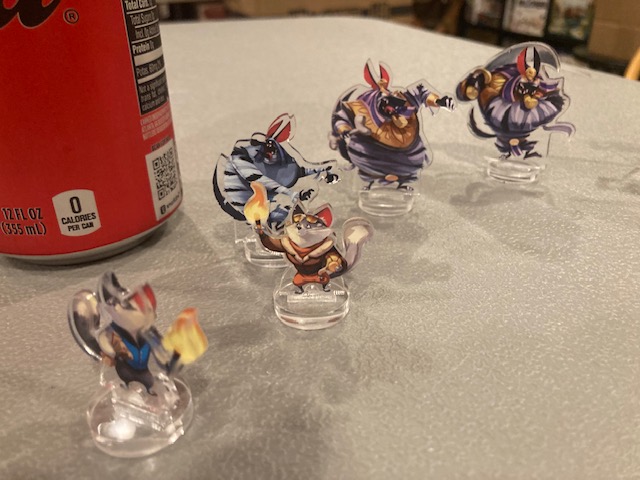
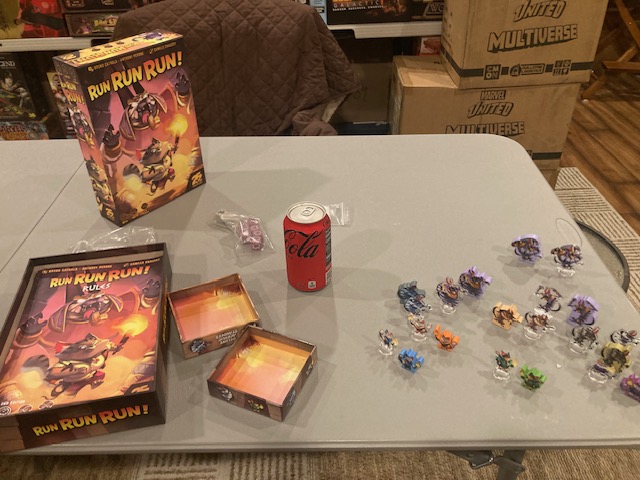
This is a small game: see the can of Coke for perspective.
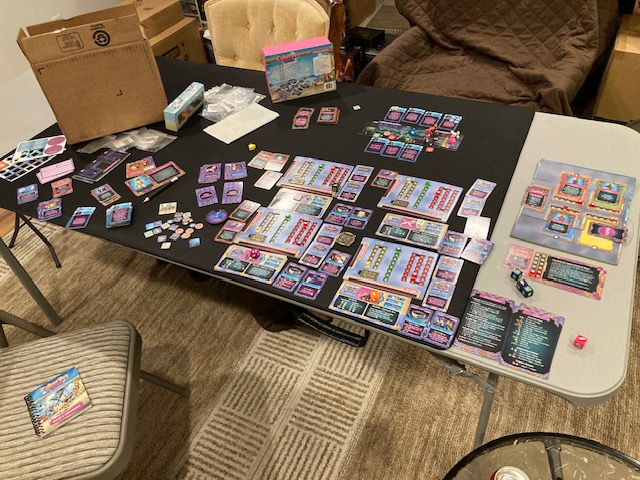
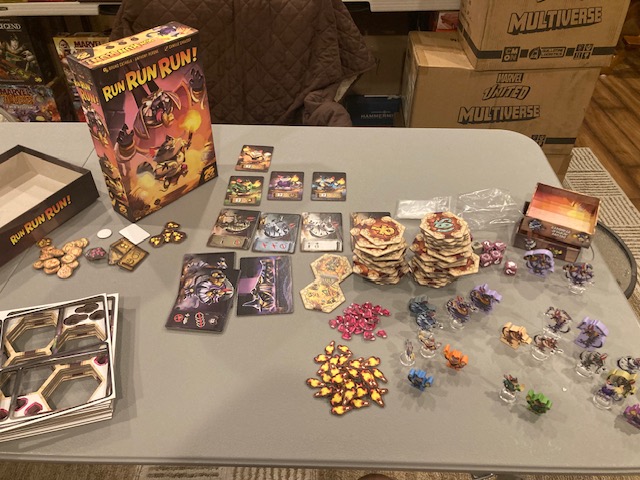
Yet, there’s quite a bit crammed into this box!! See above! So, what is this game all about?
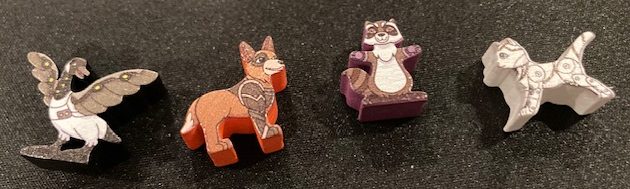
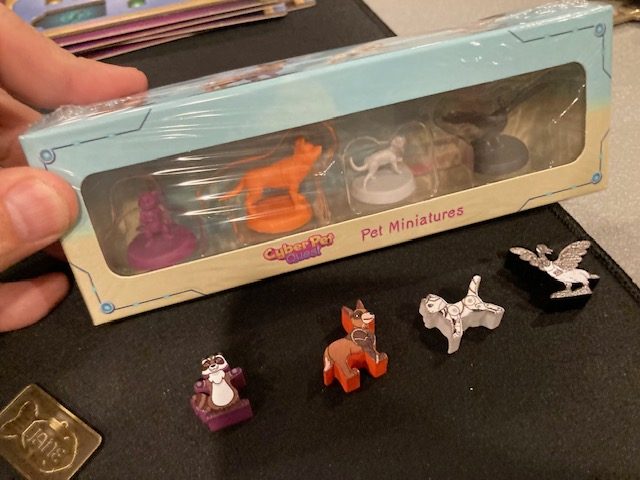
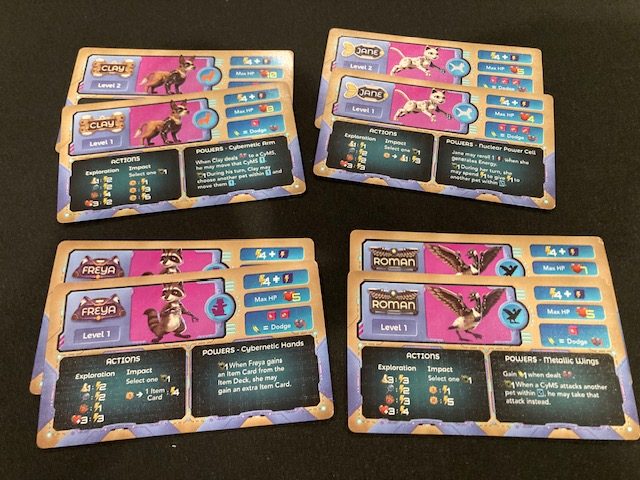
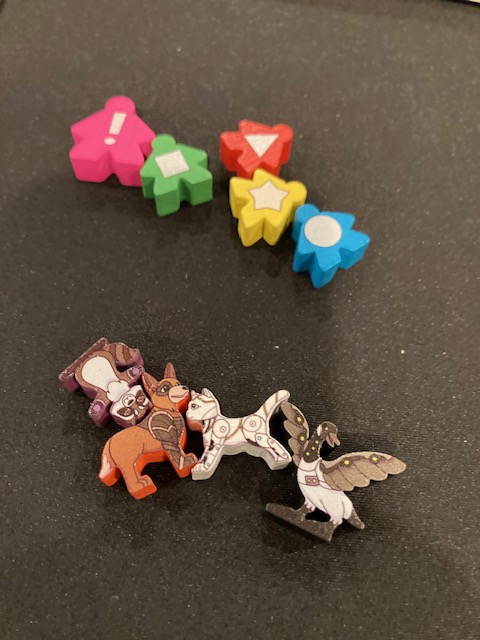
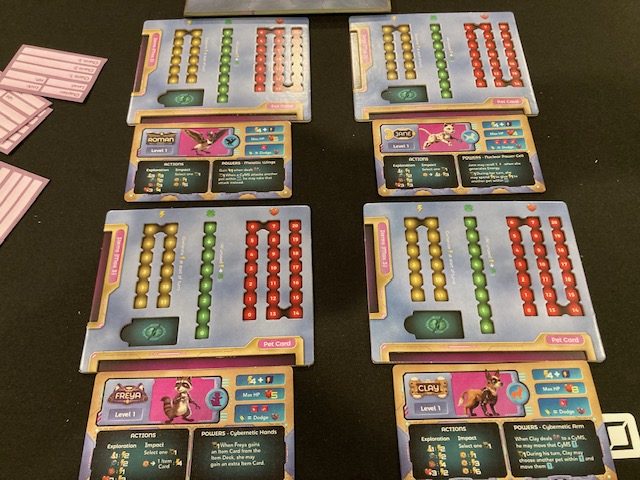
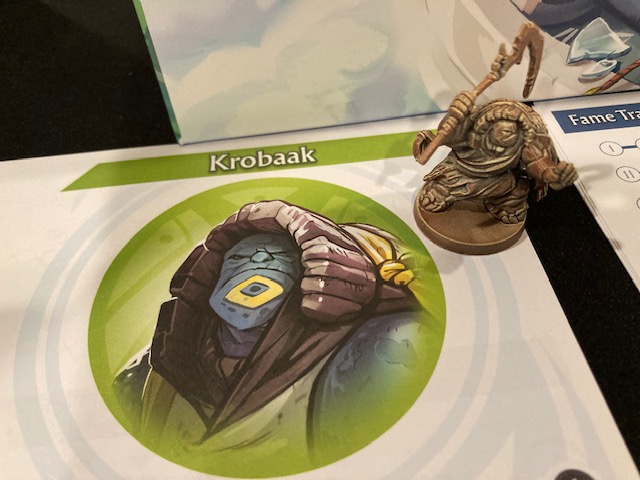
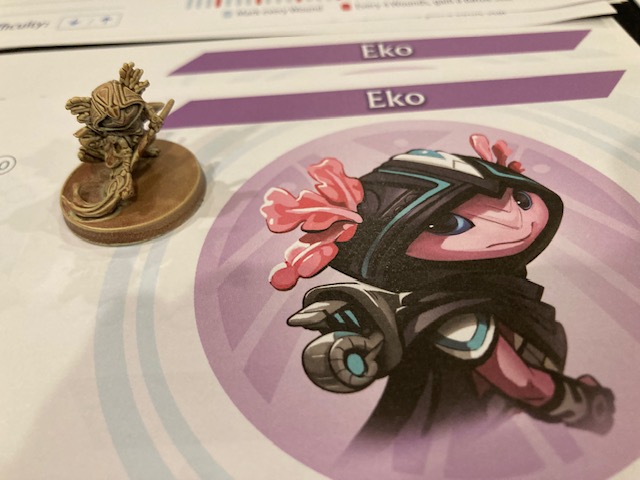
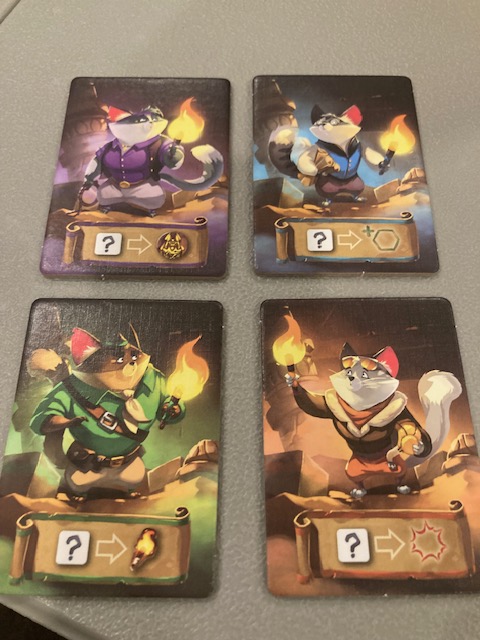
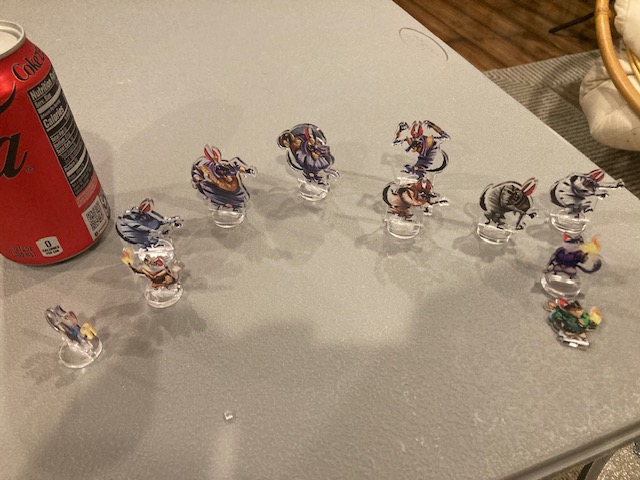
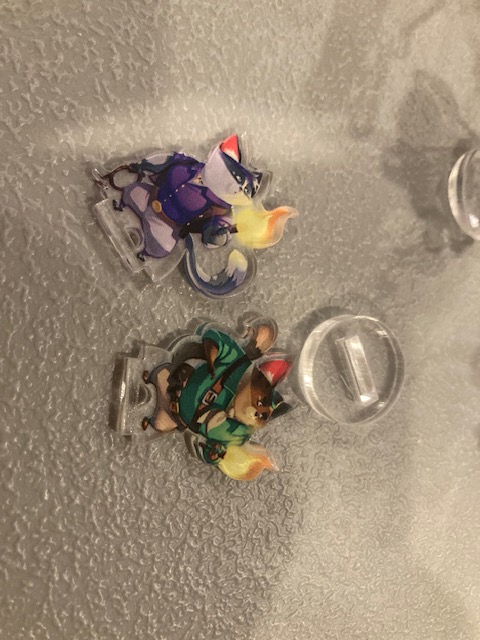
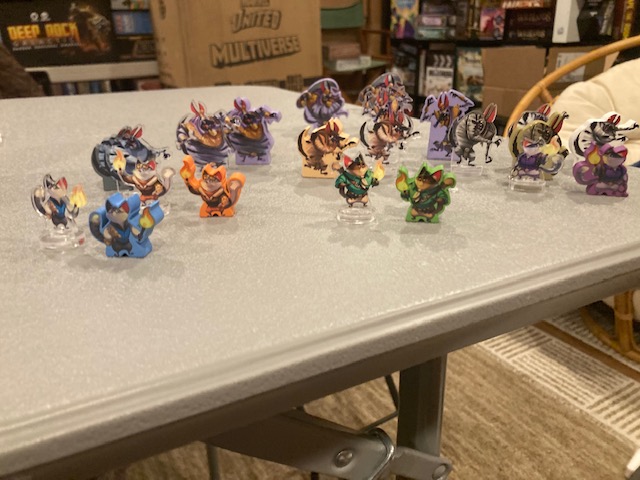
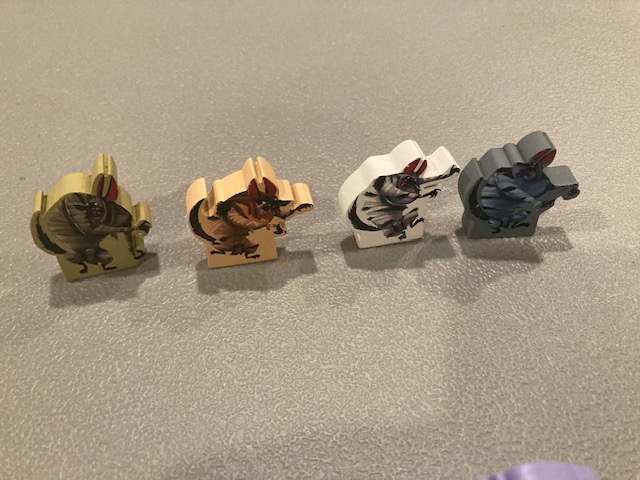
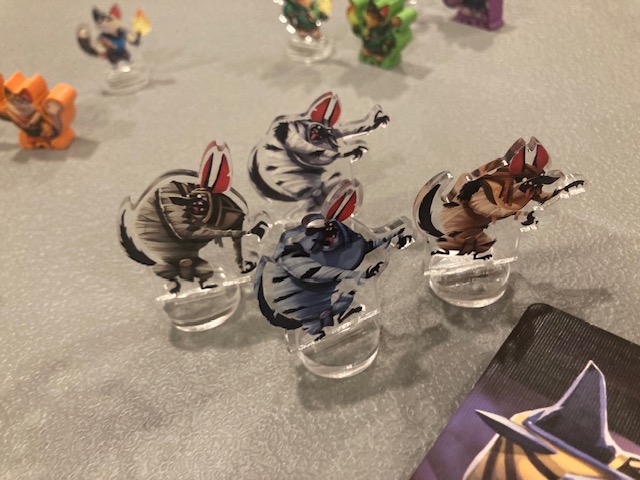
Players each take the role of the cyber pets (above, left-to-right): Roman the Canadian Goose, Clay the Australian Cattle Dog, Freya the North American Racoon, and Jane the Bionic Cat!
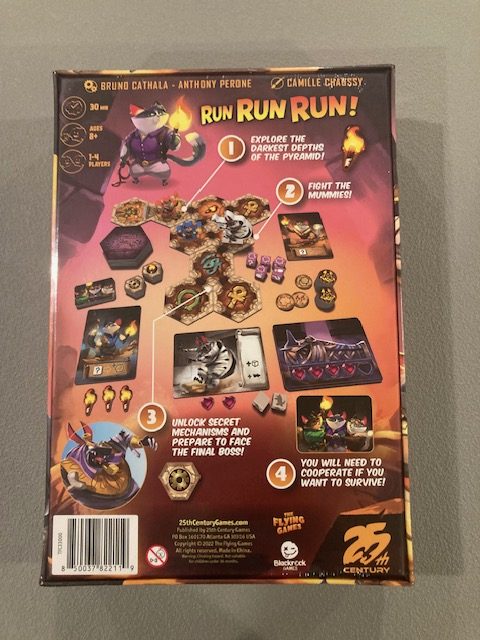
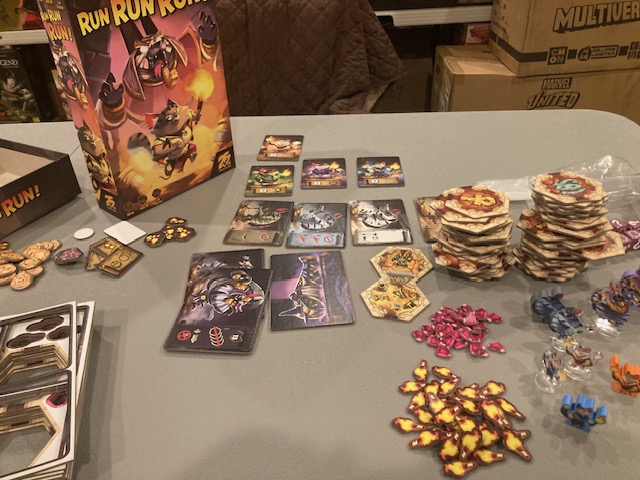
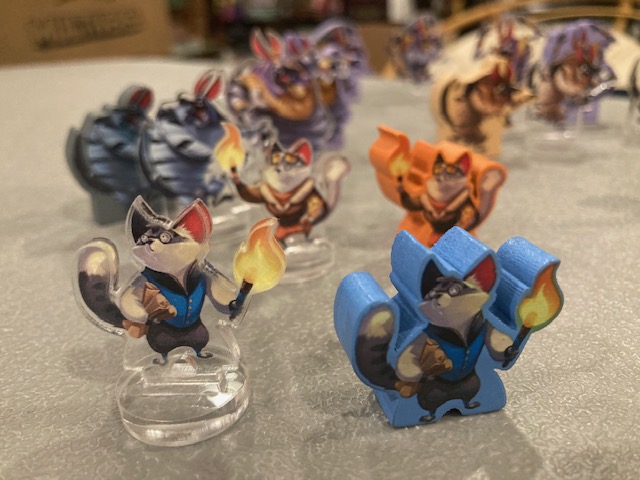
You can choose to pick up the pet minis, but I prefer the wooden meeples that come with the game (much like Run Run Run! from a few weeks ago!) Wooden meeples for the win!
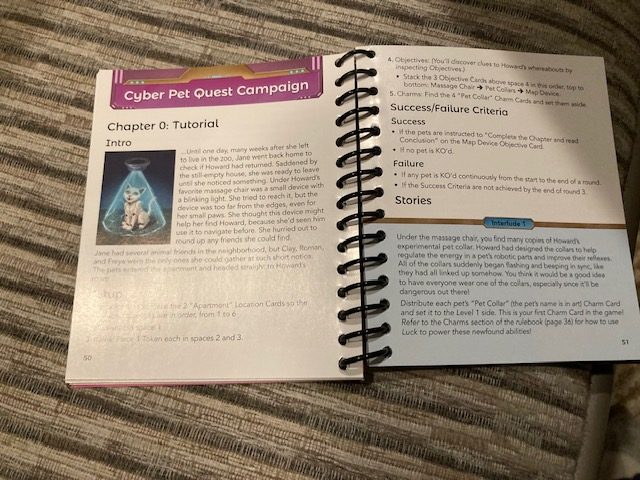
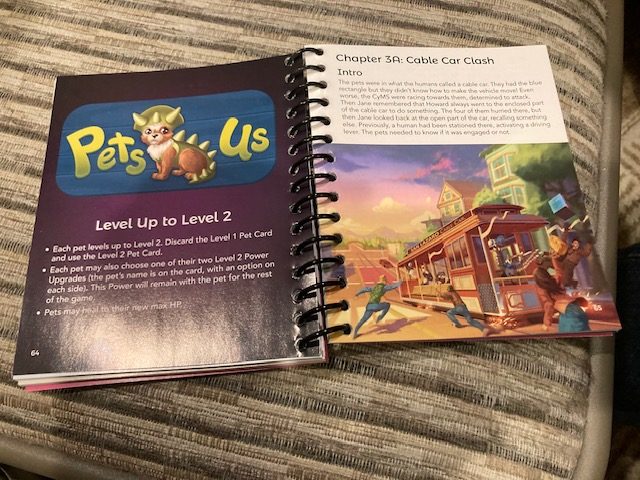
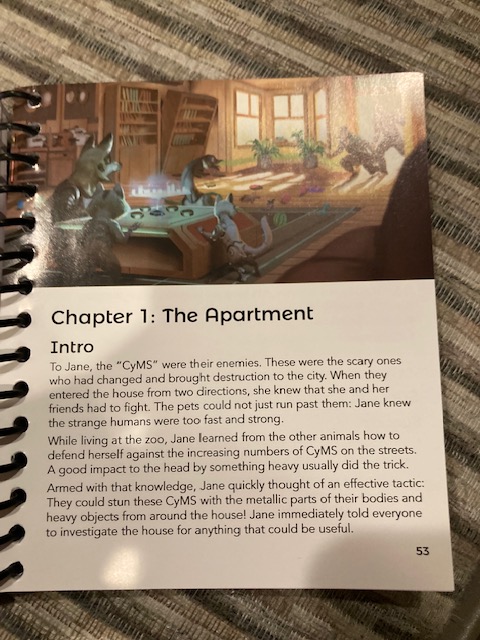
Players embark on a 6+ campaign (starting with chapter 0 to get you acclimated) working together to find their master! The campaign is all documented in the little book that comes with the game. It’s a tiny but long (at 108 pages) book describing the rules and the campaign.
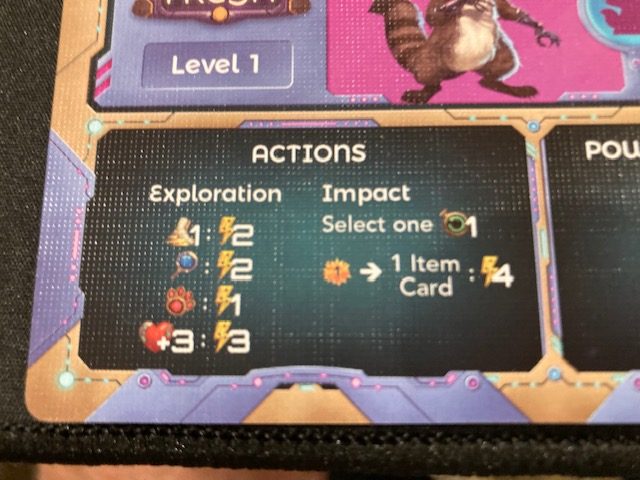
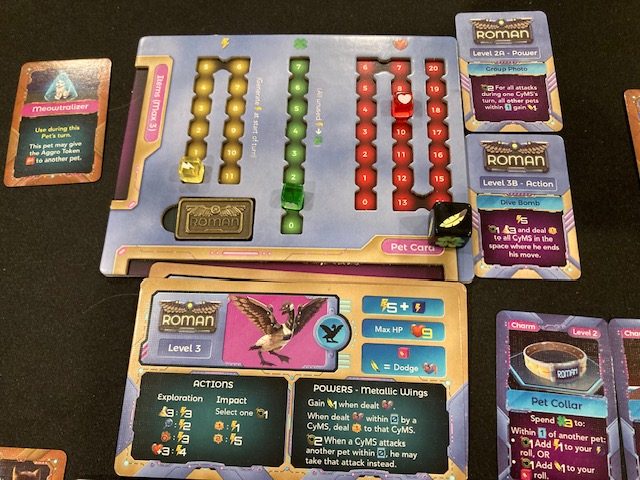
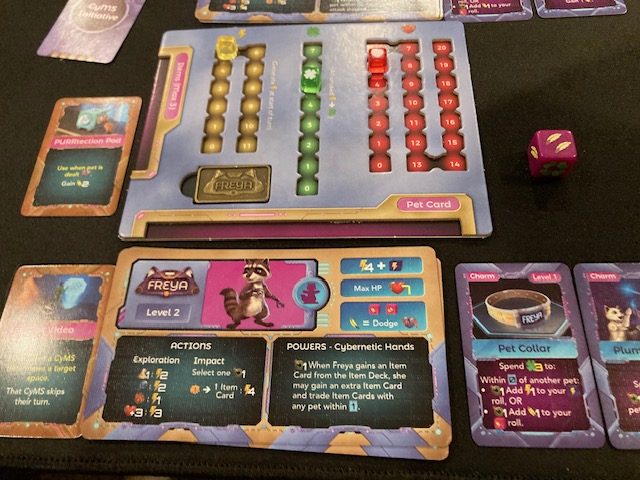
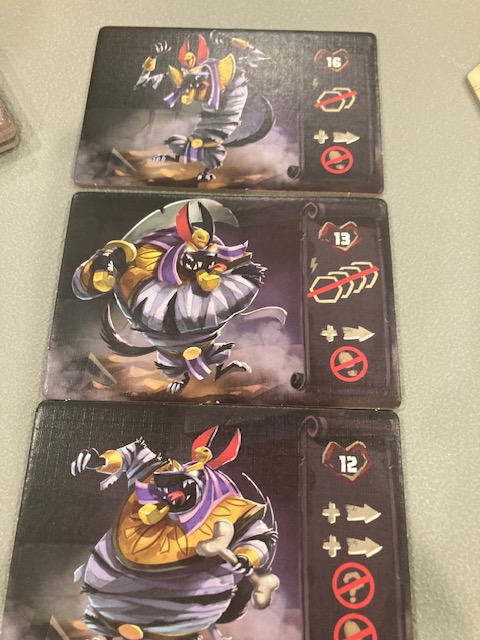
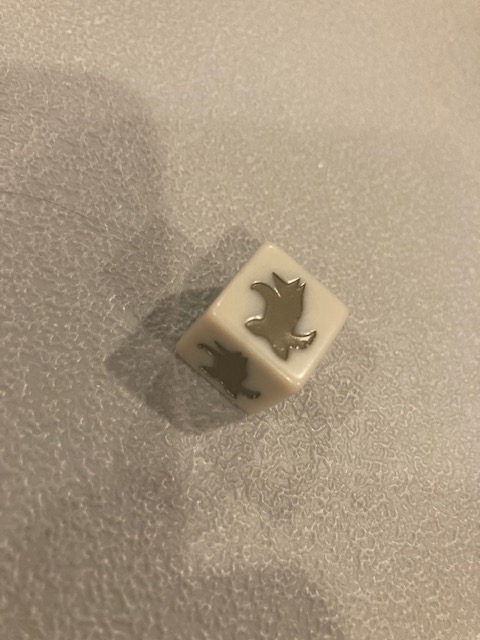
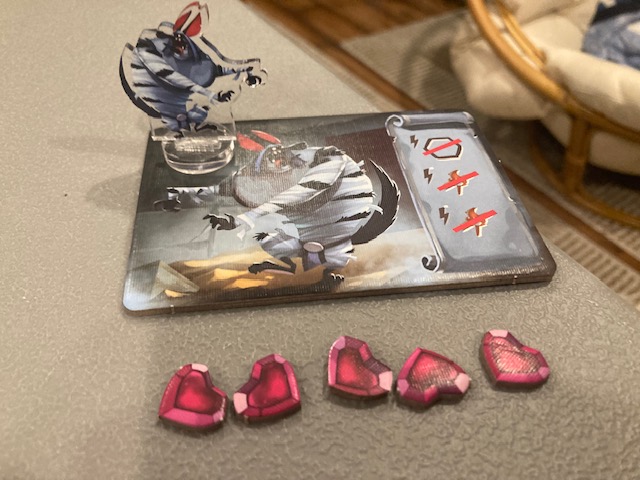
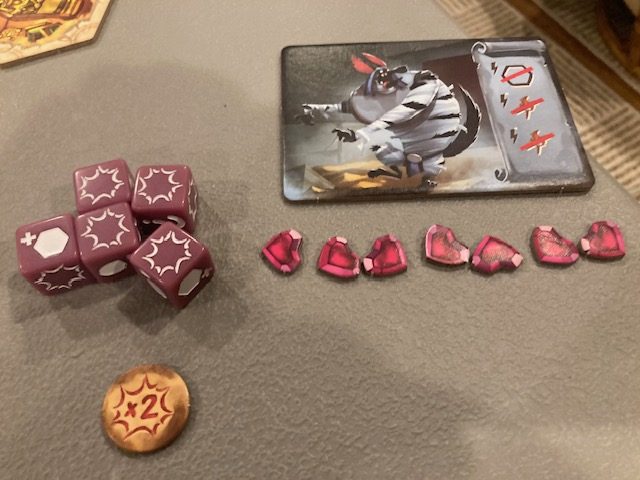
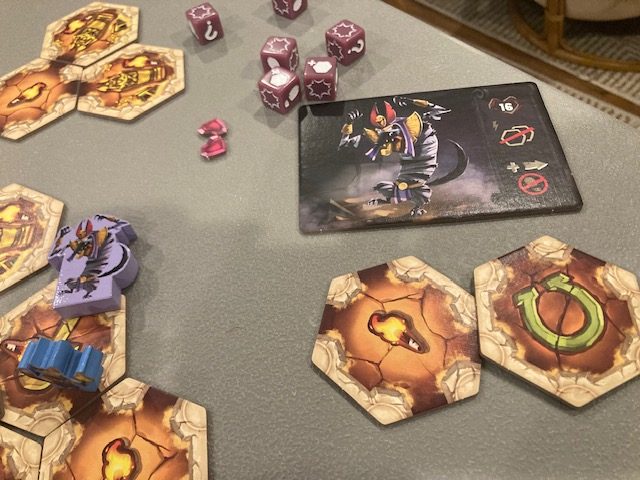
Each cyber pet is actually quite different! The cards (above) describe the differences: how many Dodge dice, how many hit points, what actions you can take and their costs, and their special powers! If you look closely, you can see that each pet is very different than the others!
For example, see above for the Actions of Freya with their cost!
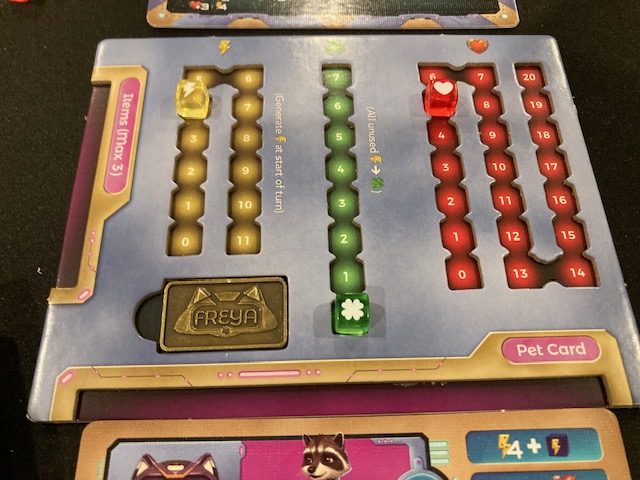
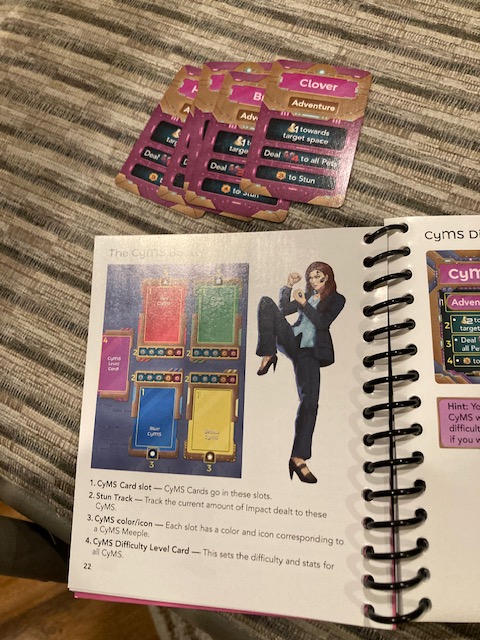
Each cyber pet gets a nice dual-layered board for marking energy, luck, hot points, and “sneak status”.
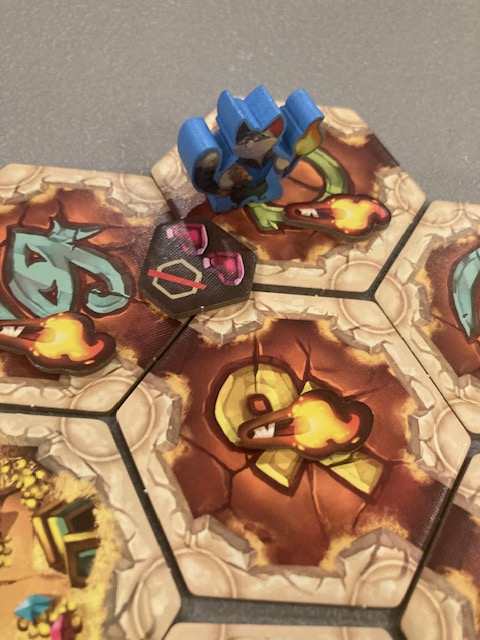
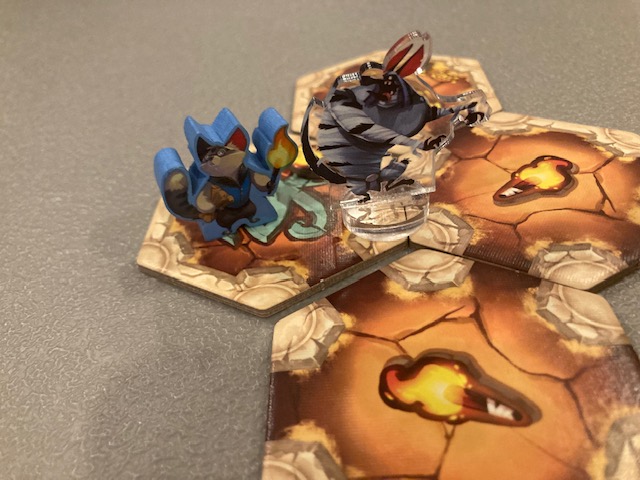
On a cyber pet’s turn, it is either sneaking (metal name token above turned upside down) or in AGGRO mode. When sneaking, most things cost more energy (except for healing which is cheaper) and that pet can’t attack! When the pet has the AGGRO token (bigger metal token), it may attack … but the bad guys are naturally drawn to it AND it takes one more damage from them! Choosing when to sneak and AGGRO is an important strategic part of the game!
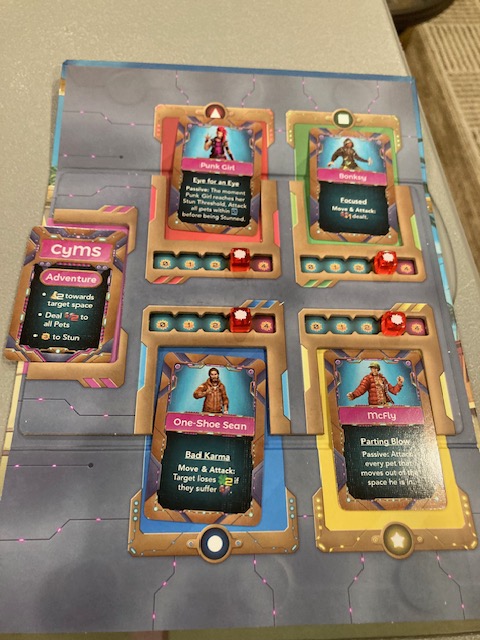
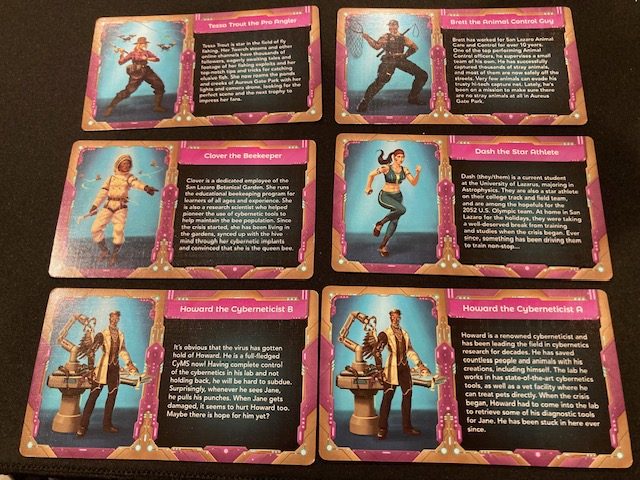
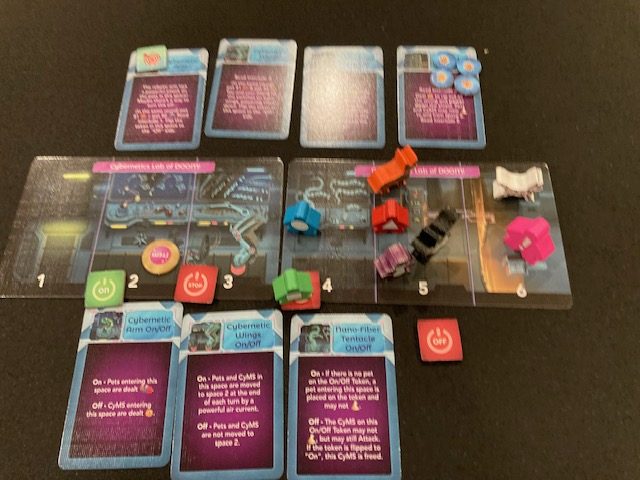
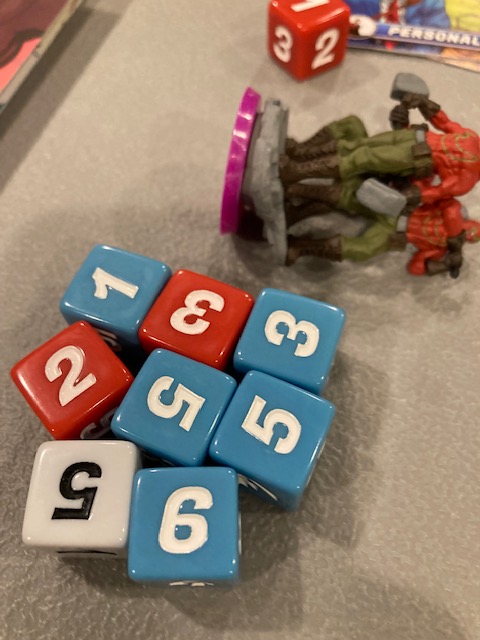
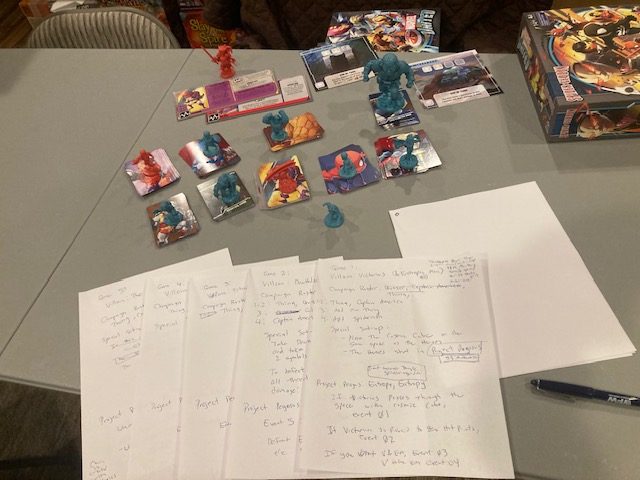
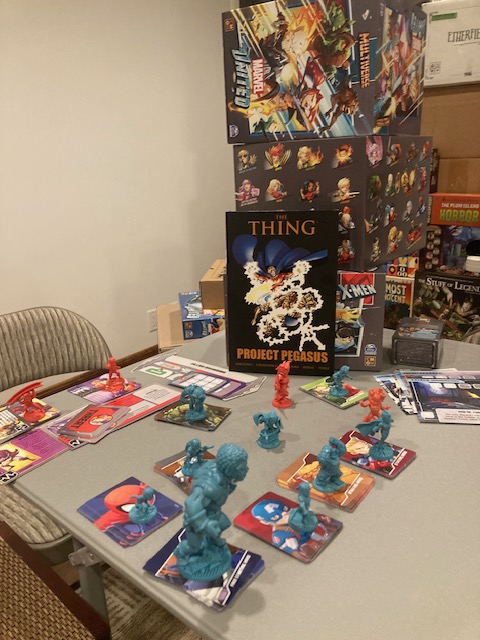
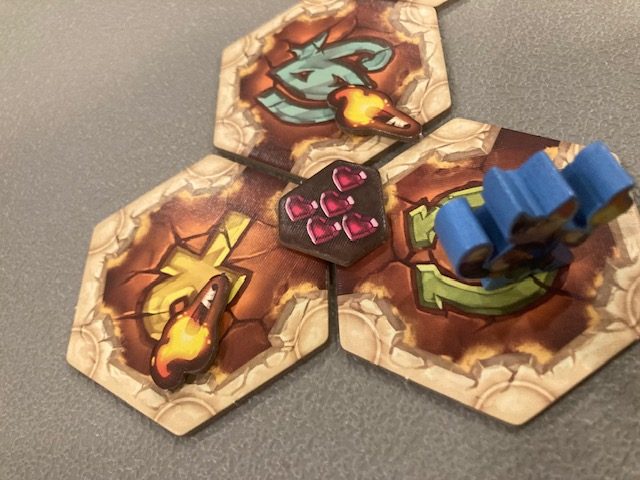
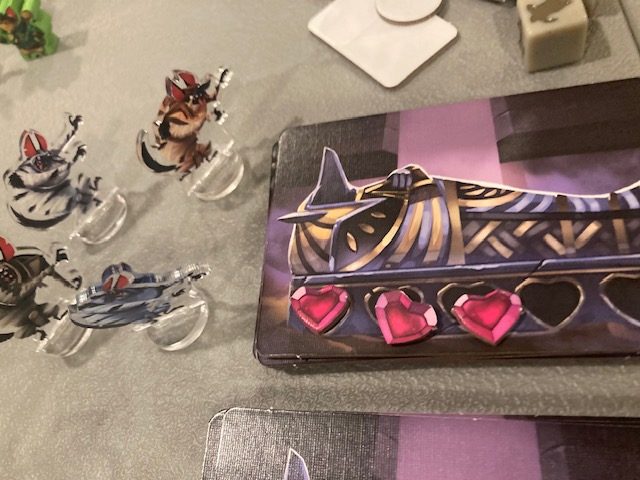
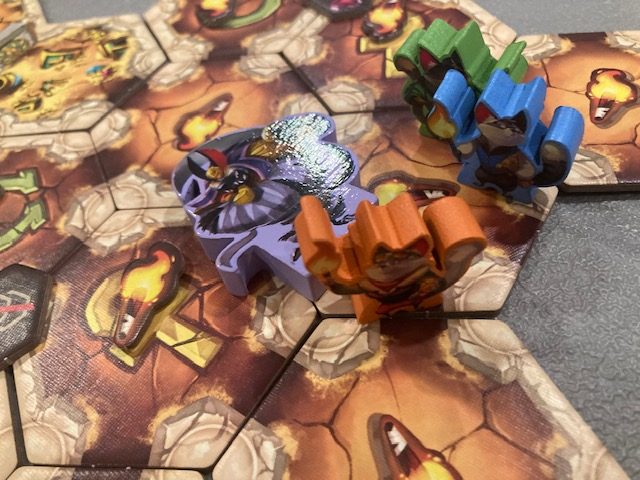
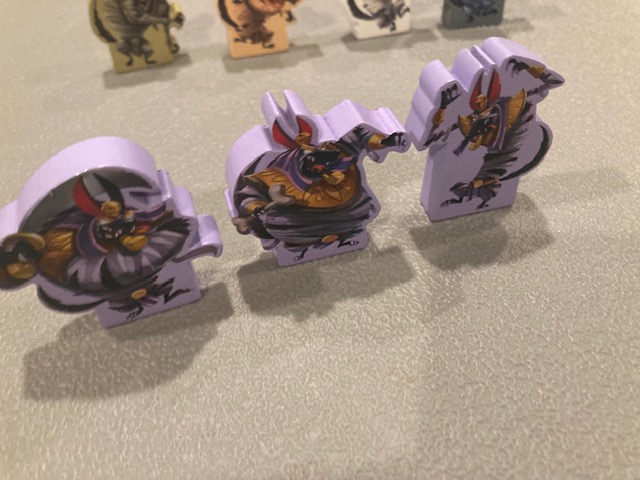
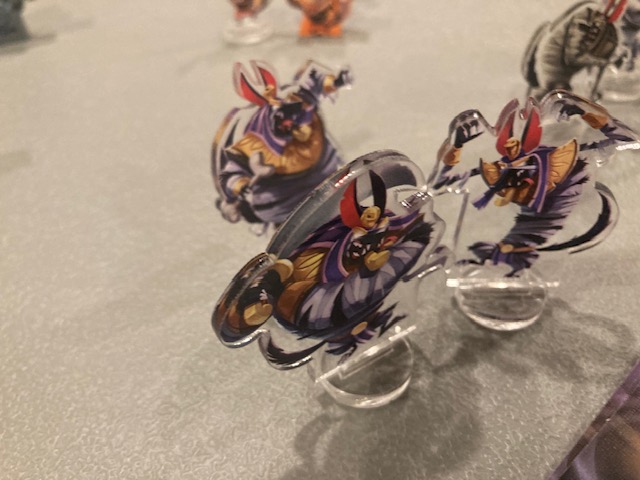
There are bad guys to fight: this is a boss-battler after all! The bad guys are the red, green, blue, yellow and BIG BOSS pink meeples! See above!
You generally have 4 CyMS (Cyber-Memetic Sociopaths) … these are generally “the minions” of the big bad boss. See above as we choose 4 for the start of the game! (That dual layer board with the CyMS is the top of the box. …. what??)
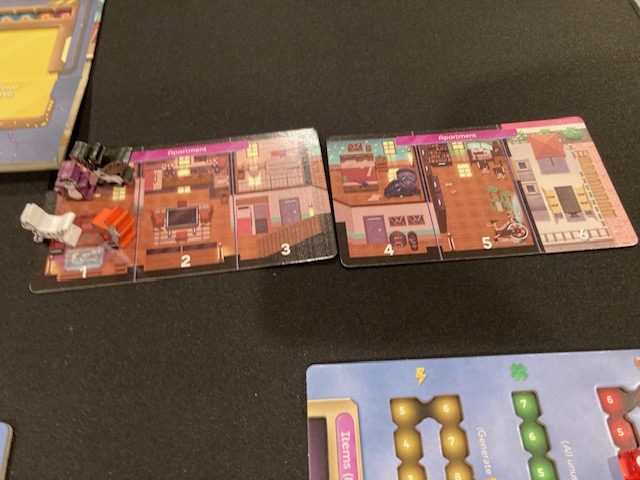
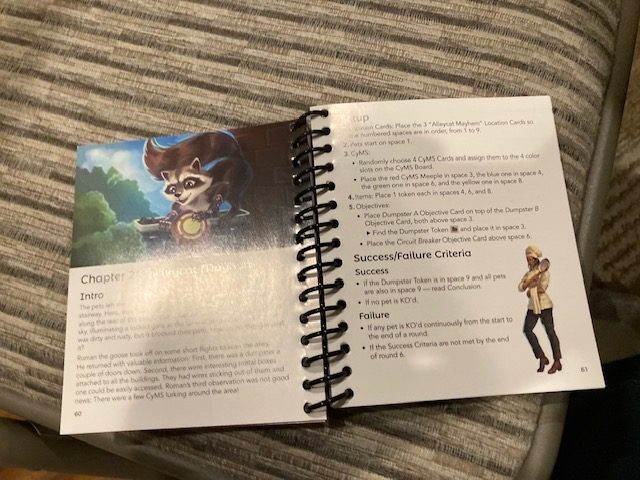
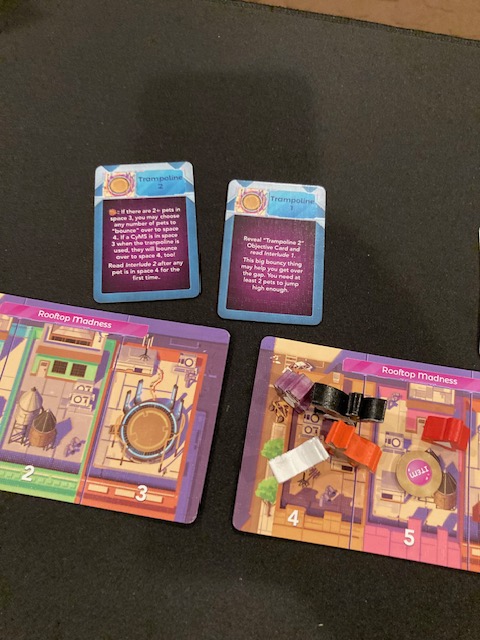
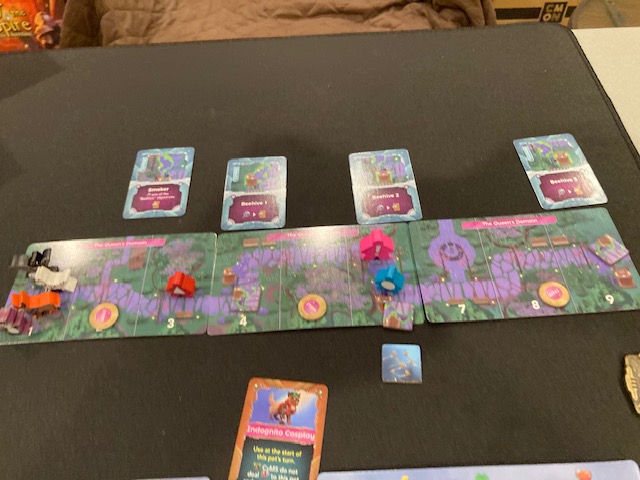
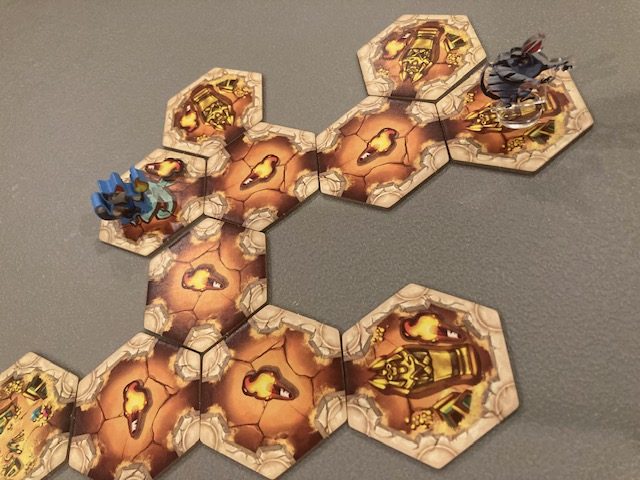
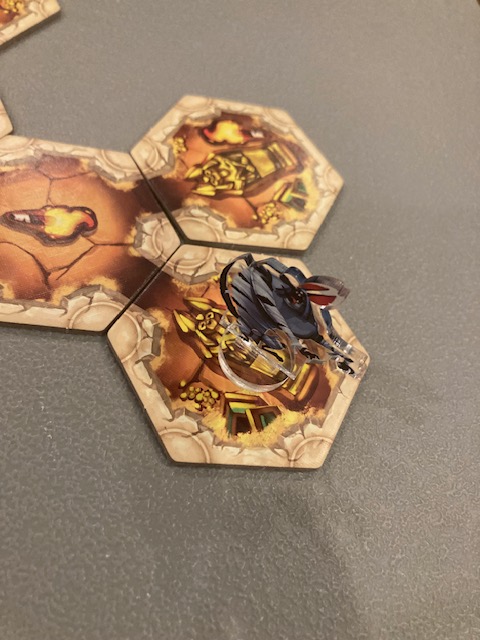
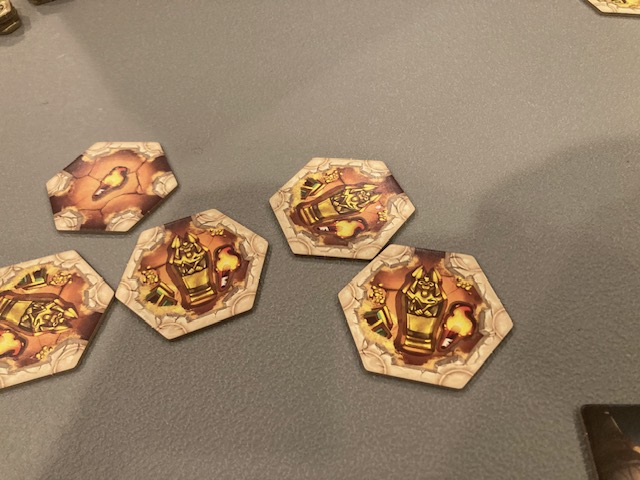
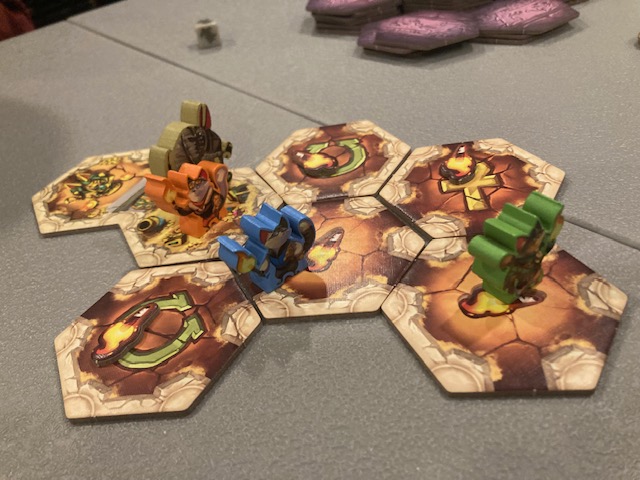
Each Chapter on the campaign happens in a group of Location cards: See above for the apartment (where the cyber pets live and start on space 1).
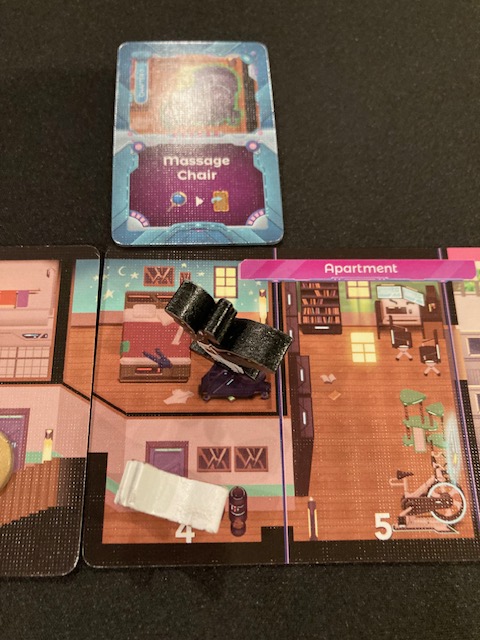
Each Location generally has some items of interest (like the Massage chair) where you have to “interact” or “look at it” to activate it!
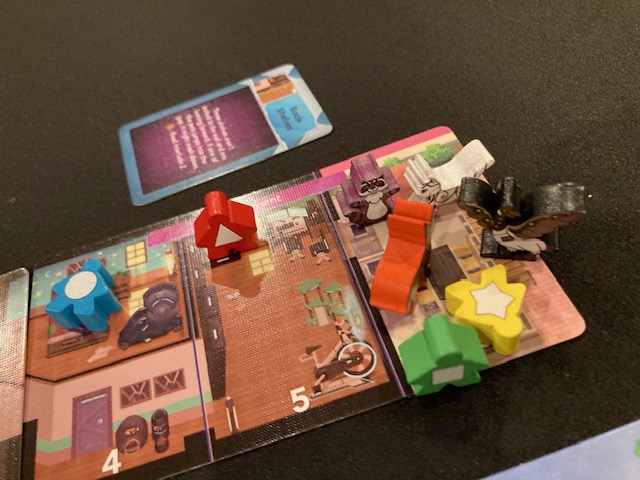
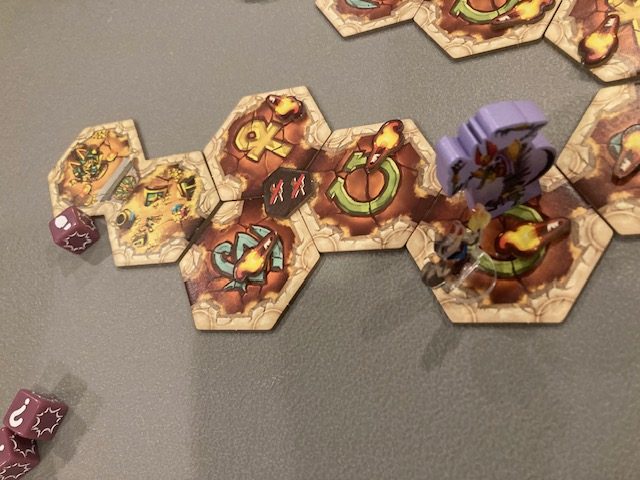
Once the cyber pets get comfortable with the mechanics of the game (chapter 0), the CyMS come out! See above as the cyber pets try to get out of the apartment with the CyMS chasing them!
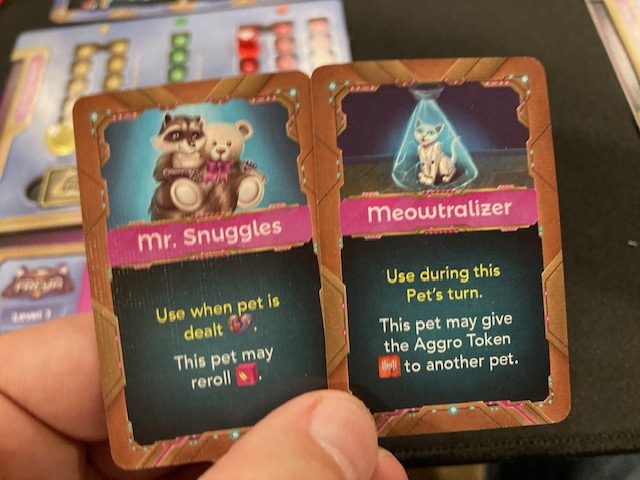
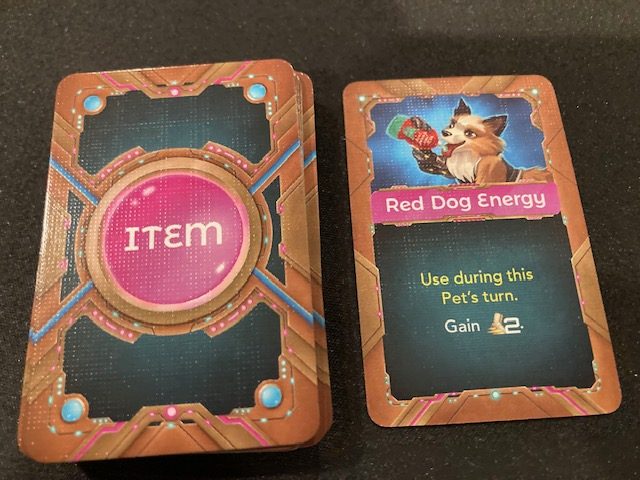
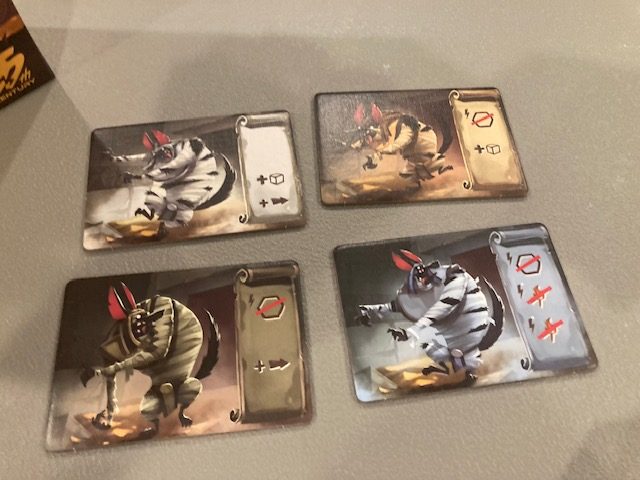
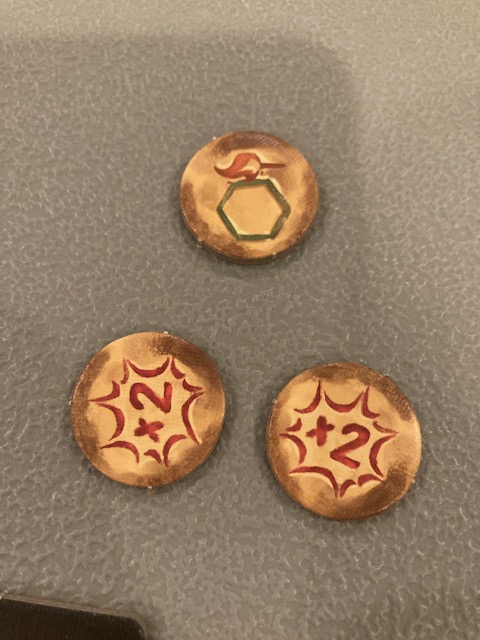
Over the course of the game, you get many things to help you in your quest to find your master! Sometimes you get Items like above (which are one shots) …
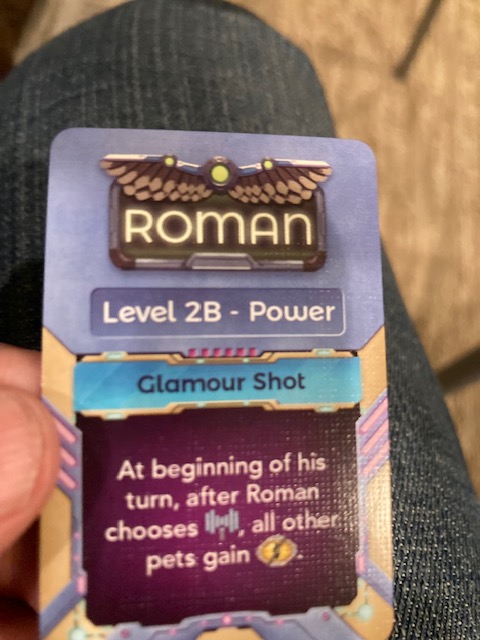
Or you may get extra powers that help you! See above as Roman gets a Level 2 power!
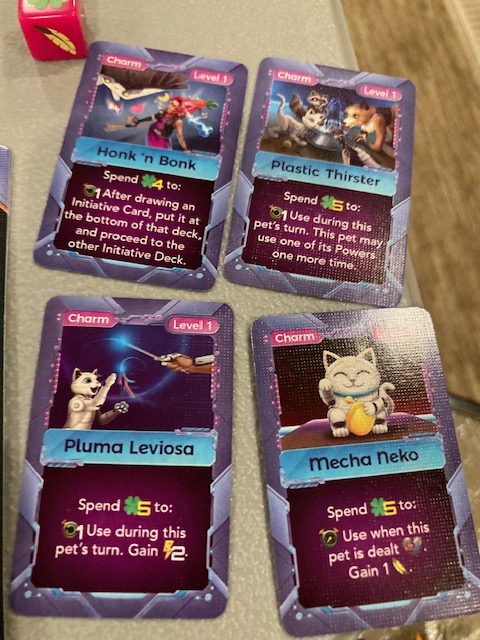
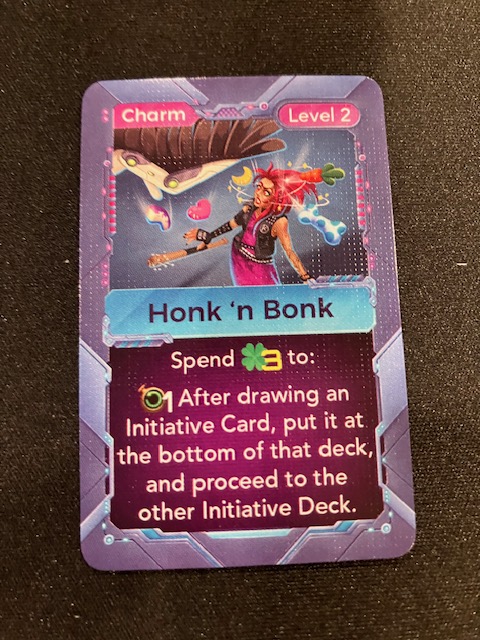
There’s also “Charms” which are permanent items that are usually powered by the “luck” resource.
Finally, each cyber pet levels up as they get further into the campaign See above as Roman is on Level 3 … which influences his hit points, powers, and actions!
At the end of most chapters, the pets get some kind of upgrade, and usually it’s a choice! Level up the character card? Get a charm? Get one of two powers? The pets really do feel like they get better as you play!
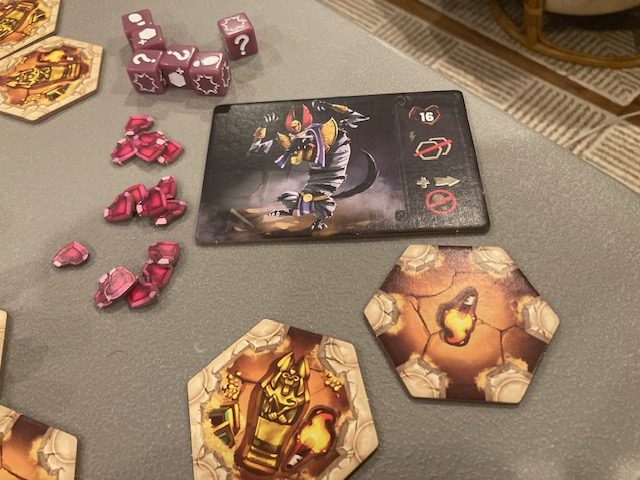
This is a boss-battler, so there will be big-bad bosses that you fight long the way! See above for the bosses you may encounter!! The story has a few turns along the way, so you may not see all the bosses on your first play-through!
In the end, the components are a little small so they can fit in the smaller box, but they are all well-labelled and very readable I have played through at least one full campaign, and I never had a problem with the smaller components: they are quite nice for this little game. The theme is a bit odd with cyber pets. And the game is surprisingly small. So, this is an odd little duck of a game! (EDITOR: maybe better said, this is an odd little goose … since Roman is a GOOSE not a duck …)
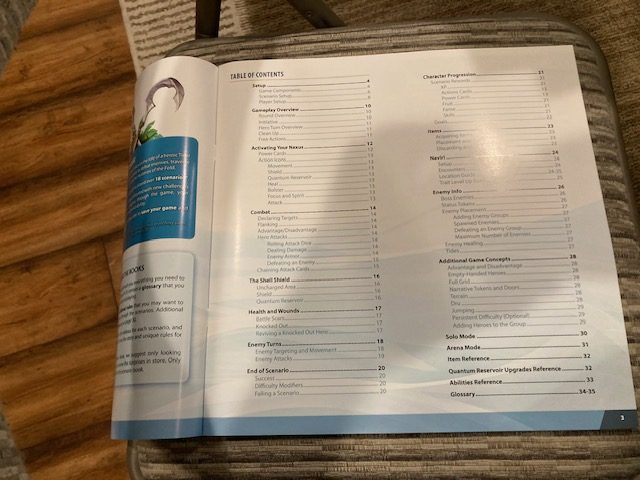
Rulebook and Campaign Book
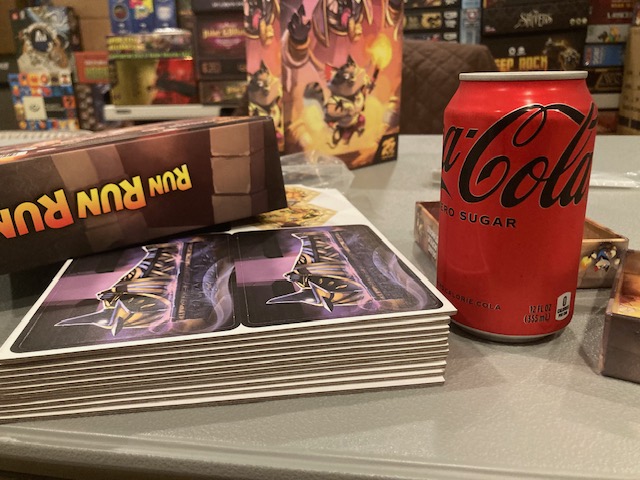
The rules and campaign are all found in this little spiral bound notebook of about 108 pages (yes, 108 pages!). See the Coke can above for perspective: I wanted to point out how little the rulebook is!
This is about a B or B- on the Chair Test: I can leave the rulebook open on the chair next to me while I am playing , but the form factor is just a little too small; the font is just a little too small to be well-readable. Since the spiral notebook stays open, we leave the grade in the “B” region, as it is still very usable.
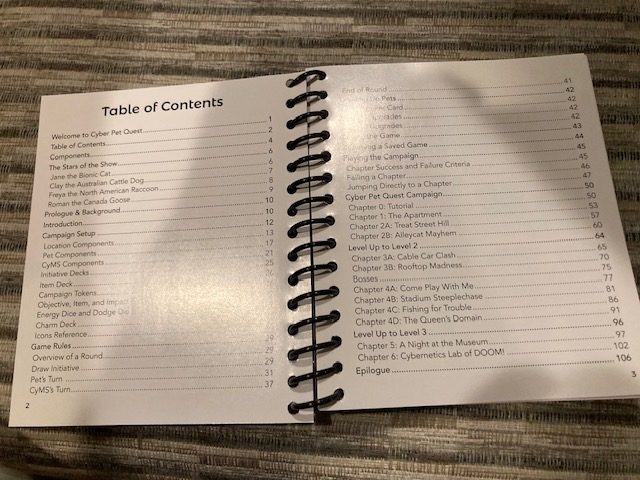
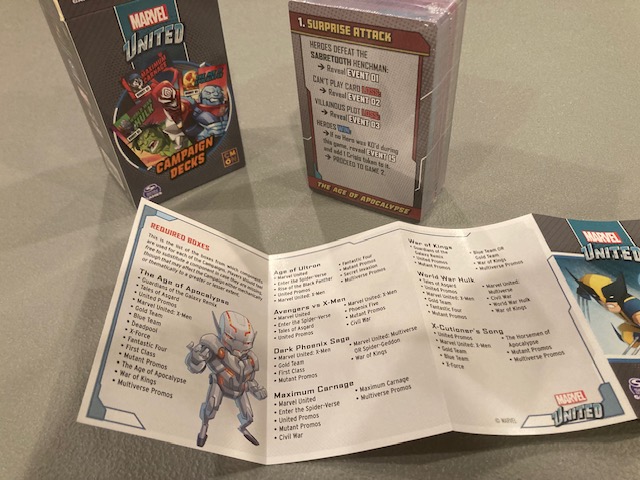
Now, the rulebook doesn’t have an index or glossary (booo!), but it does have a nice Table of Content (see above).
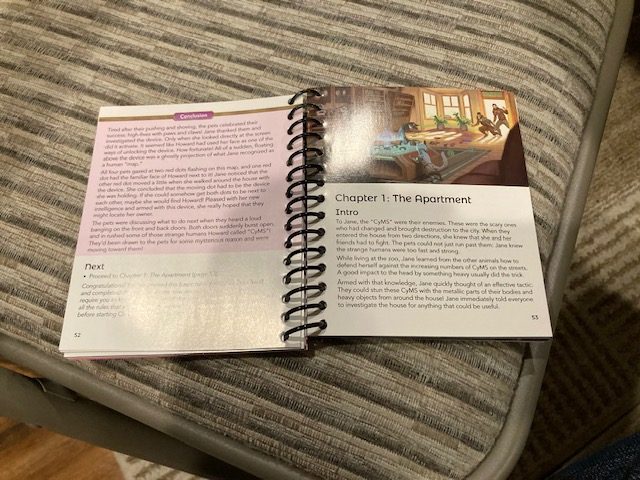
The rulebook is replete with Story! It starts off with a nice intro (see above), and continues a story (I should hope so with 108 pages of rules and campaign!).
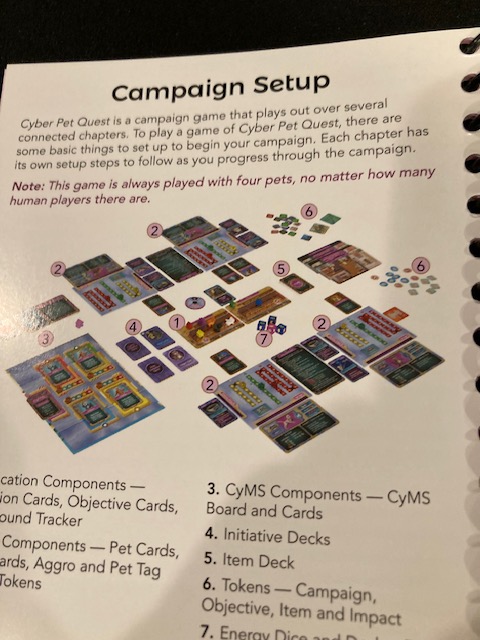
Although there are pictures of most of the major components, there are aren’t a lot of pictures of set-up except the one above. There were MANY MANY time where the rules referred to some component, and I just had to guess which it was (I found the sleeper components, I think I found the Horde token, but I never found the Hack tokens).
The rules were okay. There were a lot of time when I really wish there had been further elaborations of some of the rules. Many times, I just make the best call I could knowing the basics of the game.
There’s a lot of cute story here, the rules are pretty good at getting us going, but there were just too many times when things were underspecified (which token? Explain this rule please?) so I can’t call this this a good rulebook.
It was adequate to pretty good. I was able to play the game and move forward quickly most of the time.
Solo Rules
So, Cyber Pet Quest does support solo play! (Thank you for following Saunders’ Law!)
Unfortunately, the solo mode for Cyber Pet Quest is “play and operate all 4 Cyper Pets!” In fact, at any player count, all 4 Cyber Pets must be in the game at the same time!
Some of you might remember Set A Watch: Forsaken Islesfrom earlier this year: it’s solo mode also has the players operate all four characters at the same time! See above!
In Set A Watch, although we initially had our reservations about the 4-character solo mode, it really grew on us and became the default way we played the campaign game Set A Watch: Doomed Run! See above. This is because the Set A Watch characters are simple enough that it’s not too much work to context switch between them.
Marvel Zombies: Heroes Resistance is harder to play solo with 4 characters because the characters get more and more complicated as the game goes on.
Cyber Pet Quest sits somewhere between Marvel Zombies: Heroes Resistance and Set A Watch. At the beginning of the campaign, it’s pretty easy to context switch between the Cyber Pet characters as they don’t have too many powers, items, charms or actions. So, the initial games are easier to play. But later in the campaign, after each character has levelled-up significantly, each character has a wide array of Powers! Charms! Actions! Each character gets MUCH harder to play, as there so much to do!
See above as the characters have so many cards in the final game: Powers, Charms, Items!!! I admit, the sheer amount of options for each character does get overwhelming … BUT … as the solo player, I have been playing and upgrading the characters by myself! It’s gratifying to see all the characters get better. I think since they have been levelling up gradually (between campaigns), it doesn’t feel that bad. I think it’s actually harder in Marvel Zombies: Heroes’ Resistance to deal with the powers creep as the characters go up quickly in the same game! At least with Cyber Pet Quest, you have a chance to become familiar with the new powers/abilities between games.
Still, there is a lot of context switching between characters as you play. I can recommend playing the first Chapter 0 solo to see if you think you can handle this 4 character solo mode; even if you don’t like this solo mode, the Chapter 0 solo mode makes it easy to learn the base mechanics to teach your friends.
I have to say, despite the complexity of the 4-character solo game, I had fun! I found myself playing through the entire 6+ campaign game in a solo mode last weekend! Wait, what?? It so easy to play each game, it was fun to level-up, it was interesting to see what happened next. I must admit, I am a little surprised I ended up playing the entire campaign solo last weekend! But I was having fun! And the fact that each chapter is under an hour contributed to that.
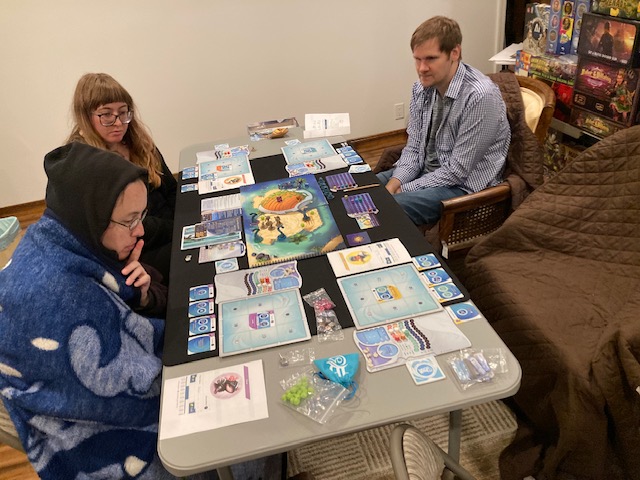
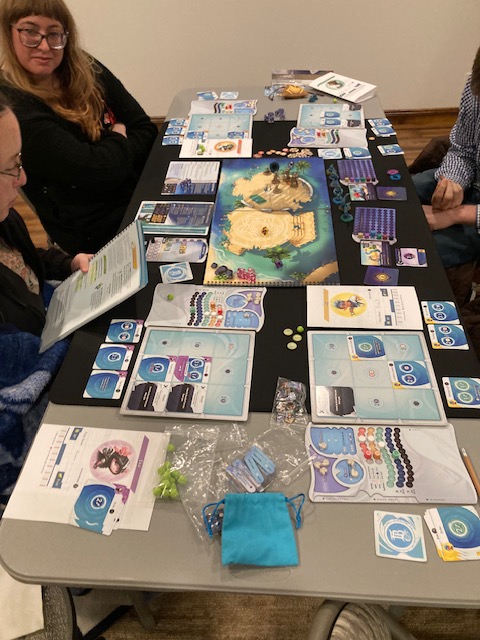
Cooperative Play
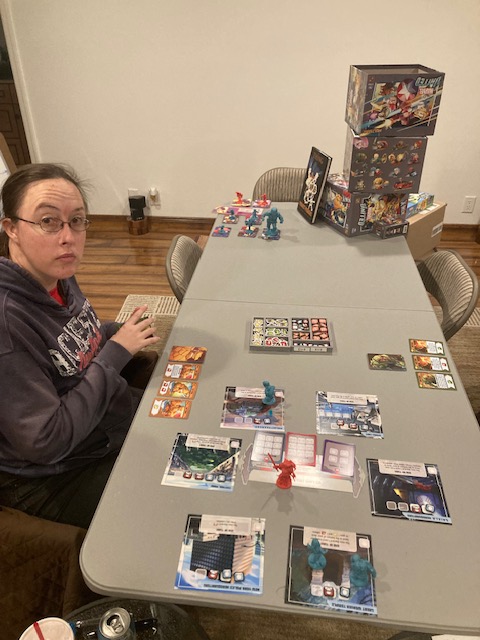
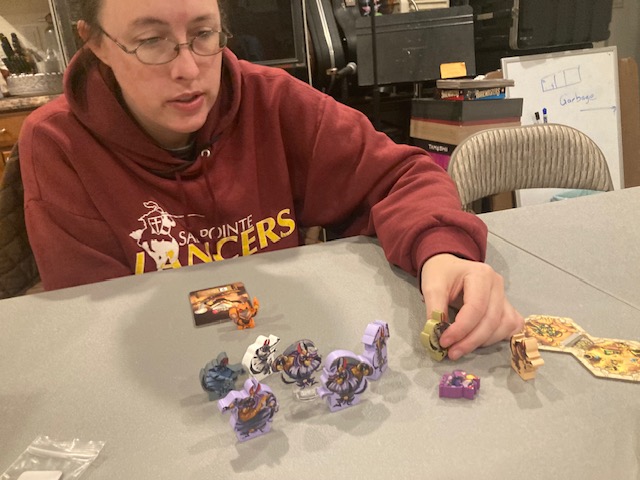
Cooperative mode is a little bit more fun than solo mode: for one, you have more people controlling the 4 Cyber Pets! Above, Teresa and I split up the Cyber Pets so that she was operating two (Roman and Freya) and I was operating two (Jane and Clay). I do think it’s interesting that we got very invested in our characters; so much so that we really did know them by name!
This is a light cooperative campaign, where cooperation seemed to happen pretty naturally. Clay was VERY good at taking out the CyMS, while Freya was VERY good at dealing with items and passing them around. Jane was the mover, getting to far-away stuff and distracting the CyMS. And finally good old Roman was good at doing a little bit of everything! We focused on each pet’s strengths and naturally felt empowered and potent as we moved around the apartment.
The game is light and fun! I suppose the best recommendations we can give this game is
1) I am playing it again cooperatively EVEN though I have already gone through the entire campaign! 2) We are planning to play more games (cooperatively) in the future
In a family situation, I can see this “4 characters” working out okay! Maybe give the “favorite” character to the little ones (Teresa really liked Roman, so she got Roman), but they can still give input as how the rest of the pets work. In other words, assign the pets in the way that brings the kidlets in the most! And the “adults” can just make sure the game stays on track!
What I Liked
Game Length: Even though this is a campaign game, I like that each chapter feels “doable” in under an hour. The game box says the game is 30-45 minutes and that’s about right! (Oh! And you can jump into any single game of the campaign if you want a one-shot! There’s a nice page that describes “get theses upgrades for set-up if you just want to play a single session!”)
Sense of Humor: This game is kind of light and fluffy; it has a sense of humor! See above as one of the cards is Red Dog Energy! And there is a Cat Videos on the Internet item as well! This is a campaign game, but it’s light enough that the game never feels “overwhelming”. It just kind of fun.
Readable: I was very worried, since this game was so small, that the components would suffer readability issues. Although I wish the rulebook was bigger, in general, everything was readable at the small size!
Story: The story is quite cute and keeps you in the game. It’s a light story, but still engaging.
Upgrades: At the end of each chapter, there are SO MANY ways you can get upgrades! Charms! Powers! Levelling-Up! And you get choices: Level 1 or Level 2? Side A or Side B? It feels really great to be moving foward and making so many choices! We saw a lot of this same feeling in Tidal Blades 2: Rise of the Unfoldersfrom a few weeks ago!
Cooperation: There were a number of mechanisms in the game that encouraged cooperation. The Pet Collars that you got in the very beginning allowed Cyber Pets to do extra stuff, but only if they were close to other pets! This made for interesting tensions! And many times, there were things to interact with that required TWO cyber pets in the same round to do something! I liked that! It felt like the pets were cooperating to get stuff done!
What I Didn’t Like
Underspecified: As the campaign gets further and further along, it feels like there are more and more places where the game needs a little more elaboration/specification. The final villain you fight has some real questions about how to operate him (Do you round up or down when you halve? How many hit points does he have?), and these kind of questions came up more than they should have during the game. As an experienced gamer, I know when to just make a ruling and move on. But I worry a family-friendly game like this might cause problems for families that aren’t as comfortable with under-specificity. Caveat Emptor.
4-Character Solo Mode: Although I had fun playing the solo mode, the fact that you always have to have all 4 Cyber Pets in play isn’t ideal. I made it work, I had fun, but it’s hard to recommend the solo mode with a 4-character mode.
Left-To-Right: Every set of Locations had the Cyber Pets move left to right. The topology was fixed in a straight line, and the pets almost always had to move all the way to the right from the left. Although this kept a lot of rules simple (with the AGGRO token and CyMS movement), it felt a little “constricting” that every single Location set “moved left-to-right”. It got a little tedious ALWAYS going left-to-right; I wish there had been some more topology to move around in. And I am tired of saying left-to-right.
Turn Order
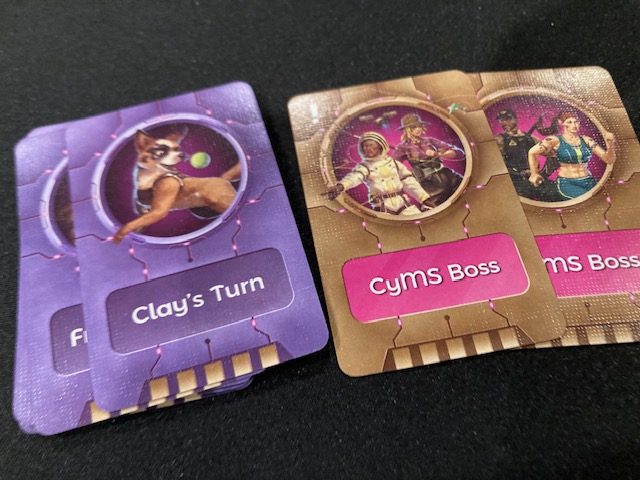
The gameplay for Cyber Pet Quest has something of interest from turn order perspective: the game play alternates between pets and CyMS! It’s still variable, as you don’t know which pet is coming out or which CyMS is coming out, but it keeps the game balanced between the two! Recall we have discussed Variable Player Turn Order many times here at CO-OP Gestalt (see here for a culmination of that discussion)! The solution that Cyber Pet Quest employs against the problems of Variable Turn Order is the same as one from Adventure Tactics: Adventures in Alchemy: the Static Initiative Invariant. Basically, this just means we alternate between Heroes and Villains.
Now, I have to admit, even though I do like this solution overall, I was worried it might still be a little too random. But, I was pleasantly surprised when I saw the game introduce Charms and Powers and Items that would mitigate some of that randomness! See above as the Honk and Bonk Charm gives the pet some agency over turn order! As the game goes on, and the players become more powerful, they CAN affect the turn order!
So, I was happy to see both Static Initiative Invariant here as well as Power/Charms/Items to help the players control the turn order!
Conclusion
I like Cyber Pet Quest. I really didn’t expect to go through the entire campaign solo this last weekend, but I had so much fun playing, I went ahead and finished it! I like heavy campaign games like Tidal Blades 2: Rise of the Unfolders (from a few weeks ago), but sometimes it’s nice to have a light campaign game (like Cyber Pets Quest) that feels “finishable”: there’s only 6+ chapters to this game, and you can do it in a weekend! I am living proof!
There’s just enough wonkiness with the rulebook being underspecified that I worry non-gamers might get frustrated with the rules. Although there’s a lot of unique and interesting set-ups and interactions in the game, sometimes they aren’t that well-specified. Just be aware that you might have to make some rule judgements in order to move forward.
I think this game is better as a cooperative game, since it’s just easier to share control all four cyber pets with more players. But I still quite enjoyed the 4-character mode; but you have to be aware what you are getting into with all the extra context switching!
This is a fun little cooperative boss-battler for 1-4 players; it has a cute story and a light vibe that’s quite enjoyable. I’d give it a 7/10 overall: it loses some points for some of the rules wonkiness and limited left-to-right topology, but Cyber Pets Quest was an overall enjoyable experience!
I am very depressed as I write this. Freedom Five made the #2 spot on my Top 10 Anticipated Cooperative Games from 2021! I was so looking forward to this! But I find myself very disappointed by it.
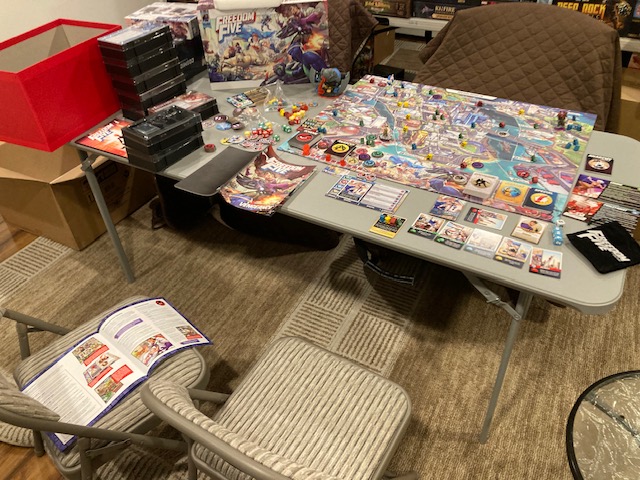
It’s not that I didn’t get a lot of stuff: I got so much! The box arrived at my door October 26, 2024. Freedom Five was on Kickstarter in Oct 2020, and it promised delivery in Nov. 2021. So, it’s three years late. And it’s been four years since I Kickstarted it!
There’s so much stuff here: no, they delivered everything they promised. Well, most of it. I still seem to be missing some stuff … (A Dice Tower unboxing showed them getting more stuff…)
This is going to be a little different than most reviews I do.
What Is This?
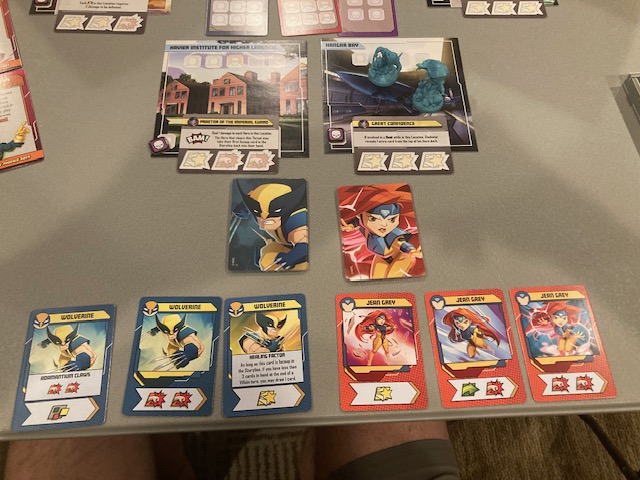
Freedom Five is a basically Defenders of the Realm with Sentinels of the Multiverse theming, i.e, it’s a superhero game! And I love my Superhero games!
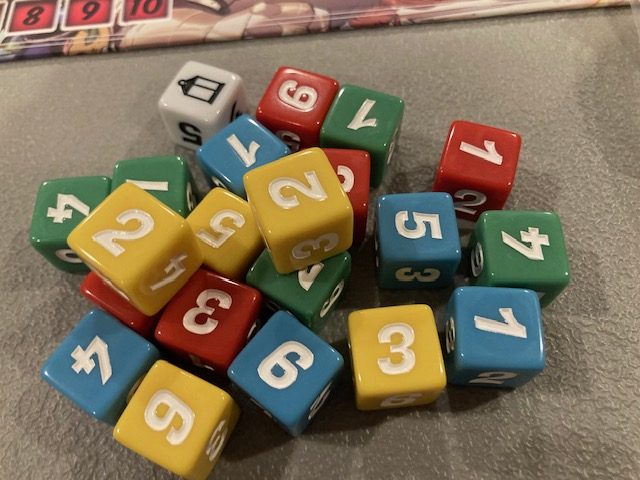
Defenders of the Realm itself is just a gyration on the game system Pandemic: in very coarse terms, Defenders of the Realm is really just Pandemic with dice.
In Pandemic, you fight disease cubes, but the randomness is mostly in the decks of cards; most players turns are very deterministic and players can make progress against the badness. In Defenders of the Realm, every fight or check is a dice roll. Let me repeat that: every fight or check is a dice roll.
Freedom Five is the newest game in the Defenders of the Realm game system. Every fight or check is a dice roll.
Too Random
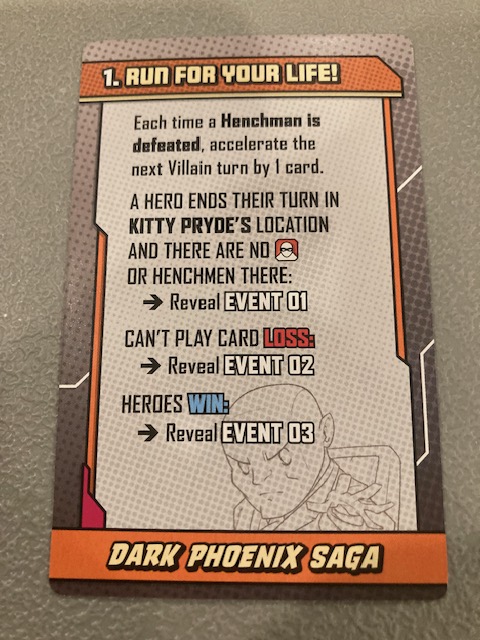
First and foremost: this game, Freedom Five, is simply too random. Everything in the game is a dice check: 1) Fighting Henchmen (like removing disease cubes in Pandemic: you have to roll dice to get rid of Henchmen! And you frequently can’t do anything else on a space until you get rid of all Henchmen!) 2) Skill Checks: roll appropriate dice 3) Anarchy Checks (which are arguably just Skill Checks) 4) Fighting Villains or Masterminds: roll dice based on how many cards you discard
The problem is that the Defenders of the Realm system is simply too random and frankly it feels out-of-date. If this game came out 10 or 20 years ago, Freedom Five would have had quite the “wow” factor. But now, we have seen many games in the Pandemic with dice ilk that do the dice better! Here’s four more recent games that improve the Pandemic with dice genre … two of them are actually Pandemic games!
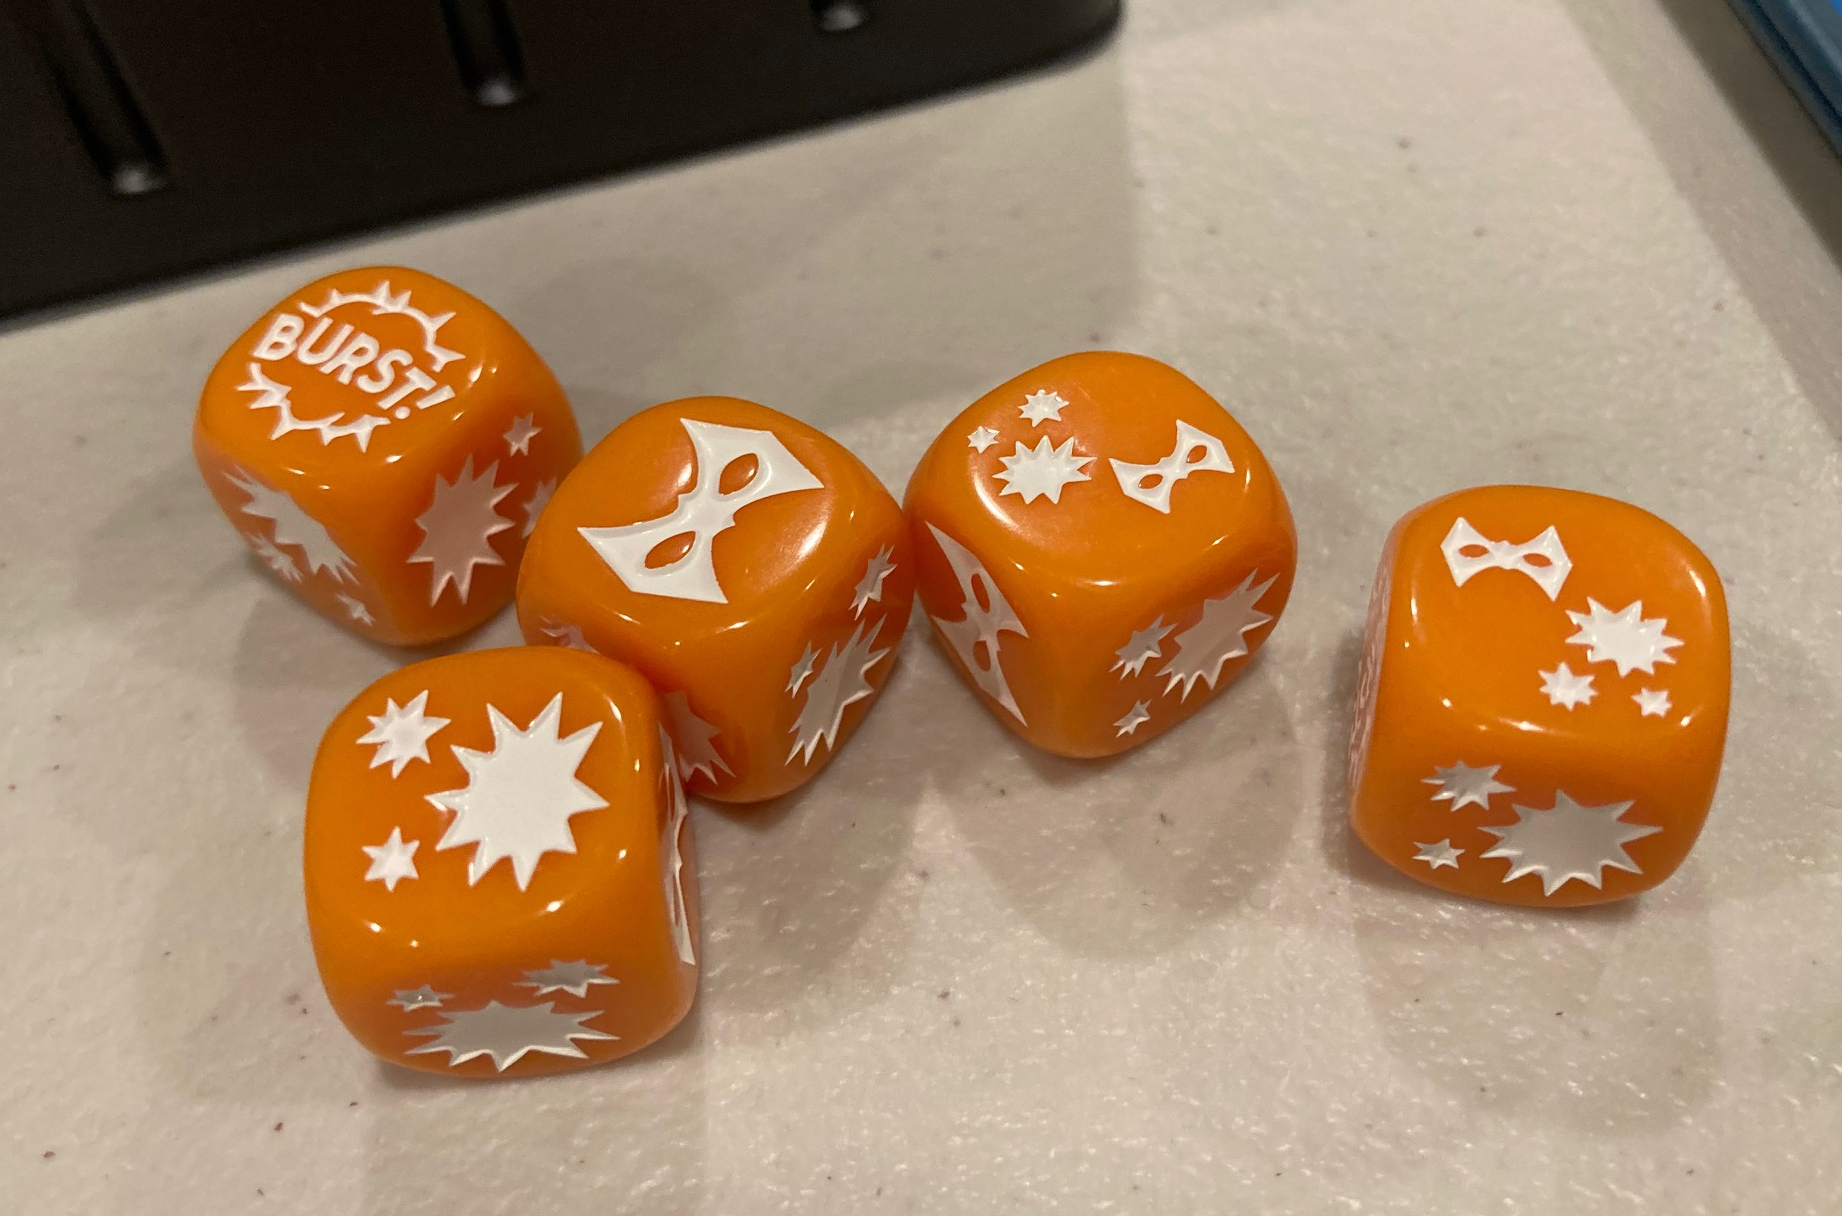
The dice: no bad outcomes! All good stuff!
1) World of Warcraft: A Pandemic System (see our review here). This is Pandemic with dice, but the dice are much less random: essentially, all good outcomes! See above! Some of the outcomes are just slightly better than others. When you roll, you have a really really really good idea what you will get.
2) Star Wars: The Clone Wars (A Pandemic system) (see our review here). The same idea happens here as in World of Warcraft, except the “dice” is one 12-sided die with essentially all good outcomes, again some are slightly better than others (sometimes the hero takes a damage). See above.
Exploding Dice!
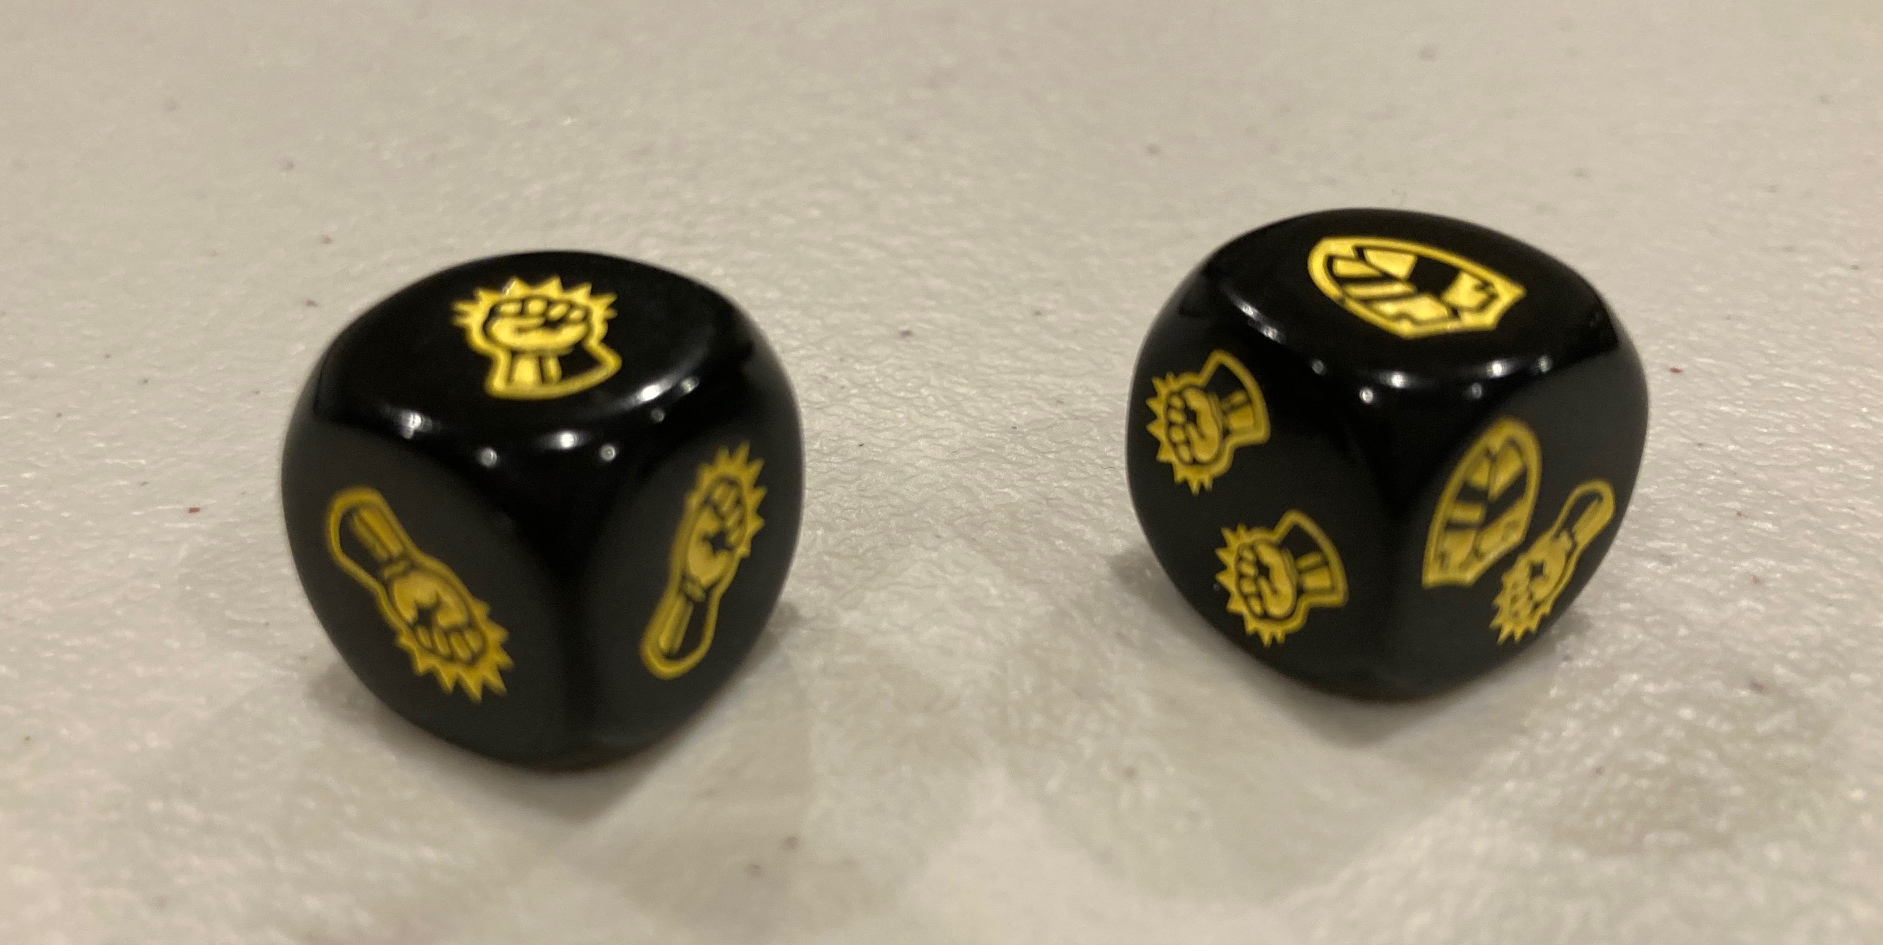
3) Hour of Need with it’s exploding dice! (see our review here). See above! This is one of my favorite dice systems: even if you fail (explosions are successes, masks are failures), you still get a FOCUS token for every failure … which you can turn a failure into a success at a later date! This feels intuitively like you are “learning from your mistakes”! It also makes it so you can still succeed even if you roll poorly! Even if you roll poorly, those FOCUS tokens turn failures into successes!
Given that Hour of Need is a Superhero game, this dice system is perhaps the most relevant here, and we will discuss it more later.
4) Tidal Blades 2: Rise of the Unfolders (see our review here): The dice here are similar to World of Warcraft; they almost always succeed, but if you are clever and have flanking or enough FOCUS, you can do better! Let me repeat that: If you are clever, you can do better!
These four newer games all improve on the basic dice formula; they don’t feel very random and there seems to be a predictable baseline of success which allows you to be smart. Freedom Force feels much more random as you can fail on every die when you roll. You have to roll above a threshold to succeed (just like Defenders of the Realm). You cannot have any sense of how successes you will get, as you have to roll “above” a number, …. but, if you roll all 1s … you are screwed! (Yes, yes, there are dice mitigation methods, but they are limited).
My problem with so many things dependent upon these dice (and almost everything in the game is a dice check) is that Freedom Five is a game that makes me feel impotent and unlucky; I can’t tell you how many turns I had where I simply lost an entire turn (5 actions) when I couldn’t roll anythinggood!! In fact, in some turns, I actually caused more problems: many of the Anarchy checks cause problems when you fail! How is this fun? You are supposed to be a Superhero and you can’t even take down one henchman?????
There is an old mantra: “I’d Rather Be Lucky Than Smart” … and that mantra applies wholesale to Freedom Five. It doesn’t matter how “smart” I play, if I roll poorly (which is easy), I will lose. And that’s the fundamental problem I have with this game: I can’t be smart. I can just try my best and hope I’m lucky. Even worse, though, this is NOT a short game. A game with this much randomness needs to be short, but the first few games I have played have lasted 3 hours?
I don’t feel like I want to play this again because it feels sooooooooooo random. Right now this is a 4/10 for me. You heard me. A Superhero game with great components: a 4/10.
However, there is hope. See below.
Other Problems
There are other problems I had with the game. Given that I waited four years for this, I am still frustrated at some of the issues that came up: these issues also contributed to my 4/10.
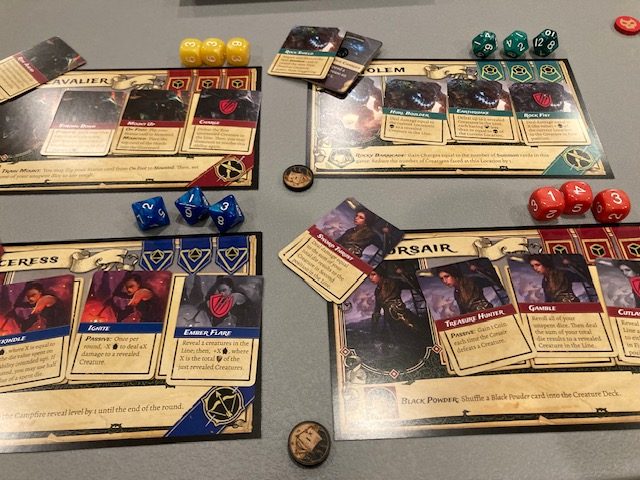
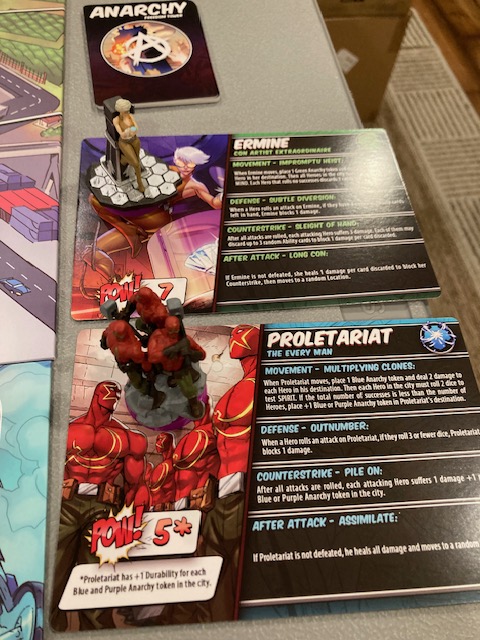
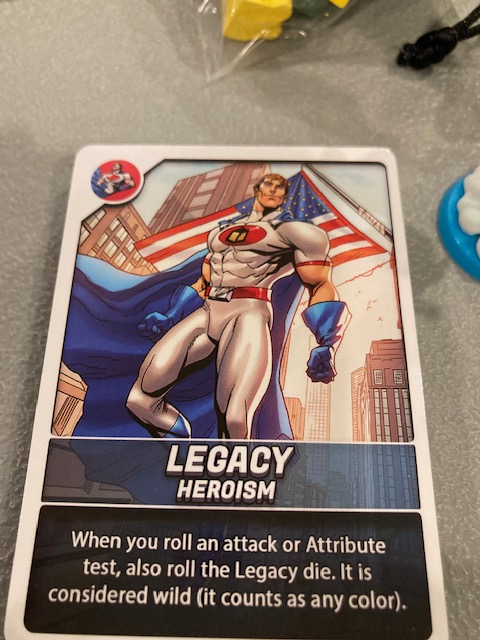
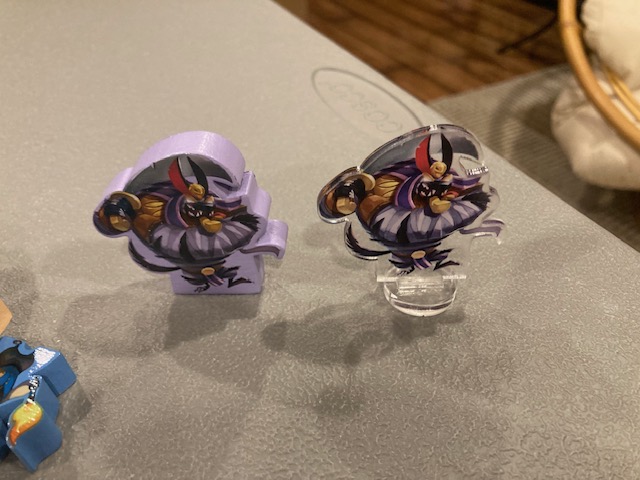
Bases: The bases of the miniatures should be the SAME COLOR as the type on the card! And they are not!!! See above as Proletariat is BLUE type, but his base is purple?? Ermine is green and her base is not green! Looking across the board, I’d like to be able to correlate the Villain to his relevant color!! I don’t think the colors ever change for the Villains, so this is very frustrating visually. This is especially hard after coming off of Tidal Blades 2: Rise of the Unfolders (see our review here) where the minis all had color-coded bases!
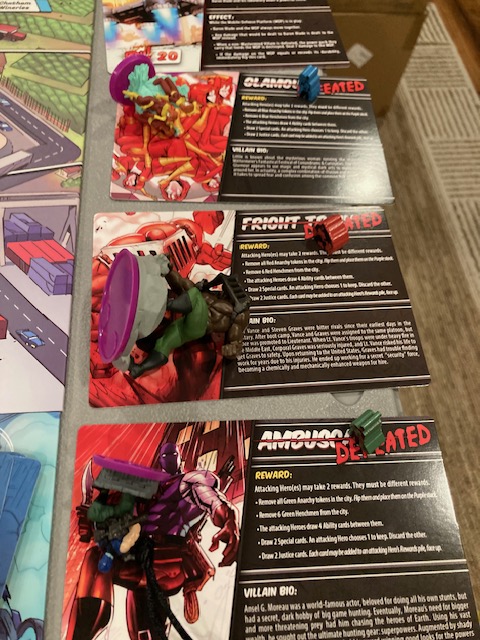
Backs of Villain cards need to be better: When you defeat a villain, you flip his card to show he’s been defeated! But, you have NO IDEA what color he was??? Why do you care? Because the BLUE henchmen (who Proletariat was) are easier to defeat and it’s good to have a visual reminder! But the back of the card has NO INDICATION of what the color of the villain was! (If it had a color-code base … see previous point … that would work).
Hint: I ended up putting a colored meeple on the DEFEATED side so I could remember which Villain was which color. See above. (And get rid of the BIO: replace it with instructions what do when you battle a defeated HENCHMEN).
Back of rulebook: There are no player help cards, or Turn Summary cards. It might have been nice if they put the turn summary on the back of the rulebook. Or symbols or anything useful to gameplay.
Upgrades: When you get an “upgrade” to your deck, THE NEW CARDS AREN’T LABELLED WHERE THEY CAME FROM!!! The “better Flight” card (left) is from envelope #1. From now on, I take pictures of my upgrades so I know where they came from. That way I can reset my game.
Bystanders: There are 42 bystanders. Note the Best Friends #1. You know how unlikely we are to get all 3 best friends? More untethered randomness.
And some bystanders cause penalties. Whee. That was fun. In a game where I have so much randomness, it’s good to know some bystanders will cause issues. It’s maybe thematic, but it’s not fun.
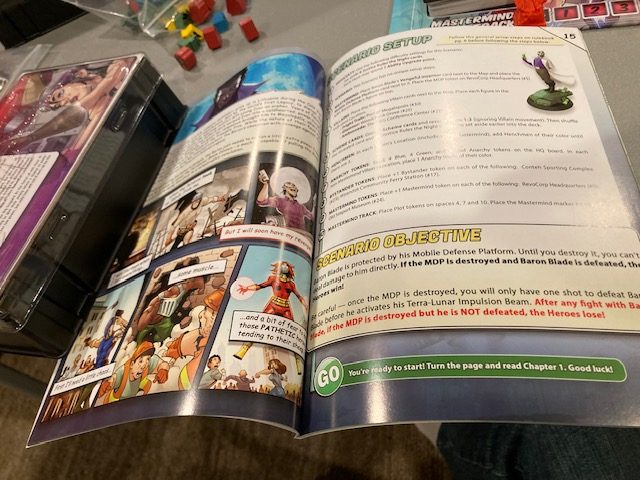
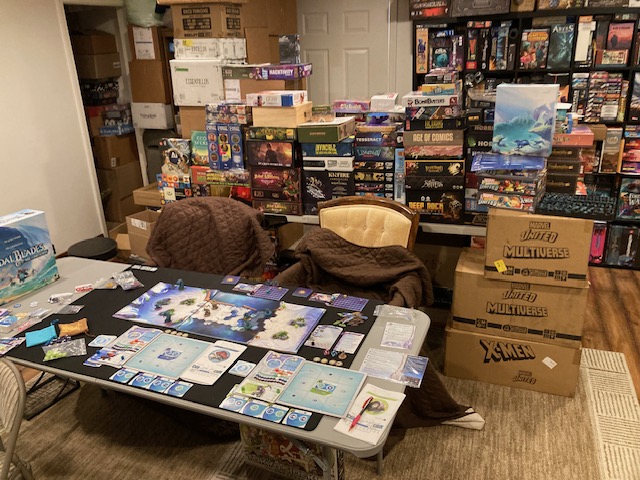
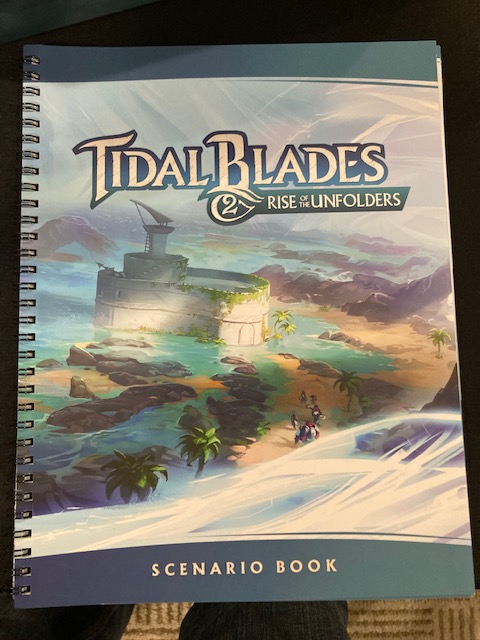
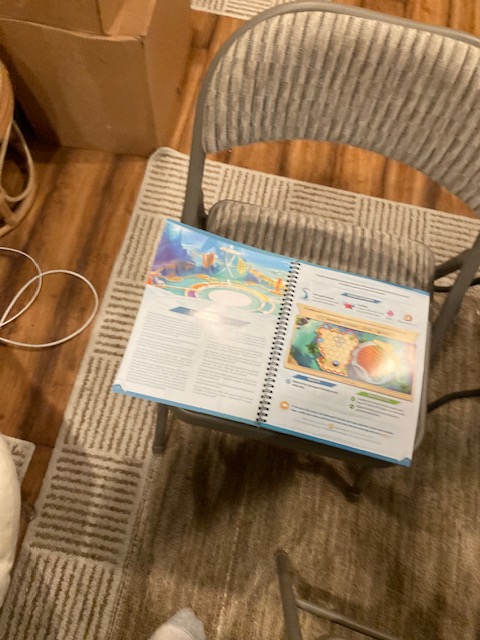
Binding: This binding on the scenario books is UNFORGIVABLE. You have to have the pages of the book open to see the rules, the end of turn actions, and it’s SO HARD TO KEEP OPEN without overfolding/destroying the binding. See above. We saw this WAAAAAY back when we reviewed The Forests of Admiron when we hated the binding on the rulebook. I can’t keep the scenario book open (easily) to look up the rules. This is unforgivable; the scenario book should have been a book that could lay flat.
I ended up using one of the unused character boxes to hold it open. That was a workaround: see above.
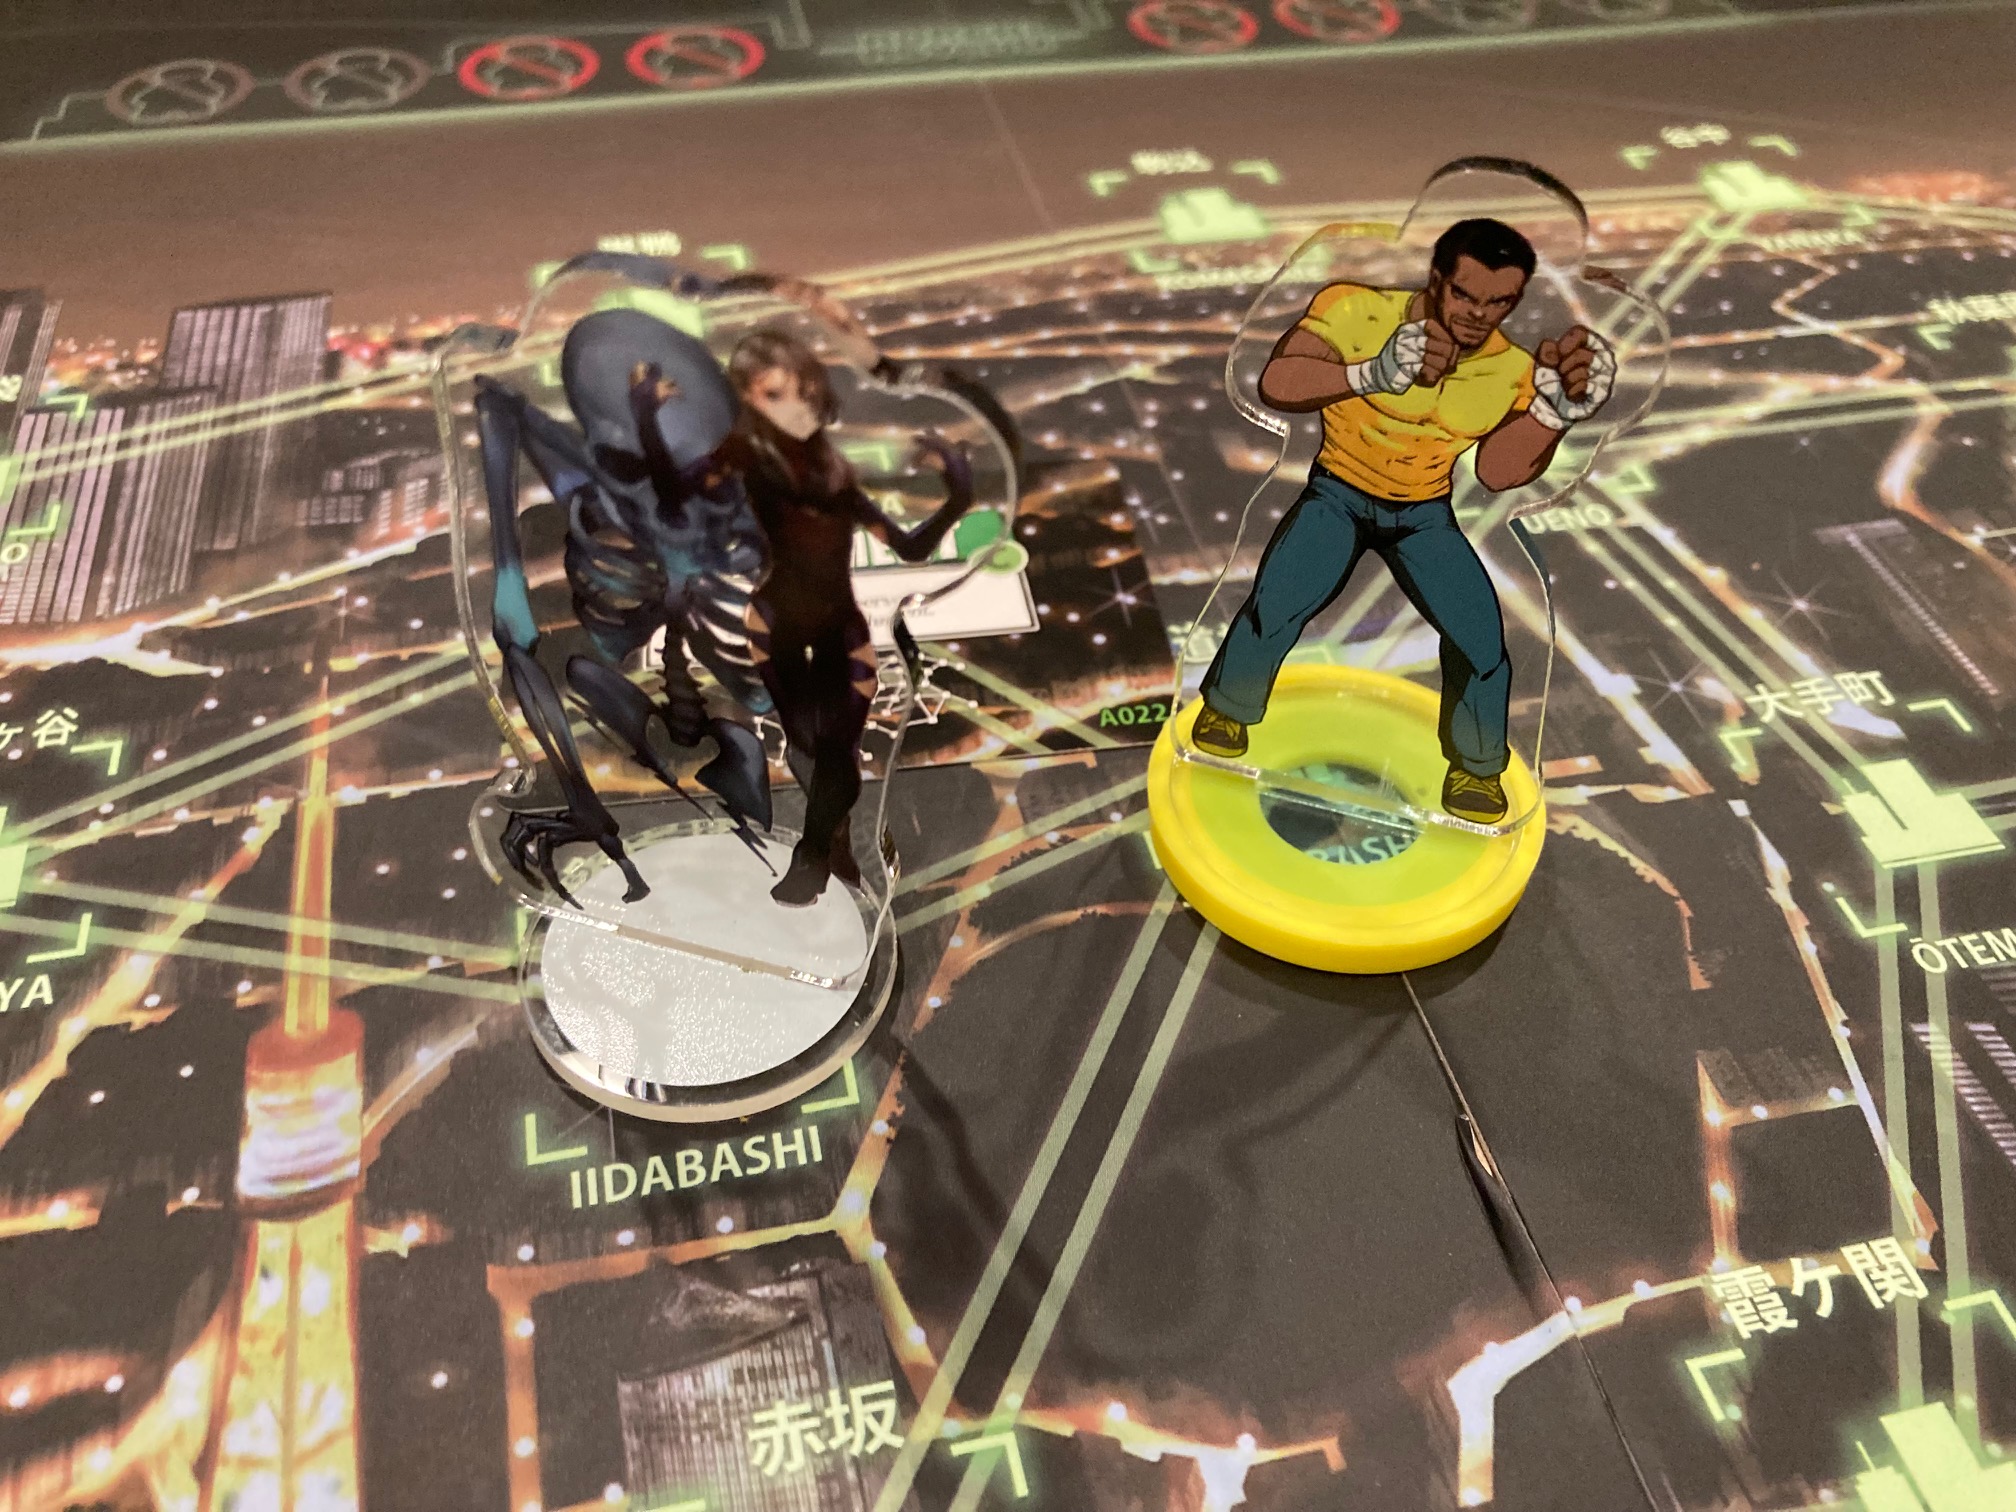
Minis: The minis are just … okay? I got the prepainted minis … and they look a little soul-less? See Legacy above.
Compare the minis to acrylic standees in another superhero game: Tokyo Sidekick (see our review here). See above.
I kind of think Acrylic Standees with Legacy’s art (see above) would have been so much cooler.
No Solo Rules: I played my first three or so games solo, but there is no acknowledgement of solo rules anywhere in the rulebook!? I think you can play solo with one character, but I don’t know. In fact, Legacy has cards that affect “other heroes” … so do they affect no one? Himself only? Does the solo game change slightly so that they affect himself? I think the game is “probably” better with 2-handed solo (the solo player playing two characters), but I wanted ONE SENTENCE in the rulebook:
“You can play Freedom Five solo with one hero: the only change is that any hero card that affects other heroes will instead affect the solo hero.”
I am genuinely surprised there are no solo rules. The only acknowledgement of any solo mode was a 1-5 Players notation on the bottom of the box.
And the bottom of the box is so hard to read!
Conclusion
Several of my friends have asked me “Are you going to sell the game? Or can you come up with some House Rules to save it?” Firstly, I have only played this game solo. It’s possible the game will get better with more people, as they can maybe (maybe) help mitigate some of the randomness I hate so much.
At first I thought: “This game was irreparably random; there’s no way I can fix it“. But all my friends encouraged me to try to come up with some house rules. Given that I spent $375 on all this, maybe it’s worth a little extra time. And after recovering from my depression about this game, I actually think I have some ideas that might help.
Right now, Freedom Five is a 4/10. But that’s only from solo plays. Come back in a few weeks after I get some cooperative plays, and maybe I try some house rules. Maybe then I can recommend it?
I hope so. I really really really want to like this game. As it is right now, I don’t.
UPDATE: I sold it. I couldn’t bring myself to play it anymore, and there’s too much negativity when you propose house rules. Those of you who are interested, I wanted to use the Hour of Need dice system (current failures become future successes) for all dice rolls EXCEPT the four villain rolls! There is a lot of fun when you roll 14 dice to see if you can take out the final Villain! But the piddly dice rolls for Henchmen and stuff, that wasn’t fun; that’s what I think needed the Hour of Need dice system.
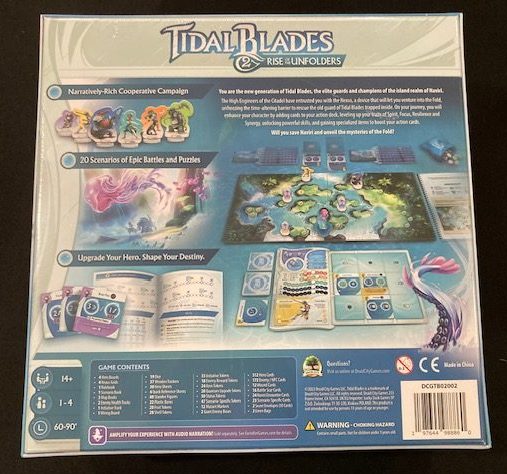
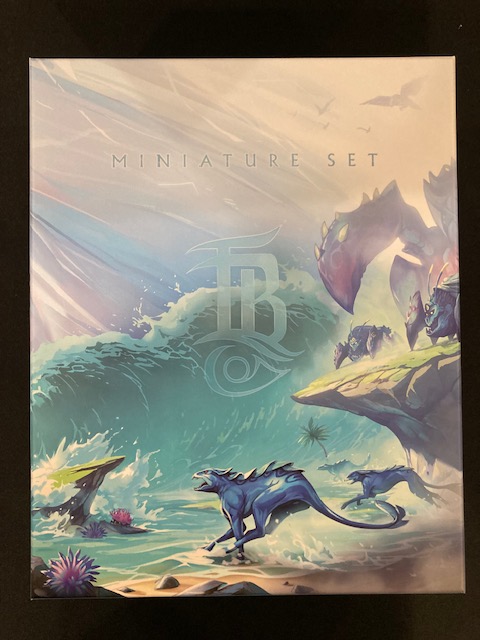
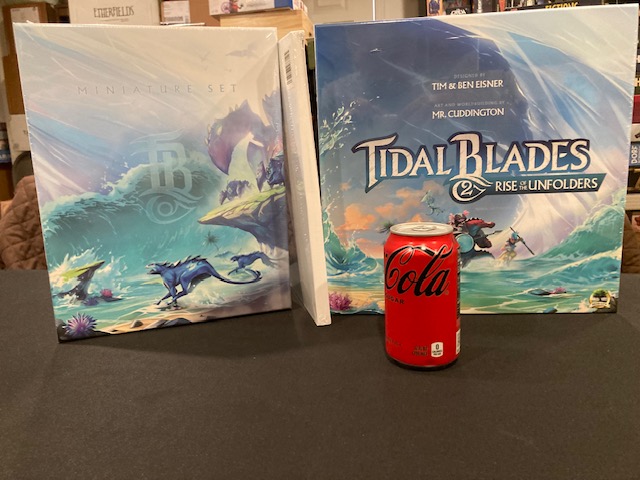
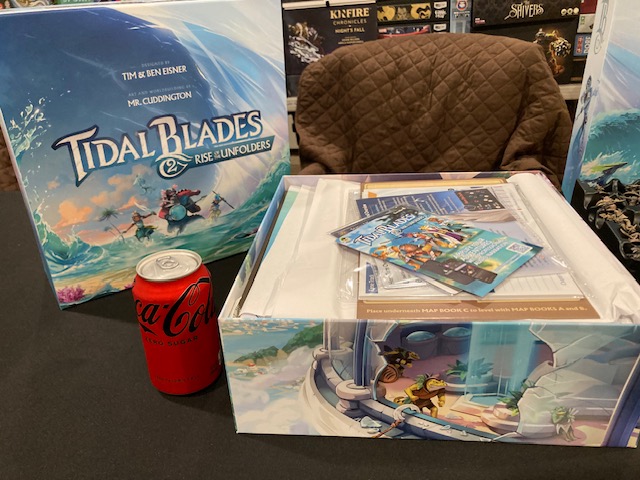
Tidal Blades 2: Rise of the Unfolders is a cooperative campaign that was on Kickstarter back in April 2022. This was the follow on to the original Tidal Blades game (which is really more of a head-to-head skirmish game). I knew nothing about the original Tidal Blades when I backed this: only that the components looked really cool. I backed it because it looked like it had a cool solo and co-op campaign.
I went all-in and got the base game (lower right), the stretch goals (upper), and the miniatures (lower left): See above. This is the deluxe version with awesome miniatures!
The most important thing to realize is that this is a standalone solo or cooperative campaign game! I.e., you don’t need the previous game at all!!!
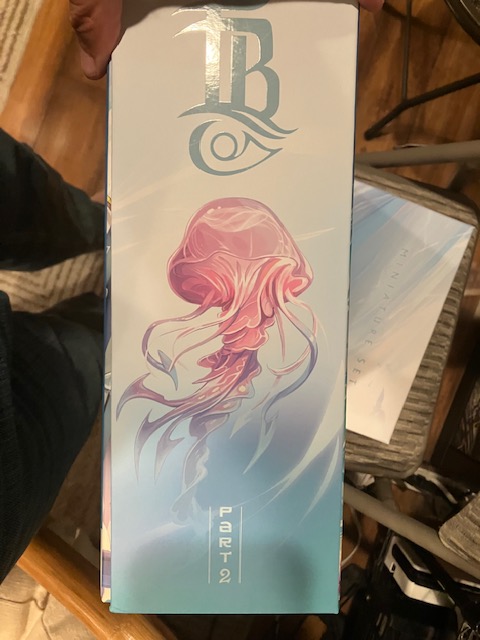
It’s a little confusing because the side of the box says “Part 2” (see above), but this is really just the next game in the same universe! Tidal Blades 2 continues with the ideas of the original Tidal Blades (which was NOT cooperative) but in a solo and cooperative game!
So, in some sense, this is still a skirmish game, as players play cooperatively against monsters in the game. Honestly, this game really gives me a Gloomhaven (see review of Jaws of The Lion here) or Batman: Gotham City Chronicles (solo or cooperative mode: see our review here) vibe! Players move around on a map in a book and fight monsters! You’ll see what I mean more below.
Let’s take a closer look!
Unboxing the Miniatures
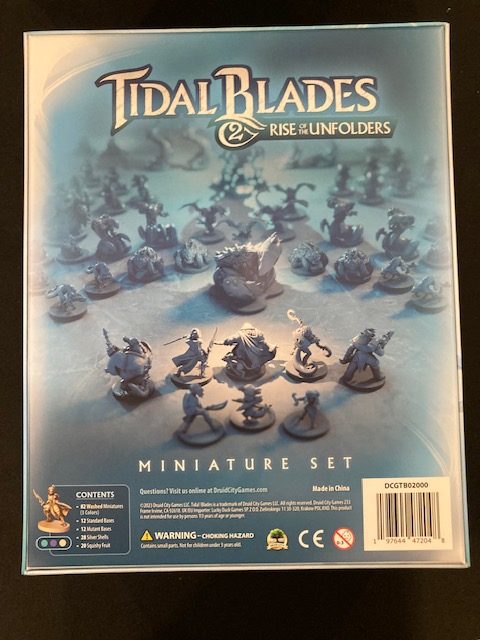
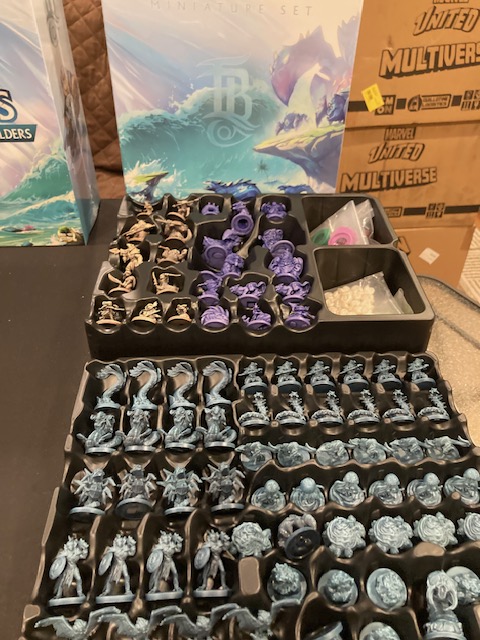
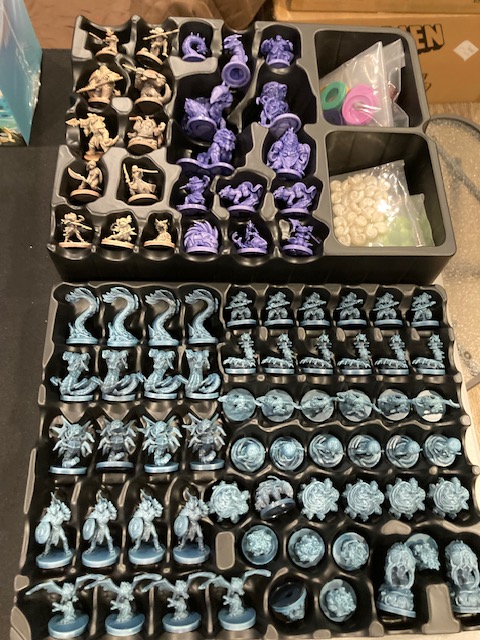
As much as you really want to see what’s in the main box, I gotta show you the miniatures first. They are fantastic!
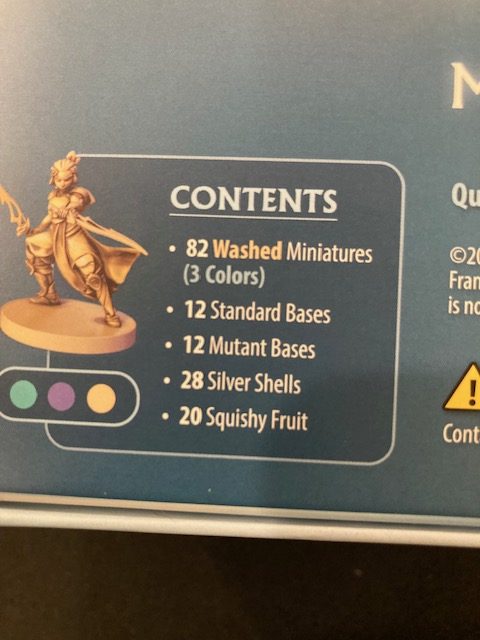
The minis are washed, they are tri-color, and they have 2 sets of bases! These are some of the nicest miniatures I have seen!
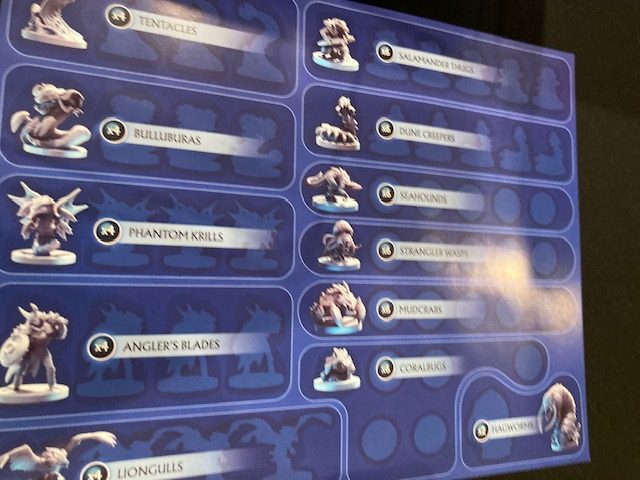
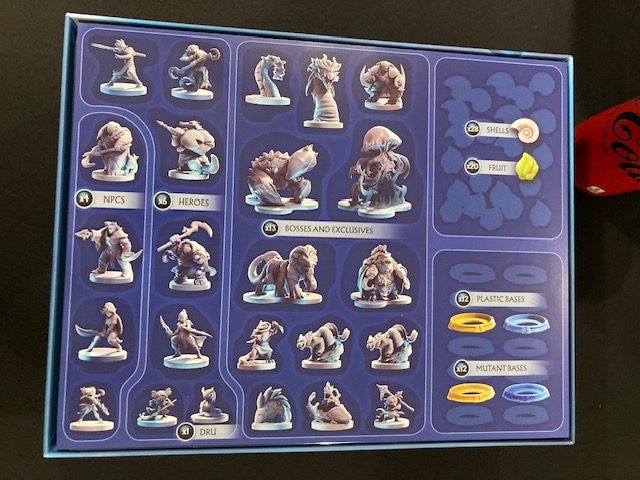
The top part of the box comes with the monsters you fight: they are all notated on a sheet (and, eben better, are labelled where they are in the box!!!) at the top of the box.
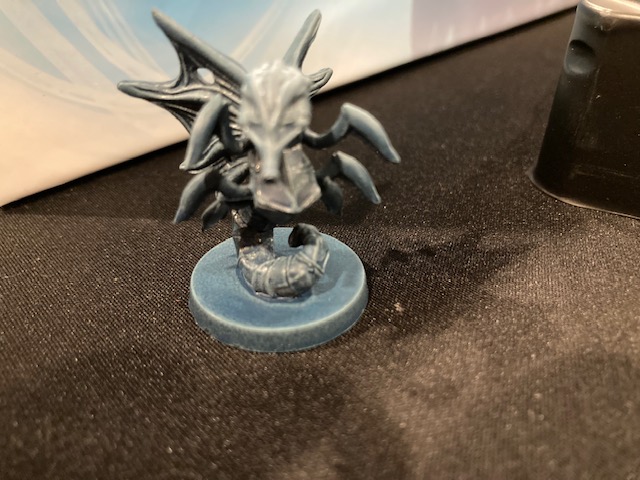
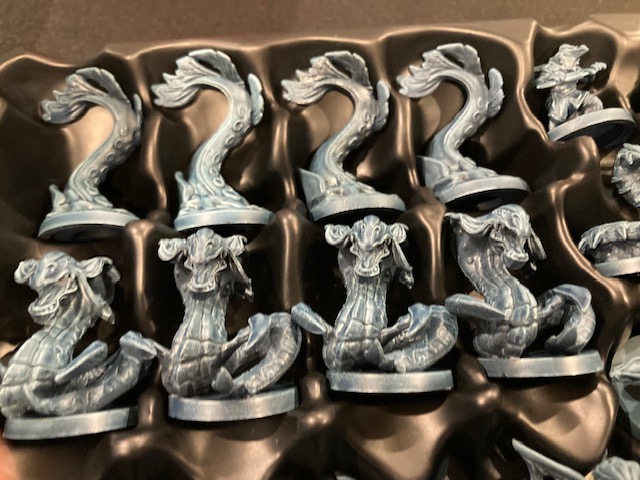
Wow! The monsters are all bluish and really great! See above! Let’s take a look at a few!
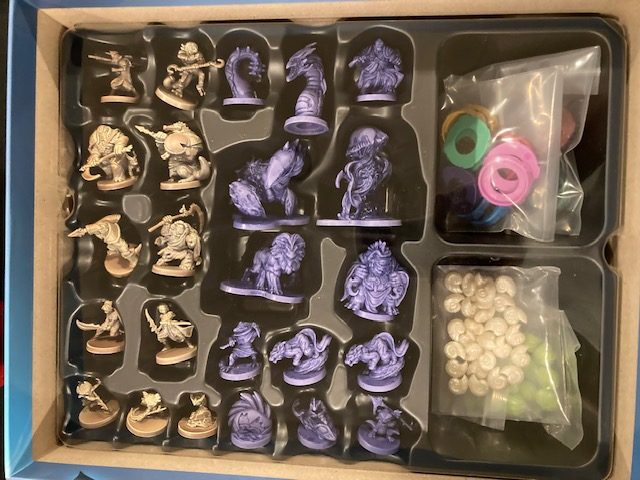
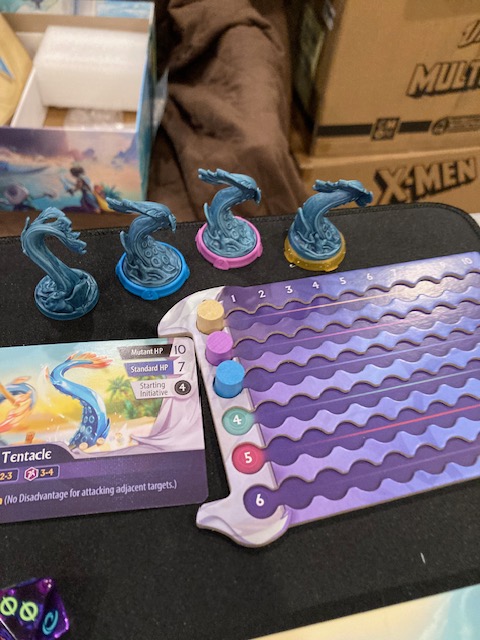
These are pretty awesome! Below the tray with the monsters are the Heroes and Boss Monsters!
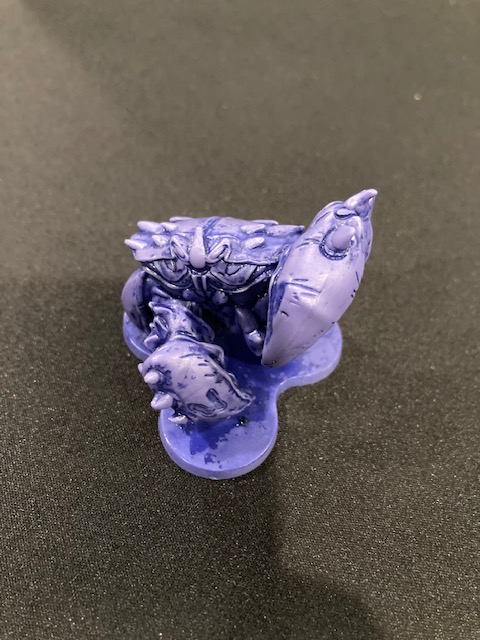
The Heroes are light brownish, and the monsters are very purple: see below.
Let’s take a closer look at some Heroes (below):
The Boss Monsters are very purple! See below.
These miniatures are just awesome!
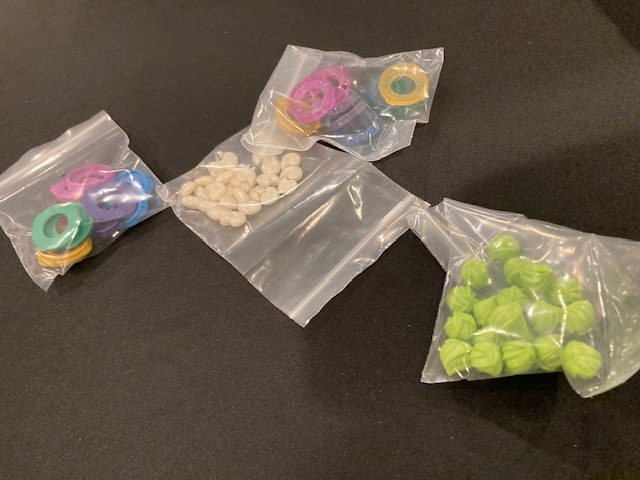
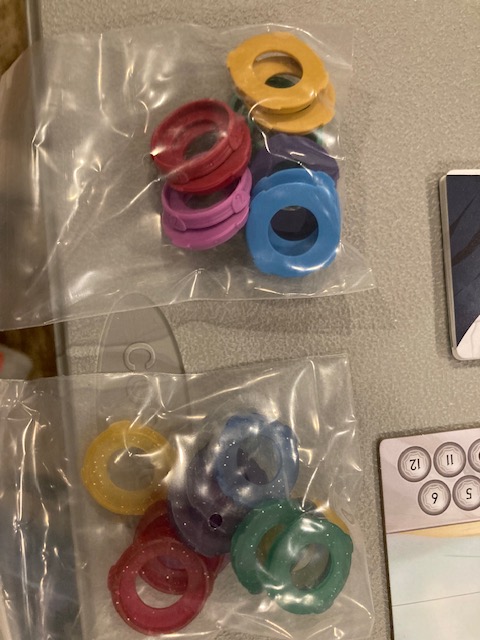
The game also comes with plastic bases for the minis so you can tell them apart. The normal bases denote the normal monsters, and the sparkly bases denote the “mutant” monster (like the Elite monsters in Gloomhaven). The “mutants” are just the tougher version of the monsters!
We also have really nice plastic Fruit and shells (replacing the cardboard from the base game).
See above as the colored hit point tracks match the colors of the base? And the “sparkly” yellow one is the mutant!
These bases really make it easier to tell monsters apart so you can track the hit points.
Overall, the colors and bases are well-thought out and make each entity stand out on the table. See above with some monsters, characters, and a boss monster all in the same frame!
These minis are just fantastic.
Rulebook
The rulebook is quite good. But it has two major flaws.
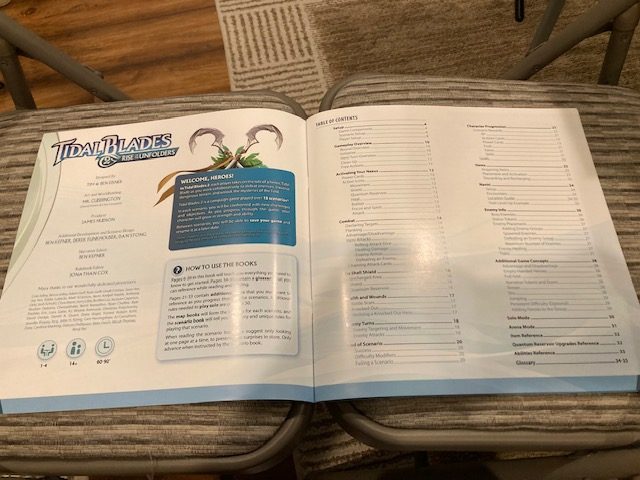
The rulebook completely fails the Chair Test! See above as it flops over both edges being almost unusable! This rulebook made a fundamental error by being the same size as the box!
Much like Batman: Gotham City Chronicles, the solution is to use TWO chairs, and have the spine of the rulebook sit in between! See above as we can keep the rulebook open and useful! I do like that the fonts are big! And the rulebook is full of good pictures! It is easy to see the rules on the chair next to me … once there are TWO chairs!
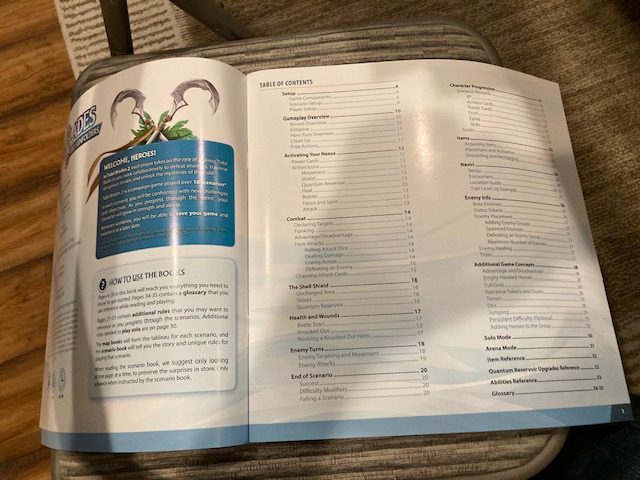
The rulebook has a Table of Contents that make it easy to look stuff up! Nice!
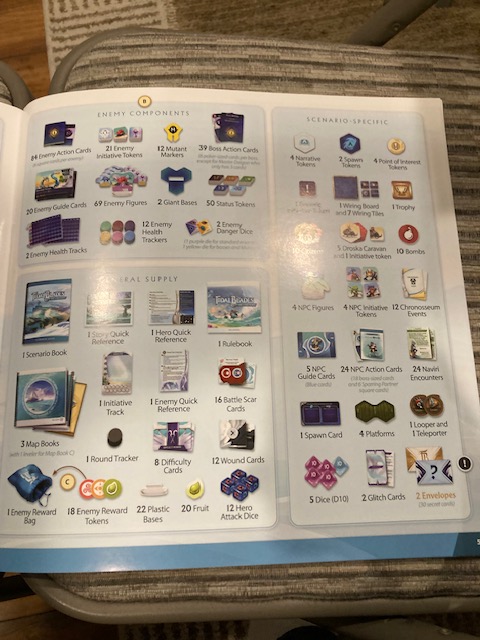
The components pages are great, with every component having a picture and being well-labelled!
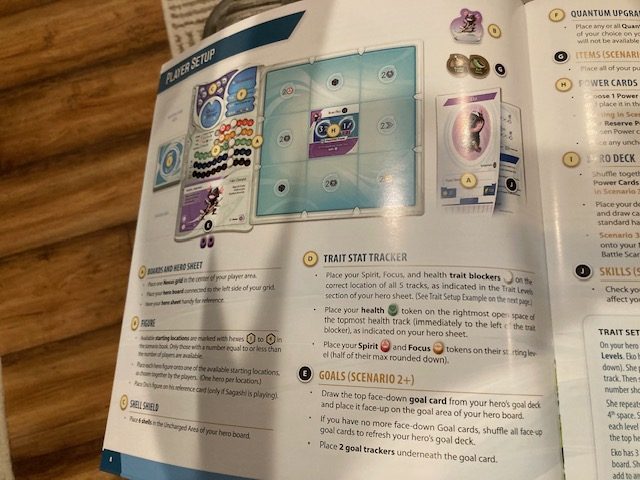
The set-up is nice (it’s over three pages), but some of the set-up is deferred to the campaign book. See above.
In general, I thought this rulebook was great. There’s a nice glossary in the back (ya), but no index. I’ll forgive the lack of index because the glossary and Table of Contents were great.
My other major complaint (besides the form factor) was that the combat wasn’t quite as well specified as I want. We’ll discuss that below.
Otherwise, great rulebook!
Unboxing the Base Game
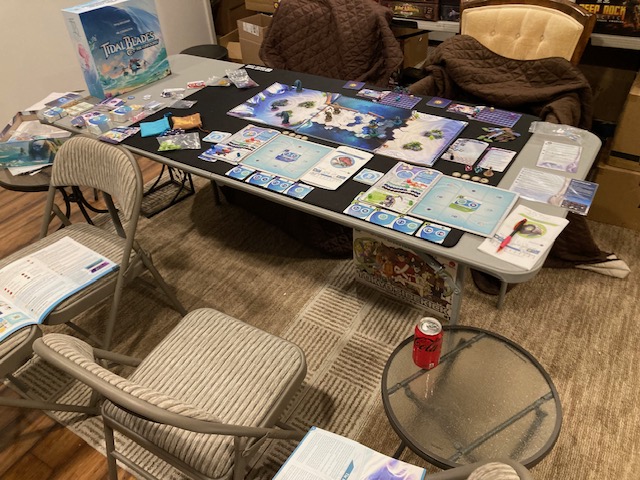
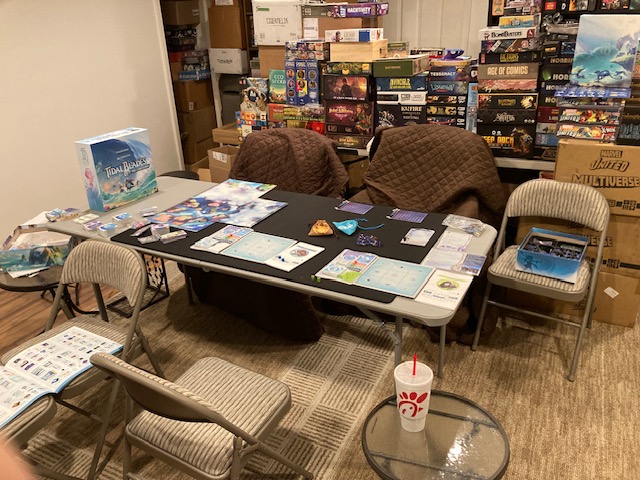
This base box (and the minis box) and both pretty big! My friends lifted the main box and were surprised how heavy it was! What’s in this gargantuan box?
See how tall the box is too (relative to a can of Coke)!
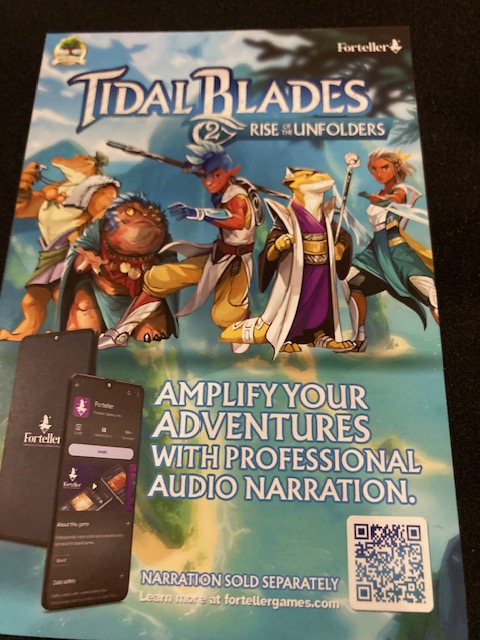
If you want, you can use the Foreteller app to read the “plot” as you go: this is a campaign game where a story unfolds and you may want to get some professionals reading it aloud. I didn’t get the Forteller narration … and it was just fine without it (but it does have the option: sold separately).
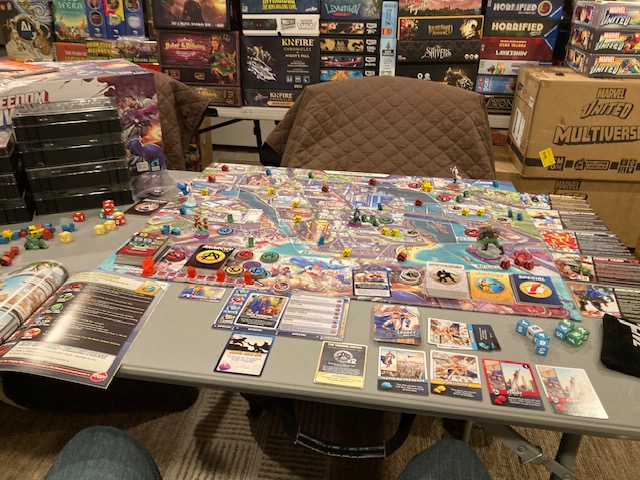
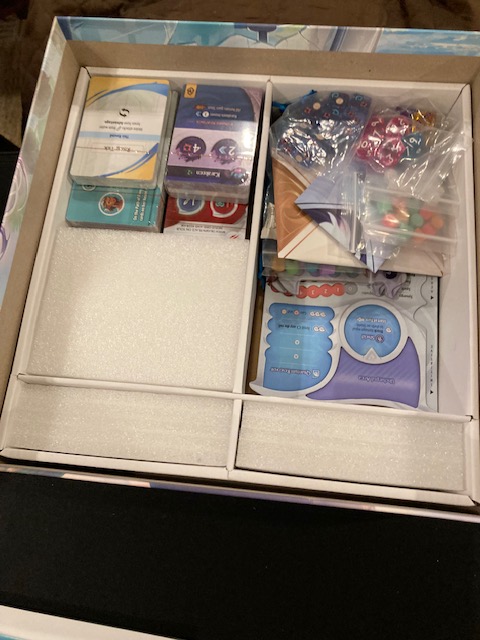
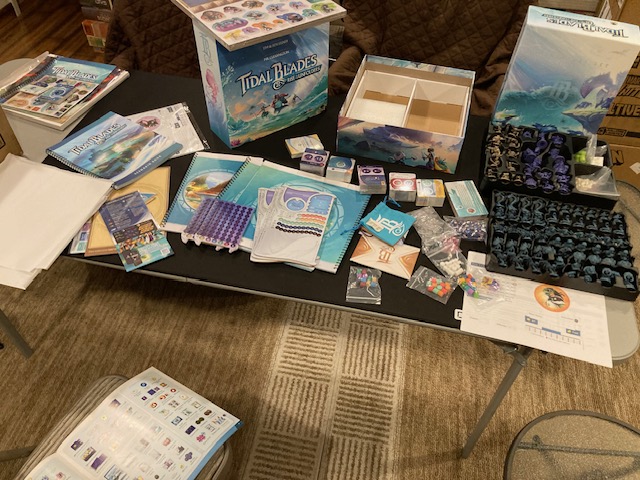
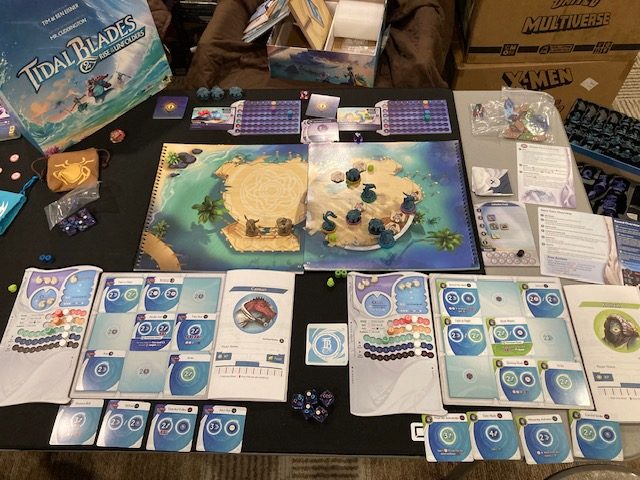
There’s a LOT of stuff when you unbox (see above); we’ll go through the components as we discuss gameplay.
Gameplay
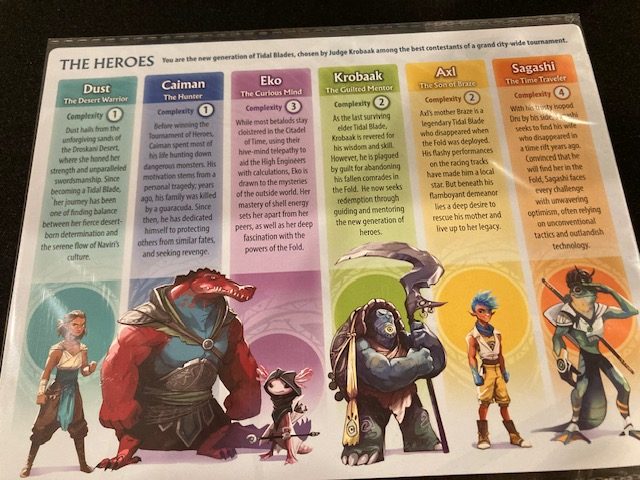
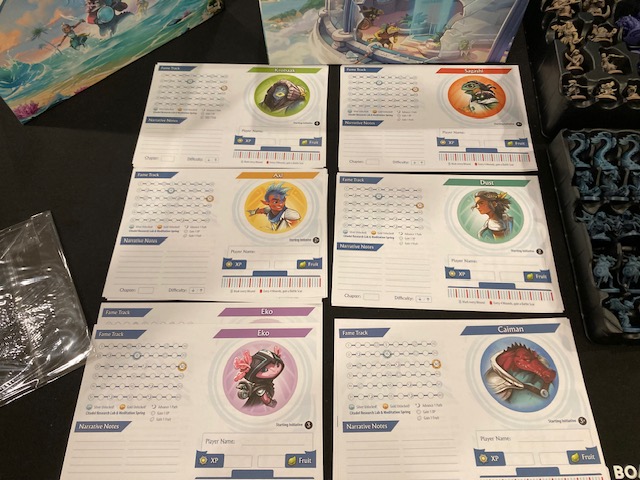
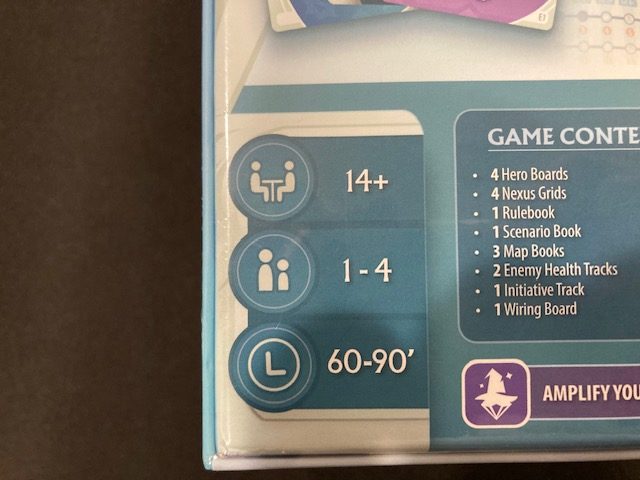
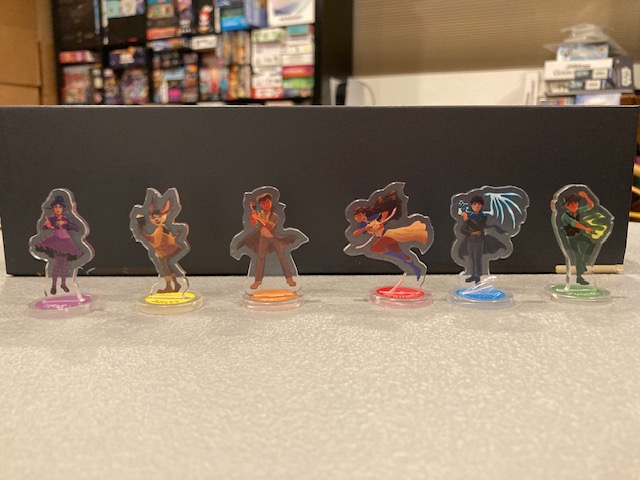
Each player (1-4 players) chooses a Tidal Blade warrior to play. See the six options above and below.
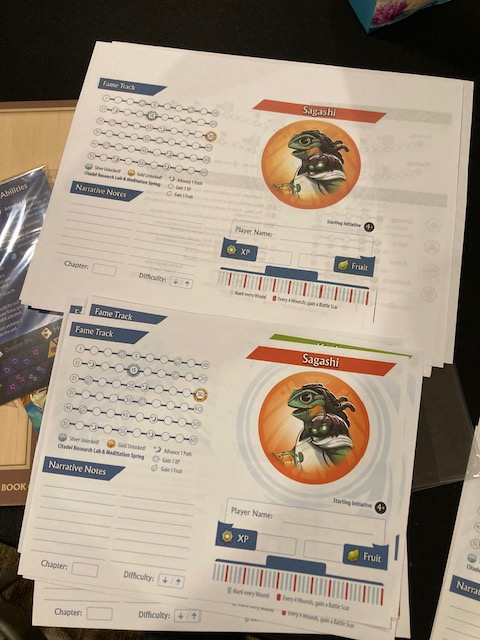
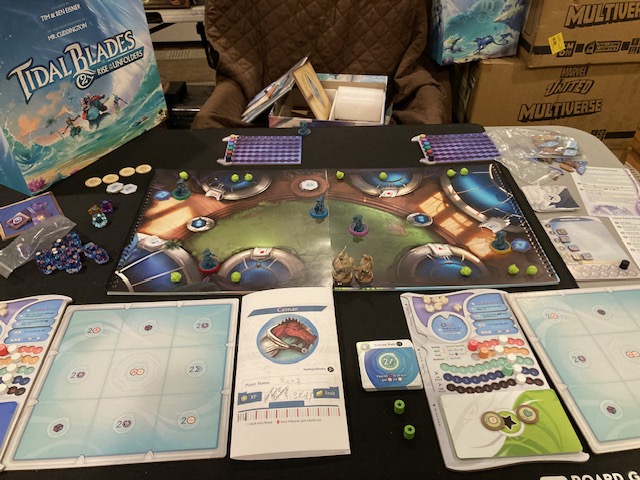
Each player gets a sheet with their character: see the six above and one (closer, below).
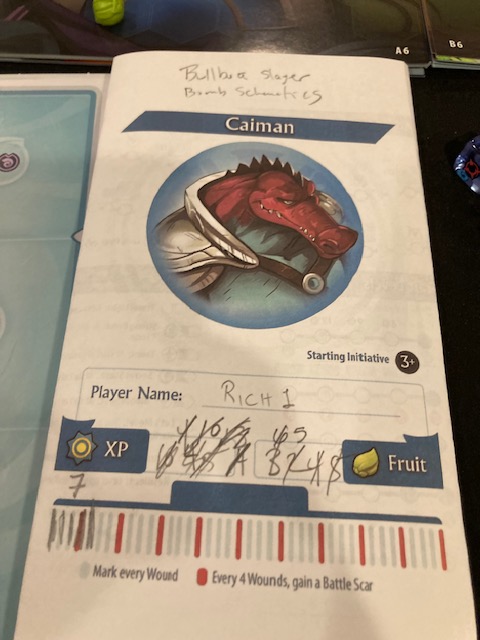
Each character sheet is for recording stuff as your character levels up during the campaign. Tidal Blades 2: Rise of the Unfolders is campaign game! Characters will be leveling up; you will be making decisions about how to do that! This sheet will become incredibly marked up as you play…
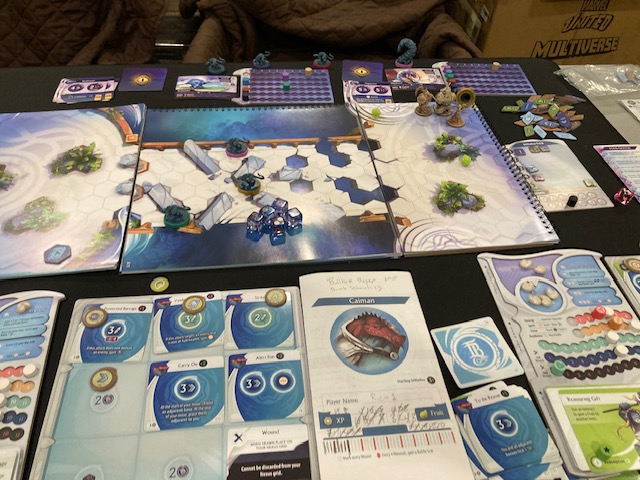
See above as Caiman has experienced a lot and marked up his character sheet!
On the back of your character sheet are “tracks” where you will make choices about how you use experience points and other forms of up-levelling. To be clear: each character is different! They have a different sheet with different cards and powers that can be activated!
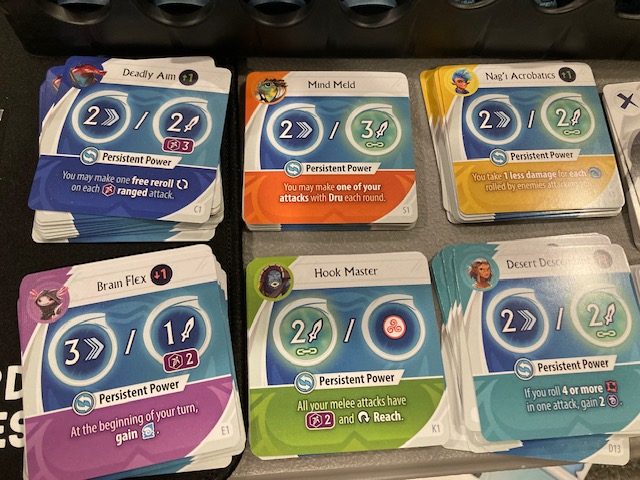
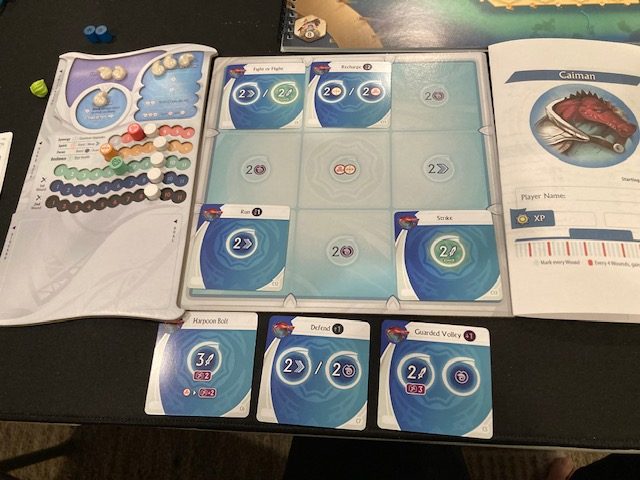
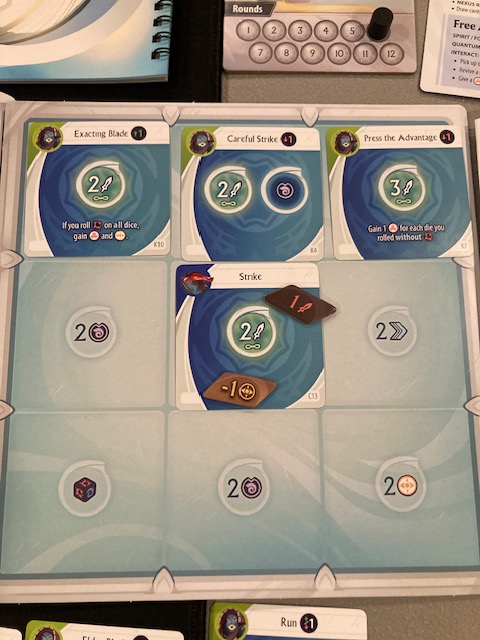
But, what really distinguishes the characters are the combat decks: see above!!! Each player has a different Persistent Power (see above) when they start, as well as a different deck!!! (Well, some cards are in common, but generally the decks are different!!) These decks will be augmented, culled, and clogged as you play! To be clear, Tidal Blades 2 is not a deck-building game per se (as that implies you are dynamically changing the deck as you play), it’s what we called a deck-advancement game. We made this distinction back in our review of Adventure Tactics: See that review here for more discussion of the difference. Suffice to say, your combat deck only changes/updates at the end/beginning of each chapter of the campaign.
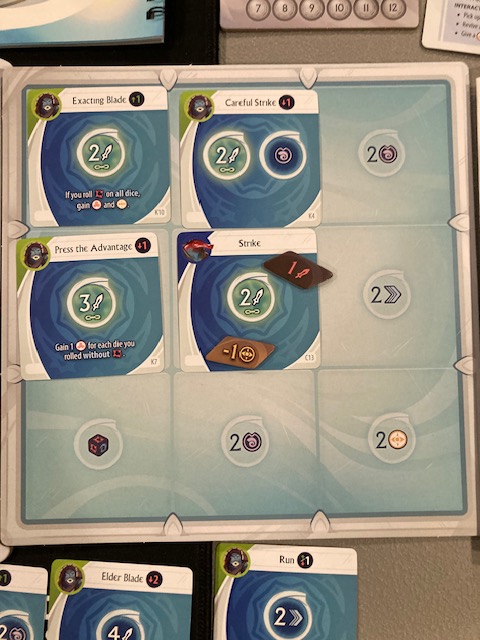
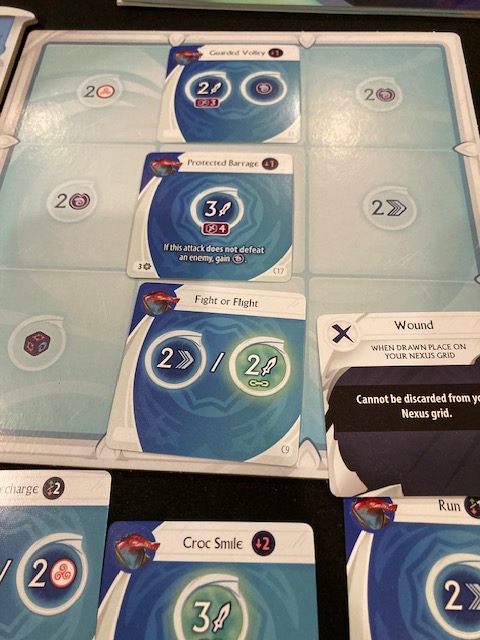
What’s even cooler is that when you use of the cards during play, you activate either a row or a column on your board! What this means, of course, is that you piggy-back on our previous turn! For example, if we just played Careful Strike to the board (top middle), we are allowed to activate ALL the actions in either the middle column or the top row! Some actions give you shells (armor), some actions allow melee strike (swords), some actions give you resources (yellow/pink), some actions give you movement, and so one!
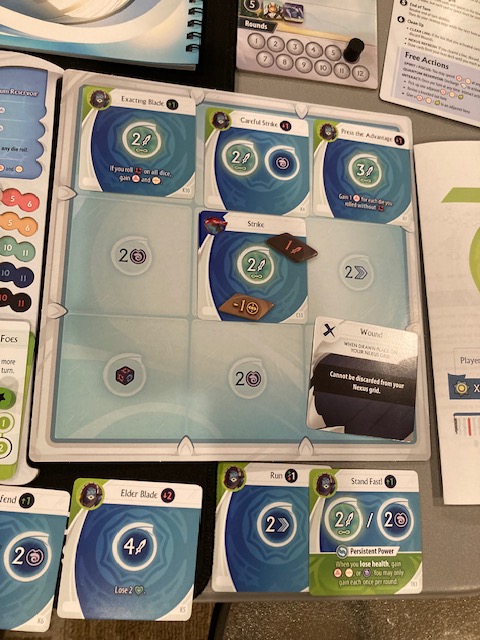
As your character takes excessive damage throughout the game, you can take WOUNDS (see bottom right) which clog your board! Now, if activate the last row or column, you can’t use anything from that last space!
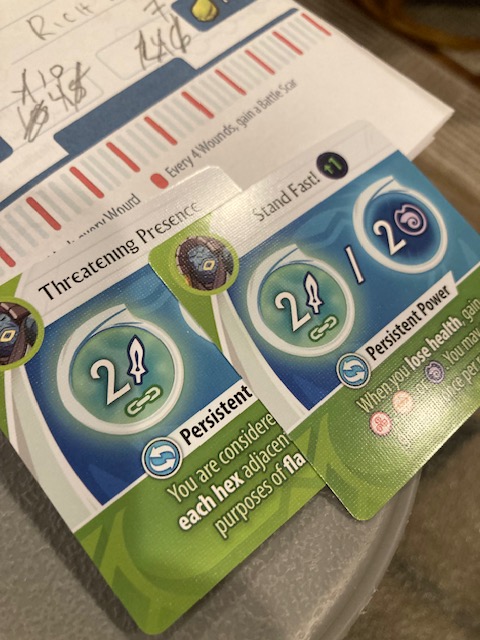
This mechanism of playing a card to a row is central to the game! What card you choose dictates your initiative (Stand Fast! gives me +1 initiative), your current turn, and what actions you might want to play on future turns! And it’s really fun, because you feel like you have a lot of choices:
1) Which card do I play? It affects my current turn and initiative! 2) Where do I place my card? It affects which “core” symbols I block! 3) Which row or column do I activate? What previous cards do I want to leverage? 4) Do I want to finish a row with 3 cards? I may clear it, but I get a very powerful one turn! Each turn is just rife of choice!
Each character also has spirit, focus, and some “shells” which can serve as armor or activate other abilities! Armor in the game is handled by putting shells from your uncharged area into your blocking area! So, if you want to play defensive for a round, you can choose the shells action! Yet another type of choice: defensive or offensive!
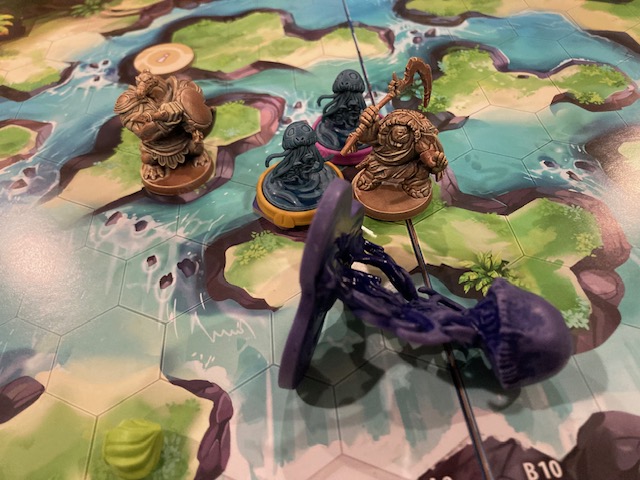
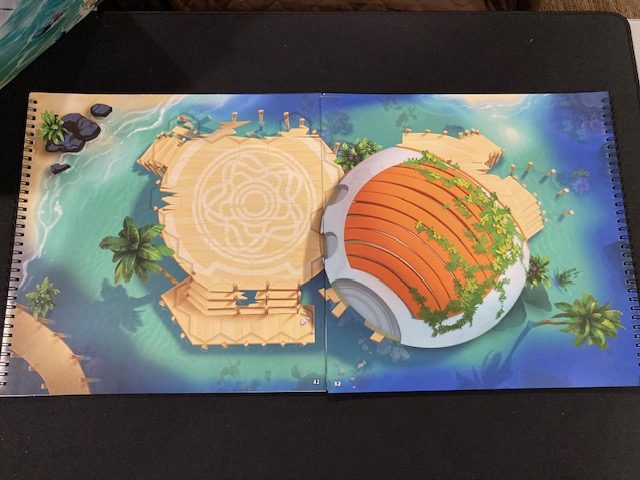
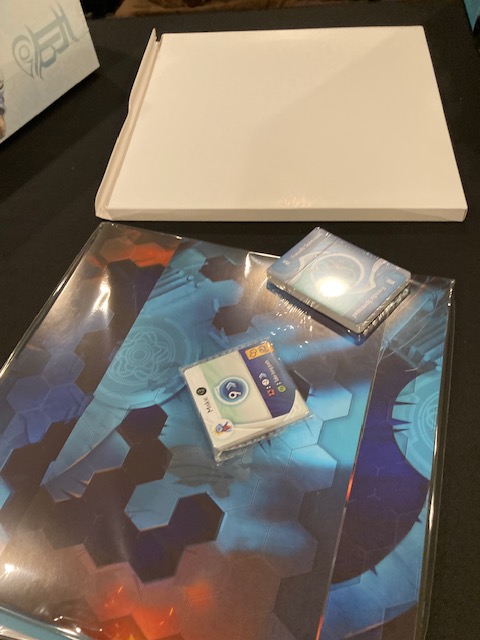
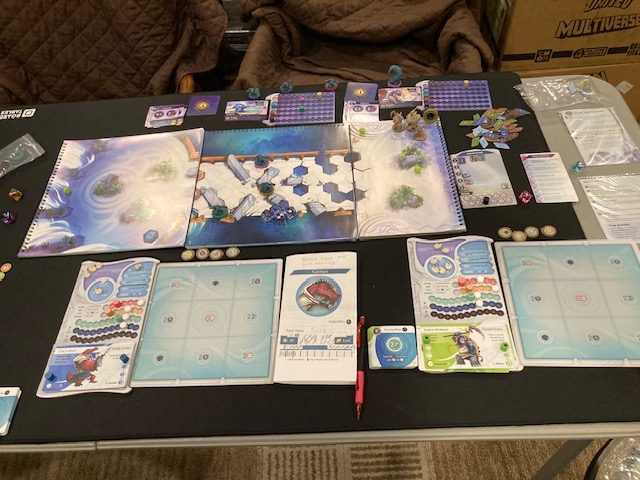
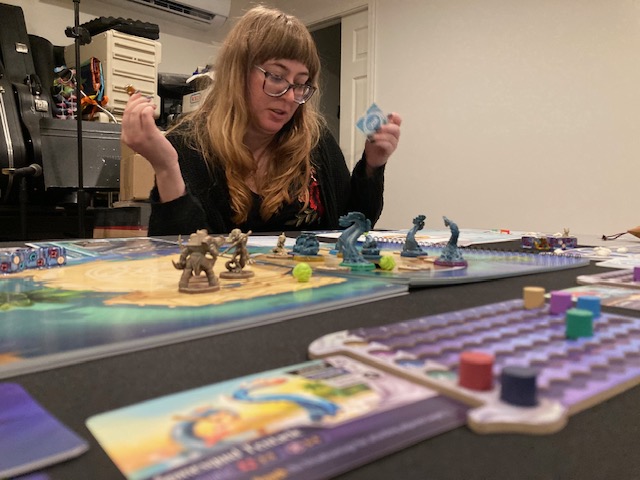
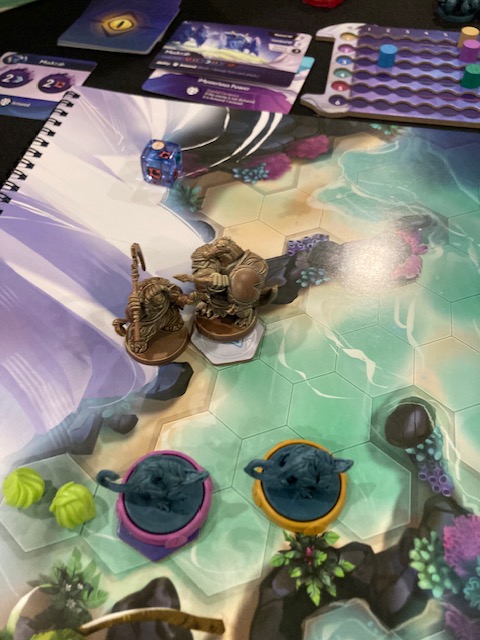
Players move around a map of hexes, fighting creatures! (Sound familiar? Gloomhaven, I am looking at you…) See above.
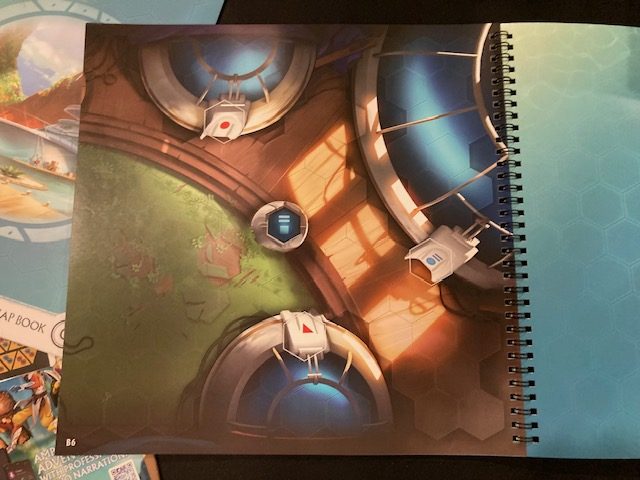
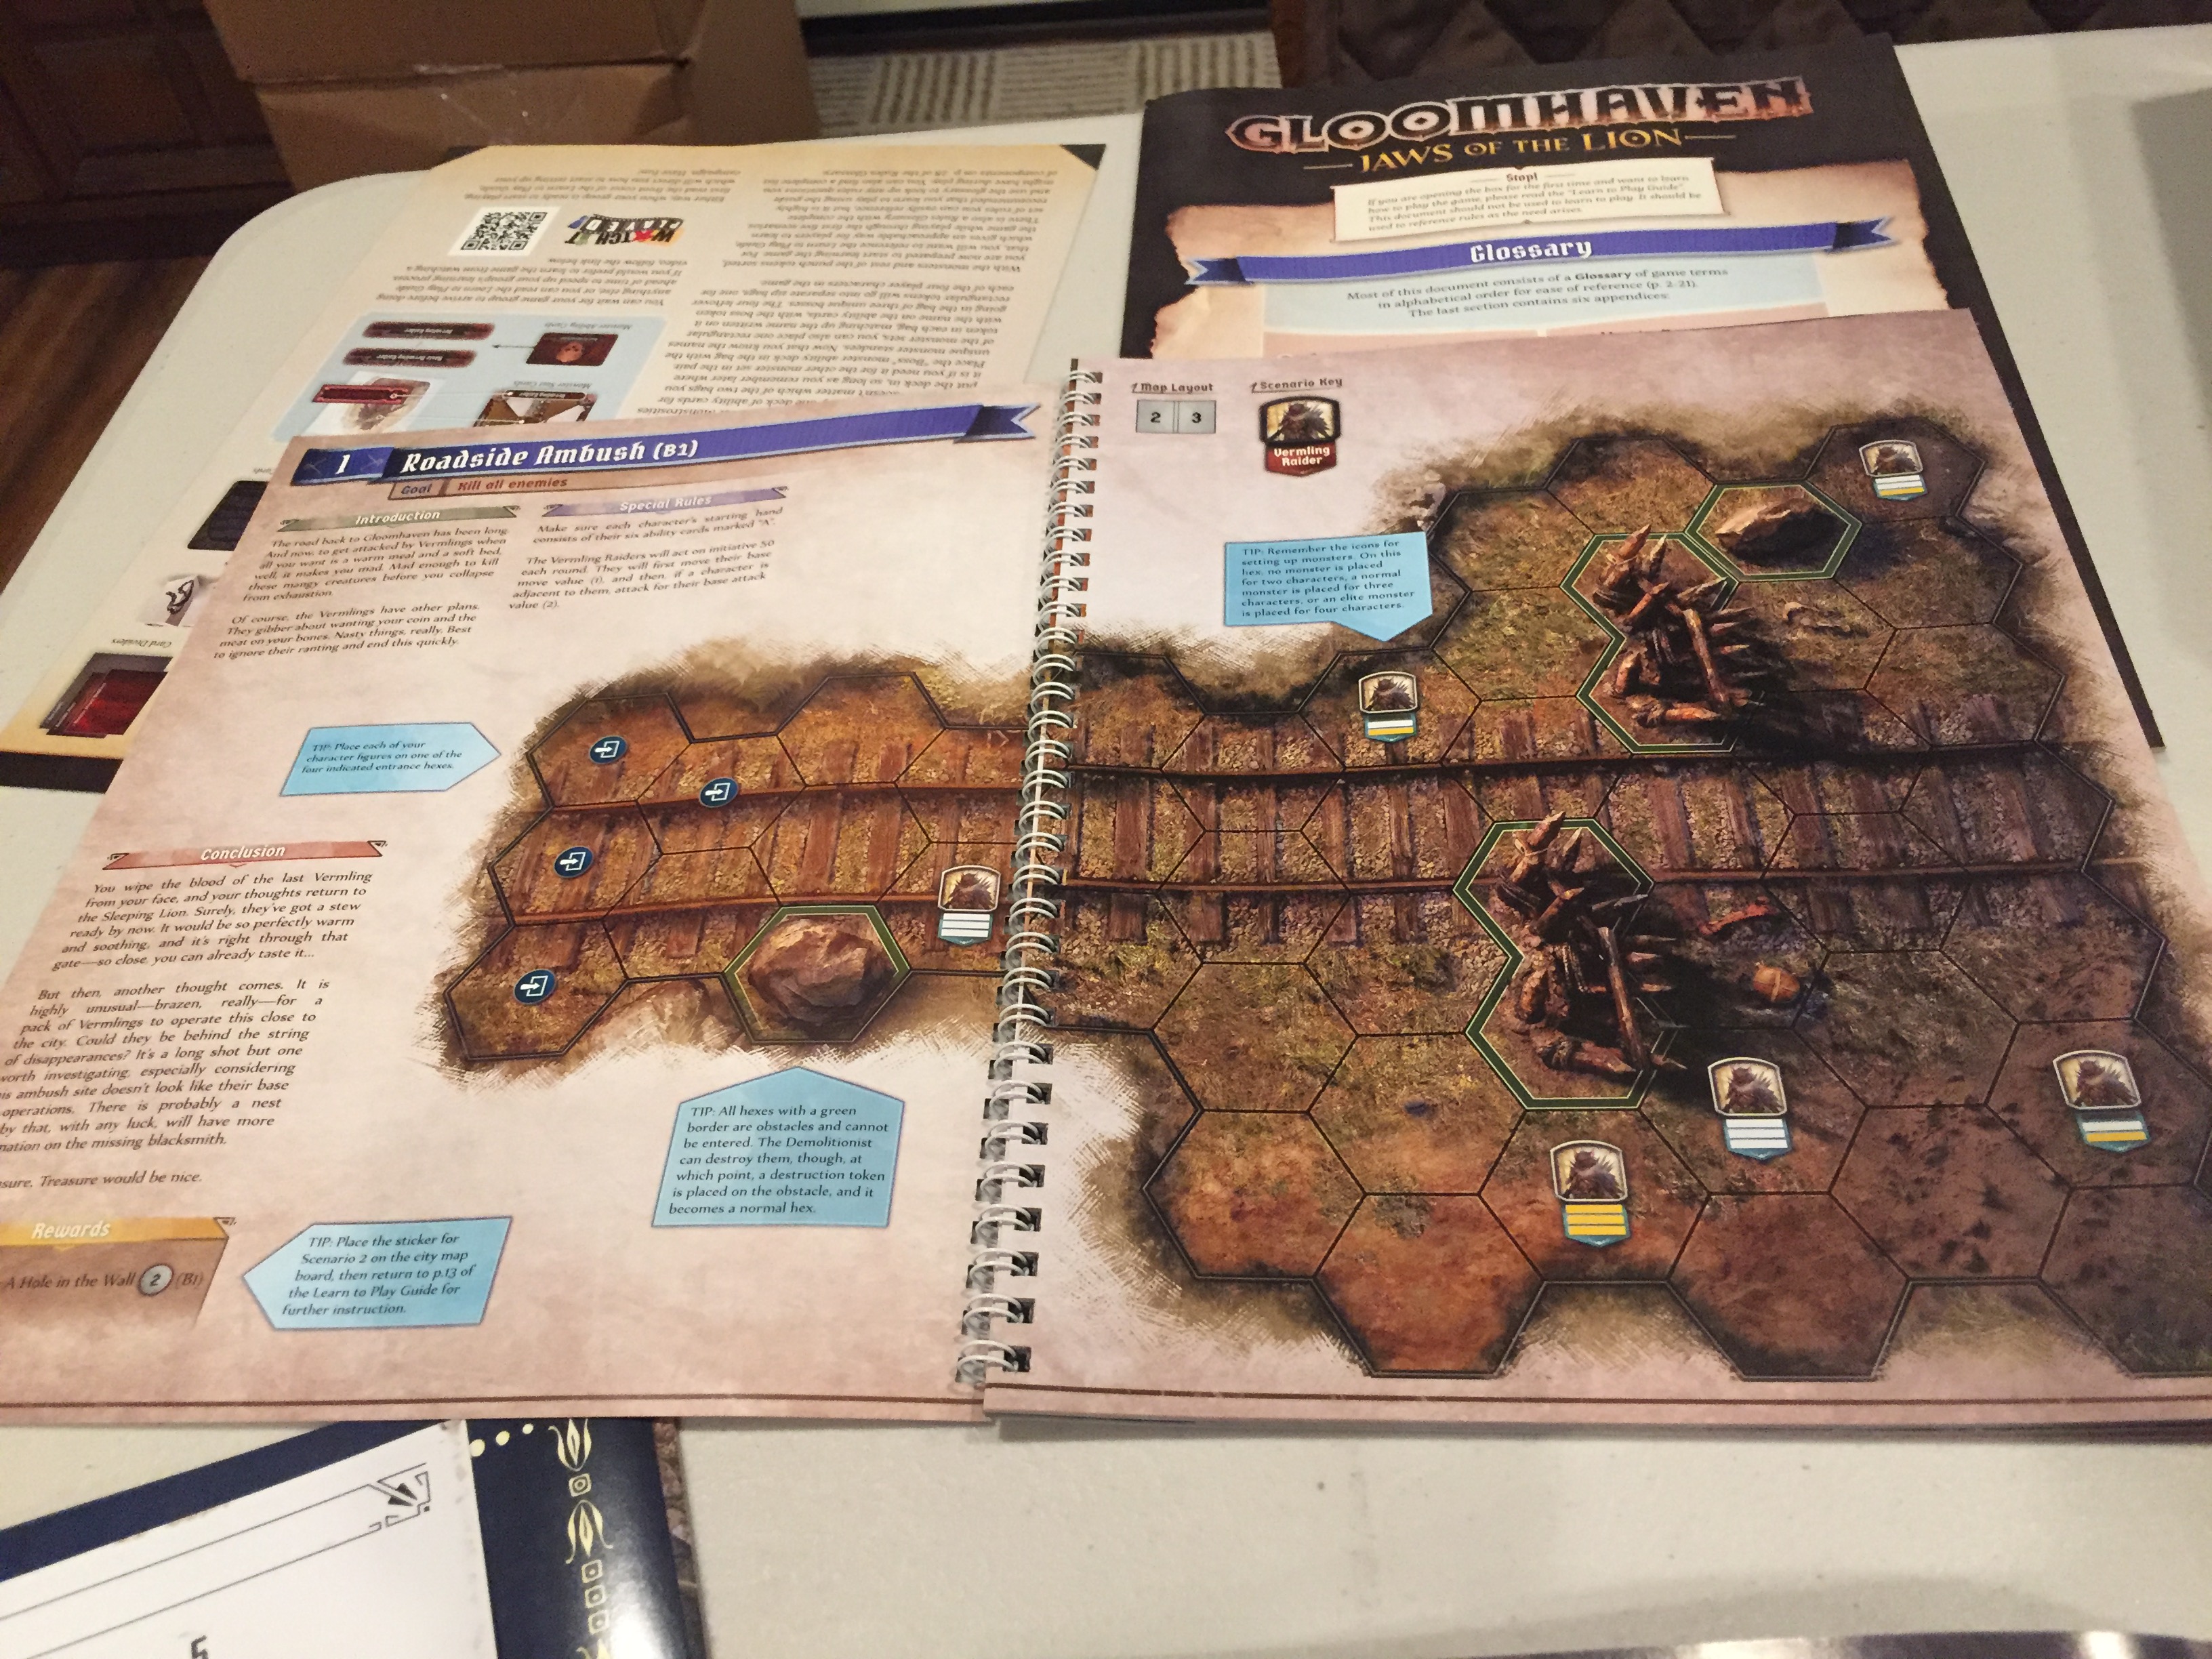
The map books remind me a little of Gloomhaven: Jaws of the Lion, as you just set-up the board from a book of maps and go! This map book was the key innovation in Gloomhaven: Jaws of the Lion. What’s cool, is that Tidal Blades 2 furthers that innovation!
The storybook is the play area! Set-up is easy! Just turn to that page!
Players move around the map, but the stupid spiral binding gets in the way of the map in Jaws of the Lion! See above.
What Tidal Blades 2 does is very clever! Rather than just one map book, Tidal Blades 2 has two map books (actually 3), but each book is rotated so that the spiral bindings are on the outside! Instead, the middles just touch and make a contiguous surface! See above! The middle of the board, where a lot of action is, in untainted by the spiral bindings! It looks more like a contiguous surface!
It’s really easy to set-up each chapter of the campaign! Just turn the book to the proper pages!
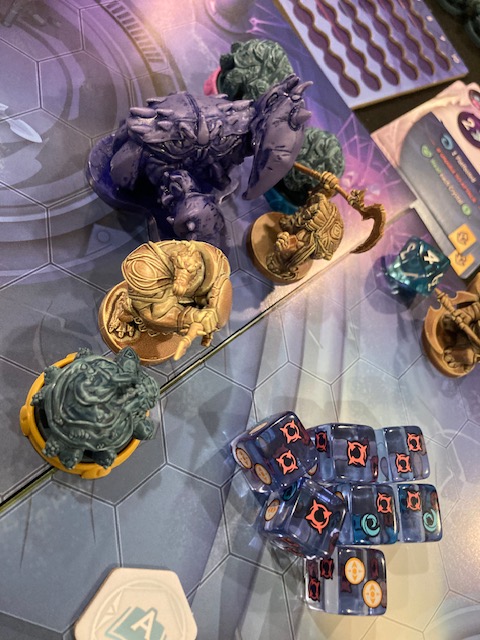
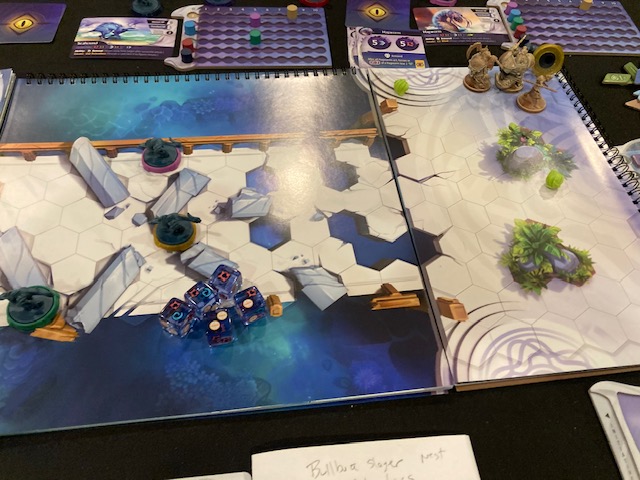
Combats are decided by dice: every SWORD you generate from your cards gives you a die! Red symbols are a straight-up hit, blue CAN be a hit if you have advantage (if your compatriots are flanking), and yellow focus CAN be a hit … if you spend a focus point! And that decides how much damage you do!
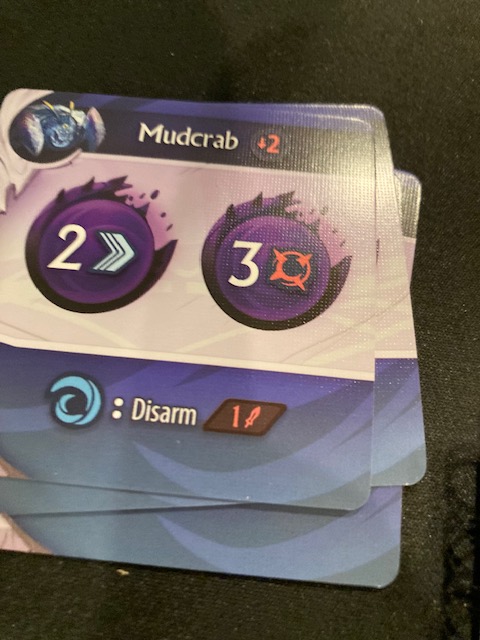
Monster combats are similar: all monsters perform the actions of their current card: see above as the mudcrabs move 2 (to the closest character) and then just do 2 straight damage! (This is modified a little by a damage die).
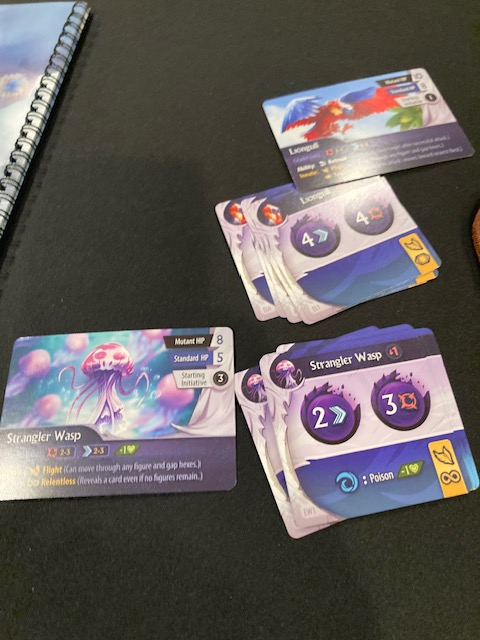
There’s all sorts of monsters with all sorts of abilities! Some poison you! (See above)
Each monster is tracked by a hit point track (see above) with the bases differentiating them. The purple die (lower left) modifies every monster attack!
There’s a lot more to this game, but that’s the “flavor” of the game!
Campaign
Let’s be 100% clear: this is a campaign game! It last about 18 chapters, and each game is about 2 to 2.5 hours (including set-up and tear-down: a lot of your time will be set-up and tear-down).
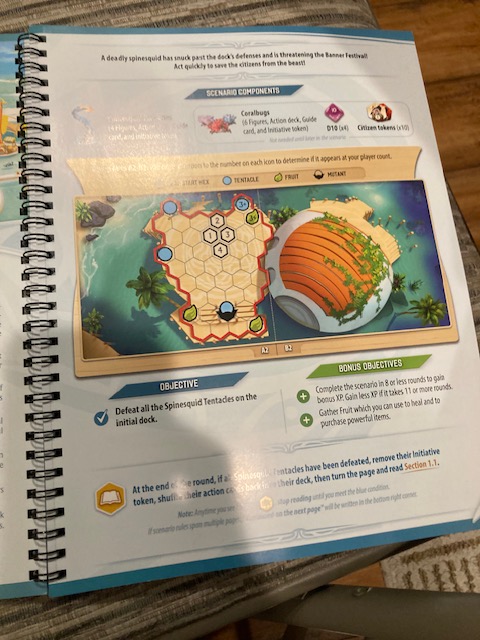
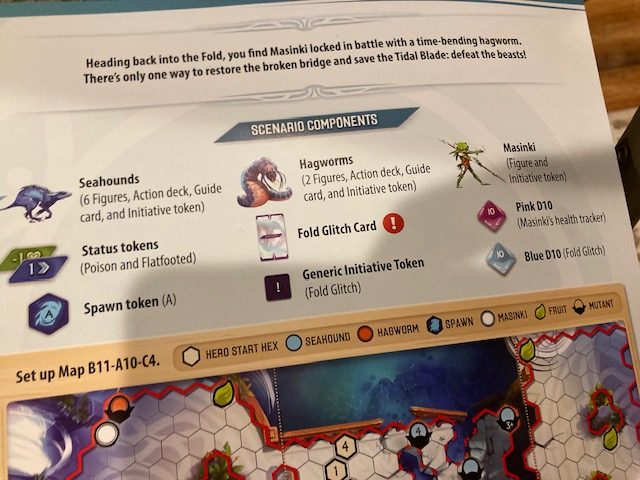
Each chapter describes in great detail which maps you need, which monsters you fight, and what the set-up is! See the first chapter above! (Minor spoilers above).
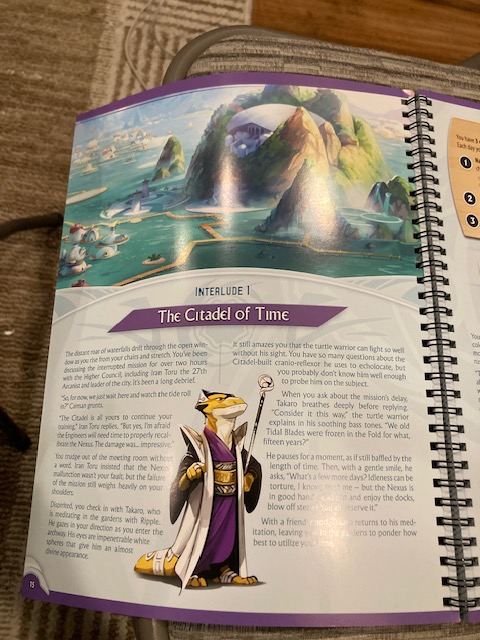
There is a story unfolding (pun not intended) about the folds of time. Each chapter begins with some text describing the story (picture blurred on purpose above).
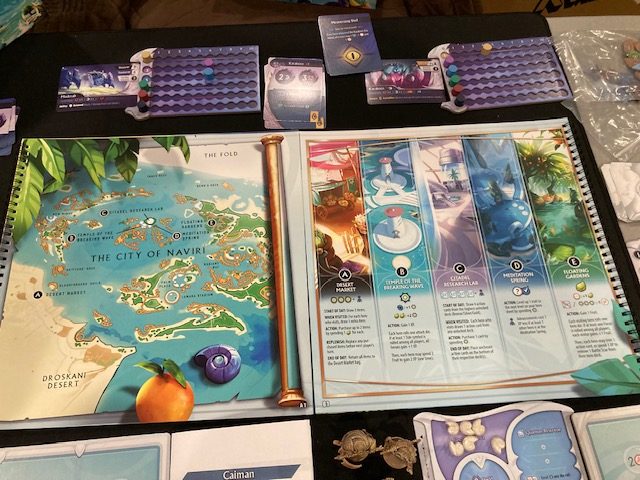
After a few chapters, there will be Interludes which give you a chance to level up. To be clear, there is SOME levelling-up after most chapters, but the Interludes offer significant levelling-up!
At these Interludes, Players choose where to go to “spend” their resources: the market? The floating gardens? It depends how you want to level-up your character. Cull cards? Add Items? Add skills? Whatever you want!
Although this is a campaign, the Stretch Goals pack (see above) comes with 5 one-shot scenarios.
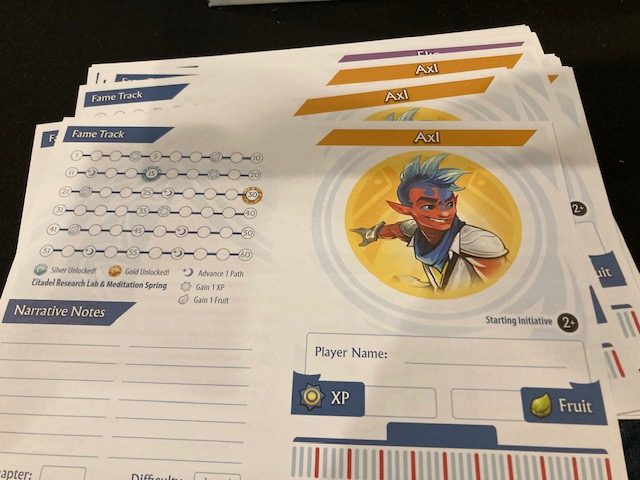
Since this is a campaign, and you have to mark up your sheet, I went ahead and made a copy of all the character sheets so I don’t have to sully the originals. There are enough sheets in there that you “probably” don’t have to do this, but I prefer not to mark up the originals if possible.
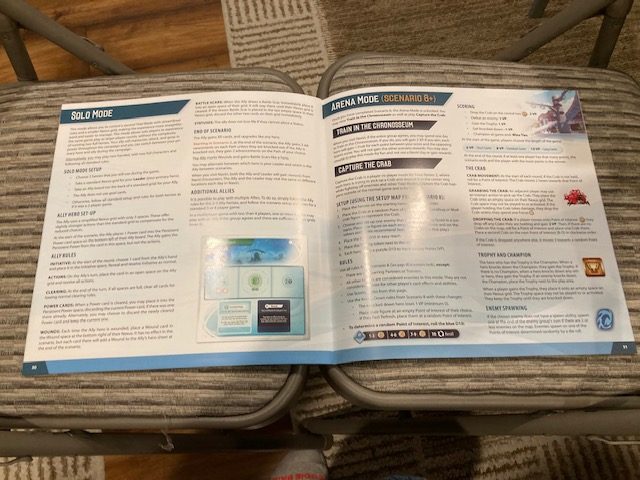
Solo Play
So, Tidal Blades 2: Rise of the Unfolders has two solo modes! (Congratulations for following Saunders’ Law!) The simpler of the two solo modes is to just play two-handed: choose two characters and operate them as-if it were a 2-Player game. This is the route I chose. And so should you!!
If you REALLY REALLY REALLY want a solo mode where you only play 1 character (but then still kinda have to operate some other pets/creatures anyways) with complicated exceptions, there is a second solo mode. I usually eschew complicated solo modes because the exceptional rules are always SO HARD to keep track of! Play two-handed: you’ll thank me for embracing the simpler mode … the simpler two-handed solo mode has NO exceptions to rules; you just play the game they way it was meant to be played.
At the time of this writing, I am eight chapters into the campaign! I have seen boss battles, several maps, several different ideas (jumping, running water, flying, etc), and some really great miniatures! Every new chapter introduces new monsters and new ideas and keeps the game fresh!
Playing two characters is juuuust about the right level of complexity. Sometimes it’s a little overwhelming, since each character has their own deck with their own unique cards, but since the system is well-described and well-notated (seriously! The icons are VERY intuitive), it doesn’t make it too hard to context switch back and forth between the characters.
One drawback is that there is a lot of maintenance for the solo player: set-up, run character 1, run character 2, operate the initiative track, operate the villains, lather-rinse-repeat, tear-down. This is really where the vibe felt like Batman: Gotham City Chronicles: there’s just a lot of work to keep the game going! But, it’s kinda fun! Everything is so bright and well-notated! The monsters are well-tracked (with the bases and colored hit point tracks), and the rules are pretty solid (so there’s not much second guessing, modulo one issue).
I really like this solo mode: I hope to finish this campaign at some point during the year. I am currently playing two campaigns: my solo campaign with 2 characters and a cooperative campaign with the other 4 characters (with my friends).
I fully expect this to make my Top 10 Solo Games of 2024: it’s that good! There are just so many good choices! Where do I go? What cards do I play? How do I level-up my character? The choices keep me involved the whole time, even if there is quite a bit of maintenance per turn.
The solo game took longer to play than perhaps it should: the box says 60-90 minutes but I frequently was at 2 hours; I also tend to like a little analysis paralysis when I play by myself. There’s no one around, so I can try lots of things without fear of wasting someone else’s time.
Cooperative Play
The cooperative experience is just in its infancy as we are only two games in, but my friends still keep wanting to play it! “Let’s keep playing it!” They really like it!
Every player has agency on their turn; the game is just too complicated for an Alpha Player to come in and ruin a player’s experience … there are just too many choices for a single player: the Alpha Player will be too busy figuring out his own turn!! At the same time, there’s plenty of cooperation and players plan when to flank (see below), which enemies to engage, which actions to take, when to defend vs. attack! This has a good blend of agency and cooperation.
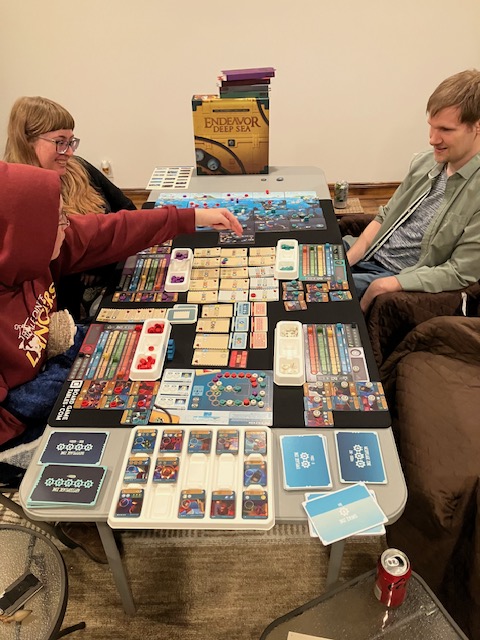
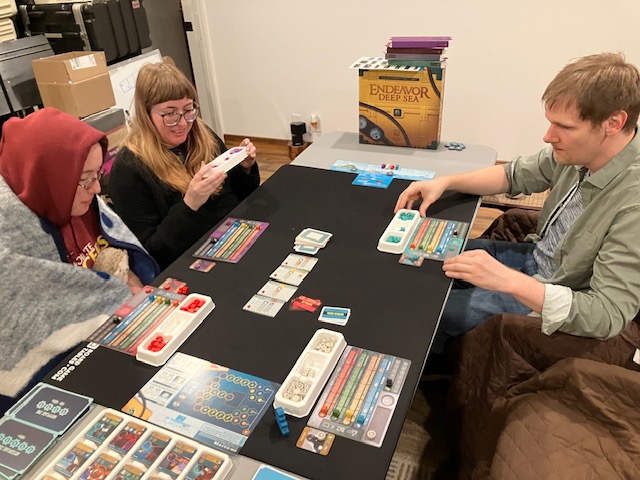
One of the things we DIDN’T like about the cooperative game Endeavor Deep Sea (from two weeks ago: see review here) was that the game didn’t “really” have any mechanisms for helping each other too much; players had a lot of multiplayer solitaire going on in Endeavor Deep Sea. That’s not the case here! Even you though you can choose to play multiplayer solitaire, you can also do quite a few things to directly help your compatriots! You can spend shells to allow your friends to re-roll dice (if they run out of re-rolls)! You can set-up flanking opportunities! You can use skills that help everyone within 2 spaces! There’s a number of mechanisms where the sole purpose is to help your compatriots! And that does increase the level of cooperation! Even choosing the initiative order can be an act of cooperation! And THANK GOODNESS there are no Communications Limitations in this game! Just last week, we saw how the Communications Limitations ruined that cooperative game! Luckily, you can talk all you want and work together in Tidal Blades 2!!
The only real negative for the game is that sometimes it can take a while to get back around to your turn (as there is no simultaneous play): players must play in initiative order. Like any game with lots o choices, sometimes a little Analysis Paralysis can slip in and slow down the game. It’s still not too bad, because you can always be talking with your friends or figuring your own turn out while waiting for others.
It’s easier to overlap turns in a cooperative game (like Tidal Blades 2) because you can ask your friends to leave the board “in a certain state” so you can preplan your turn! In a competitive game, you always have to wait until the previous turns are over to re-assess the board every turn! With a little cooperation, there can be much more overlap! And we saw some of that overlap here in Tidal Blades 2! It’s a minor point, but that overlap can make cooperative games (without simultaneous actions) move a little faster.
Overall, this game was a lot of fun cooperatively. It’s a good blend of agency and cooperation, and there are many ways players can help each other. It’s fun to talk and plan with your friends!
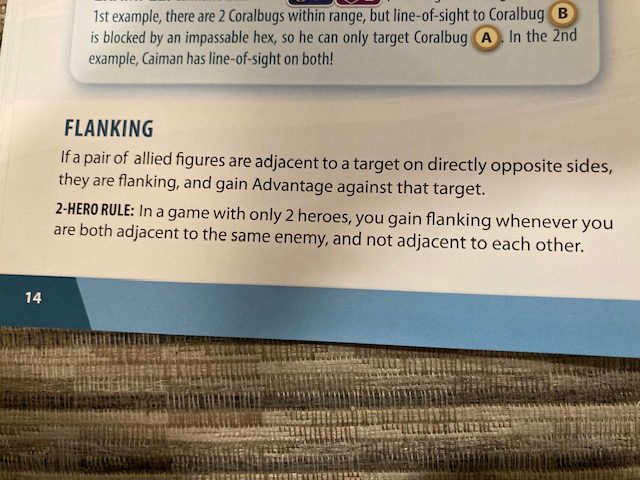
Flanking and Advantage
So, this is, at its core, a miniatures fighting game! Which means you have rules for flanking and advantage! If you flank (players surround an enemy adjacently from opposite sides), you can get advantage (which allows you to turn the blue wave symbols on dice into hits)! This is very cool, because it is a mechanism that encourages the players to cooperate and coordinate their attacks! The best results come if you cooperate, flank an enemy and maybe get 50% more hits because you can gain advantage!
If you saw “Flanking and Advantage” and thought “What is this … 5th Edition Dungeons and Dragons?” You are not the only one who thought that!!! But, these ideas in this game really do help improve the cooperation: they encourage an easy way to increase the odds of hits!
What I Liked
The minis! You can get the game and just use cardboard standees, but I would strongly recommend getting the miniatures! See above!! They are so well done, with the different bases, the beautiful sculpts, the different colors to highlight the different types! I feel like they really made the game feel more thematic. The minis add to the cost of the game (as you buy them separately), but I think in this case, they were worth it.
Combat Mechanism! The combat mechanism of choosing a card, then choosing where to put it, then choosing a row or column to activate is so cool! Your choices affect your current turn as well as future turns!! This mechanism is at the core of the game, and it makes you feel like you have choices at all times!
Well-done Monsters! The monsters are pretty easy to run (modulo one problem, see below)! The cards clearly specify what to do, the bases clearly denote which monster is which, and it’s pretty quick to set-up a game! Heck, I spent more time putting plastic bases on monster minis than I did setting up the cards! It really is easy and quick to SET-UP and RUN the monsters!
Not too much Randomness! I was very worried that there would be too much randomness with dice deciding combat … but here’s the thing, there’s not that much randomness! There is usually at least one hit per die and sometimes your focus shows (which means you may have to spend focus if you want extra hits). See the dice above! If you roll XXX dice, you will probably get about XXX hits! If you have extra focus to spend, or some special abilities, or flanking (see below), you may need much better! It’s like having a baseline of hits, and you choose (by having focus, or flanking) if you need to do better! I really like this system! I usually dislike the randomness of dice, but how it’s done here works for me!
Easy-to-Read! The components are well-labelled, bright, and have very easy-to-discern icons! This game is very intuitive and easy to read!
The Components! The components (even if you don’t get the miniatures ) are fantastic!! The dual-book system solves the spiral middle problem, the cards are linen finished, the dice are clear and beautiful, and the cardboard components are well-done … just overall the components are a joy!
Cooperation and Agency! The game has many many ways to encourage cooperation, but still allow each character to have their own agency. The card choice mechanism is very intense and full of choice; players are allowed to coordinate if they like (there are no silly communication limits)!! Players must decide who goes after what! Players must decide if it makes sense to flank! But, you can’t really Alpha Player the game because each deck is so different, and frankly, each character is so involved (in a good way) to run! Players will have intense agency on their turn to operate their character, while still having to work together to come up with a plan! And that flanking mechanism I think really encourages finer cooperation: it’s so good to gain advantage, you just need to!
Loot 2.0! In some ways, Tidal Blades 2 feels like it should be called Gloomhaven 2.0. One of the things we house ruled in Gloomhaven was the Loot Rule (see discussion here: Top Seven House Rule for Cooperative Games). Basically, stopping to pick up loot takes you out of the flow as you have to stop and use actual resources to do that. The nice thing in Tidal Blades 2 is that you can a free action every turn to “interact” with one item! So, maybe you can’t pick up three pieces of fruit or five rewards, but you can move by something and pick it up without needing to spend one of your precious actions. Granted, you may still have to spend movement, but usually a reward (when you kill an enemy) comes out right next to you, and you just pick it up! We enjoyed this free interaction SO MUCH more than Loot in Gloomhaven!
What I Didn’t Like
Wait, What Am I Unfolding? I love story in my games (it’s why I like Astro Knights: Eternity better than the original … it has a compelling story!!), but the story and the writing here feels … forced and a little turgid. And I like story! But it felt like Tidal Blades 2 were trying to hard to have their own “surfer-techno” lingo, and it just didn’t work for me. I tended to just skim over the exposition and head straight into the scenarios.
Enemy Movement: As easy as the monsters are to set-up and operate, the AI for the monsters movement is a little weak. There’s some nonsense about “clockwise heading north” in the case of ties, but the description in the text and the picture don’t match (for me anyways). In the end, the final rule for specifying things is done using “Fastest Initiative”: the character with the fastest initiative is the tie-breaker … that tended to be my goto rule! Many times, that was the tie-breaker (when it was really unclear) for us because it just make things easier. Otherwise, the enemy movement phase becomes an overwrought “look at all possibilities”, which isn’t fun. Gloomhaven did a better job at specifying the enemy AI, but at the cost of more rules.
The AI basically works, but if you focus too much on it, the game can become overwrought. I worry that zealots for rules will make playing this less fun as you spend the entire game getting the AI rules “just right”. And that’s fine if that’s what you want, but I think most people won’t love that. Just play the game; it’s good!
Bases didn’t Work? Some of the mutant bases didn’t quite work: the miniature just kind of “slipped” out the base: see the video above. It wasn’t all the mutant bases, and most of them worked, but it was weird that some of them didn’t work!
Reactions
Rich: This is probably a Top Ten Game of the year, both solo and cooperatively! I am keeping my solo campaign alive as I still venture cooperatively with my friends! There is just so much to like! This feels like the next evolution of Gloomhaven! This is a 9.5/10 for me. I just wish the AI was better and the story was better: that’s what keeps it from a 10/10. Sara: I really liked it! Let’s keep on playing it! It’s probably a 7 for me! Andrew: Ya! Let’s keep playing it! A 6.5 or 7 for me! Teresa: I loved the minis and how the game worked, 7 or 8 for me! It was like a better Gloomhaven, and not nearly as dark!
Conclusion
Tidal Blades 2: Rise of the Unfolders is a fantastic game! I still am not quite sure what we are unfolding (I think we are unfolding space and time), but there are so many things to love in this campaign miniatures skirmish game! The components are first-class, the miniatures are stellar, the cards are easy-to-read and intuitive, the combat system has so many great choices, the leveling up is fun, and the campaign is really interesting! In some ways, Tidal Blades 2 is the next evolution of Gloomhaven as Tidal Blades 2 evolves the map book ideas, the Loot rules, and the combat with the row/column mechanism!
The card “activate column/row” mechanism works so well, that I think it elevates the game significantly. It’s such a unique mechanism and makes the player feel like they can do so much! I expect to see this mechanism in upcoming games because it just works so well.
This is a 9.5/10 for me, with my group rating in highly with 7s and 8s as well. This will make our Top 10 Solo Games of 2024 and the Top 10 Cooperative Games of 2024!
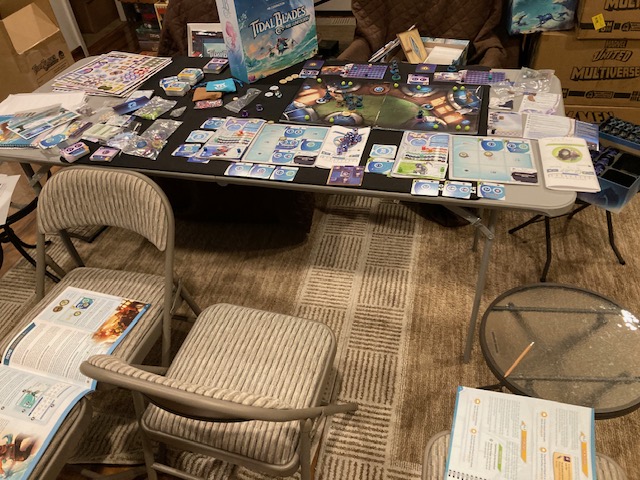
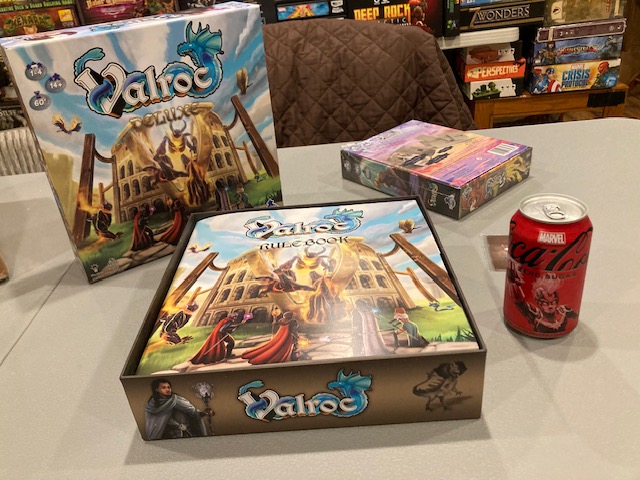
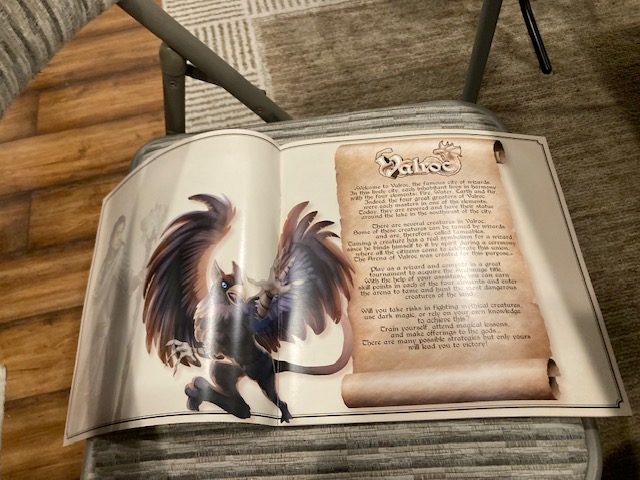
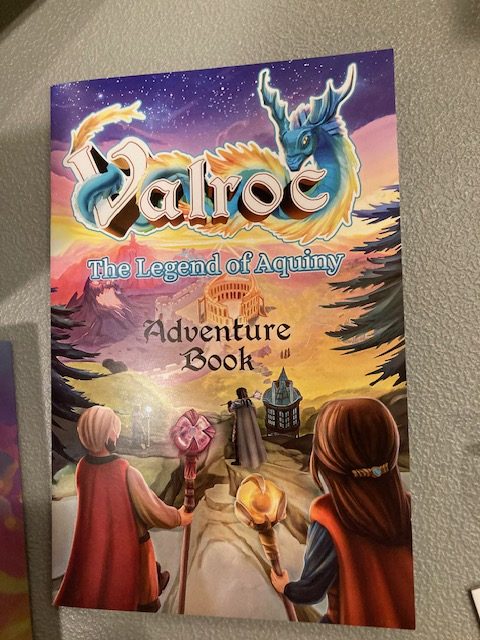
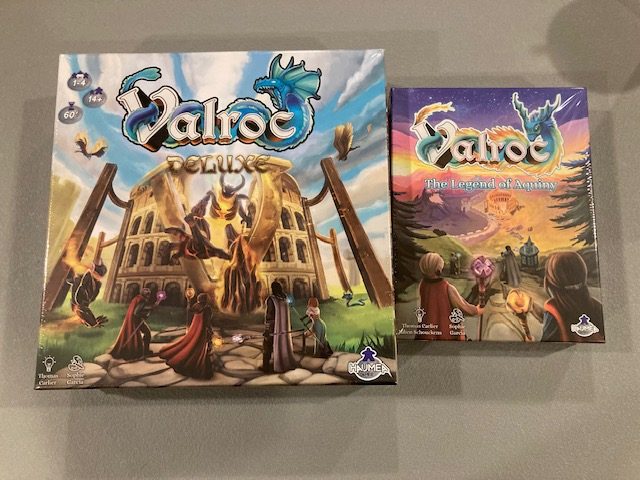
I wasn’t sure if I wanted to pick up Valroc. It was on Kickstarter again in September 2022: see here. This second Kickstarter offered the base game and a cooperative expansion called Valroc: The Legend of Aquiny.
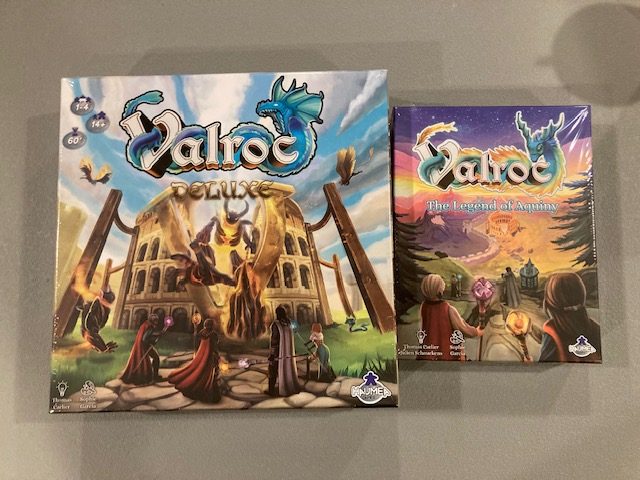
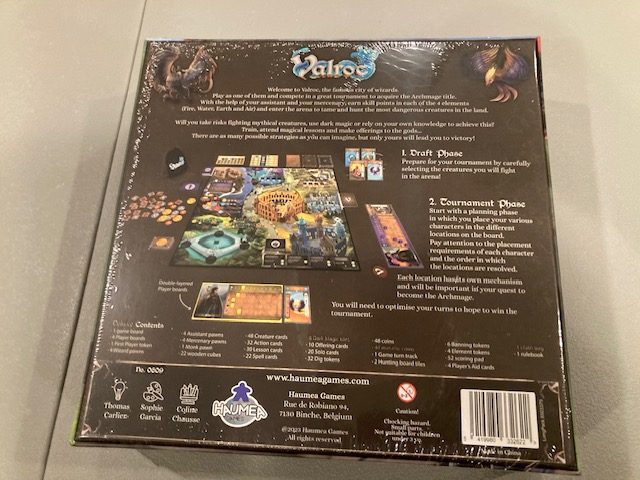
The base game is a fully competitive drafting and worker placement game (with a solo mode). See back of the base game above.
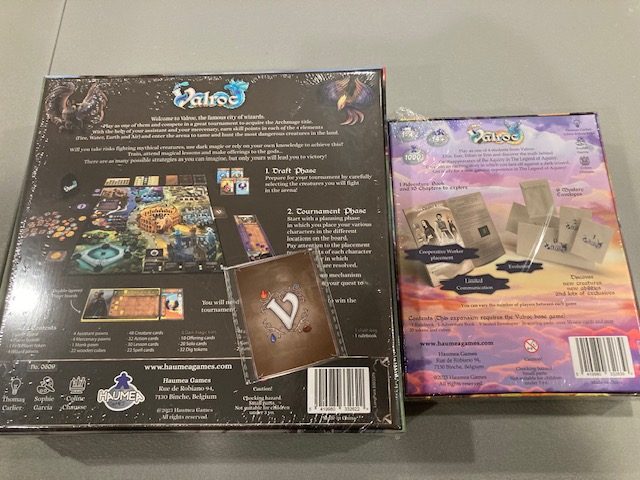
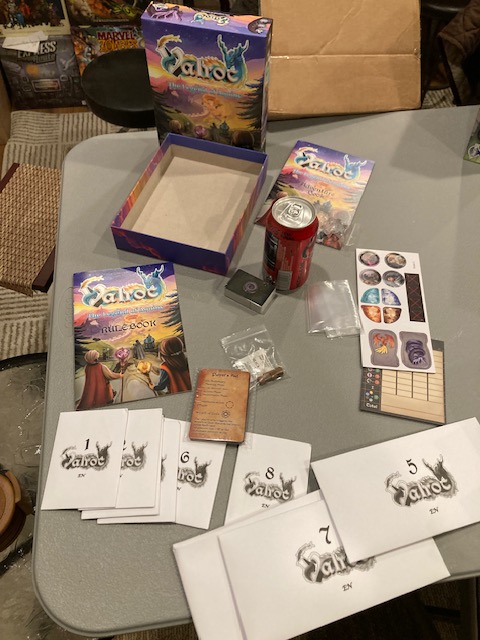
The expansion (The Legend of Aquiny) promises a fully cooperative mode with lots of envelopes to open! Ooooh fun! See above.
The Valroc Kickstarter promised delivery in September 2023, but it ended up delivering in April 2024 sometime. See above. For a Kickstarter, 6 months late isn’t bad.
Let’s take a look at this game!
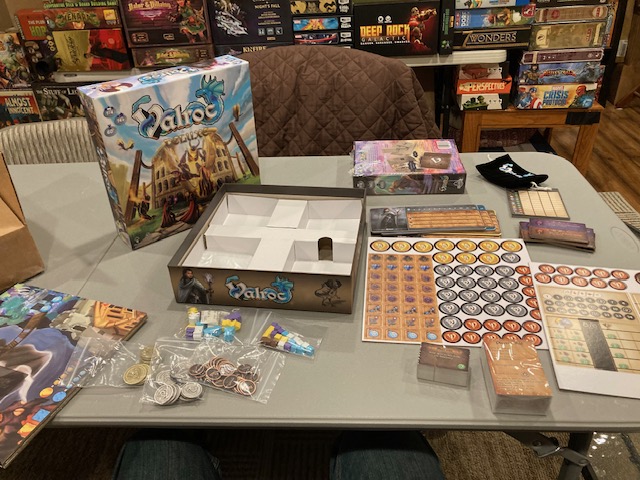
Unboxing The Base Game
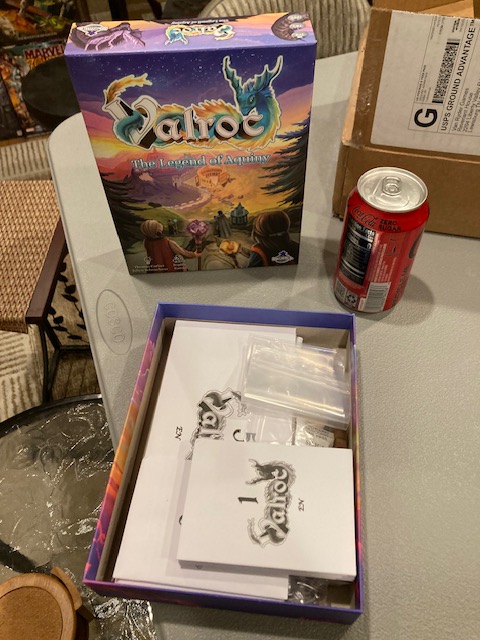
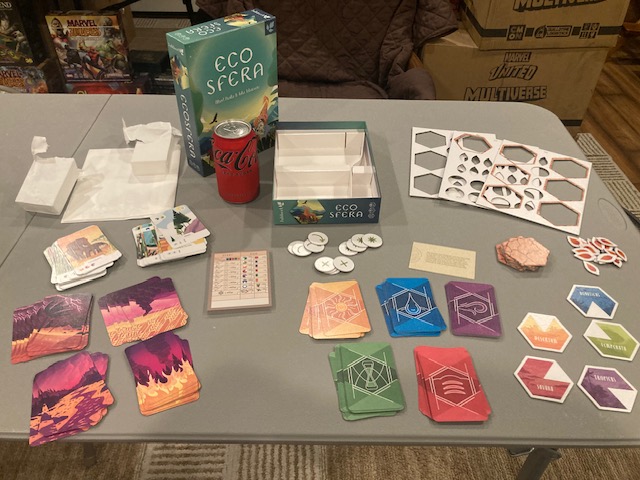
The base game is a fairly normal sized box: see Coke can above for perspective.
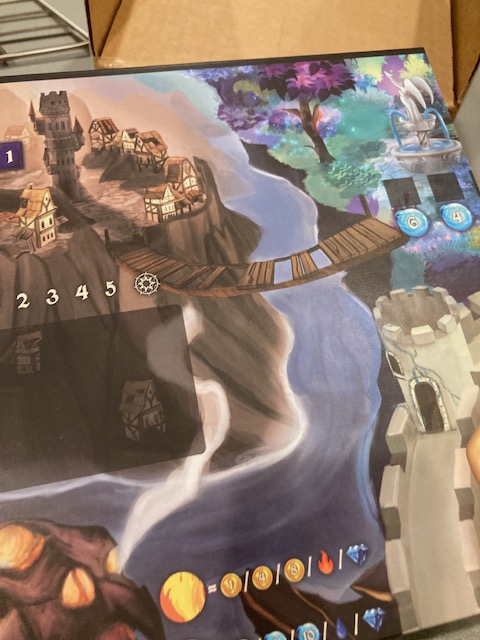
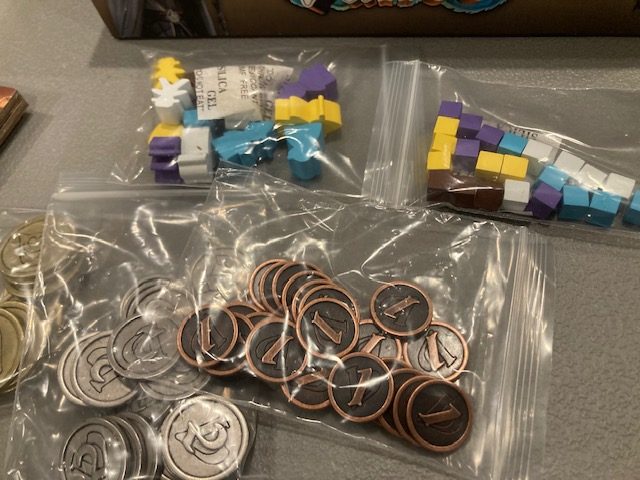
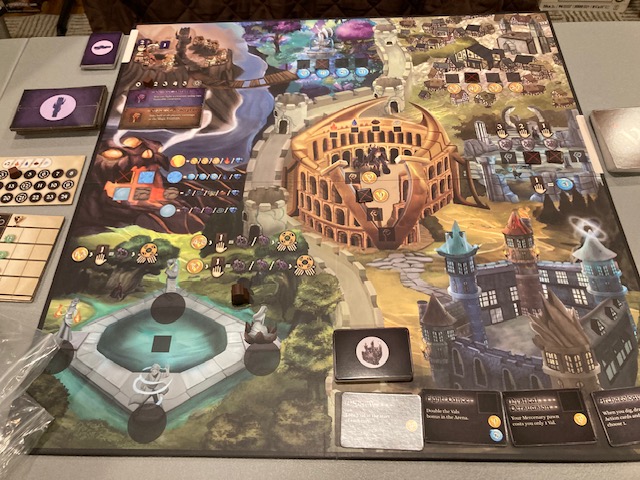
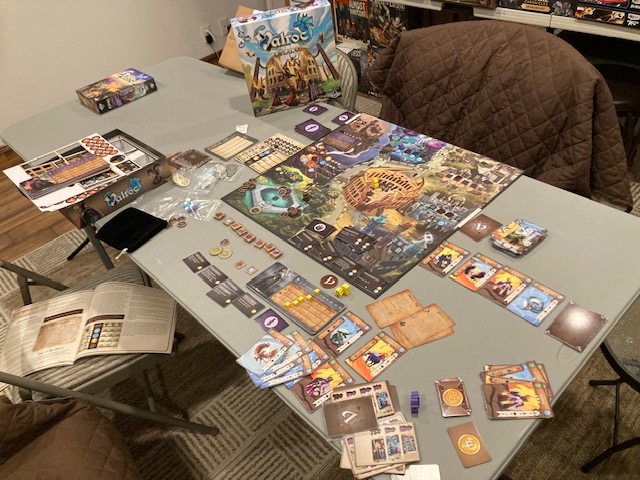
The game comes with a nice board: this board is for the worker placement part of the game.
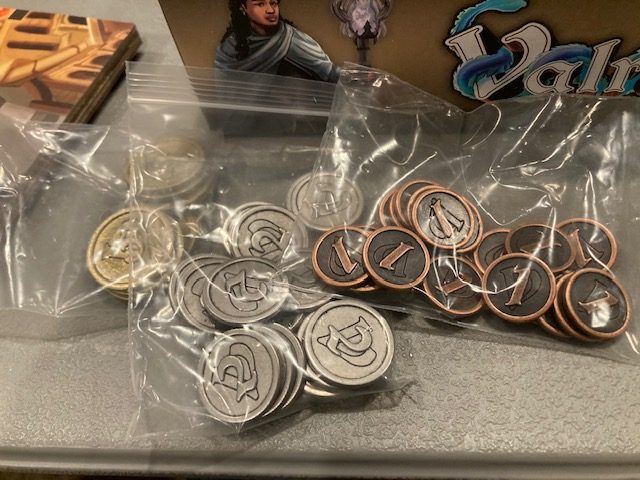
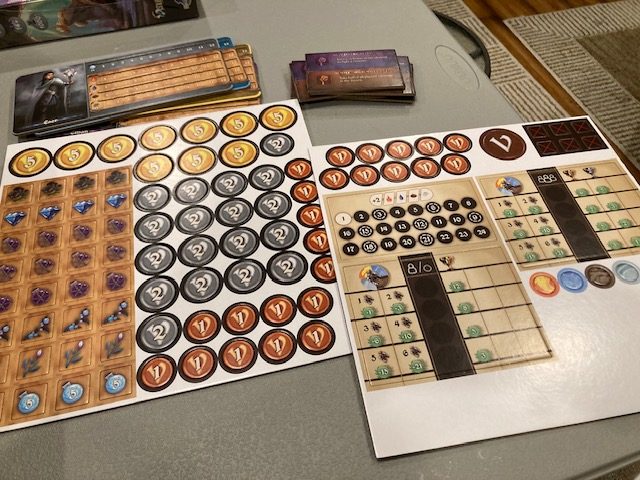
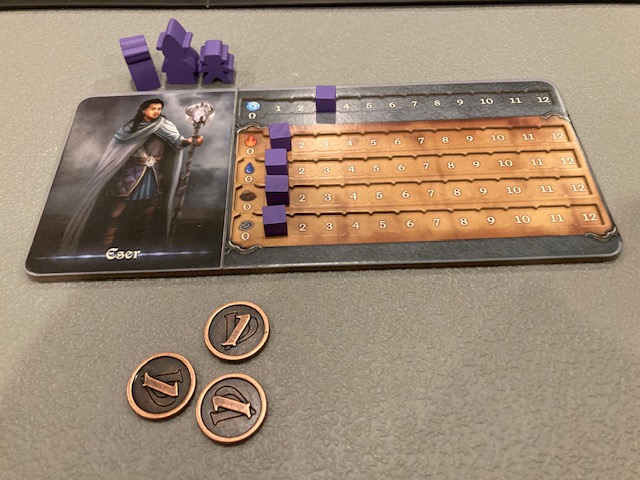
There’s a lot of buying of things and acquiring of money: I ended up getting the metal coins (called Vals) which are quite nice. The money is used to help you stuff in your worker placement phase.
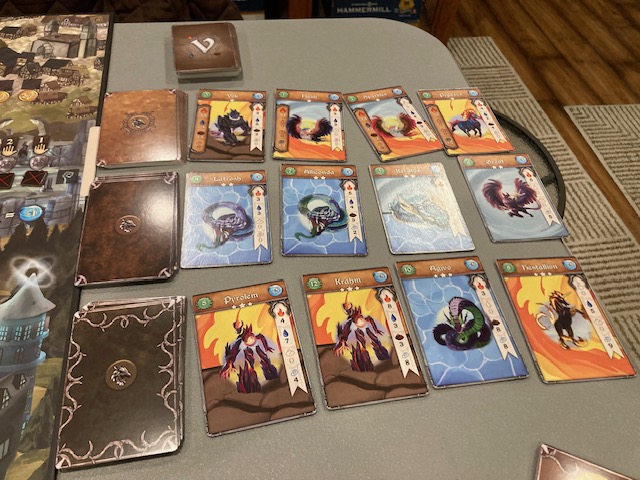
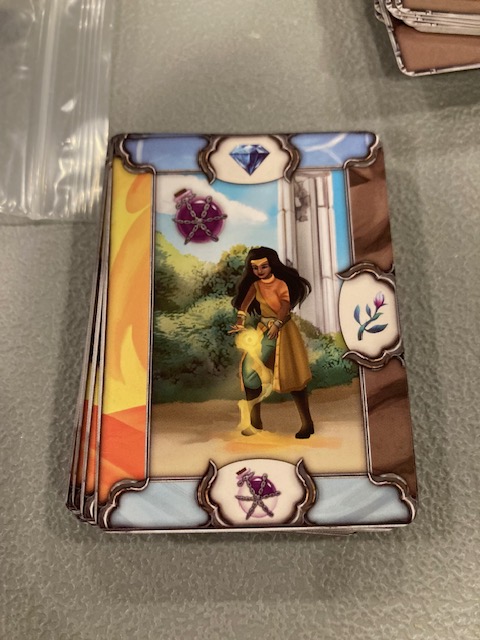
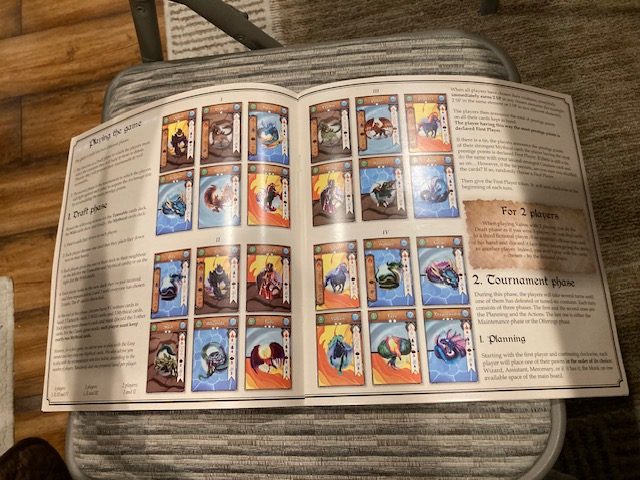
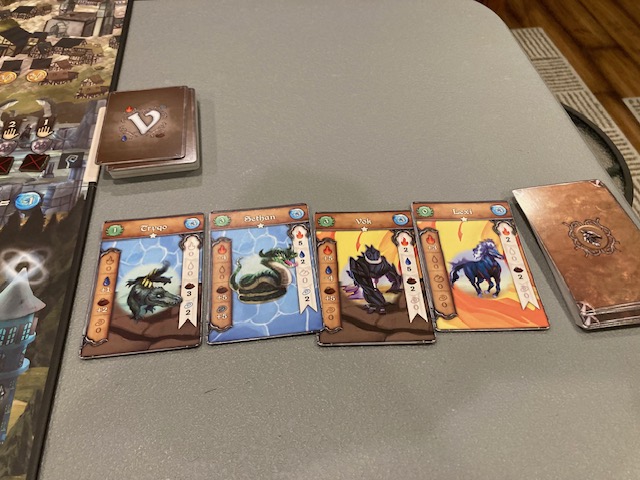
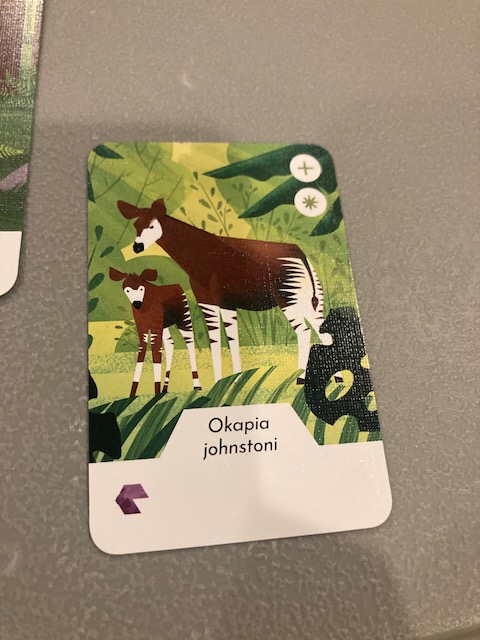
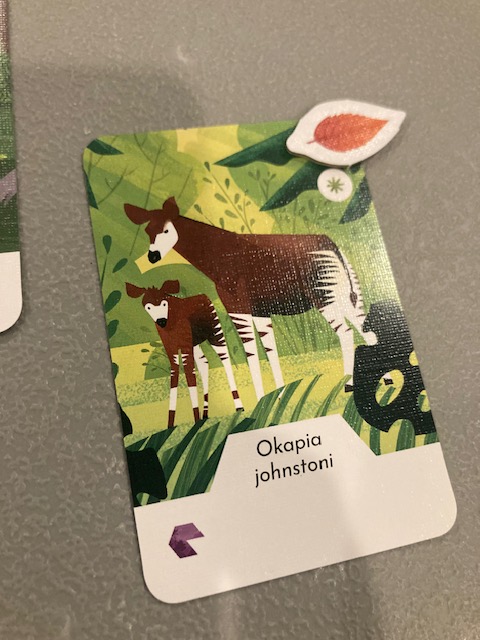
This game is all about buying of the creatures in the game: see a bunch above (You have to get 6 to invoke the competitive endgame). The right hand side of the card are all the resource prerequisites needed to acquire the creature.
There’s a lot of colored cubes and meeples: 4 colors for the 4 different players.
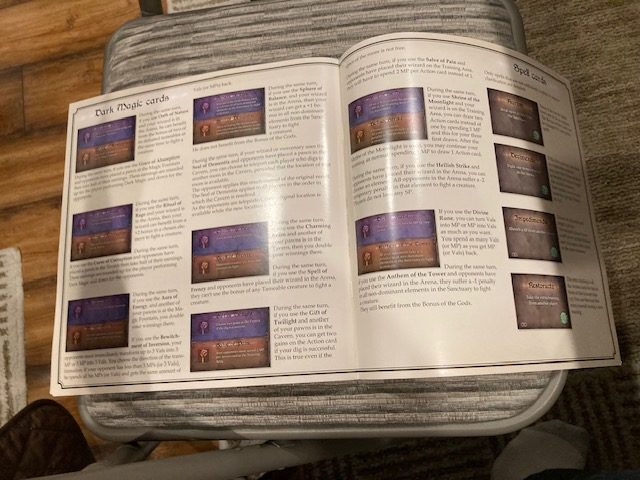
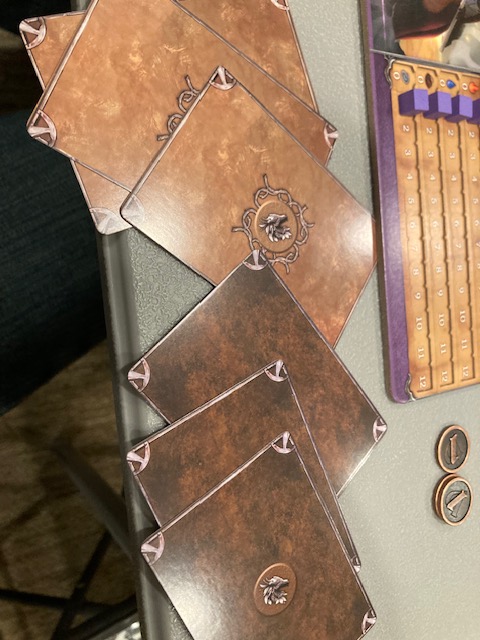
There’s a bunch of multi-use Action cards: see above. These same cards are used for digging, offerings, and training. The section of the card you use depends on the activity; the cards are nice enough.
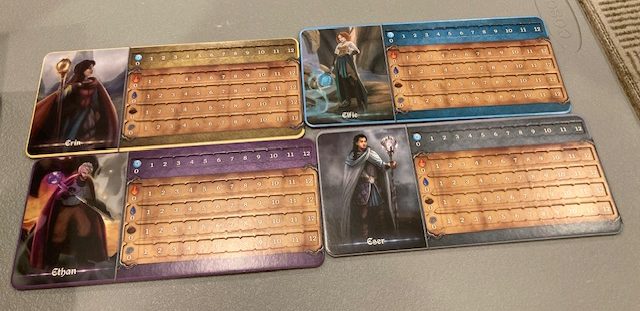
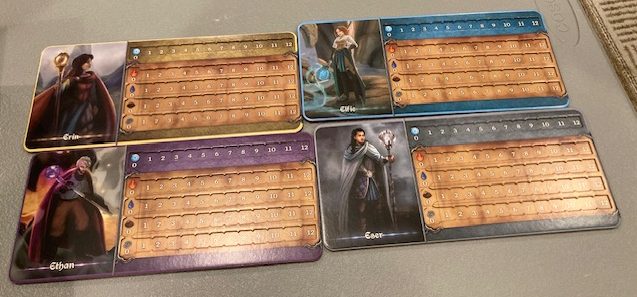
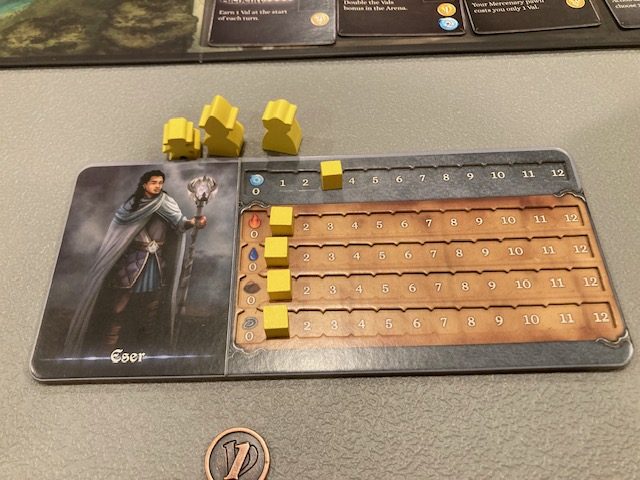
The components are all quite nice and consistent. Probably my favorites pieces in the game are the dual-layer player boards: see above.
In general, I think these guys did a great job with the production. I thought the game looked really nice! See above!
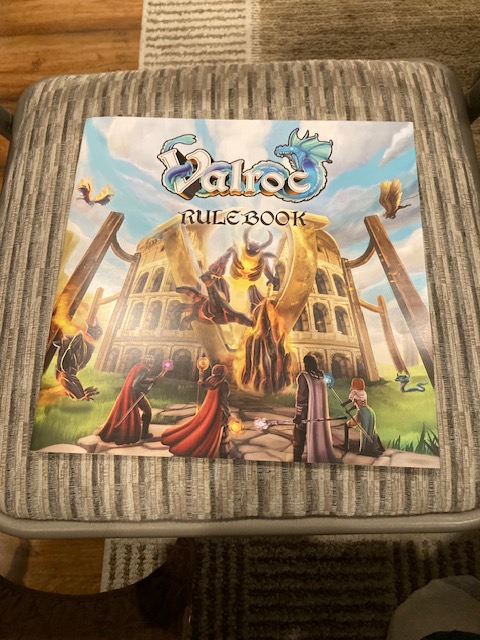
Rulebook for Base Game
The rule book was okay.
It’s a little too big of The Chair Test (maybe a C+), but I can still read it. At least it stays open and the font is readable. There’s a lot of white space: this could have easily been a smaller form factor to fit better on the chair next to me.
I was grumpy that there was no correlating pictures with the list of components. The rulebook can “sorta” get away with that because there’s not too many components in the game. I think, since this is a dual-language game (I think French and English), everything is labelled with abstract symbols, which was a little frustrating until you got used to it.
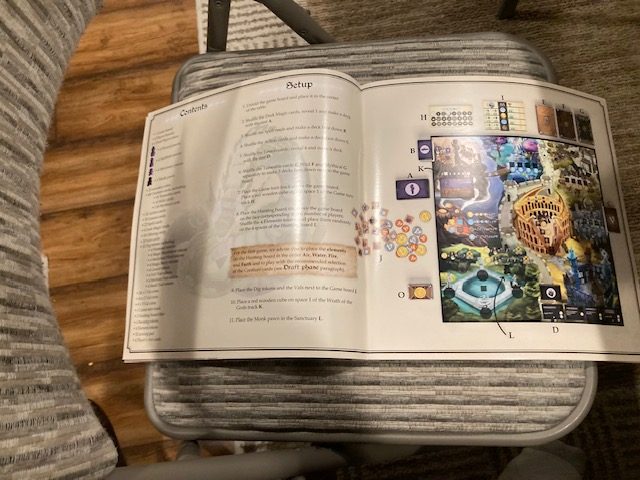
The set-up was decent, although they interspersed NUMBERS and LETTERS??? Each step should have been marked with one or the other: I found this unintuitive. A couple of steps had multiple things exposed, which is why mixed NUMBERS for the steps and LETTERS for the items, but I felt like this would have been better served by having JUST numbers. I think there were trying to do double duty and have the components list and set-up on only one pages. I would have rather had the first 2 pages (which had ONLY a picture and some flavor test) list the components and then had the set-up steps be NUMBERS and labelled with NUMBERS.
Regardless, I was able to figure out what was going on.
I was also grumpy because the rules specify special set-up for 2 and 3 players .. what about the solo game? Nope, you gotta wait for that … (so I can’t set-up the solo game just yet?)
There’s a very very nice list of creature cards to se for your first game.
The rules were okay. It’s very clear this game was originally a competitive game and the solo and cooperative modes were grafted on: Everything about this rulebook puts the competitive mode first and foremost.
Later in the rulebook (why aren’t the pages numbered?) they finally have rules for the solo mode. So, they are in there, but only after elaborating the competitive game.
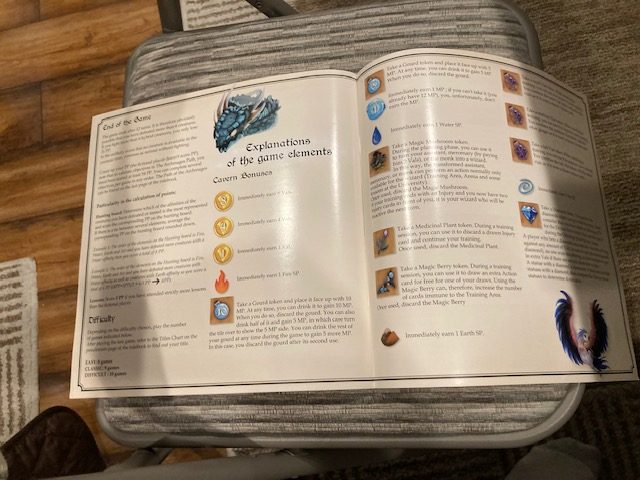
There’s some nice explanations of symbols: see above.
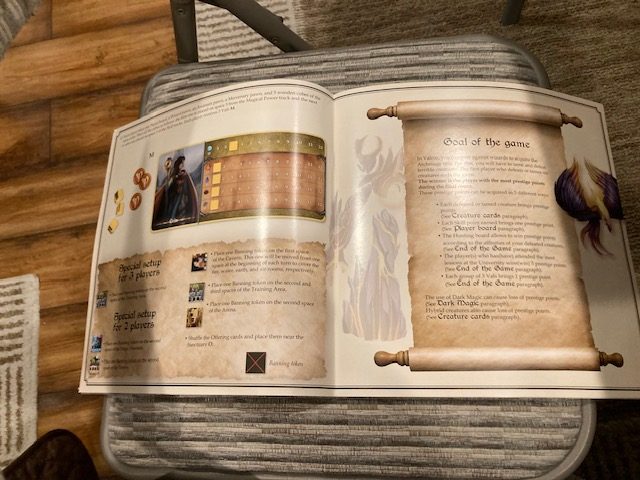
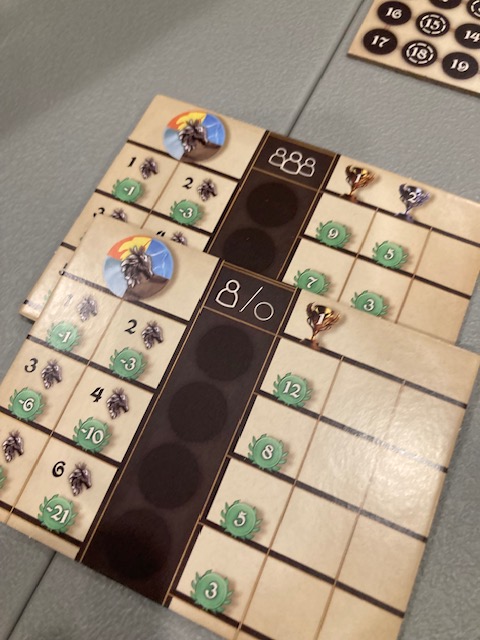
The back cover has something called the Archmages path … which is really only useful to the solo player (see solo discussion in a later section below).
There is no index and this game really needs one! Boo! But there is a further elaboration of many of the cards later in the rulebook.
The rulebook was probably best for the competitive mode: first and foremost, this is a competitive game. The lack of an index really hurt this game, because I was frequently trying to look up rules in the game, and I struggled to find things.
The rulebook taught the game decently: I was able to learn the game from the rulebook.
Gameplay
Each player takes the role of a mage in the game. There’s no different deck or asymmetric powers: the mage color is used only to disambiguate players.
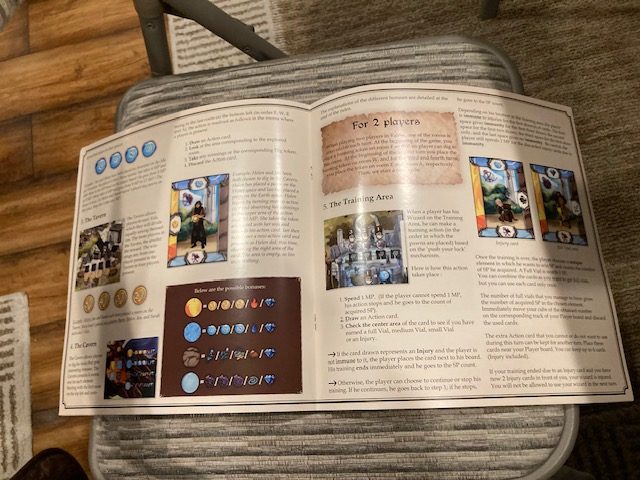
Each player starts the game with 3 worker placement tokens: left-to-right above: the assistant (tiny one), Wizard (hat), and Mercenary (nun hat?). Each wizard also has resources: Fire, Water, Earth, and Air. The mage himself slowly grows his resources in the game so he can acquire the creatures.
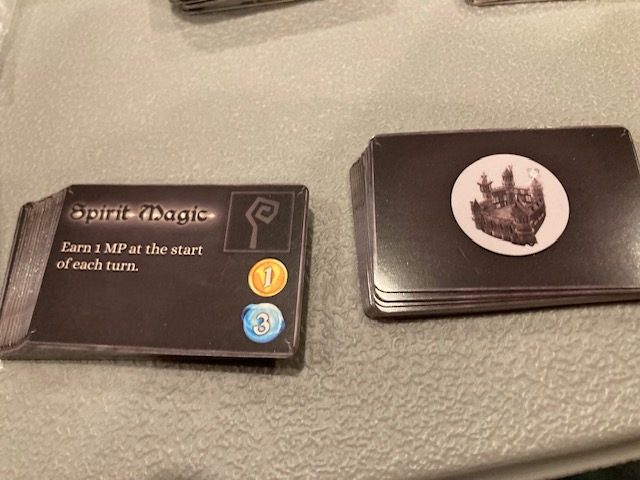
There’s also some MP (magic points in blue) that are used for many operations in the game.
Money is also an important resource the game: each player starts with 3 Vals.
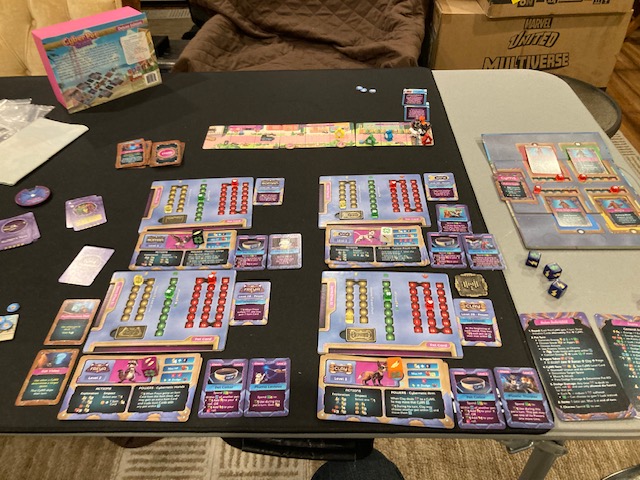
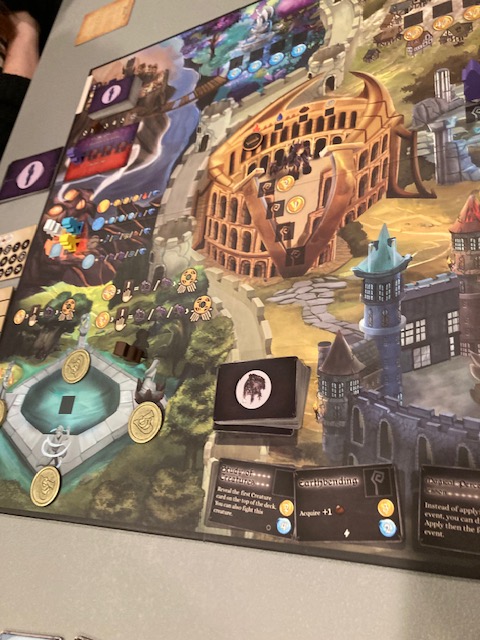
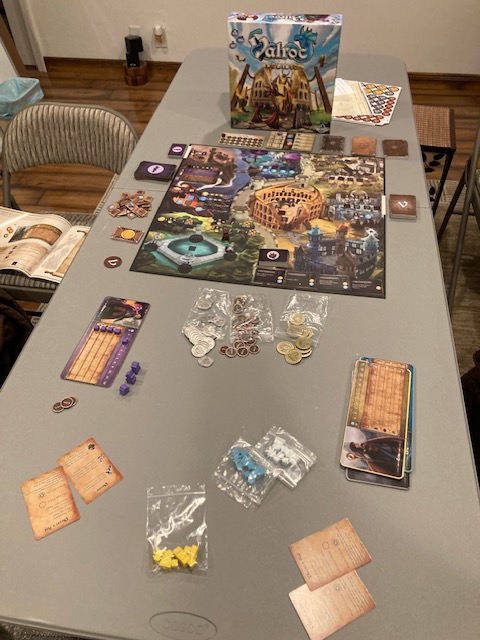
After you choose your Mage, you set-up for getting Creatures to acquire. If you playing competitive, you draft (7 Wonders style) the creatures. If you are playing solo or cooperative, you set-up a “river” of creatures (see above).
Either way, these represent the creature you can acquire: the resource prerequisites are on the right side of the creature cards.
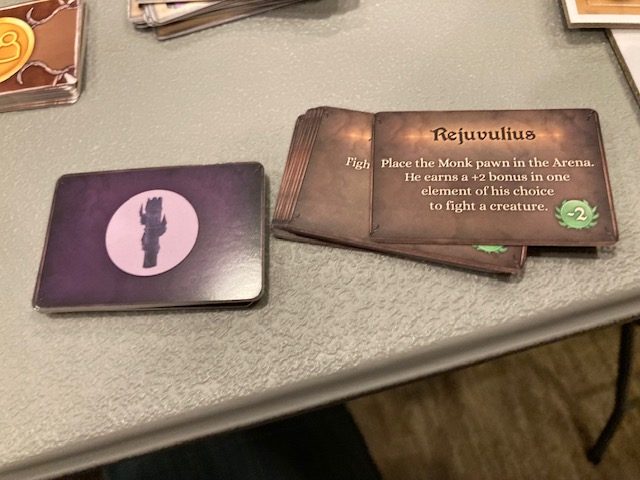
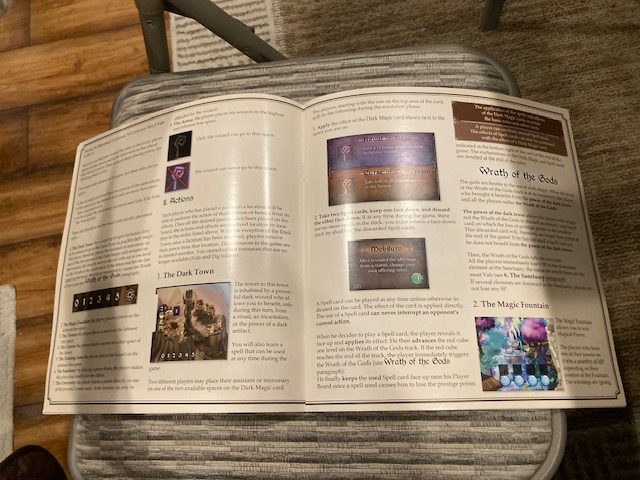
The rest of the game is Worker Placement! Players place their workers at one of the 8 spaces on the board (see above). Some spaces can ONLY be used by the Wizard, some spaces can only be used by NOT the Wizard! If you make an offering, you can also get the Monk worker for one round.
The players continue to play until they get to the endgame! The solo, cooperative, and competitive games all have different ending conditions.
But at its core, this is a worker placement game. Players manage money, MP, resources, creatures, their workers, and try to make the best tradeoffs they can.
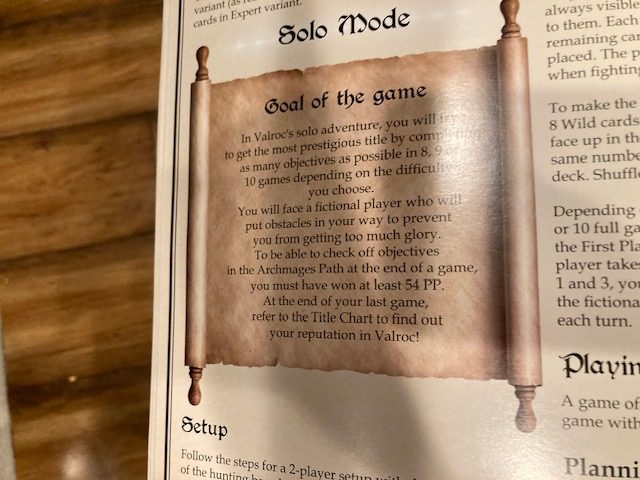
Solo Game
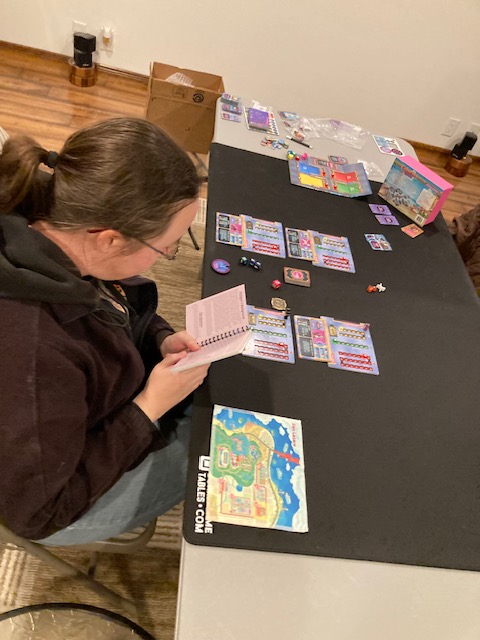
Valroc does have a solo mode (thank you for following Saunders’ Law)! My first play of a new games is almost always a solo game, as I have to learn the game to teach my friends!
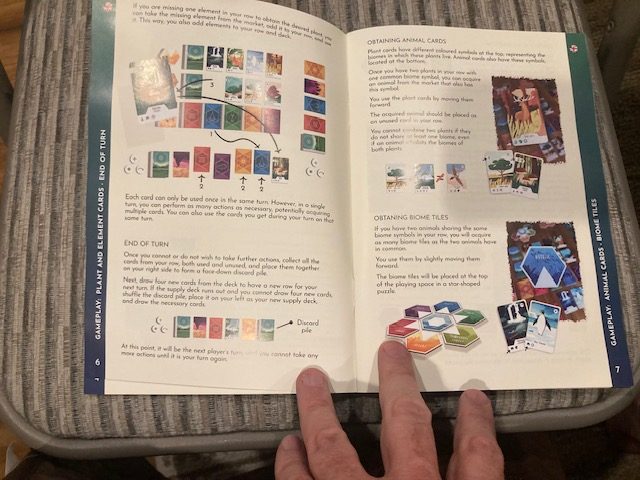
Unfortunately, the solo mode seems to be less well-described in the rulebook.
The pages describing the solo mode are full of text with almost no pictures (see above). I really struggled to get the solo mode going, especially the Offering phase. There’s a LOT of rules changes for the solo mode, and I don’t think two pages was quite enough to cover everything. Or at least, the solo rules needed some more elaborations.
I was able to get through a solo game to see how everything worked.
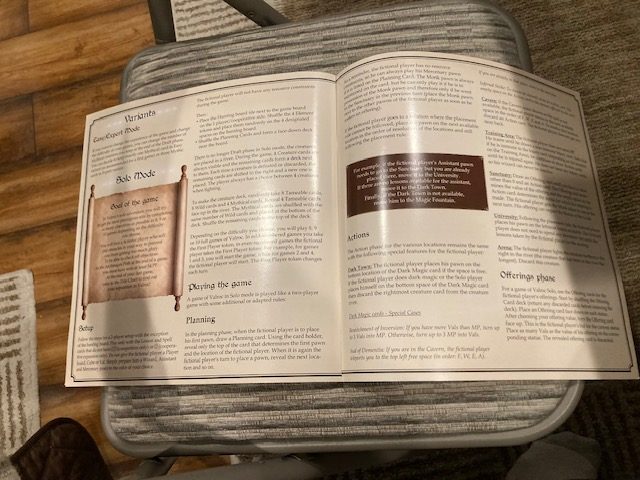
Instead of a drafting phase, creatures can only be acquired from the River (see above) … there is no drafting in the solo mode.
At it’s core the solo mode is basically the 2-Player mode, with a solo deck of cards controlling the second (opposing) player. See above: the solo card tells you where to place the “opposing” players worker pawns. It’s basically an automata placing pawns to simulate “blocking” you.
The solo mode did work: I was able to play a learning game to get most of the concepts in the game so I could teach my friends.
I had three major problems with the solo mode.
One, it’s not quite the same as the competitive mode. What do I mean by that? For my purposes, I learn the solo game to play that game with my friends. The more”different” the solo mode is from the base game, the less useful it is for me. The solo mode, although it introduced a lot of ideas of Valroc, was different enough in rules to be frustrating. A bunch of rules had to change to play solo, so it was harder to switch gears that to the base game.
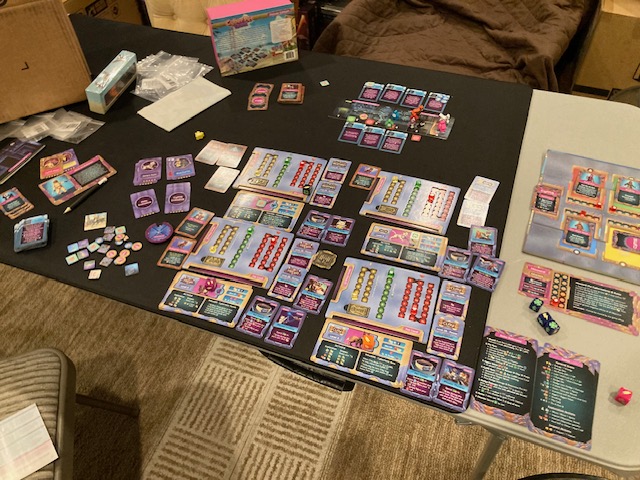
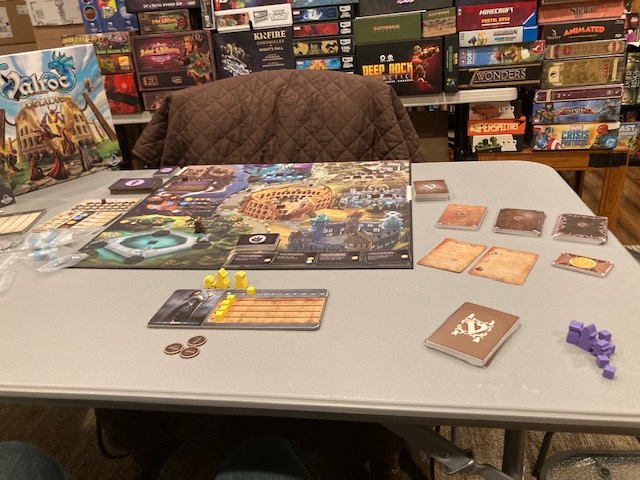
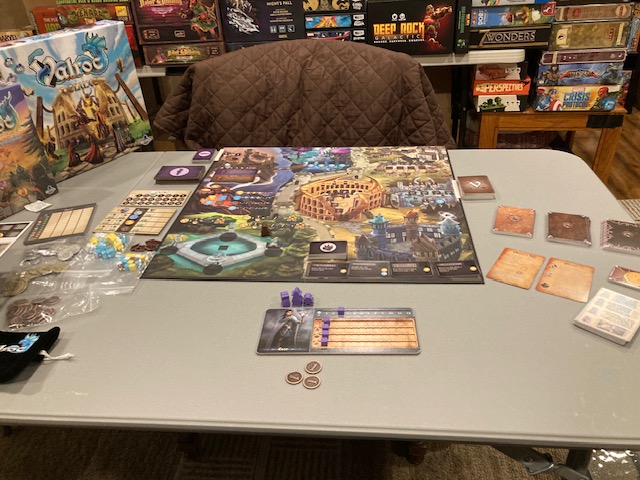
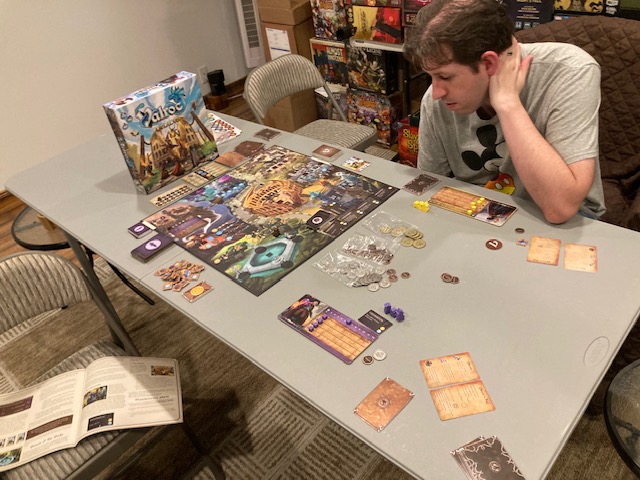
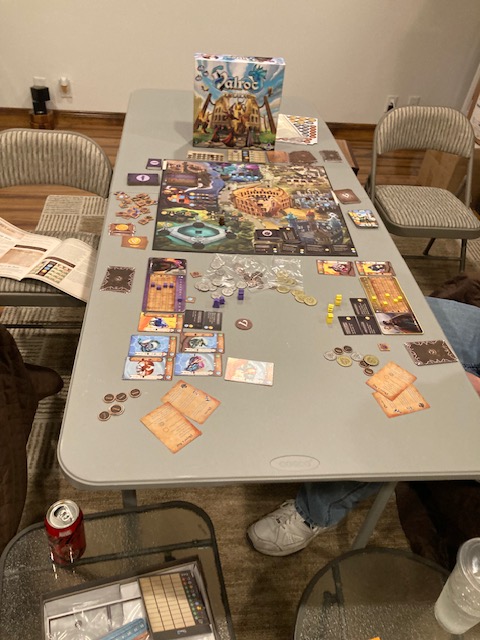
Two, the solo mode was exhausting: see above as it takes over the table!! The solo player has to do everything, including playing the second opposing player! And the rules for the second opposing player are different than your rules. So, I frequently had to stop and discern “What does it mean when the opposing player goes there versus when I go there?” I found the solo mode to be a lot of upkeep work, as I placed my workers, the opposing players workers, all the while trying to lookup rules differences.
Third, the solo mode “win” condition is not very satisfying … it is not a win condition but a CAMPAIGN win condition? You have to play 8 to 10 FULL GAMES and try to get as many checks on the Archmages path (the chart on the back of the rulebook: see above). At first, I thought that was a misprint! Surely, they can’t mean you need to play 8 to 10 FULL GAMES to “win”? In other words, you can’t just play a single solo game for fun to see if you win … a win is described ONLY as a result of a 8 to 10 game campaign!!! If there was a more meaningful “single solo play” win condition, I might like the solo game more, but I don’t want to feel like I am tethered to a 8 to 10 FULL GAME CAMPAIGN to enjoy this!
I liked the solo mode well enough, and it taught me most of the game basics, but as an entry point into the Valroc universe, it could have been significantly better.
Competitive Mode
At its core, I think Valroc is best as a competitive Worker Placement game. The rulebook puts the Victory point/Worker Placement game first … because I suspect that’s how it was developed.
The core drafting phase is kind of fun: this sort of reminds of many competitive games like Res Arcana or Seasons where players draft at the start of the game to get the initial game going.
The competitive game isn’t too cut-throat: it tends to be more multi-player solo, where each player does his own thing (unless we get in each others way). There were a few take-that cards and mechanisms in the game (mostly in the Dark Magic area, and the University area with the Lessons cards), but they only came out occasionally. I would probably consider taking the take-that cards out of the game: none of my groups particularly like that aspect.
The funnest part of this game is trying to balance all your resources (Vals, Fire/Earth/Water/Air, Magic Points, Creatures) to maximize your victory points at the end of the game. How do you place your workers to get the best results for yourself while steering your opponent(s) away?
I feel like this game is best for people who like Seven Wonders and Lords of Waterdeep: the drafting is fun to set-up the game, and the worker placement is fairly straight-forward like Lords of Waterdeep.
Sam texted me after we played through the competitive game: He said something like:
“Valroc reminds me a lot of Res Arcana. The drafting in the beginning, the resources, and such make me feel that people who like Res Arcana might like this game”.
The Legends of Aquiny Unboxing
The cooperative mode was the reason I picked up this Kickstarter. It’s a full box with a “whole new game mode” for playing Valroc cooperatively!
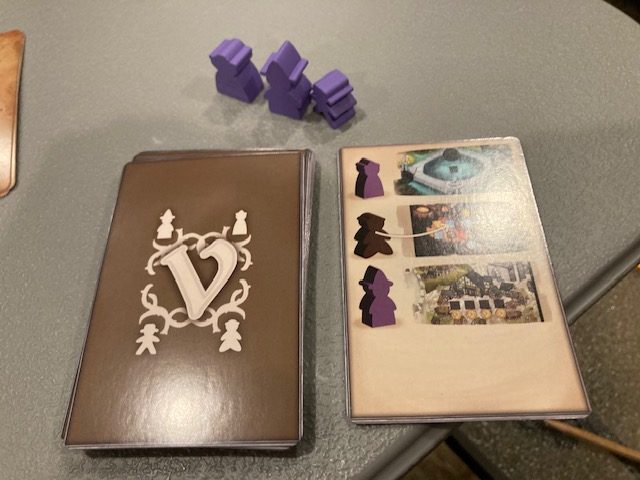
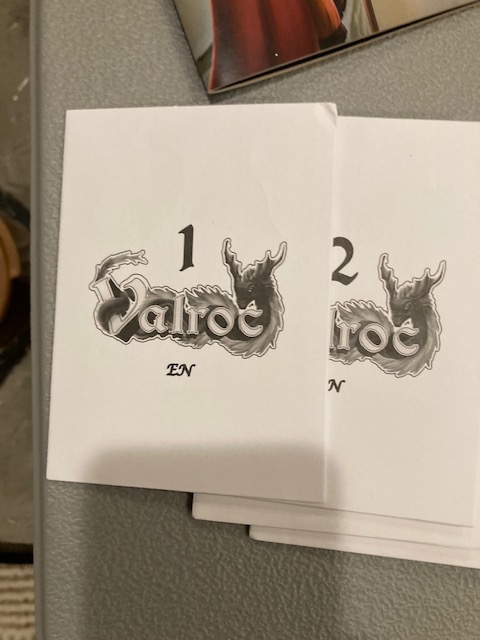
This is obviously a campaign cooperative mode. Look at all those cool envelopes! My group and I were excited for this … we were looking forward to opening the envelopes! What do we get??
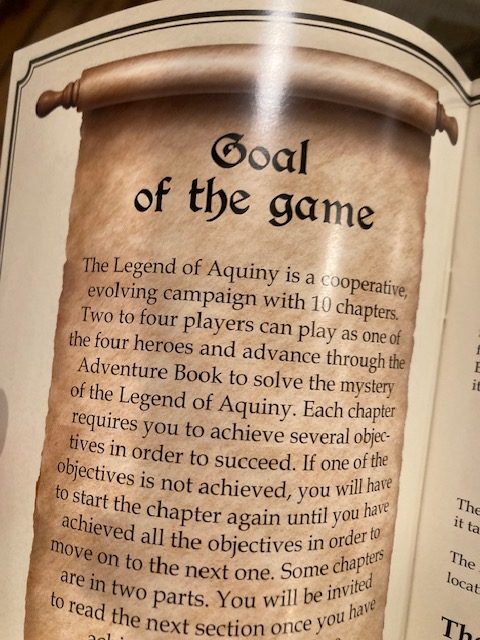
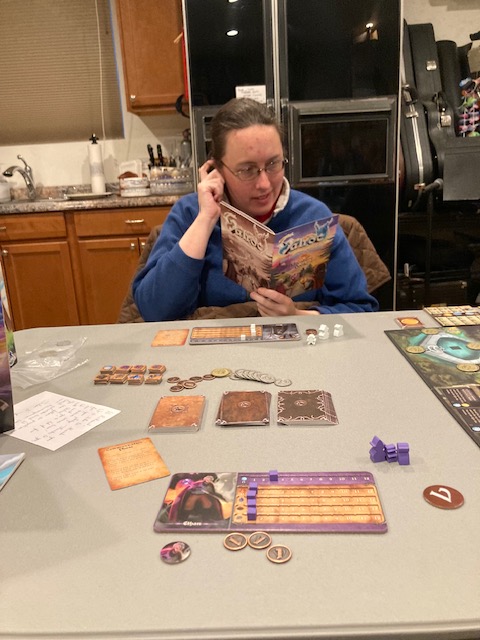
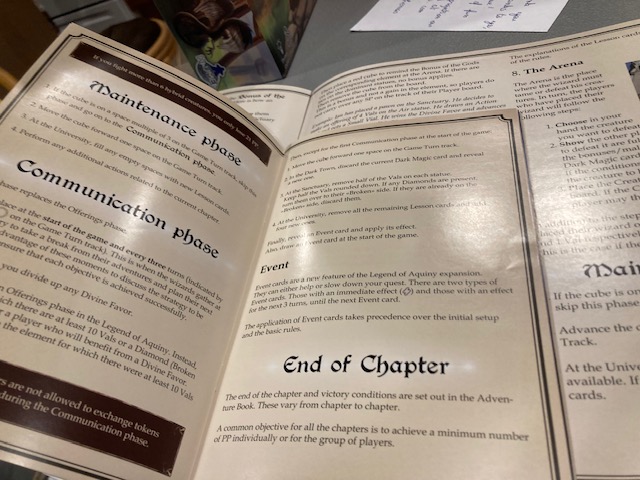
The Adventure book (above) outlines the campaign and the rulebook (below) describes the changes.
Basically, this is a campaign over 10 Chapters … see above.
We look forward to these envelopes!
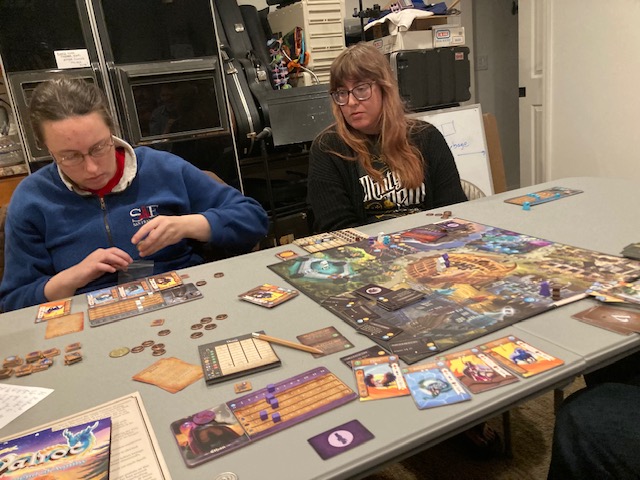
Cooperative Play
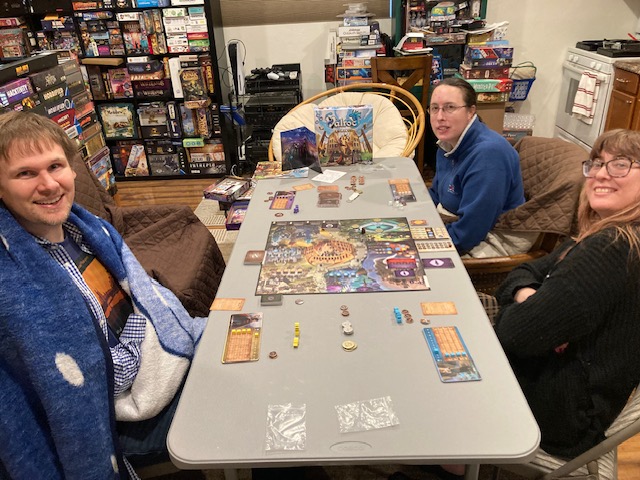
We were all excited for the cooperative play! The cooperative play appeared to be a real full expansion! Remember when we got a cooperative expansion for Thunderstone Quest!? It was its own thing!
Unfortunately, the cooperative game didn’t go well. My friends did not enjoy this at all.
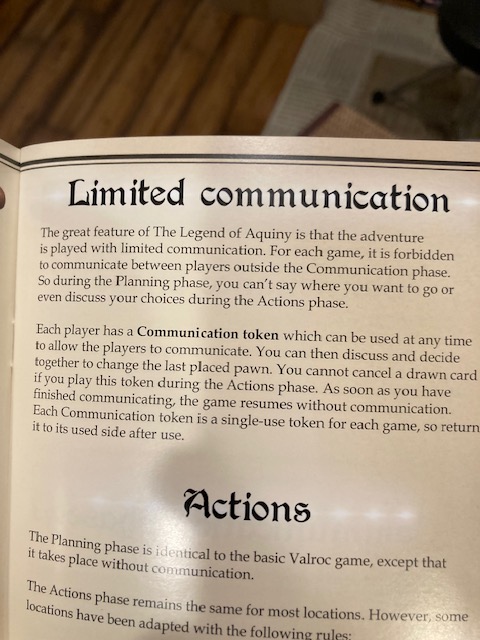
First of all, my friends hated the Limited Communication. You can only communicate in the Communications phases (see rules above). You could be standing next to each other in the Arena or any place on the board, but you still can’t talk! I might take a creature from the river that my friend wanted and he couldn’t say anything!
There’s the notion of a Communication token (which you can use ONCE per game), but even that didn’t feel like enough communication.
It just felt like we took our turns in silence as we played. We even “narrated” our turns just to break the silence.
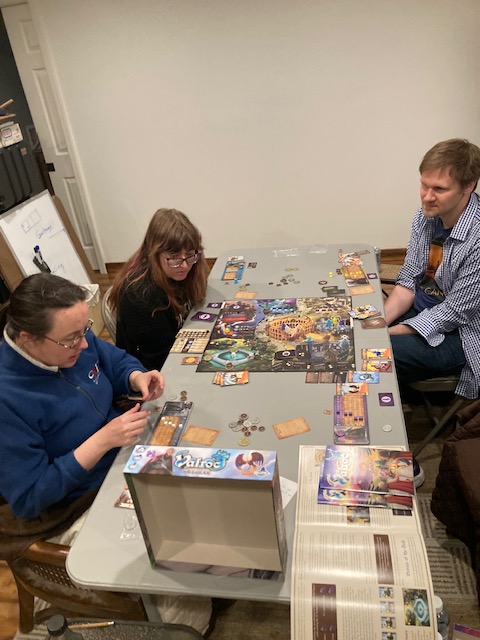
We also didn’t like how slow the upgrade path was. Remember those cool envelopes? Finishing a chapter in the campaign made it so we could open an envelope! COOL! … but only one player could upgrade??? And you were told which character!!! So, the next chapter would have one character being stronger … and no one else would be … It wasn’t fun for the rest of the players. I looked at a few more envelopes … it was more of the the same. We all said the same thing: Lame. We ALL want to upgraded every adventure!!
The cooperative rules were okay. They worked.
Me and my friends didn’t like the cooperative rules. The cooperative rules felt grafted on: they didn’t seem to enough of the fundamental change needed to make Valroc feel cooperative.
Communications Limitations
Recall that we just ended up “ignoring” a lot of the communication limitations in Hacktivity weeks ago … because it didn’t seem like a big deal. Hacktivity is a lighter game, and having real communication made the game more fun!! Here in Legends of Aquiny … it felt like breaking this limitation would break the game. I don’t know, we did NOT like this limitation. Our turns were couched in silence.
A lot of time, Communications Limitations feel like a “crutch” designers use:
“You can make a game cooperative by just adding Communications Limitations!! Just play the game cooperatively but you can’t talk!”
The typical justification is that, by limiting communications in cooperative games:
1. You can get rid of the Alpha Player: the Alpha Player can’t tell you what to do if he can’t talk!
2. You can avoid analysis paralysis: If you can’t talk, you can’t talk with each other to over-analyze
3. You can shorten the game: the game is quicker if you can’t talk!
Here’s the thing: I want to talk to my friends! If it means I am enjoying the game by discussing things with my friends, I am okay with that. If my friends want to find a better and optimal path, sure, let’s over-analyze a little! At least I am engaged and talking with my friends as opposed to sitting in silence as we play!
One of my friends (I forget who) made this brilliant observation:
“Limited Communication may actually cause analysis paralysis as you try to guess and figure what each other player might do! If they can tell you what they can do, that gets rid of the extra analysis!”
I think they are onto something: Limited Communication can cause the same Analysis Paralysis they are trying to get rid of!
In the end, my friends and I prefer cooperative games without Limited Communication. Limited Communication is just less fun.
Conclusion
Valroc seems best as a competitive worker placement game for 2-4 players: it feels as that as how it was first designed and how it plays best. If you like Res Arcana, Seven Wonders, or Lords of Waterdeep, this might be a good game for you. This is probably a 6.5/10 or 7/10.
The solo mode is okay and works, but there’s too much upkeep per turn, the win condition is not satisfying (it requires a 8 to 10 game campaign), and the rules seem less well-described in the rulebook. The solo mode is probably a 5.5/10. With a few tweaks (give me better descriptions in the rulebook and a more satisfying single game win), this could get a better score: I would welcome a second edition for the solo mode. The rulebook does teach most of the principles of the game if you want to try it solo.
If you, like me, you picked up Valroc (and the expansion) for the cooperative game, I think you will be deeply unsatisfied. Legends of Aquiny feels very much like a grafted-on cooperative mode: the limited communication feels stifling and the upgrade path in the envelopes is too slow. I can’t recommend the cooperative game. It worked as a game, but it wasn’t fun. My group would probably give it a 4/10 overall: they did not have fun and they did not want to continue playing.
Valroc seems best as the base game: a competitive worker placement game.
My Kickstarter copy arrived October 1st, 2024 (see above) making it about 5 months late. Meh, that’s not too late in the grand scheme of Kickstarters.
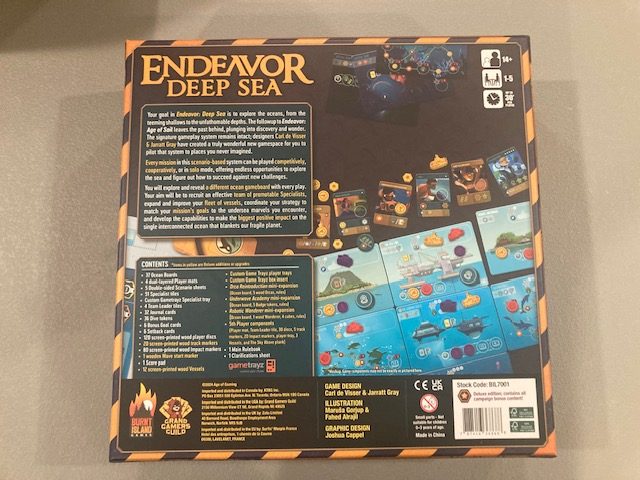
I backed this because it is a worker placement game promising both solo and cooperative modes! That’s right! Cooperative worker placement games are a rare creature, so I was excited to see what this would bring! (How many can you think of? Exactly!)
Let’s take a look below!
Unboxing and Gameplay
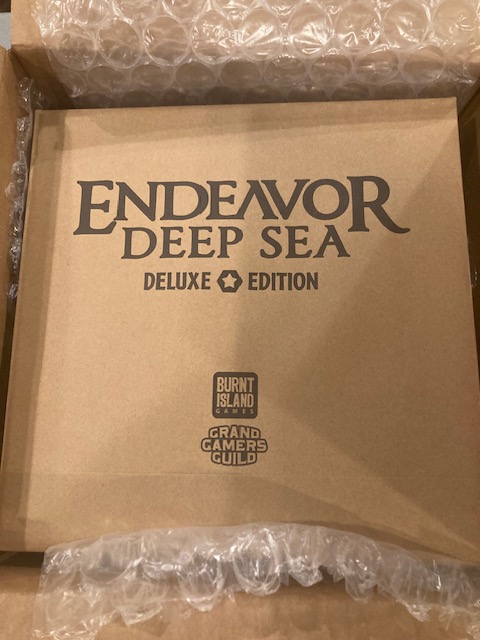
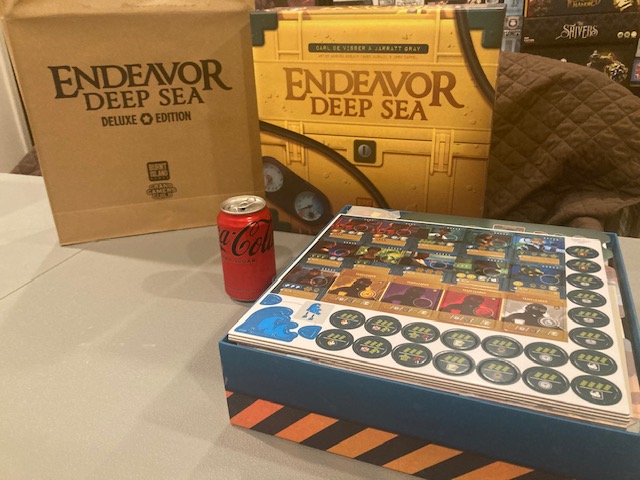
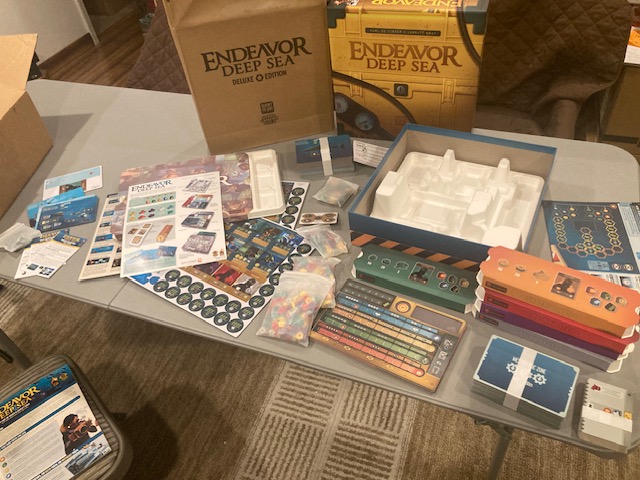
So, my version is the deluxe version (see above: I had to pay extra for that). Anything you see here will be from the deluxe version: mostly, the deluxe version has nicer components and adds a 5th player.
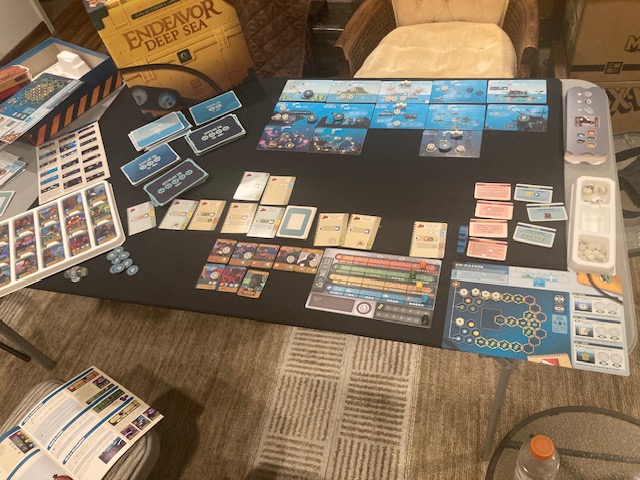
This is a pretty big mamba-jamba! Look how the Coke can is dwarfed by the box!
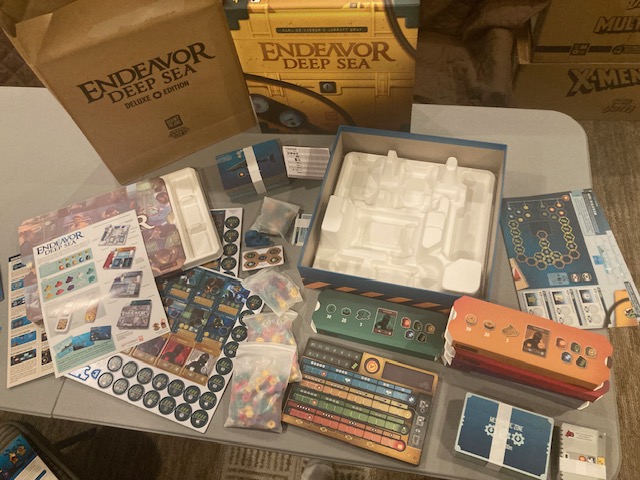
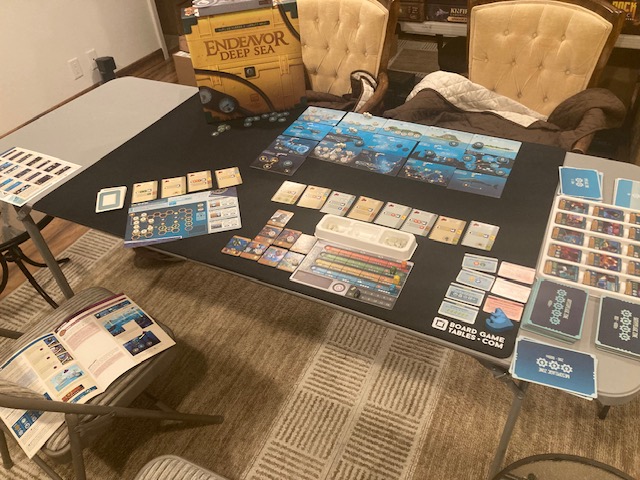
There is a LOT of stuff in this box! See above! The easiest way to take a look at it is to talk about gameplay and show the pieces as we do, so you can see how everything (so much stuff!) interacts!
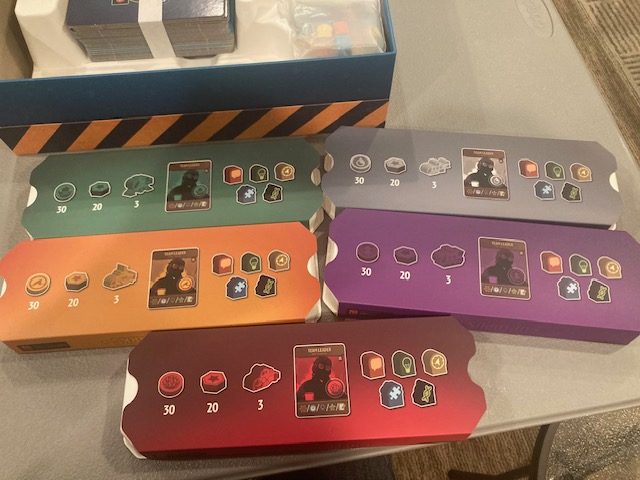
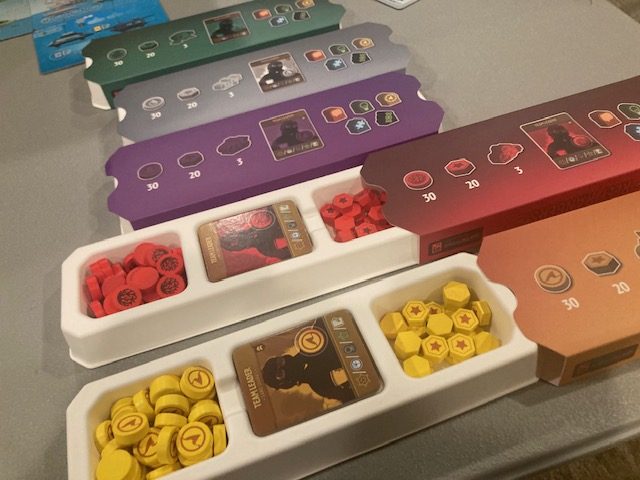
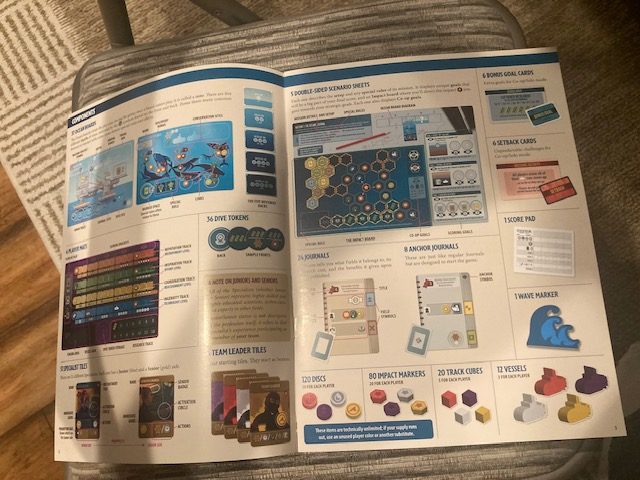
There’s 5 “teams” in the game: each player chooses one of them to operate. (They are all the same except for the color: there’s no special powers or anything). Each team has a whole bunch of tokens in their little trays.
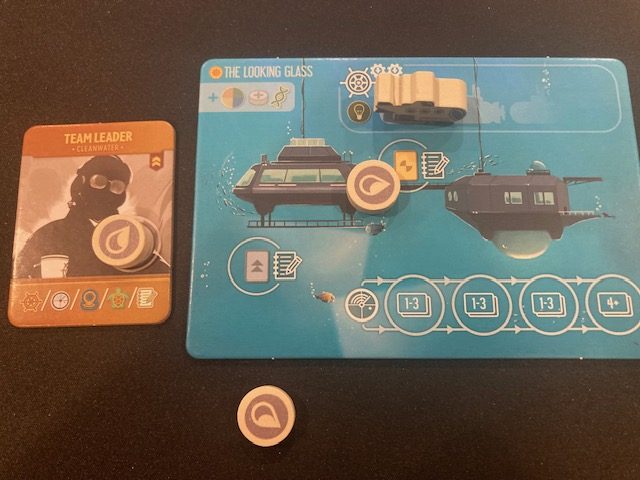
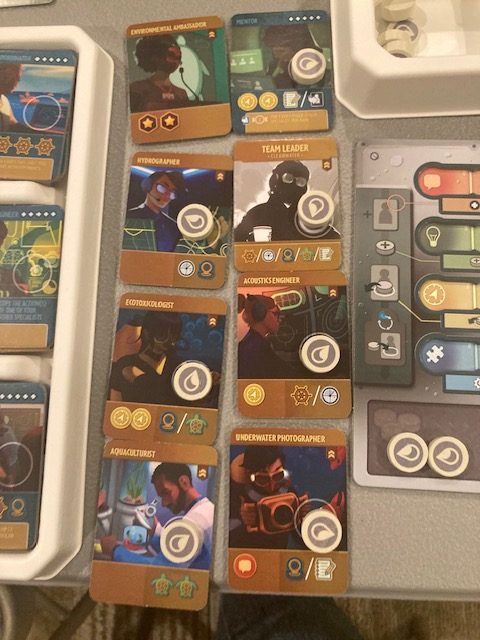
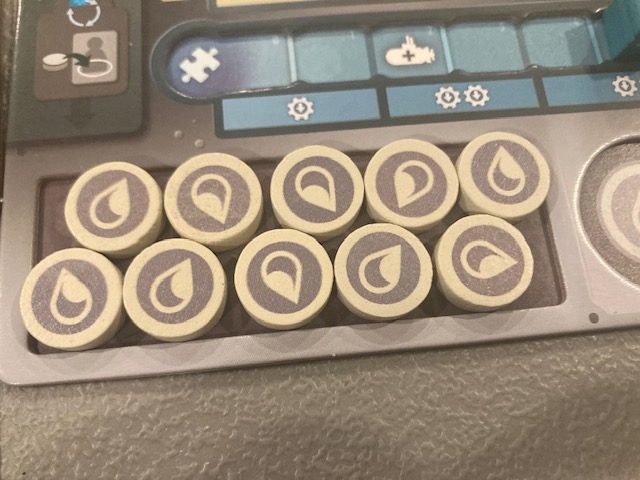
The circular tokens are the worker player disks: these go out to “do actions”. The hexagonal tokens are special tokens that go on the Impact Board (we’ll discuss more below). Each team also has a Specialist called the Team Leader … they are a Jack-Of-All-Trades: they can do any of the actions in the game!
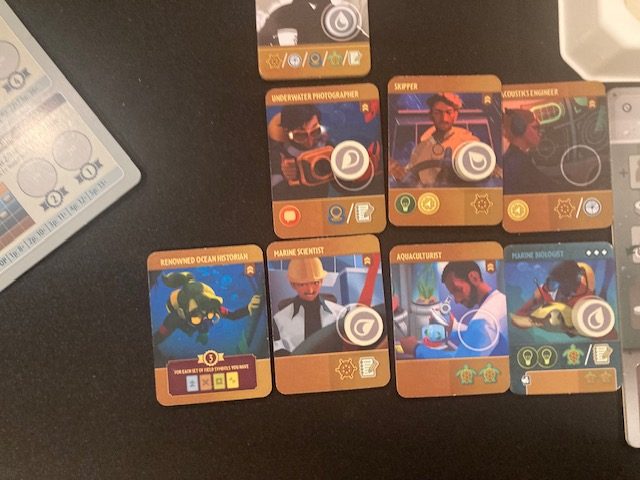
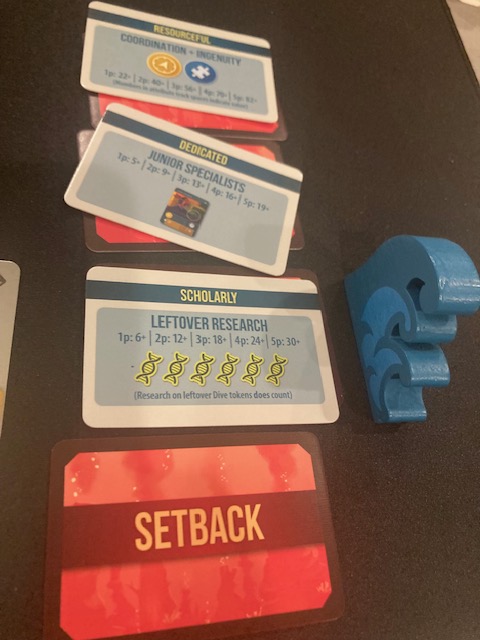
As the game progresses, you acquire more and more Specialists: see above. Basically, you place a circular “worker placement” token (see above) on a Specialist to activate their ability! Notice that each of the Specialists can only do certain things! The Skipper can only MOVE! The Underwater Photographer can either DIVE or JOURNAL! So, your choice of Specialists is important, as it shapes what you can do!
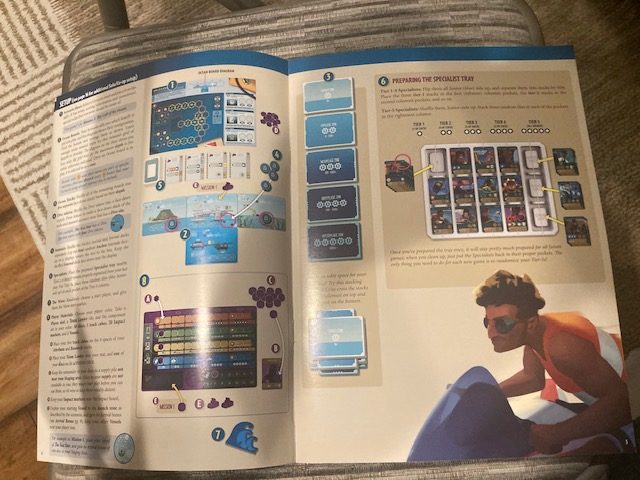
The Specialists come from a special tray (no pun intended). It’s nice, because at the start of every turn, each player gets a Specialist, no matter what! So, as the game progresses, players get more and more Specialists to activate with the “worker placement” tokens.
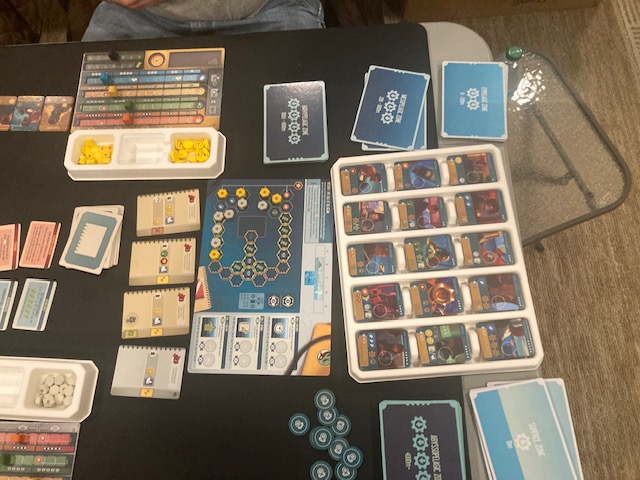
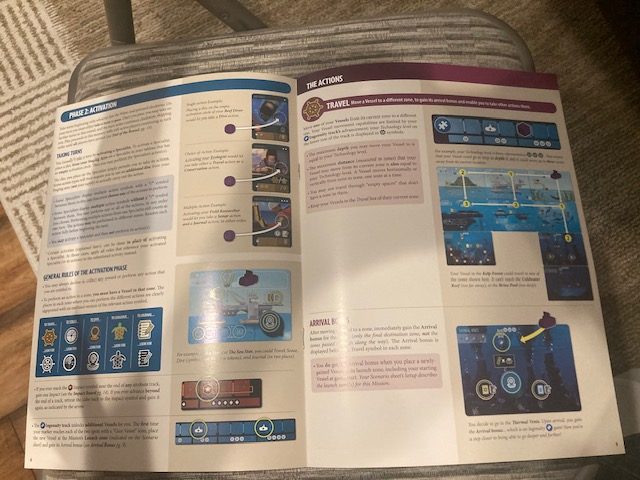
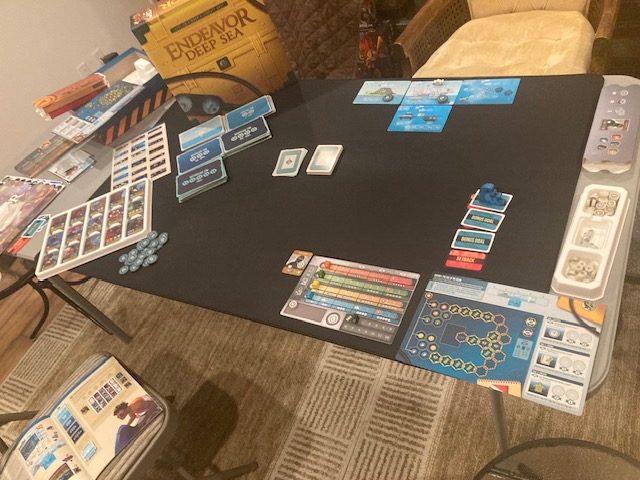
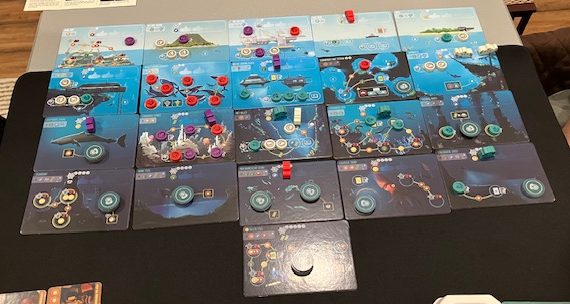
There’s some real interesting things going on with worker placement in this game! For example, the “worker placement” tokens tend to placed out in pairs! Also, you can only do an operation (like DIVE or JOURNAL) if your sub is on a Deep Sea Zone with that action on that board!
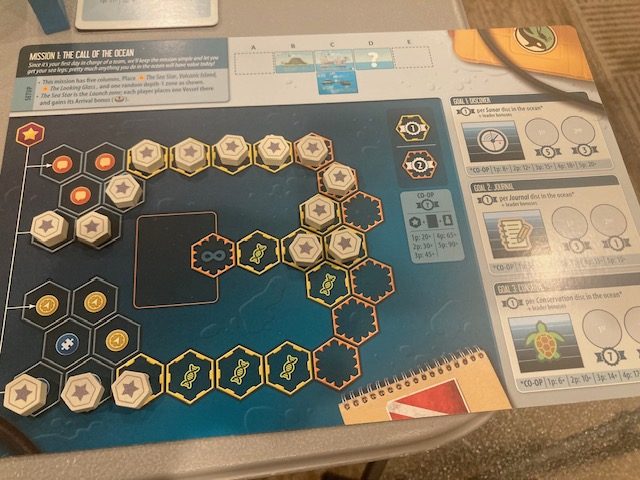
For example: Let’s say you want to JOURNAL! See configuration above! 1) Your sub has to be on a zone with a JOURNAL action (it is: the sub is in the upper portion) 2) One of your Specialists would have to have the JOURNAL action as something they can do (the Team Leader can do anything, so he can JOURNAL!) 3) You place one token on the Specialist AND one token on the JOURNAL action on the board! (We have enough tokens: one to activate the Specialist and one to put in the JOURNAL action on the board)
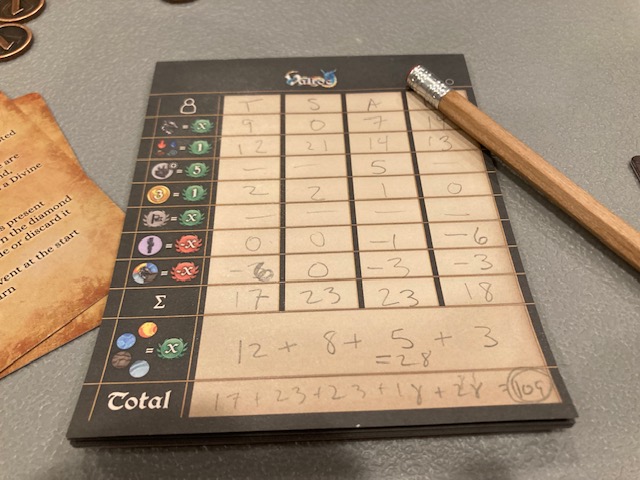
This is a little different than most worker placement games … it took me a game a few rounds to get the gist: some of your worker placement tokens go onto the board and never come back! The idea is that your tokens on the sea boards score you victory points/achieve some goal.
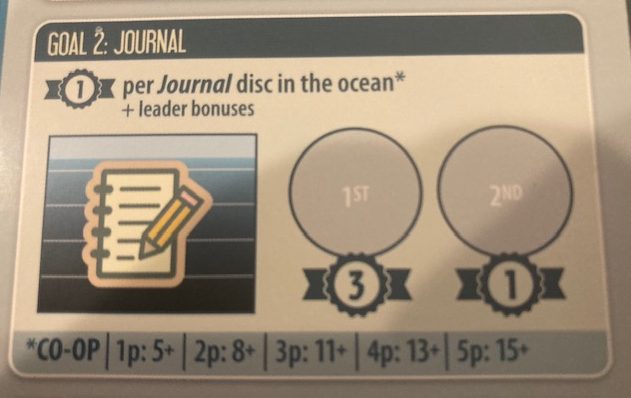
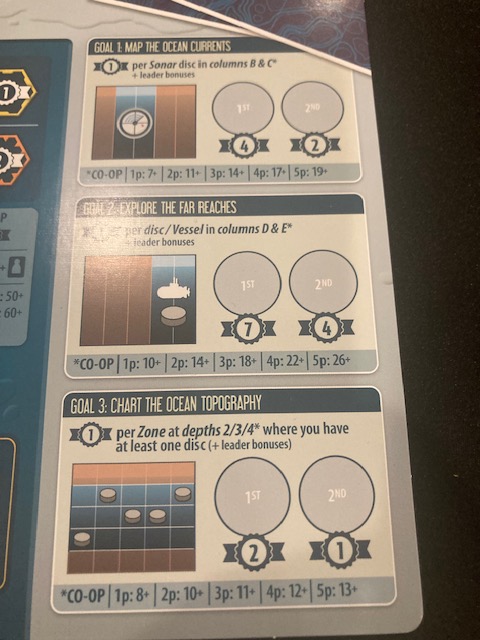
For example, in the cooperative solo game, you might need to get 5 JOURNALS on the board! See GOAL 2 above! So, that’s why one of your worker placement tokens stays on the board: to denote progress for those Goals!
Now, lest you think you run out of these tokens quickly, never fear!!! These worker placement tokens are both created (from your supply) and reclaimed (from your Specialists) every turn! But it’s your player board determines the rate you get more tokens!
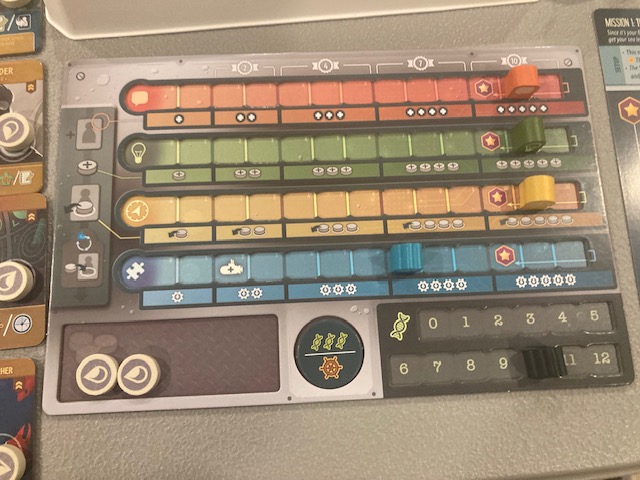
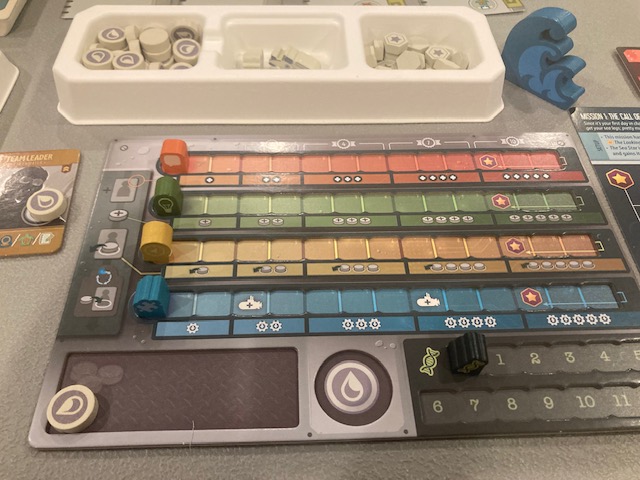
Each player gets a board like above (all boards are the same except for color; there are no special abilities). The 5 tracks above help determined the rate of many things!! The higher the track the better!
Orange Bubble: How good a Specialist can you recruit? (Reputation track)
Green Light Bulb: How many worker placement tokens do you create this round? (Inspiration Track)
Yellow Arrow: How many worker placement tokens can you reclaim for specialists this round? (Coordination Track)
Blue Puzzle Piece: How fast can your sub move/How many Subs do you have? (Ingenuity Track)
Black DNA: Research Track … How much Research do you have so you can JOURNAL?
At the start of every turn, you will gain a Specialist, create some worker placement tokens, and reclaim some of them from your Specialists.
Once you have all tokens for this round, you put all your tokens in your Staging Area … and you are ready to go for your turn! Players play an action one at a time, and play until they want to, are out of tokens, or out of Specialists! Many times, you will find you have more tokens that Specialists that can use them …
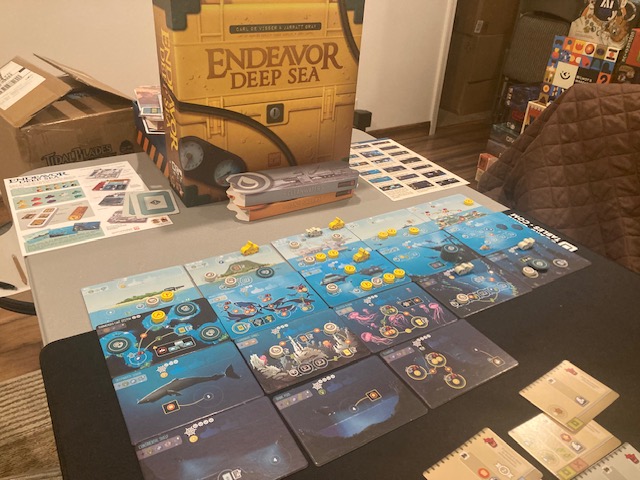
And that is the worker placement part of the game! Using worker placement, New Zones come out, players explore, players journal, they dive, they conserve, they explore the deep sea! See above for what a completed game might look like, both with new Zones explored, worker placement tokens everywhere, and a bunch of journals!
There’s significantly more to this game, but it’s got such a different worker placement feel, I wanted to go over that part a little! I really do like the components!
When the seascape is all explored, it looks really cool!
Everything is very readable and the trays make it so easy to jump into a game!
Rulebook
The rulebook has good points and bad points: generally, it’s pretty good.
It’s does well enough on The Chair Test: it opens up without drooping too much, it stays open, the fonts are big enough, and there are plenty of pictures. It’s about a solid B+ on The Chair Test.
The front page jumps right into the overall game: it does a nice job “introducing” you to concepts that will permeate the game! I also like how it mentions there are several ways to play the game! (Play Against your friends, or With them, or without them!)
The Components pages are pretty great: they show all the components and show the fronts and backs of cards and Specialists. This is well done. See above.
The Set-Up is good. See above: It shows pictures of everything and has easy-to-read annotations. I had no trouble getting set-up!
Generally, this rulebook is very concise. This is both boon and bane: it keeps the rulebook shorter (which makes it easier to peruse and get through) and generally clear, but there are several places where a few sentences would go a long way. My friend Sam actually knocked a full half-point of of the score because it was too concise in a few rules!
One such example of this is the cooperative rules (the last page), where it’s not clear that little blue bubble is considered an optional one of the 7 goals you can achieve! It clearly looks you must achieve it as well as the other goals … but the more you stare at the components, the rules, and the game, you have to conclude that it has to be optional, or the game is too hard. A sentence saying “The Impact Mission Goal is one of the optional 7 goals” would have done wonders for my first few solo games.
This is a pretty good rulebook overall, it just needs a few more edge cases defined and few more sentences for clarification. Honestly, I really like this game, but this is one of my major complaints. Concision and precision are worthwhile goals, but not at the cost of clarity.
There is also no index. Or Table of Contents. You pretty much have to go searching linearly for rules when you need to find them. This is a big enough game that I think a Glossary or Index would have helped a lot.
This is a generally pretty good rulebook, so I don’t want you to think I didn’t like it…. I did like it!! It has lots of good examples, lots of good pictures, and it teaches the game pretty well. But the lack of index and lack of some extra clarity were frustrating. It was pretty good, but it could have easily been a great rulebook.
Solo Play
Endeavor Deep Sea does support solo play! Congratulations for following Saunders’ Law!
All of the solo rules (and cooperative rules) are found on the last page of the rulebook. The rules SAY there’s only one real change between Solo and Co-operative rules: The Solo player plays 7 rounds instead of 6 rounds… that’s it!! That’s great! … well, that’s what the rules SAY … but the solo and cooperative rules really do change the game more! Instead of victory points, players are trying collectively complete some goals, (and must choose from 7 goals to complete). The basic rules stay the same, but the victory conditions are VASTLY different! The game feels very different in solo/cooperative mode, so I don’t 100% buy “only 1 change”. But generally, that’s true.
Nominally, this is a competitive worker placement game FIRST (as the competitive rules come first), but there’s not too many changes to make the game solo/cooperative.
The competitive game is all about victory points on the goal cards (see above)! But, the cooperative game (and solo) is all about working together to achieve (collectively) a certain number of Goals … 4-7 Goals, depending on your difficulty. For example, for GOAL 2 (above) JOURNALing, the 1P needs to do 5+ JOURNALS to “achieve” the goal, but 2P need (collectively) 8+ JOURNALS!
Each scenario you choose will have 3 unchanging goals (as per the scenario) …
… and then bonus goals you draw (4 in the solo game) …
.. and finally the Impact Sheet goal!! (This was the goal we complained about in the rulebook section, which was unclear that it was one of the OPTIONAL goals!)
You get to choose which of the Goals you want to try to achieve, but you can change you mind mid-game as the game evolves!
I have currently played about 4+ solo games! I played two with the starting Scenario, and a few others to get a sense of what other Scenarios do! I had to play one full game to “get” the game, but after that, the game flows pretty quickly!
I like this game! There are about 10 Scenarios, so there is a lot of variability to extend the life of the game. And the game plays fairly quickly: with only 7 rounds, you find yourself running out of time quickly! So, your turns are fairly thinky as you try to take the best advantage of the Specialists you have, how to advance your tracks, when to explore, when to move, when to JOURNAL, when to dive, and what regions to explore!
This game has a really neat “explore” feel as you SONAR to find new regions of the sea to explore! But, even cooler, you get to choose which of 2 regions to bring forth! And each region has different bonuses when discovered! And different special abilities! And different new Locations! Remember, Locations get “filled” as you play, so you absolutely have the explore to open up new regions and new Worker Placement Locations!!! So, you have to balance “Well, I like the bonus I get if I discover this region, but we need these spaces to win! Which do I choose?” Every thing you do involves some kind of choice which affects your game!
I had a really nice time playing this solo. The plays pretty well once you’ve played it solo. And you can absolutely teach your friends the game quickly once you know it.
I would absolutely play this again solo.
Two Players
Sam and I had a good time playing 2-Player. Because of my solo experiences, I was able to teach the game quickly, and we jumped right in!
There was a good balance of cooperation and solo agency in the game: every one did what they wanted on their turn, but there was discussion about what Zones to bring out, what Journals to do, what Specialists to focus on. I don’t think there would be a lot of Alpha Player problems in this game, as each player still has agency.
Generally, the 2-Player game went … swimmingly (pun intended).
The only real problems were more with the rules: both Sam and I felt like the edge cases and some of the cooperative Goals needed more explanation. Since this is a competitive game first, the co-op explanations get the lesser explanation.
3-4 Player Games
The three and four player cooperative games went over quite well.
The only real problems of the 3 and 4-Player game was the downtime between turns. In the solo and 2-Player games, the game moves much more quickly as the turns bounce back and forth quickly. In the 4-Player game especially, sometimes it felt you did have to wait a long time for your turn to come around. There is some analysis paralysis in this game, as you try to find the right Specialists, right actions, and so on, so they gets multiplied out. This isn’t as bad as you might think because the game is still cooperative—while your friends are thinking, you can be talking about strategies with others, plans on your turn, and generally communicate. Luckily, there are no communication limitations in this game! So, even when someone might be taking a longer turn, players can still talk!
Another possible negative was that the game was pretty multiplayer solitaire. Sure, players could talk freely, but none of the actions of the game “really” help others … (some of the Journals help all the other players, but those are few and far-between); mostly, each player is trying to do the best they can on their turn, while trying to keep the cooperative goals in mind. I am not sure that’s too big of a negative, because the multi-player solitaire keeps everyone involved on their own turn. Even when someone is taking a longer turn, there are still cooperativ things the other players can talk about.
Generally, the balance of the multiplayer solitaire and the longer turns seemed to balance out: players were either thinking about their own turns or talking to each other about the cooperative goals. There did seem to be less cooperation and more multiplayer solitaire in the 3 and 4-Player game than the 2-Player game. Nevertheless, it still seemed to work fine. Everyone had a good time.
What I Liked
Exploration: I liked exploring the seas! It’s a real interesting phenomena in a worker placement game that you have to explore to bring out more location because you keep using them up! The exploration worked really well because you got to CHOOSE which of 2 tiles comes out! That choice kept me more involved and interested in the game.
Components: The components are generally very high quality and easy-to-read. I liked that the tokens were in a token box … it was so easy to set-up! I don’t think this game will win best components of the year or anything like that, but I liked what I saw and everything was easy to read.
Seas: I did like the look of the seas once you had explored a lot.
Worker Placement Mechanism: The fact that the worker placement is so different in this game really elevated the play (you have to be in a Location with an open spot, and you have to have a Specialist that can do that action, and tokens are typically placed in pairs). But it also felt very thematic to the game, with the Specialists!!! Also the fact that worker placement worked so well in a solo, and more impressively, in a cooperative game really made this stand out.
Variability: There’s quite a bit of gameplay to be had between the variability of the Scenarios, the Zones, the expansions (which were included with our copy), the many Goals, and all the little touches in the game! That really extends the life of the game.
Ecosfera (Eco sfera as implied by the cover) was a game on Kickstarter in April 2023: See here.
This is a cooperative deck-builder with a few push-your-luck elements. This is also a nature themed game! Nature is a very hot theme for games right right, so I call this Yet Another Nature Game (YANG). Many nature games are competitive, so this stands out as a cooperative YANG.
This is a game intended for 1-4 players, ages 8+. The intended time is 45-60 minutes, which is about right, but see more discussion below.
Let’s take a look!
Unboxing and Gameplay
Ecosfera is a smaller box game: see Coke Can above for scale.
Ecosfera is mostly a card game, but it also has a lot of punch out tokens: see above.
This is a deck-builder with three different “currencies” of buying. Elements buy plants, plants buy animals, and animals buy biomes. See the offering of elements, plants, and animals above!
The base currency is the elements: the multi-colored cards above are also multi-labelled cards to avoid color-blind issues. These elements can only buy plants.
See two plants above: notice the element symbols on the BOTTOM of the cards. You can only buy a plant if you have the elements (we need two winds to buy the Papever radictum). You can be missing one element and still buy a plant … if so, you get that extra missing element for free into your hand. You’ll also notice the symbols at the TOP of the cards: these are the currency for buying the next level: animals.
Animals can ONLY be bought if you have two plants with matching symbols on that animal! Again, the cost to buy animals is on the BOTTOM of the card. Using the two plants from above, we can buy a Penguin, because we have two of the Tundrus symbol!
Finally, the animals buy biomes. If you have two animals sharing some biomes, you can immediately spend them to buy the overlapping biomes! Using the penguin and the lizard above, we can acquire the Aquaticus biome since the animals share that!
If you make all biomes, you win!
Along the way, many things can go wrong: you can get the Disaster cards (see above: the different symbols mean nothing)! These cards clog your deck, preventing you from buying things along the way!
If you can’t buy anything on your turn (either a plant or animal or biome), you get a Disaster card in your deck. By itself, the Disaster card doesn’t do anything: it clogs your deck mostly.
But, if you ever get 3 Disasters in your hand (see above) …
… your turn immediately ends and you get an Extinction Tile! (If you get 4 Disasters, you immediately get 3 Extinction Tiles!)
If you ever get 7 Extinction Tiles, you lose!
Along the way, each Player gets some tokens to help them. The Plus (+) can be spent to pull an extra card, the Star (*) can be spent to refresh a line of cards (to get better buy options), and the Arrow is the most important symbol in the entire game: you can use it to move cards to other players OR to cull cards (ya, but you can’t EVER cull Disaster card).
These are one-time usage, however, you do refresh them every time you have an animal pair that matches a biome in your hand. (So even if you can’t buy a new biome, you can still refresh your tokens).
You’ll notice that some of the cards ALSO have these symbols: you can choose to use these symbols from your hand as well! (Only one OR the other)
To help remind you which cards have been used, the game provides some leaf reminders: see above as we use to remind ourselves that we used the + and can’t use that card again.
This game is quite lovely to look at: the art and tokens are easy to read, and cards are a very nice linen-finish. In all my game groups and plays, the players commented on how nice the art on the cards is. This is a beautiful production.
Rulebook
The rulebook was okay. It looks a bit daunting because it’s very thick, but it also have 4 translations in it. It only take about 9 pages to get the rules across.
Although the rulebook works fairly well on the chair next to me, and the font is a decent sized, I was slightly annoyed that I had to hold the rulebook open many times! I want my rulebook to lay open on the chair next to: this ventures into C territory for The Chair Test, but since I can “break the spine” to get the rulebook to stay open, I’ll give this a B- on The Chair Test.
The set-up and components were fairly well-notated on the first two pages. This allowed me to jump in fairly quickly, which was nice.
The rules had some nice pictures showing how the game flows and plays (see above).
I felt like some of the organization was a little off: they spent precious space showing simple rules, but then failed to elaborate more complex rules in a few places.
The rulebook was fine: it taught the game, but sometimes you will have to go hunting for a rule.
I won’t ding this for the lack of an index because it is a pretty simple game overall; it doesn’t need one.
Player Count
More than any other game I have played in some time, the Player Count matters for this game. It’s either a slog of playing of cards that play themselves, or a dynamic event!
Solo Game
This game does support solo play (see top of page 10): Thank you for following Saunders’ Law and giving us a solo mode. The only real difference is that the Arrow symbol means that you can’t share cards with anyone else (you can still cull), you can only share with yourself and give yourself an extra card.
See above as I have a solo game set-up! The solo mode does allow you to learn the game: I have played this game quite a bit solo.
The most important thing you learn from a few games is that the Arrow symbol is critical.
The major problem with solo mode is that your deck just builds and builds (see how huge my solo deck is) and many times you feel you have no agency! You just draw cards and hope you get the cards you need. You can either do something or not. That’s it. The game feels like it plays itself!!! If you have used all your tokens, well, it’s even less fun. Right now, the solo game hovers at a 4/10 for me. (I will revisit this below)
I had enough information to teach my friends AND emphasize the Arrow. Maybe the game works better with more people?
Two Player
Sam came over and we gave it a a try: I made sure to emphasize the Arrow symbol and that we needed to talk.
The game went a little better as we tried to be intelligent about the use our symbols. Again, the most important feature is to use Arrow to share cards at the right times.
The decks still got pretty big (see above), and many turns had nothing happen as we acquired Disaster after Disaster. See below.
We started to see a little more strategy: maybe it made sense to move a card to my compatriot, maybe it made sense to cull this card. There was more sharing as we tried to help each other.
In the end, we won, and there was some sharing. And there was some discussion. And there was some strategizing. But there were a whole lot of turns where nothing happened and we just acquired a Disaster. During those turns, it just felts like the game was playing itself.
In the end, Sam gave the 2-Player game about a 6/10. I was a little more down on the game after my solo play and I gave it a 5.5/10. The decks got huge, and there were still a lot of turns where nothing happened, but we saw a glimmer of the sharing and strategy.
3- Player and 4-Player
We saw, in the first 3-Player game that this game CAN be fun! As long as you use all the symbols on the cards, and try to use the Arrows to move and cull cards, and communicate and cooperate, the game feels like you have agency!
The difference between a solo/duo game and a 3 to 4-Player game is the number of opportunities! More players means more opportunities to share resources smartly!
“I can share this card, but Sara doesn’t have any animals. AH! But Andrew does! I’ll share this with him so we can get the last biome!”
All of a sudden, people are looking around the table for opportunities to share! People are talking, people are communicating, people are cooperating!
The 3 and 4-Player game is fun! As long as you exploit the shared opportunities, this game can be quite fun! My friends all had fun and wanted to play again.
I mentioned the problems with solo and duo play, and my friends said “There’s just more opportunities to be smart with more players!”
Be aware, if you are looking for a game that is good as a multiplayer solo game, this isn’t the game for you! If you play Ecosfera like multiplayer solitaire (no one really works together and everyone just plays by themselves), Ecosfera will have all the problems of the solo game … and it won’t be fun. In order to truly enjoy this game, you need 3 or 4 players with a group that will engage with each other!
You need to have opportunities to share. You also need to strategize to use those opportunities well. There’s a lot more of this in the 3 and 4-player game.
Conclusion
If you are looking for a solo game, I can’t recommend this game: although the solo game is good enough to teach the game, it leaves a bad taste in the mouth that this game plays itself. It’s about 4.5/10 at a solo play because it just barely works.
Even a 2-Player game isn’t quite right: there’s not enough quite opportunities for intelligent sharing; the game still feels like it’s playing itself too much of the time. It’s better at 2-Player than solo (maybe a 5.5 or 6/10), but I still can’t recommend it.
It’s not until you get to 3 or 4 players together that this game opens up and becomes fun! There are so many more opportunities to work together and strategize together as a group when you have 3 or 4 players!!! In that configuration, I can recommend this game, as can my friends: they have suggested we play again! This is a 6.5 or 7.0/10 for 3 to 4 players. Just make sure you play with a dynamic group!
I don’t think we’ve ever had a game that is so player count dependent! If you want a solo game or something to play with your partner, I can’t recommend this game. If you want a game that plays multiplayer solitaire with little interaction, again, I can’t recommend this game. I think this game only works with 3 to 4 players with a dynamic group … and then it’s fun.
The Nature theme is fairly thematic, the art is pretty, and the game is gorgeous …. but that will only get you so far: Be aware of when this game works and when it doesn’t before you pick it up.
The Project PEGASUS series was one of my favorite comic series when I was a kid. It took place in Marvel Two-In-One Issues 42, 43, and 53-58 back in 1978 and 1979. There are several reasons I liked this story: it featured the Thing and a really interesting cast of characters, including Quasar and Man-Thing! Plus, it’s one of the few times you see the art of John Byrne and George Perez together.
Once Season 3 of Marvel United arrived, I saw that Project PEGASUS was indeed a Location from the Multiverse base set: see above (we reviewed the base Multiverse set here)!
See all the great series of Marvel Comics! But where’s the campaign for Project PEGASUS?
Never mind, I’ll do it myself.
The Road To Development
Over the past month, I have read and re-read the Project PEGASUS series (a burden of joy) to get a sense of what its campaign might look like. See above as I have taken out most of the content I need!
After coming up with a general outline of what the Villains, Heroes, and Games should be, I started to put something together! See above for written notes on the first draft of this campaign.
I’ve have also had some play testing from my friends, as well as many many many solo games (with 2, 3, and 4 Heroes).
In the end, I am very proud of the Campaign I came up with: it follows the story of Project PEGASUS pretty well and adds some new ideas to Marvel United.
Over the last few weeks, the campaign has evolved quite a bit: I have some added some new Villains and Heroes for the final cut.
Some of the ideas in the Project PEGASUS campaign are a little outside the box, because even though Season 3 made this all possible, I will still missing some pieces (Heroes/Villains/etc) to make the campaign complete. So, I had to improvise using what I had.
I am very proud of what I did for Games 1 and 5, and especially Game 2. But be aware that those games are a little different.
What Do I Need?
Like all of the campaigns, The Project PEGASUS campaign needs a lot of pieces stolen from all parts of Marvel United. See the complete list below.
• Base Marvel United • Spider-Geddon Marvel United • Multiverse Marvel United • Season 1 Stretch Goals • Season 3 Stretch Goals • Fantastic Four • World War Hulk • Annihilation • Civil War • Enter The Spider-Verse • War of Kings
Current State
The current draft of the campaign is at version 1.0.1. I fully expect there to be revisions made as me and others playtest it. UPDATE: We are now at 1.1.0: we had some explanation clean-up and a few balance adjustments to Game 1! Oct 20th, 2024 UPDATE: Updated to 1.2.0: Added explanation of how to play solo, updated Game 2 with better descriptions and a rules fix/clarification.
Feel free to download the PDF below and give it a try!!! If there is interest, I can try making the form factor more like cards (with Rules cards and Event cards), but right now the Events are presented alongside the Games of interest in the PDF document below.
If you have any feedback (too easy, too hard, spelling problems, unclear rules), please email us at returnfromsubroutine @ gmail.com
The Campaign Decks were part of the Multiverse Marvel UnitedAbsorption Expansion Explosion (where we received so much new context for Marvel United)! !
The Campaign Decks give you just that: campaigns you can play through using the Marvel United system.
Let’s take a look!
Unboxing and Gameplay
This is a surprisingly small box of cards: see Coke Can above for scale.
The game comes with a very small pamphlet (sigh, I am not a fan of pamphlets) and 114 cards for 8 campaigns.
Each campaign is 8 to 23 cards each, with Age of Ultron and Maximum Carnage being 8 cards, X-Cutioner’s Song and World War Hulk being 13 cards, War Of Kings and Dark Phoenix Saga being 16 cards, Avengers vs X-Men being 17 cards, and The Age of Apocalypse being a whopping 23 cards!
Each campaign has two types of cards: Campaign Set-Up and Rule cards (top cards: each game in a campaign is defined by one of these) and Campaign Event cards (bottom cards: which are brought out during certain points of the campaign).
The front of the Campaign Set-Up and Rules card define the parameters of each encounter: the Villain you will fight (Emma Frost above), the Heroes you can operate (Prof. X, Storm, Wolverine, Colossus above), and special set-up or rules (split the start-up, must start with HANGAR BAY, etc.). See above.
The back side of the Campaign Set-Up and Rules defines special rules for that scenario, as well as triggers to bring out Event cards: see above. Warning: minor spoiler below!!
Events are related to the scenario you are fighting: see as Event 01 brings some rules into play once you rescue Kitty Pride. Many times, Events just add Heroes to your roster: this is important, as it gives you more choices of Heroes to play when you fight (and some Heroes are better in certain scenarios).
Basically, these cards control the progression of games.
Generally, you need almost all of the Marvel United content to play these Campaigns. The back of the pamphlet tells you ALL the base games/expansions you need to play through!
See how The Dark Phoenix Saga,Age of Ultron, and Maximum Carnage all require a whole bunch of expansions! And a very disparate set of expansion as well!
These expansion all look really cool … but how do they play?
Campaign Flavors
Not all campaigns are created alike.
The World War Hulk campaign requires players to play in the one-vs-many mode known as Super Villain Mode in the game: this is definitely not solo or full cooperative!
The Maximum Carnage campaign requires the players to do The Carnage Challenge (at least for games 2 and 3).
The War of Kings requires team vs. team mode, at least for the first game, then the game goes back to being solo and/or cooperative for games 2, 3, and 4.
The Avengers vs X-Men is mostly Super Villain Mode (one-vs.-many), and game 1 is a special PVP mode: Clash of Heroes.
The rest of the decks (Age of Apocalypse, Age of Ultron, X-Cutioner’s Song, and Dark Phoenix Saga) can all be played solo or cooperatively.
We’ll only be looking at those decks you can play solo or cooperatively today. Over about 2 weeks, we were able to get through a few campaigns. Let’s take a look!
Campaigns and Spoilers?
So, to talk about the campaigns, we have to talk about some of the stuff that happens. However, that could mean spoilers. We have done two full playthroughs in this review: decide if you want to read them or just jump ahead to the Conclusion!
The first campaign is the Age of Ultron story. There are some very minor spoilers in this section (just below), but if you want to go in the game without knowing anything, skip to the Conclusion!
The second campaign is the Dark Phoenix Saga. There are some pretty significant spoilers in that playthrough, both in terms of reveals and stories! If you know X-Men #131-137, the story won’t have have any spoilers, but some of the events/happenings may still be spoilers. Since this playthrough has Major Spoilers, we’ve moved this section ALL THE WAY TO THE END to the Appendix section. Feel free to read it if you want more of a feel what the Campaigns look like, and you don’t care about Major Spoilers.
You have been warned.
Age Of Ultron Campaign: Minor Spoilers Ahead
The Age Of Ultron campaign is 3 to 4 games long (depending on how well you do). This is probably the best campaign to start with. (There a few minor spoiler ahead: skip ahead to the Conclusion if you want to avoid any spoilers).
Basically, you fight Ultron a LOT, and he gets stronger and stronger as you play!
Each game will usually have a different set of Heroes you can play: I started the campaign with Wolverine and Iron Man, but was told (by the Campaign Set-Up and Rules card) that I had to use some different Heroes for Game 2. I liked that I had to change Heroes (it kept the game interesting), as I had to try to pick a good set of Heroes to play together.
Winning or losing a game usually gets you an event: so far, many good events I see add a new Hero to the Campaign Roster (see above as Spider-Man joins the roster as a new Hero I can play!)
My second game used Emma Frost and Black Widow together. Wow, were they good together! Black Widow‘s predictive power made a huge difference! They took out Ultron!
Finally, I used Captain America and Iron Man for my Game 3! They (barely) kept Ultron under control …
Basically, by (barely) defeating Ultron in game 3, I was able to avoid a final Game 4 (which gives a few more chances to defeat Ultron).
There wasn’t a lot of story per se in this campaign, as my Heroes were just doing the best they could in each Game. It was, however, very thematic to have Ultron get better and better and better in each game! Really, he was quite tough by the time Cap and Iron Man took him on. I probably should have lost (and had to play Game 4).
It was fun to play the Age of Ultron campaign, Ultron had an interesting progression, but there really wasn’t any story.
Conclusion
In the end, the Campaign Decks reminded me a lot of Set A Watch: Doomed Run (see our review here). Why is that? Each particular game of Set A Watch: Doomed Run is thematic, but the story tying them together is very very loose: it’s so loose you can drop players in and out of the campaign as you play! And I think that’s true here as well! Each Campaign game is thematic and fun, but it doesn’t really twist and turn very much; each Campaign is fairly linear. If you were looking for a thematic story with lots twists and turns to entertain you, the Campaign Decks aren’t really that.
There’s a few “twists” I saw, but in general, I think the purpose of the Marvel UnitedCampaign Decks is an excuse to relive your favorite comics and an excuse to play through the ridiculous amount of Marvel United content. There’s a lot of theme, especially if you know the stories involved, but the Campaign Decks don’t present a deep, dark, complex adventures: they are just an excuse to play Marvel United and relive your favorite comics! As long as you know what the Campaign Decks are, they might be right up your alley.
Just be aware HOW MUCH Marvel United Content you must have in order to play these!
Appendix: Dark Phoenix Saga Campaign: Major Spoilers!!
NOTE: There are MAJOR SPOILERS ahead! Skip this Appendix if you don’t want any spoilers!!
The Dark PhoenixSaga campaign is a little longer at five games. Honestly, it will probably be more: you will almost certainly lose a few games, because the game gets hard! I lost two games along the way, but was able to come to a successful conclusion (so six games total).
I was really looking forward the Dark Phoenix Saga: when Jean Grey fights for her life in X-Men #137, it was a very powerful and moving story. Could the Campaign capture some of this?
Well, the Dark Phoenix Saga starts Game 1 with Emma Frost and Kitty Pryde (ShadowCat): see set-up above! This is reminiscent of issue X-Men #131 where Kitty Pryde wanders the Hellfire club trying save her compatriots … see below.
In this Game 1, I had Wolverine and Professor X take on Emma Frost. Remember, you have choices of which heroes you can use! Part of the fun of the campaign is trying to find the best heroes…
Well, it turns out I played my first game so very wrong (I missed some of the threat effects and special rules about accelerating the Master Plans, and didn’t realize I was supposed to find Kitty), so I restarted halfway through.
Wolverine and Professor X were able to find Kitty and take out Emma Frost.
This led to Game 2:
Game 2’s villain is Sebastian Shaw: a Hellfire club member! We are firmly in issues #131-#137 of the X-Men now! It feels like we are in X-Men #132 fighting Shaw!
We were required to play Jean Grey and Cyclops: definitely very thematic!
And why isn’t Jean Grey called Marvel Girl like in the comic … but I digress … I mean, her secret identify is her hero name? No, she should be Marvel Girl (Jean Grey).
Shaw was rough: I ran out of cards (losing the game) and had to flip Event 5. To be fair, this loss feels very thematic, as Sebastian Shaw really trounced the X-Men in this particular series of comics!!
Too late! But, at least I had Nightcrawler on my Roster now …
The next game up (Game 3) had us fight the villain Mastermind: he’s the evil creature trying to take over Jean Grey‘s mind!
We get to choose heroes in this Game! If you look carefully at the Threats, you realize you want to try to keep the Heroes together (bad things happen to lone heroes). Nightcrawler pretty much HAS to teleport every turn (the black text on his cards means you are forced to do that), so it would be easy to keep the Heroes together. When the Heroes WOULD take damage, Kitty was able to phase and mitigate that!! This was a great combination of Heroes for this game. And it felt thematic: Kitty’s phasing kept them safe, and Nightcrawler’s teleportation kept them together.
This was thematic from the character’s perspective. The story not as much (I should have used Wolverine: Wolverine fights alone!)
Then Jean Grey becomes Dark Phoenix. Oof!!!! There’s some really thematic stuff that happens in this part of the game, but I don’t want to give away too much.
Dark Phoenix was one of the hardest battles I have ever had.
I started with Kitty and Cyclops, but after losing to Dark Phoenix once, I had to “remove Kitty” from play. I could only keep playing as long as I had 4 Heroes in my Roster.
See above as Dark Phoenix easily takes out Cyclops and Kitty.
I get to try again: For my next trial against Dark Phoenix, I brought out Nightcrawler (and you are required to keep Cyclops).
I was able to eke out a win, but just barely.
Dark Phoenix’s Master Plan cards are just rough!
I fully expected to need 3 or more games to beat Dark Phoenix. I mean, she’s Dark Phoenix.
Even though the X-Men were able to defeat Dark Phoenix, … things happened while Jean Grey was Dark Phoenix. Like, she ate a sun and destroyed a world, so she must stand trial.
And Gladiator is the one to deal with her.
Jean Grey must fight, since she’s fighting for her own life. The choice of Wolverine is important here: we know from playing Gladiator from the War Of Kings, it’s important to always have a full hand! Since Wolverine has his healing factor, he is an exceptional character to play against Gladiator.
In the end, Wolverine and Jean Grey were able to defeat Gladiator. And win the campaign!
Although, technically, Jean Grey doesn’t survive … they don’t tell you that … see above …
I know the Dark Phoenix story and wow, this felt incredibly thematic! From how hard Dark Phoenix herself is, to some events in the deck, the Dark Phoenix Saga Campaign Deck was very thematic. To be fair, the Campaign Deck didn’t “tell a story”, but it sure reminded me of one of my favorite X-Men stories of all time.
Run Run Run! is a cooperative game from Kickstarter: it was up on Kickstarter in February 2024 (with several other games) promising delivery in May 2024. It actually delivered in late August 2024, so it was about 3 months late. Eh, that’s pretty good for Kickstarters.
With a name like Run Run Run!, this sounds like it should be a real-time cooperative game, but it’s mostly cooperative tile-laying game. See our Top 10 Cooperative Tile-Laying Games for more discussion of the tile-laying genre. Run Run Run! is also a little bit of a boss-battler game.
This is a light-weight cooperative game for 1-4 players taking about 30 minutes: the game time listed on the box seems accurate enough.
So, this game was part of an “import Kickstarter” where they found games from around the world and imported them to the USA. Apparently, this is an older game by Bruno Cathala and Antony Perone. BoardGameGeek lists the game as a 2021 game, although for some of us here in USA, this is a brand new game (including me). This is the 2nd Edition of the game, so I guess it’s new in that respect.
Let’s take a look!
Unboxing and Gameplay
This is a game with a LOT of tiles: more than half the box was filled with punch outs. The first 30 minutes of my unboxing was just punching out all the tiles and other components! We did say this was a cooperative tile-laying game!
Players assume the roles of one of four explorer cats (Catventurers to use the nomenclature of the game)! See above! Each explorer cat has a special power that is invoked when they roll a ‘?’ on the dice …
This is also a cooperative boss-battler game: you will face one of the three Final Boss Mummy’s above! To win, you have to take out the Final Boss before it makes it back to the Relic room!
Along the way, lesser Mummies will be summoned to slow you down. If any of the Mummies ever make it to the room with the Relics of the Pharaoh, all players instantly lose! You need to keep all Mummies OUT of the that room!!
Players lay out tiles, one at a time, trying to build a maze out.
To unlock the Final Boss, you have to build three tiles adjacent to each other with different symbols! And you have to do this three times (or more)!! See above! This is the only way to unlock the Final Boss, but every time you do that build, you invoke a “trap”! See above as the Mummy summon triggers a “trap” that gives the Final Boss 5 more hit points!
Torches are an important part of the game: you need to put torches in rooms to see! You start with 5 collective torches, and if you can’t place a torch, you get closer to summoning a Mummy!
At the start of the Mummies’ turn, you roll a die (or more…)! If you roll the monster symbol (see above), you have to move all Mummies closer to the Relic Room AND you also come closer to summoning a new Mummy!
Every time you roll a monster, you have to put a heart on the current top Mummy tomb!
If a mummy get 5 hearts, it has been summoned the Mummy and that Mummy goes on the board! Where on the board? Player’s decide!
Usually you put the mummy as far away from the Relic Room as possible (see above), or right next to a Catventurer so they can fight it!
Mummies are defeated by rolling dice! See the attack dice above! Some symbols give you a successful Attack: note above we do 4 damage to a Mummy with 7 hit points! But since we have have the x2 token, we do all 8 damage and take it out in one shot!
How do we get dice?
Every exit on a tile you discard give you an attack die! For example, to get all 6 attack die above, we can discard the one tile with all 6 exits to get all 6 dice (6 is the max).
How did we get the x2 token? Whenever we explore a Sarcophagus room (with the little golden coffin, see above), we get a Sarcophagus token … one of which may be a 2x! See above!
Oh yes, if we ever run out of torches, we can get new ones in a couple of ways. One: if we build three rooms adjacent (see above) the same symbol, we immediately get 5 torches!
There’s also a cooperate action which can give more torches (or tiles if needed). See above.
If we can take out the Final Boss before he reaches the Relic Room, we win! See above as we LOSE as the Mummy enters the Relic Room!
The production for this game is pretty great with tons of thick cardboard tokens! The art is super cute and the game looks like a high quality, but cute, production!
Oh, and this is a cooperative cat game! It may not be clear at first, but we are all cats working together!
Rulebook
The rulebook is good.
The rulebook gets an almost perfect score on the Chair Test with an A! See above as it fits perfectly on the chair next to me, it stays open, it has readable fonts, and it has good pictures! This would probably get an A+ on the Chair Test if the fonts were just a little bit bigger.
The Components page is great: it shows all the components with annotations. See above.
The set-up pages are perfect: the entire set-up is pictured and each step is labelled with a relevant number! I can leave this open, and set-up the entire game from these two pages!
The rest of the rulebook is pretty good.
My only real complaint is that they didn’t show/explain all the possible Trap tokens that can come out. I had to “guess” what they meant. It was mostly intuitive, but not always.
The last page of the rulebook is useful: this is where I wish they would listed all the trap and Sarcophagus tokens with more description. Still, at least the back of the rules was useful.
There’s no index, but this is a 30 minute game, so I don’t think it needs it.
In general, this is a good rulebook.
Solo Play
This has a solo mode! (Congratulations on following Saunders’ Law!). So, there’s a very small section describing the Solo Mode on the very last page of the rulebook. See above. The solo game basically plays true solo: you play one Catventurer (the Cat Explorer) and play the game as-is! The only rule that needs some “slight” expansion is the COOPERATE action: you can still play the COOPERATE action, but only the solo cat gets the rewards! This is great! No real changes: just play the game as-is!
My first game was a win, as I killed the final Mummy on his way to the end! See above!
My initial tile selection wasn’t great (as only one room has more than one exit), but I soon got a lot more branching rooms. I also had a lot of Sarcophagus rooms …
Those Sarcophagus rooms enabled me to get some great tokens at the start of the game! I saved those 2x tokens for the end game, because I knew how hard the final Mummy would be!
I played my first game very well: I kept the Mummy’s under control and I had plenty of tiles going into the final battle, and I was able to build enough space so that the Mummies were far enough back that I could take them out!
My second game was a close loss: I made the mistake of not having enough of the temple built!
I was able to knock the Mummy down to 5 hit points, but he just moved too fast! He made it to the Relic Room and I lost! See above!
I admit my final loss was depressing because I rolled so poorly; not on the Attack dice but on the Mummy movement! It’s basically a 50% chance that the Mummy will move every turn, and he moved EVERY TURN after he came out! The Mummy screamed to the exit and I lost!
Cooperative Play
Cooperative play went pretty well.
There was shared workload setting up and playing. There are enough components in the game (torches, tiles, 5x torch, sarcophagus tokens, mummies, player tokens, etc) that it was nice to share the workload of taking care of the tokens.
We were able to take out the final mummy!
Basically, after he came out, were were able to all pounce on him and do as much damage as we could!
The cooperation in this game was interesting. We didn’t “love” that you couldn’t talk about the tiles you have, but you were allowed to “point” to to where you were going to build, and that seemed enough to allow us to all move forward. There was never any “fine-grained” cooperation (“I’ll build this tile, you build this tile”) as we played … because there can’t be! The cooperation was more “coarse-grained” in that each cat did their own thing on the way to helping the party: “I’ll take out the light mummy if you can just build! Oh! I need help with this!” The game was kind-of multiplayer solitaire with many moments of high-level cooperation.
If you don’t like cooperative games because of Alpha Player Syndrome (because the Alpha Player tells everyone what to do), then Run Run Run! is game that keeps the Alpha Player at bay pretty well. Because you can’t do any fine-grain cooperation with tiles, the group decides more of the high-level actions together! Everyone stays involved on their turn by choosing the tile to play, but everyone stays involved with the group as they makes high-level decisions together.
With some retrospective, I liked the amount of cooperation the game elicited, even if we did have some communication restrictions.
Communications Restrictions
My groups don’t tend to like communications restrictions because we get together to play, talk, and strategize together! We are friends and we want to talk to each other! Some games with communications restrictions work, and some don’t! And it’s a razor’s edge of difference.
Run Run Run! works mainly because it doesn’t stop all communications: you can’t really show your tiles and talk about them precisely. The rule is (from page 2):
“Also, even though you may openly discuss your intentions, you may not show the tiles from your hand to the other players, nor describe them precisely. You may, however, point a finger to a specific Room, without saying anything…”
The rule is still imprecise (“What does it mean I can’t describe them precisely? Can I tell you it’s a symbol?“), but I think the intent seems to be don’t tell/show others your hand. Other than that, talk as much as you want! That seems to work!
Compare this against the Communications Restrictions in Defenders of the Wild (see our review here):
“At the start of each round, all players must cease communication and maintain silence while choosing a defender card from their hand to play…”
The restriction is much more draconian, and squanders an opportunity to make a multi-player solitaire game even more cooperative!
What’s the difference? In Run Run Run!, you simply can’t share your tiles, but in Defenders of the Wild, you can’t talk at all (for that phase)!! I think this very minor difference makes a world of difference: I liked playing and talking and cooperating in Run Run Run!, and I am annoyed in Defenders of the Wild by the restriction. (I still don’t think the communications restriction rules work at all in Defenders of the Wild, but maybe the rule should have been simply been “You can’t show/discuss your Defenders“).
It’s a fine line, but the Communications Restriction works in Run Run Run!, but not in Defenders of the Wild.
Try It Out
Since this game has communication restrictions, one of the things you are NOT allowed to do it show your tiles to any other person. The problem is, sometimes you want to “try stuff out!” See above as we have a bunch of tiles we want to play with and see what we can do!
In our review of Race To The Raft (another cooperative cat game with tile-laying), we saw the same problem! You aren’t allowed to share what you have in your hand in Race To The Raft either, and many times you want to “try” stuff out!
In Race To The Raft, we developed the house rule “look away while I try stuff” so we didn’t break the spirit of the game! That way, you can still try stuff out, while preserving the confidentiality of the tiles. We ended up doing something like this in Run Run Run!
It’s a shame: neither Run Run Run! nor Race To The Raft nor many of the cooperative tile games games on our Top 10 Cooperative Tile-Laying/Tile-Placement Games have any acknowledgement of this very human phenomenon: People want to try stuff out! Please, if you make a cooperative tile-laying game, please have some sort of rule for addressing this issue:
“If you wish to try out some tile layout ideas on your turn, please ask others to look away so you don’t overshare your tiles!”
Otherwise, you make people dislike your game because no one feels like they can “play with” and/or “try stuff”! Or people come up with a house rule like the one above anyways.
Acrylic Standees
I am a huge fan of acrylic standees! I loved them in Tokyo Sidekick (see review here) and Kinfire Chronicles (see review here) and Weirdwood Manor (see review here)! So, when this Kickstarter offered a deluxe side of Acrylic Standees, I was in!
This is a small box full of replacements for the wood standees that come with the game.
It’s a small box (it turns out, you can fit that box into the final game box with some creative packing).
See above the the standees!
They are pretty nice! See above!
Unfortunately, I had two that were broken. I think they can be fixed with a little glue, but it was still a bummer. (They had fallen out if their standees, and they really didn’t fit back in).
My friends and I did a comparison of the Acrylic Standees to the wood meeples: see above and below.
Which do you prefer?
In the end … both me and friends preferred the COLORED wooden meeples. Whaaaattttt???? It’s not that the acrylic standees weren’t gorgeous, but the wooden ones were (1) more HEFTY and (2) we could distinguish the colors easily from the wooden standees! The wooden meeples made the game easier to play.
In our review of Weirdwood Manor,we also loved the Acrylic Standees! See above! One of the major differences here as that Weirdwood Manor standees are color-coded ON THE BASE! See above! This color-coded base makes it that much easier to distinguish the standees across the table! I think if Run Run Run! had added color to bases, that would have made them that much better!
In the end, my friends preferred the wooden meeples. And I think I do too.
A good compromise might be to mix them: use the wooden meeples for the characters (so you can see each player’s color very easily) and then use the acrylic standees for the mummies! That way, you get a nice differentiation on the board between the good guys and the bad guys!
But, you really don’t have to get the Acrylic Standees; the wooden meeples that come the game are very very very good.
What I Liked
One: This Is A Little game! This is a fun little cooperative game that’s only 30 minutes.
Two: Wooden Standees: The wooden standees that come with the game are much better than you think; it is nice that you have the option for Acrylic standees, but you don’t need them.
Three: High Quality: The components are pretty high-quality, from thick cardboard tiles, wooden standees, and thick readable tokens.
Four: Limitations Okay: I generally don’t like Communications Limitations in my cooperative games, as they tend to suppress the reason I get together with my friends: to talk! In this game, the restriction on NOT sharing your tiles didn’t seem to get in the way of us still communicating: we still made plans as a group and had a good time.
What I Didn’t Like
One: Acrylic Standees: I am slightly annoyed that the Acrylic Standees weren’t better: some of mine were broken, and they really needed colored bases to help distinguish them on the board. They are still gorgeous, but not as “mind-blowing” as I had hoped.
Two: Random. The game is pretty random; it all depends on what you roll on the monster dice and what tiles you draw!!!
Maybe you get terrible starting tiles!! I think there needs to be a MulliganHouse Rule at the start of the game where you can redraw your tiles).
Also, the monster dice gets rolled every turn and there’s a 50-50 chance (greater with more dice) that something bad will happen. I lost my last solo game because the monster moved EVERY SINGLE TURN when I rolled badly 5 turns in a row! I simply couldn’t stop him and there’s no dice mitigation for that!
Reactions
Rich: “I generally liked it. As I look reflect back on it, I liked it a little better cooperatively than solo. Even though I generally don’t like communications limits, we still strategized as a group and were able to get stuff done, while still having agency on our own turns. The randomness of the game is a little much (as dice and tile draws control the fate of the party), but since it’s only 30 minute game, it’s not a big deal if you get wrecked. It’s probably a 6.5/10 for solo, 7/10 for cooperative”
Andrew: “5.5 or 6? It was pretty good. I like cat games.”
Teresa: “6 or 7, it was pretty fun.”
Conclusion
Run Run Run! is a light cooperative tile-playing game which just so happens to be a boss battler. The game seems to unfold as multi-player solitaire, as each player cannot share what tiles they have. But, a higher level cooperation seems to emerge as players take on high-level roles as they play (“You kill the mummy, I’ll build out!“) If you are looking for a game with mechanisms that tend to suppress Alpha Player Syndrome without losing too much cooperation, Run Run Run! seems to strike a good balance of being cooperative but still giving each player some agency.
There is some randomness in the game, as it really depends what you roll and draw! Luckily, this is only a 30 minute game, so even if you get wrecked, it’s a short game.
I would recommend Run Run Run! if you like the theme and are looking for a light cooperative tile-laying game … with cats!! I am very sad that I can’t recommend the Arcylic Standees: all of my friends (and myself) preferred the wooden meeples that come with the game.