Interlude: Playing A Deckscape in Wonderland at the Airport

Recently, I got stuck for a three-hour layover at the airport. I had brought a few games for just such and emergency! One of them was Deckscape In Wonderland!

Table Space

IMG_6789

If you can find a decent sized table (at a cafe or in the club or just around), the Deckscape games will work fine. I had brought Deckscape in Wonderland!

IMG_6790

I had a plant on my table that I had to put the side as I played … but I put it back when I was done.

IMG_6788

Although I could have brought any number of Deckscape games, Deckscape in Wonderland was the one I brought that day.

IMG_6800

As you are playing, you will end up taking over some of the table: see above.

What is Deckscape?

IMG_6794

If you’ve never played the Deckscape games before, it’s just an (oversized) deck of cards with a little adventure of puzles contained therein. The game is one-and-done: once you’ve played the game, you’ve seen all the puzzles and exploration … and will probably just want to pass this of to a friend.

IMG_6795

The game works by reading the top of the card, and it tells you what to do: see above. Usually, this involves solving a puzzle before you flip the card over to the other size. Once you think you have solved the presented puzzle, you flip the card and see if you are right! Either way, (if you are right or wrong), you still continue on the next card. If you are wrong, however, you get an X—these Xs accumulate and are detrimental to your final score.

IMG_6793

There’s a neat little mirror in this game you have to use to solve puzzles!

Game Arc

IMG_6796

The game lasts about an hour as you try to get to the end of the deck. Along the way, you will solve puzzles. The game recommends a pencil and paper to help with some of the puzzles, but I didn’t need any for my play.

IMG_6802

When you get to the very end (the last card is 64: note the upper left corner), you’re done! Your score is then based on how many Xs you got. Honestly, I didn’t care for the score too much. But it’s nice to do better than worse.

Airport Game

IMG_6797

In some ways, this is the worst Deckscape game to play at the airport, and some ways the best. What do I mean by that?

Of all the Deckscape games, Deckscape in Wonderland is probably the most “meta” and “outside the box” of all the Deckscape games … which makes sense when you consider the source material: Lewis Carrol is known to have many hidden puzzles and metajokes in his Alice books. Thus, when you are tired and grumpy because you are stuck in the airport for three hours, sometimes your brain doesn’t work as well. Maybe this game is best to be played when you are at full capacity?

IMG_6798

On the other hand, the game is so inviting and colorful and fresh, it’s invigorating to play! The colors, the puzzles, the simple mechanisms are a perfect lift-me-up when you are stuck at the airport and grumpy. I found that when playing Deckscape in Wonderland, that the hour just zoomed by! I had so much fun playing!

Conclusion

IMG_6791

I really liked the Deckscape in Wonderland game. It’s not my favorite Deckscape game, but it’s close (my favorite is probably Behind the Curtain): it may be #2? I wish I had more of a brain when I played it, because this one is slightly more challenging than previous Deckscapes.

IMG_6792

But the thing is: I had a blast playing it, even when I was tired. The fun vibe, the colors, the interesting puzzles, the simplicity of the game was invigorating! After playing through for an hour, I was very glad I had brought this with me to the airport.

For first-timers, I probably recommend taking a different Deckscape game to the airport (maybe Time Test), but if you have played any of these, try Deckscape in Wonderland. What a wonderful way to pass an hour at the airport! The form factor was perfect: small deck of cards, easy to play, small playing surface, and easy to clean-up.

Maybe I should have brought three Deckscape game to take up the three hours at the airport?


P.S. I didn’t get any funny looks when playing this at the airport. At least, I didn’t notice if I did because I was having so much fun!

A Review of Tamashii: Chronicle of the Ascend. Is This What Programming is Really Like?

Tamashii: Chronicle of the Ascend is a cooperative programming game from Gamefound This game was originally on Gamefound back in April 2022. It delivered to my house in late September 2023.

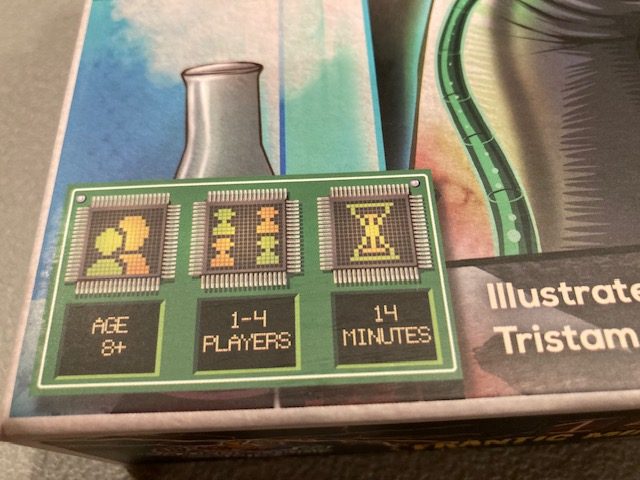
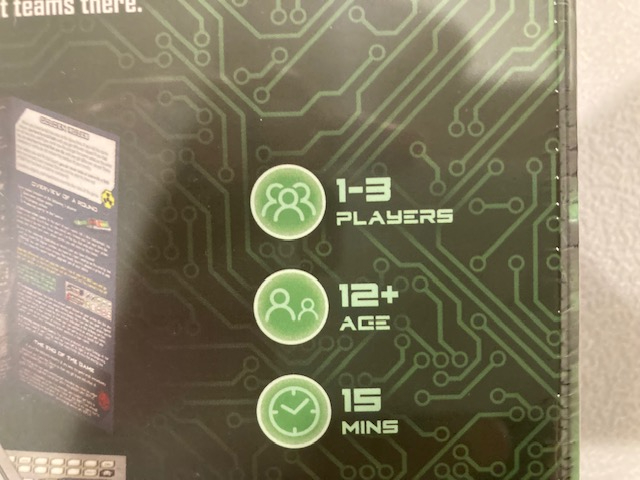
This is a cooperative game for 1-4 players, taking 90 minutes (more on that later) for ages 16+. We were very excited to get Tamashii: it was #9 on our Top 10 Anticipated Cooperative Board and Card Games of 2023! Our only concern was that it was an Awaken Realms game … (well, strictly speaking, it’s an Awake Realms Lite game). Even though their games are gorgeous with amazing production, we’ve had mixed luck with their games. For example, our Tainted Grail (another game from Awaken Realms) experience started amazingly (see Part I) only to be tarnished by the grind of the game (see Part II). Let’s hope Tamashii endures!

Unboxing

IMG_0327

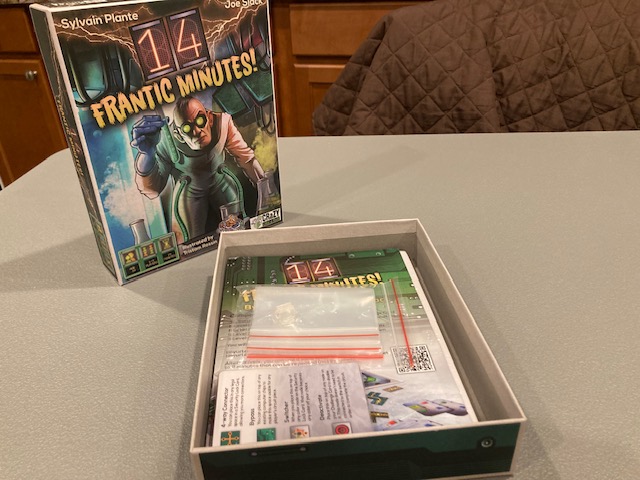
Like all Awaken Realms games, the box Tamashii comes in is pretty well padded and packed. It’s a quality box!

IMG_0328

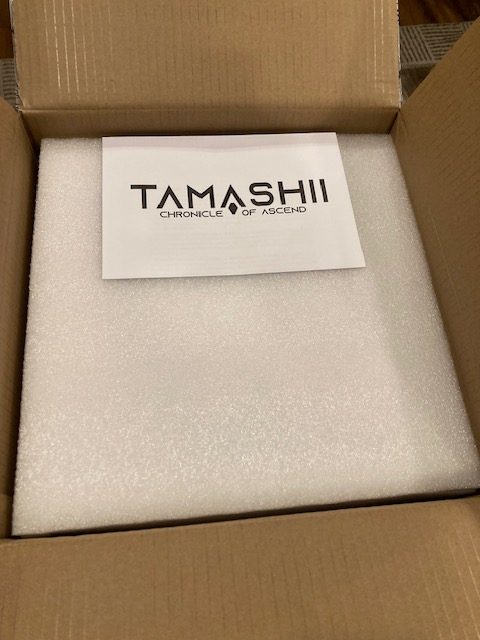
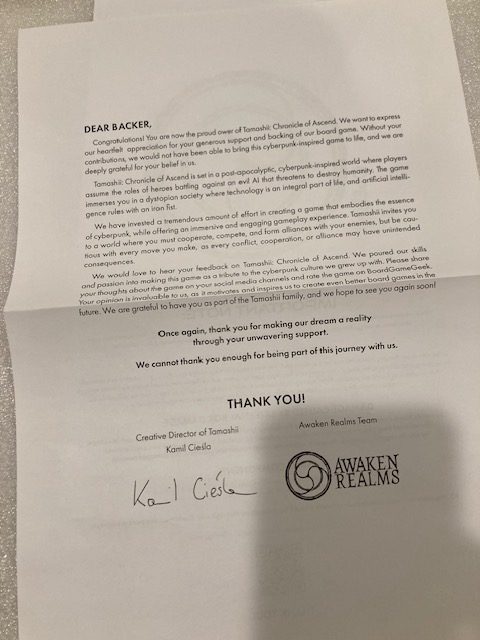
The game comes with a nice letter from the publishers (on top).

IMG_0329

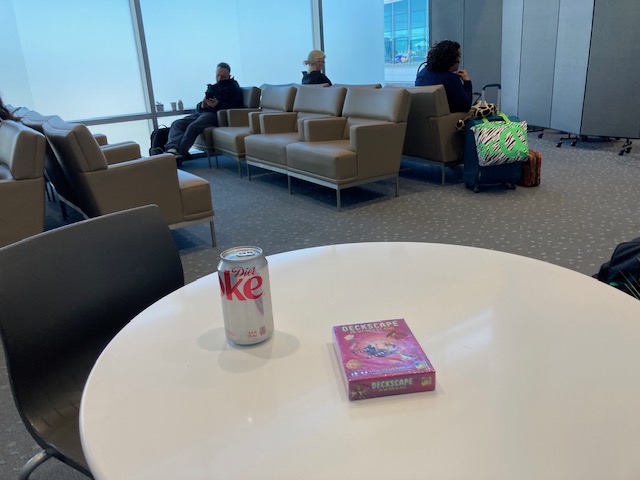
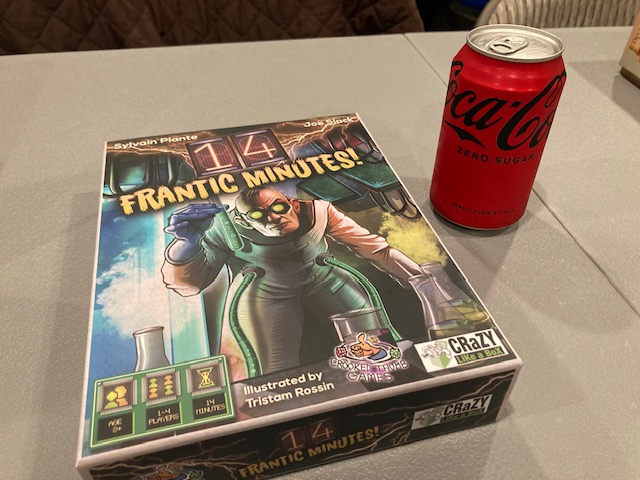
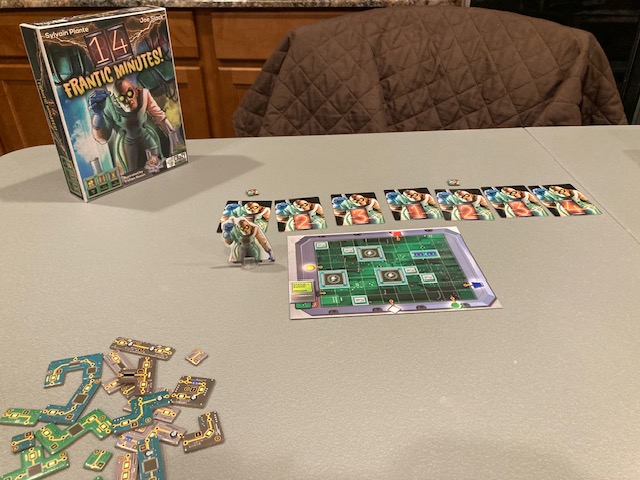
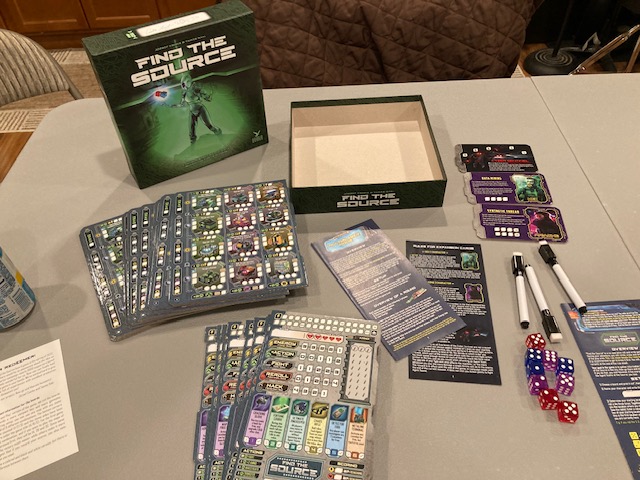
The game itself is pretty big (but not as big as other Awaken Realms games).

IMG_0331

See the Coke can above for scale.
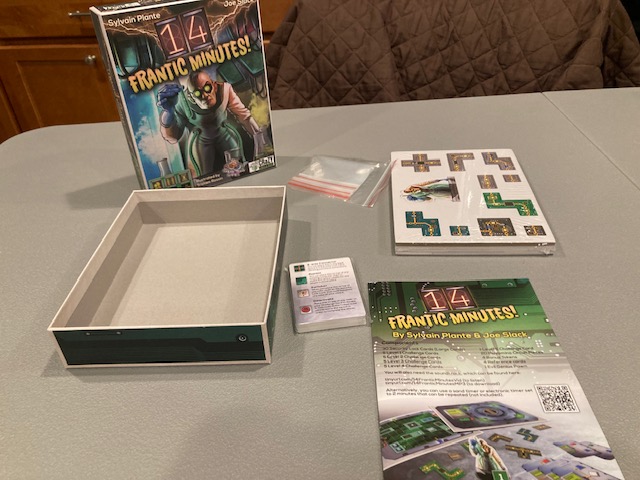
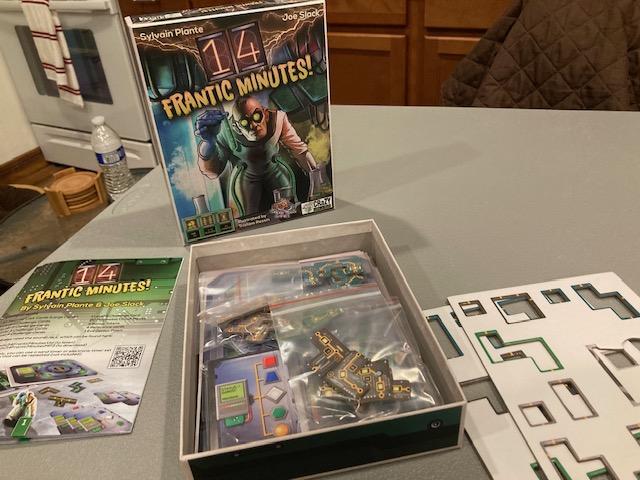
IMG_0342

What’s inside?

IMG_0344

The rulebook is right on top: it’s a big square thing.

IMG_0364

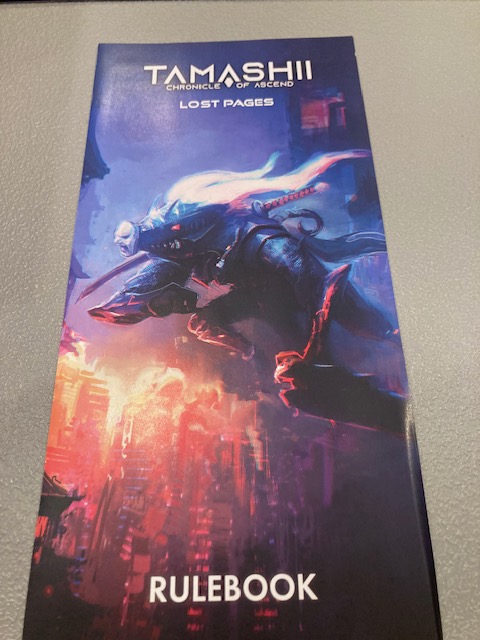
There’s a nice lost Page rulebook.

IMG_0368

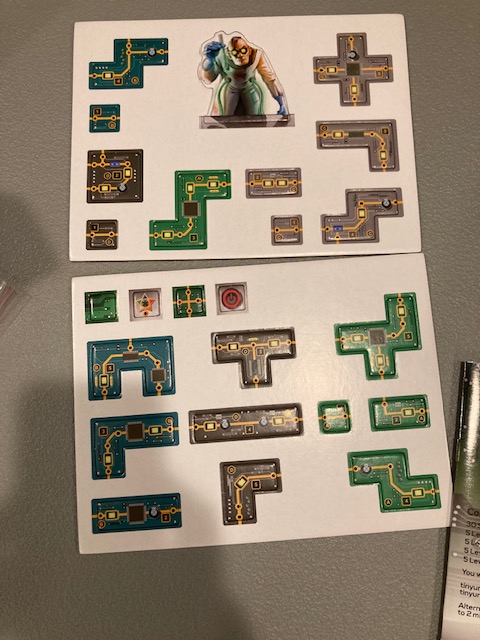
There are quite a number of punchout sheets: some of these will be unnecessary to punch out because they are minis which replace them.

IMG_0369

IMG_0370

I really like that there is a sheet showing where all the minis go on top of the minis! I wish they were labelled (more on that later).

IMG_0371

The minis themself are pretty cool: Lots of cyber-anime minis! This game is set in a post-apocalyptic cyber future in Japan, so these minis really capture that.

IMG_0372

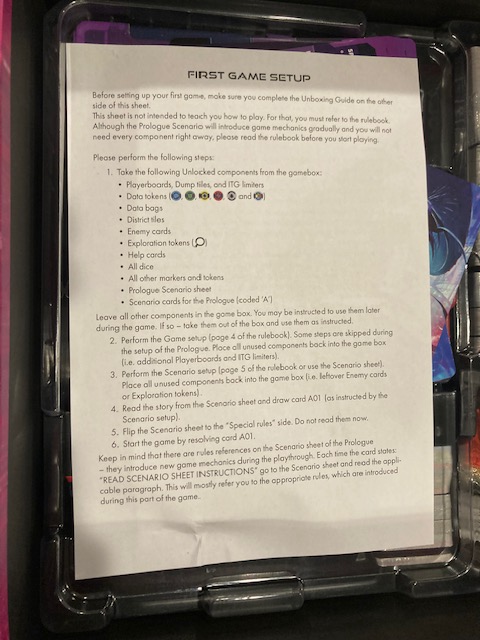
Underneath the minis are a special set-up sheet (for first timers).

IMG_0373

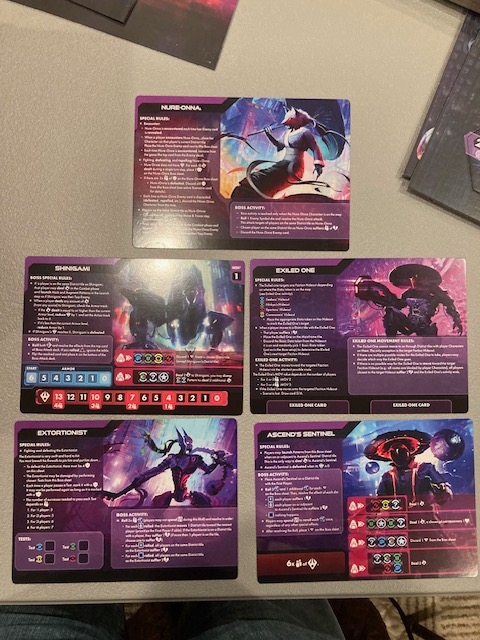
There’s a bunch of bad guy cards! (You don’t necessarily see these right away).

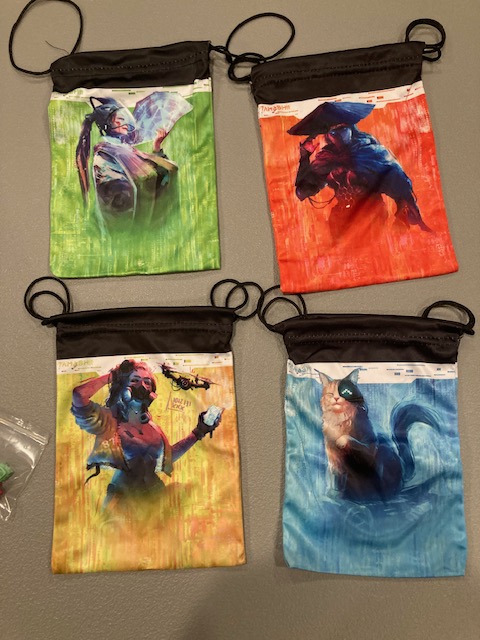
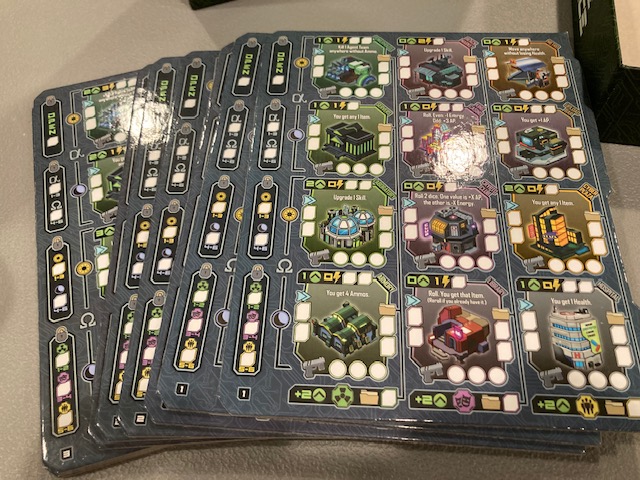
There’s a bunch of cards, dice, player boards, scenario books, and bags!

IMG_0399

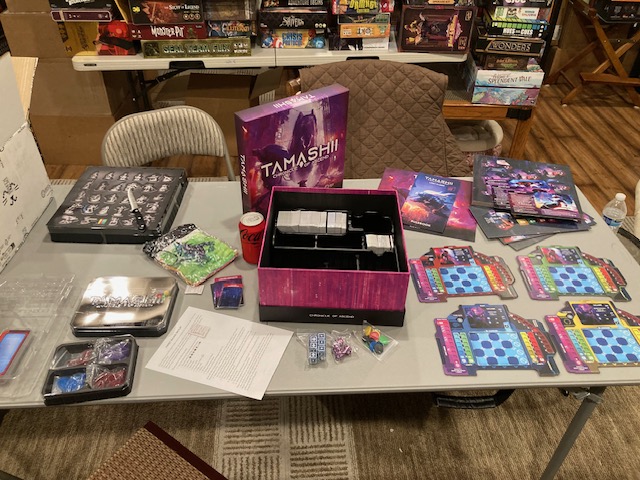
There’s a lot in this box! It looks pretty good!

First Time

IMG_0380

My first time through was a little daunting. Was I supposed to read the rulebook first? The Unboxing Guide above “sort of” showed what you needed to do, but like most games this big, it makes sense to correlate components and labels from the rulebook. This correlating gives you names for later references (“forward referencing”).

IMG_0346

IMG_0403

Our first couple of hours with the game was just unboxing, looking at components, figuring out what everything was, and using the Unboxing Guide to get going. Don’t expect to jump right in to this game! There will be a lot of reading and correlating of components.

Rulebook

IMG_0344

This rulebook is … pretty good to good.

IMG_0345

It gets a C+ on the Chair Test, as I can’t really put it on the chair next to me without it flopping all over the place. Now, the font is big enough to read some of it, and for some of my solo plays, I was able to use the Chair to hold the rulebook. But my first few plays absolutely had me putting this monster square rulebook on my player table (thus eliminating some play space).

IMG_0346

The Table of the Contents and Components (with names) on the first two pages is fabulous.

IMG_0347

The set-up on the next page is quite good too (if a little “small”).

The rest of the rulebook is pretty well notated with Labels and pictures. I don’t necessarily love the organization, as a I struggled a few times looking for a rule.

IMG_0363

BUT: Most importantly, it has an index! Not only an index, the “main definition” of a keyword is highlighted in BOLD so it’s easy to go find where a rule is! This Index really saved the rulebook for me. I don’t quite get the organization, but the fact that the Table of Contents and Index are so well done makes this a very usable rulebook.

IMG_0353

The rules are a big long, but they all seem to be here. I think I had most of my questions answered when reading or playing without too much bother.

IMG_0343

But then the rulebook ends with a BANG putting a nice “important Keywords, Key Phrases and Icons” on the back!

I didn’t love the form factor (C+ on the Chair Test), I didn’t love how long the rulebook was, and I didn’t love the organization, but the Index, Table of Contents, and back cover made this a pretty good to good rulebook.

First Few Days

IMG_0401

My first few days with this game were very strictly delineated. First day: unpack the game and get a sense of all the components: this was a few hours. See above.

IMG_0426 (1)

Second day, set-up the game and start reading through the rulebook, at least a little. This was a few hours too.

IMG_0416

The third day was to be playing through the first Scenario: PROLOGUE. I didn’t have to read the whole rulebook before I played, I just had to read portions as “new rules” were revealed. The little prologue did a good job of not getting caught up in the rules. So, you’d play a few turns to get the hang of some introductory rules, then uncover the next part which had new rules. Then you’d stop and read the few new rules. Then return to playing, getting a sense of the new rules. Then stop, read a few new rule. Return to playing, get a sense, read some new rules and so on … until you got all the rules!

IMG_0419

This piecemeal way of learning the rules worked pretty well. So, at the end of Day 3, I had a pretty good sense of the main rules of the game. The previous two days were shortish, but day 3 was pretty long at about 3.5 hours. It’s a lot of work to play, read, play, read, play read! Make sure you give yourself plenty of time to play.

Gameplay

IMG_0406

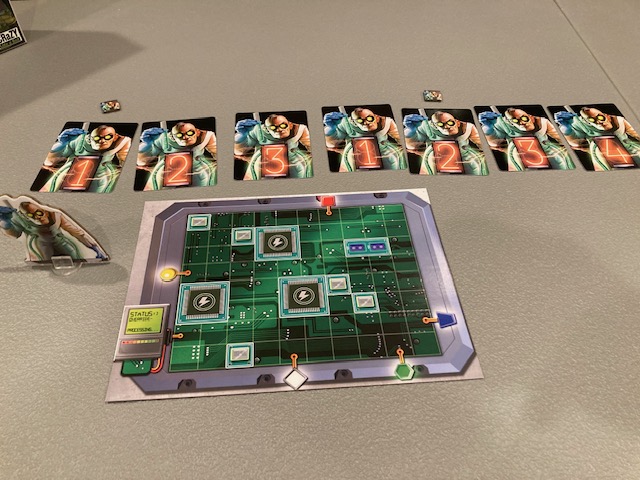
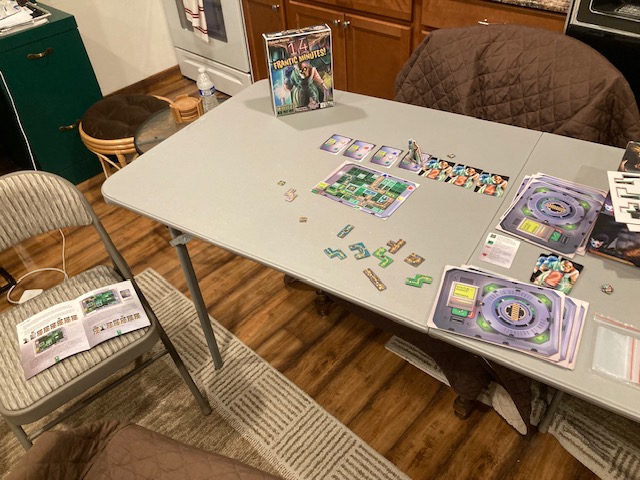
This is a bag-building game! Each player had their own bag, and they can cull tokens, add tokens, and generally do bag-building like operations. These tokens are placed on your console (see below).

IMG_0447

The tokens are yellow, green, blue, and red. Each of these corresponds to an Asset in the game: yellow is reroll, red is extra dice during combat, green is shielding, and blue is memory for upgrades.

IMG_0429

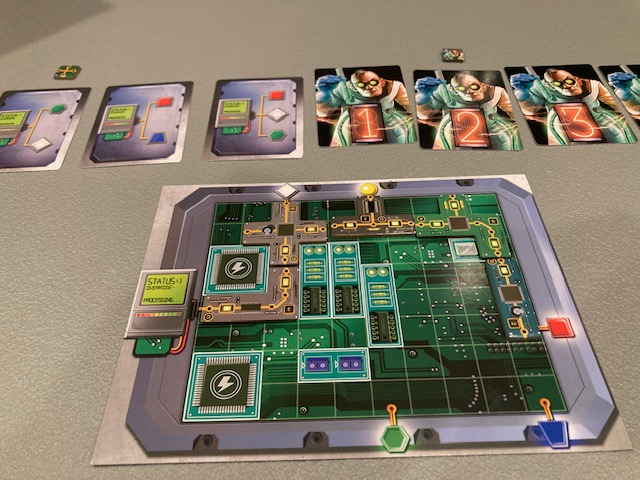
As you pull tokens from your bag, you put them on the your Launcher in the light-blue spaces. Then you “program” moving the tokens around to form patterns. “Programming” is essentially two operations: moving a token 1 space or swapping two adjacent tokens. What you are trying ot form is patterns!

IMG_0482

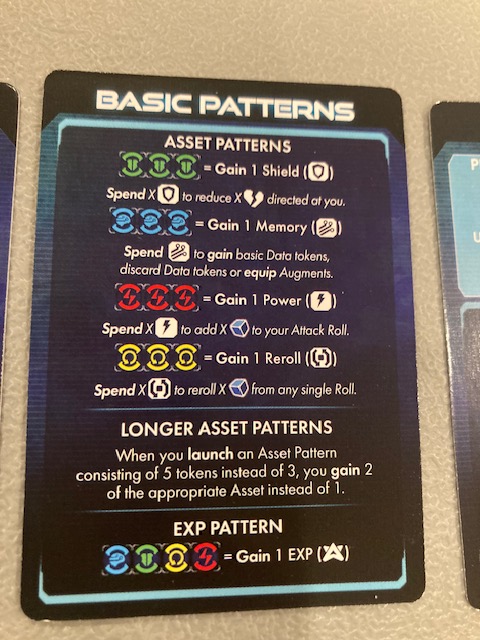
The basic patterns are three in a row: if you can launch that program, you get that resource!

IMG_0429

In this example, I can launch three programs simulaneously: A red basic patterm (giving me one energy), a blue basic patterm (giving me one memory), and a green basic pattern (giving me one shield).

IMG_0407

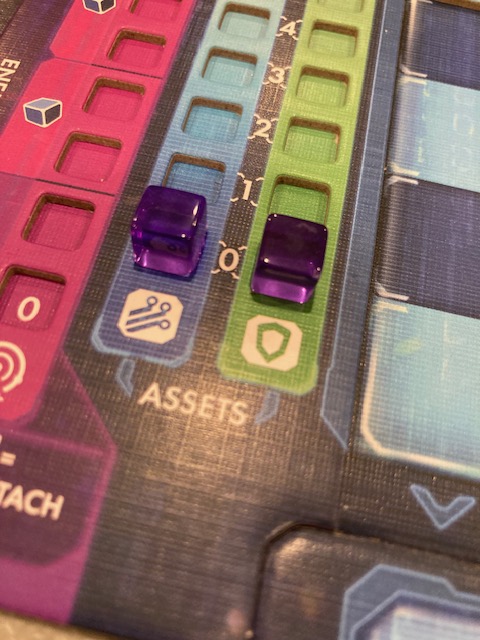
Up your assets to reflect the new status!

IMG_0430

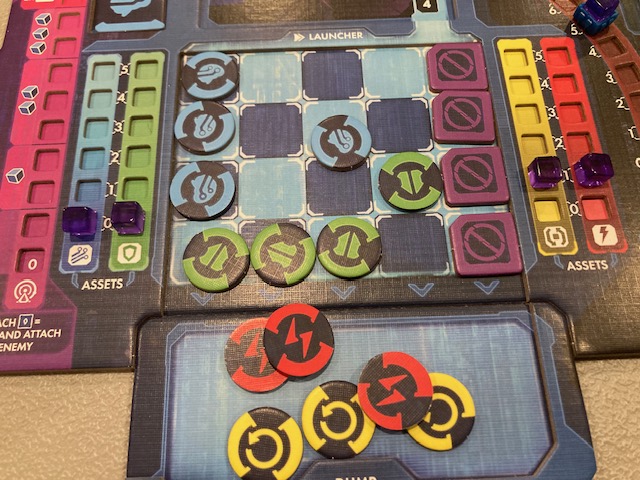
As the programs launch, you place the used tokens in the “Dump” (think discard) just below your board. We just launched the red program above to get 1 red energy!

IMG_0432

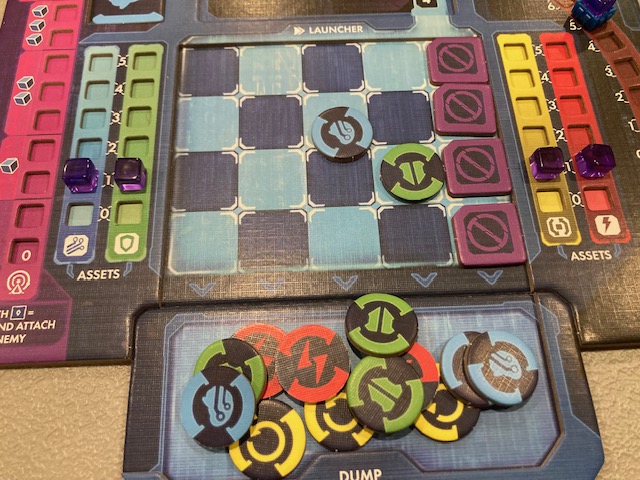
As you launch programs, your launcher becomes empty and your dump becomes full. If you ever need to draw a token from your bag and you can’t, you immediately take all tokens from the Dump into your bag and start drawing from there (the “Dump” is like a discard pile in a deck-building game).

IMG_0508

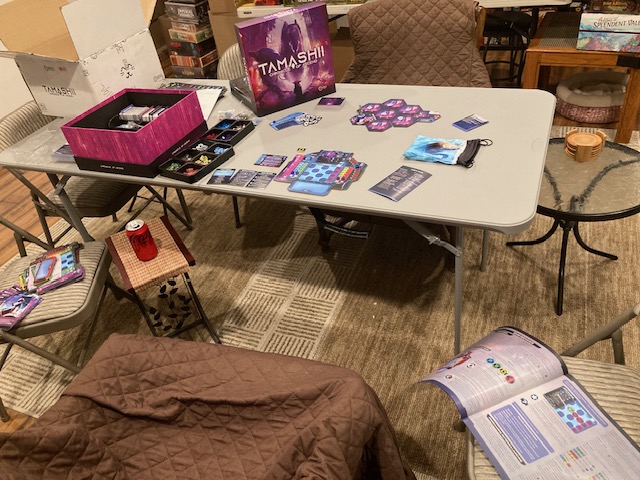
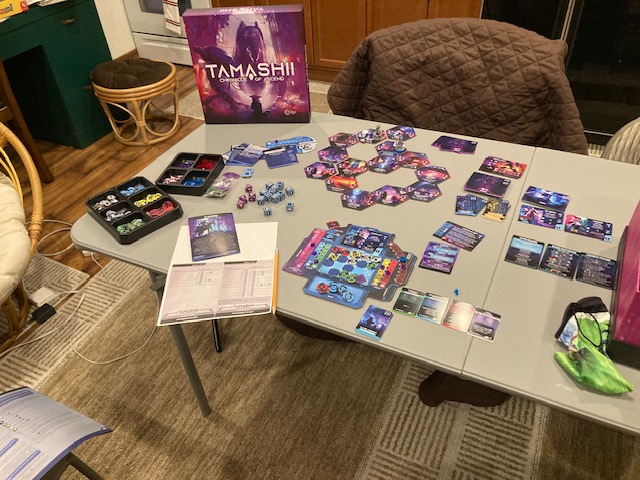
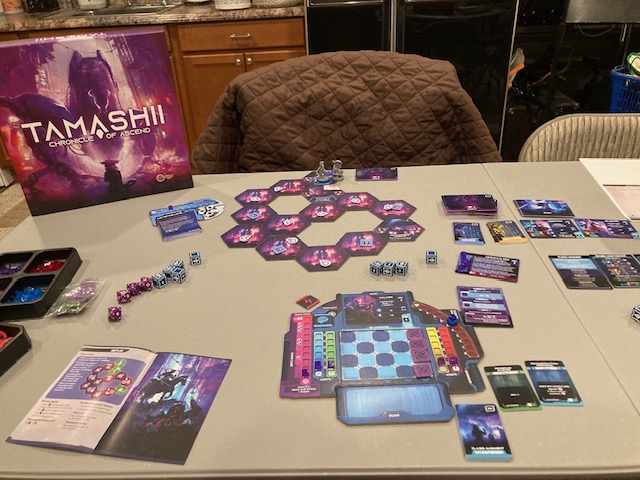
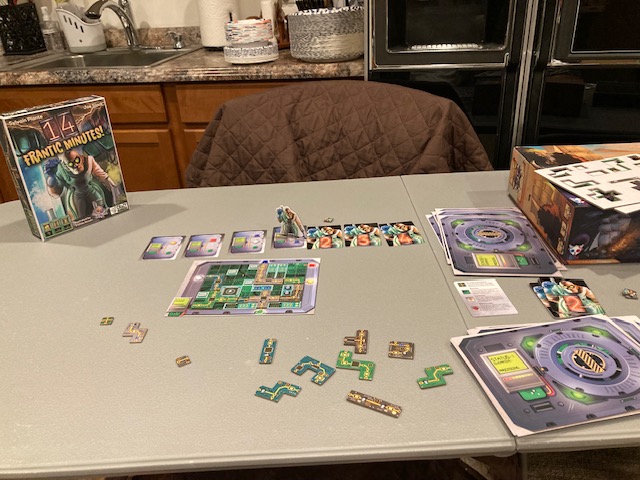
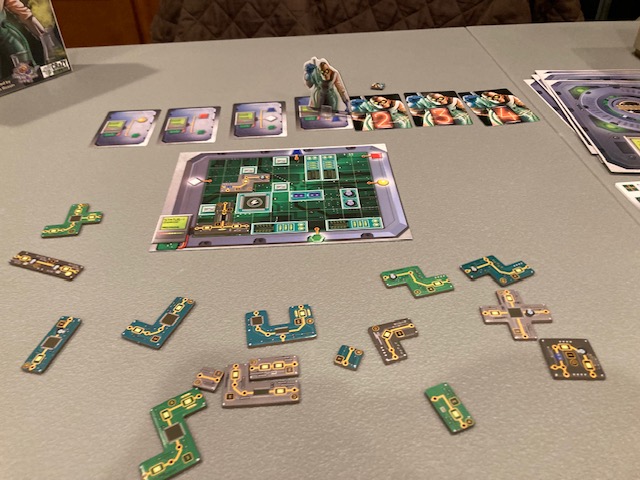
Although this is a deck-building .. pardon me … bag-building game, it is also an exploration game. There are numerous scenarios in the game, and each scenario sets-up a different topology of tiles to explore. Unexplored tiles are flipped over with a “honeypot” token on each one: when you explore it, you flip the token and usually get an asset or something good. It depends on the scenario of course, but usually exploration is good as it opens up the map: you can’t move quickly through tiles you haven’t explored!

IMG_0416

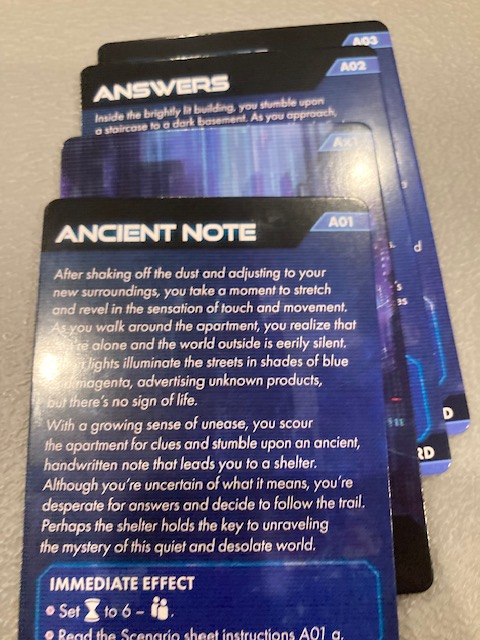
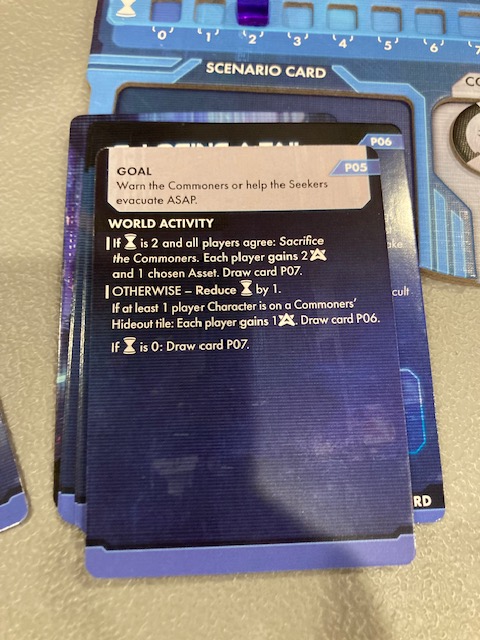
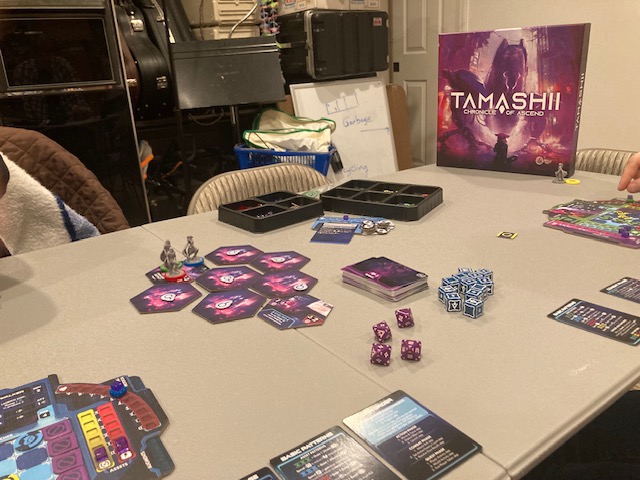
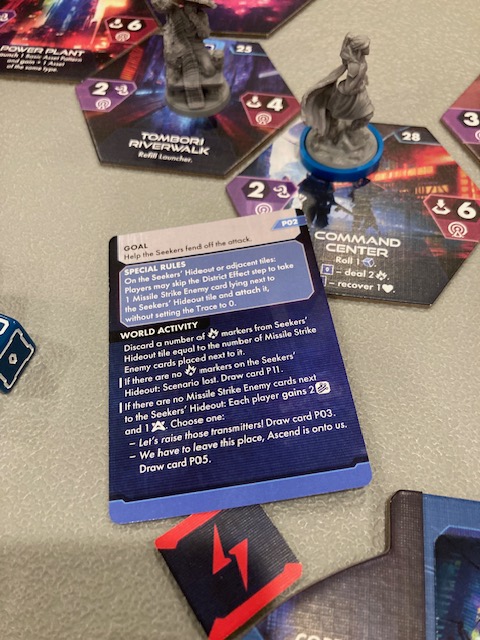
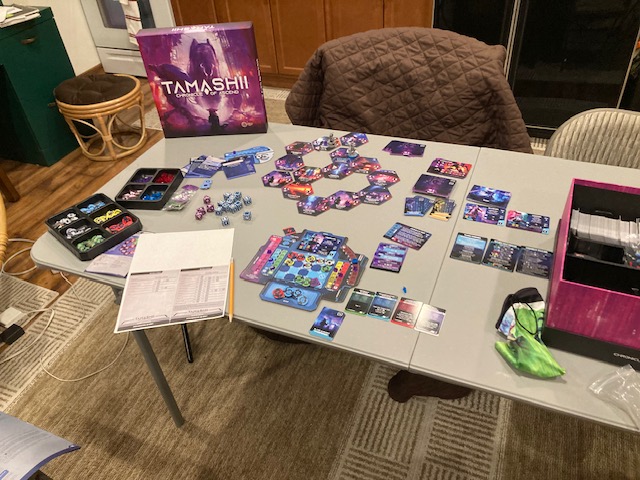
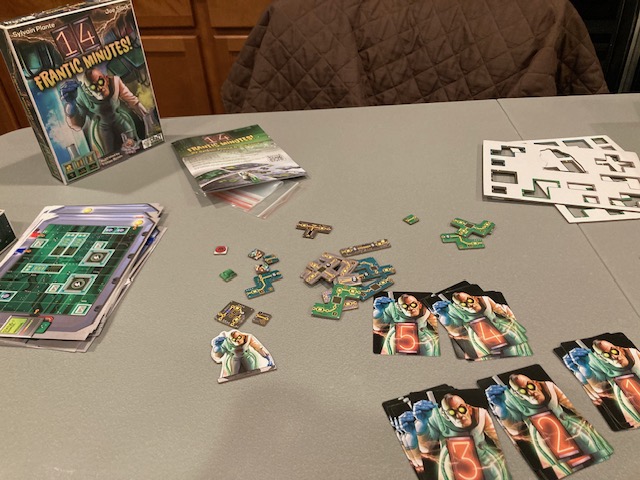
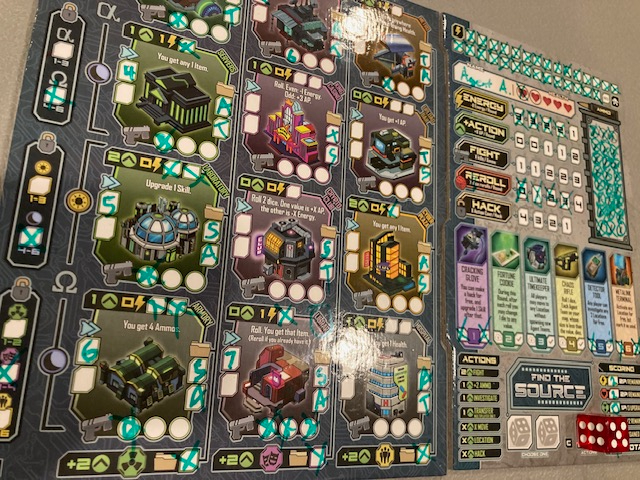
The scenario is controlled by a little book that describes set-up: see above for the PROLOGUE set-up! Each scenario has a little story where you make some “Choose Your Own Adventure” Choices while completing challenges. The game flow is controlled by a Deck for your scenario.

IMG_0422

Usually there in an objective to each part of the story!

IMG_0423

Some of the challenges to overcome are defeating enemies in combat. Combat is a little different in this game: enemies “attach” to you and you have to fight them in the combat phase. This seems pretty thematic: the idea is that you are running around the city trying to get away from the big bad AI, so occasionally they will catch site of you!

IMG_0518

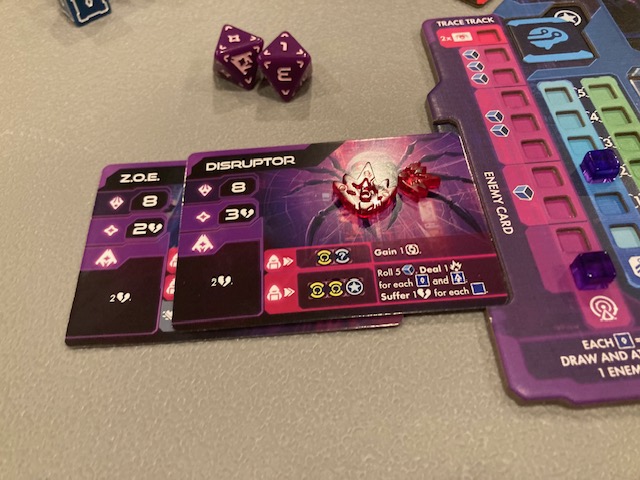
You can either launch programs to do damage, or you can just straight up attack with dice. See above as the DISRUPTER can be harmed with yellow/? program or y/y/core.

IMG_0446

You’ll see the CODER character has 2 ATTack dice when we does fight.

IMG_0445

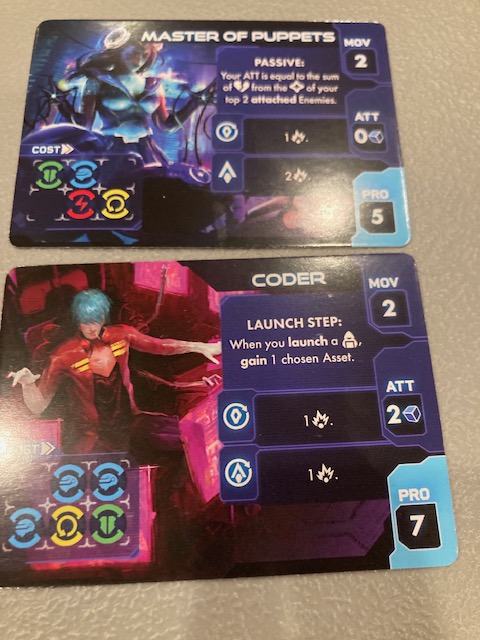
Oneof the cooler elements of the game is that you can upgrade your body to get better Skills: ATTack, or MOVe or PROgramming! You can inhabit the CODER body if you launch the program in the lower left!

There’s also many ways to upgrade your character while you are playing: you spent memory (blue) or EXP (experience) to get AUGMENTS, get new tokens for your bag, cull tokens from your bag, and other ways!

IMG_0513

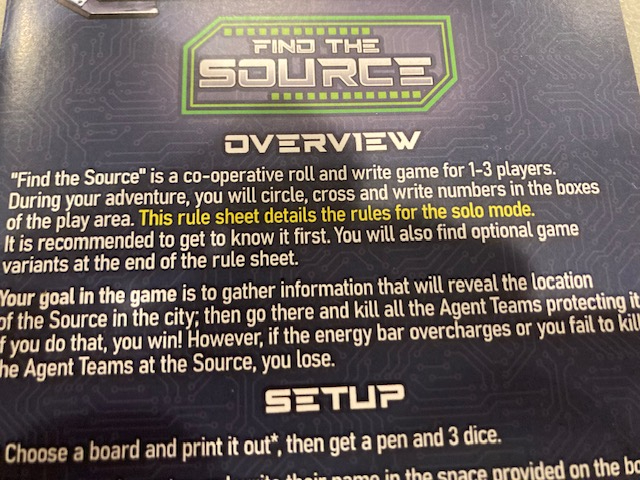
If you can fight, explore, upgrade, and and hack your way to the final card, you win!  

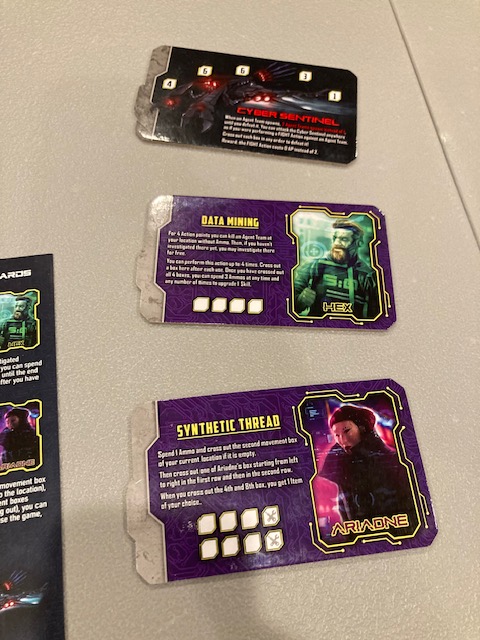
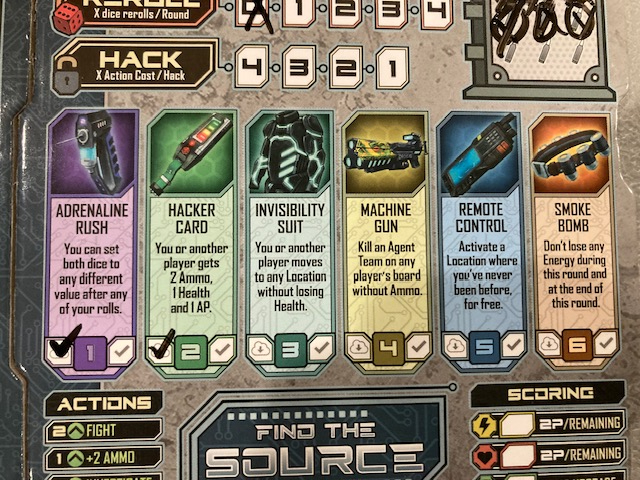
Whew.  Yes, there are a lot of rules to this game. BUT, there are three reference cards (everyone gets their own copy) to help!
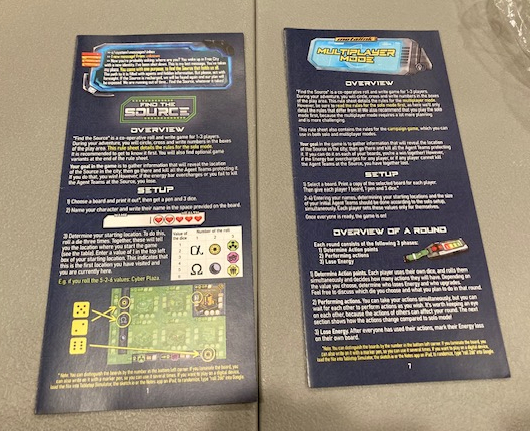
IMG_0506

Solo Play

IMG_0420

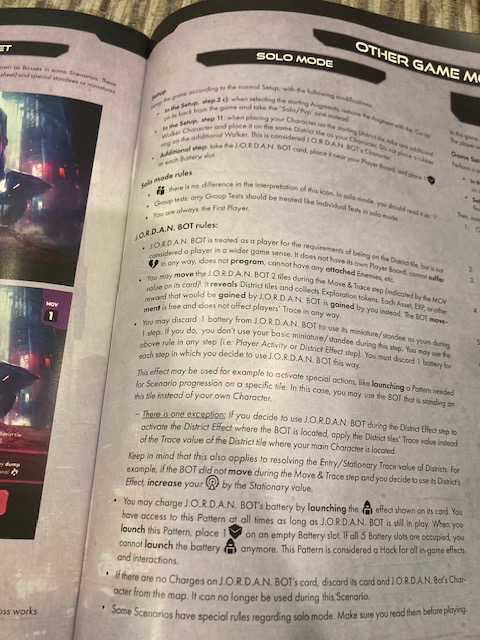
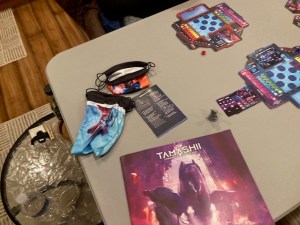
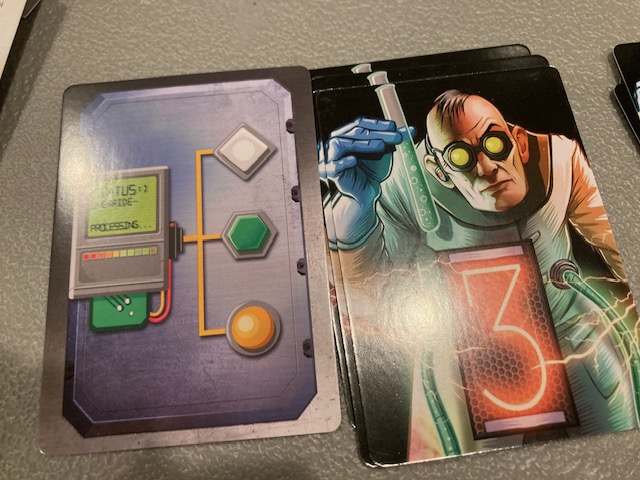
The game has solo rules that work pretty well (thank you for following Saunders’ Law!). There is a half of a page near the back of the rulebook that describes how to play solo: see above. It looks a little daunting at first, bt there are really just two main rules: Use the JORDAN BOT to help you explore, and when you see the PLAY ICON, it counts as just 1 player. So, you only have to play 1 character to play solo.

IMG_0421

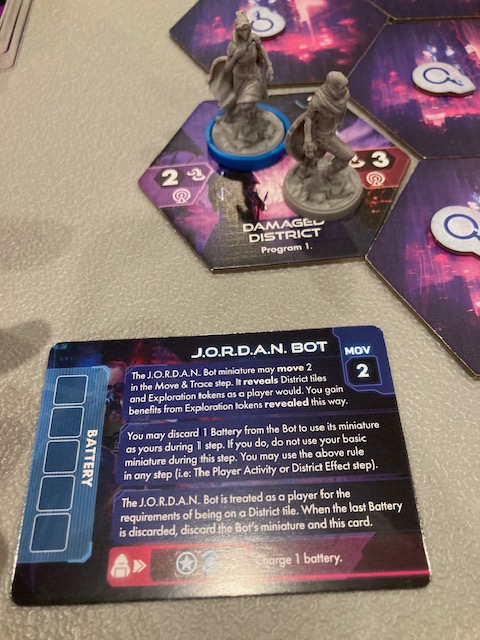
The JORDAN BOT (see card above) basically helps you get the board explored more quickly, and he’s easy to just move without any special rules or skills. Occasionally, you can launch programs from the JORDAN BOT (which can be useful) for 1 battery. See above.

Solo play went pretty well: I think you pretty much have to play this solo first to teach your friends! There are sooo many rules!! Now, once you get the majority of the rules under your belt, it’s easy to teach the rules so you can your friends can move forward quickly.  The game is pretty intuitive once you get over the rules hump.   Like I said earlier, it took me three days to get to my first solo game.  But once I got there, the game seemed to open up.

IMG_0520 (1)

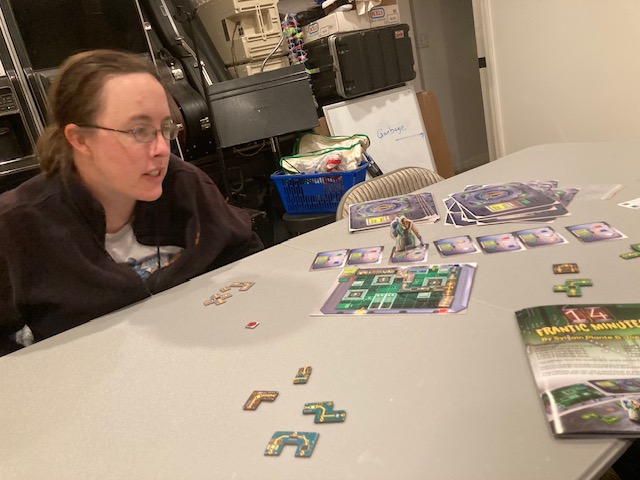
Later on, after playing cooperatively with my friends, I went back and played some more scenarios solo.  This is a pretty thinky solo game, which I like.  The game says 90 minutes, but I still haven’t had a game that short yet. Most games have been at least 2.5 hours, if not more.  I do admit that some of that is “we tend to be thinky”, but I don’t think we are are prone to Analysis Paralysis.  

IMG_0516

I like the game solo, but there are a few problems that I am still unsure about: see below.
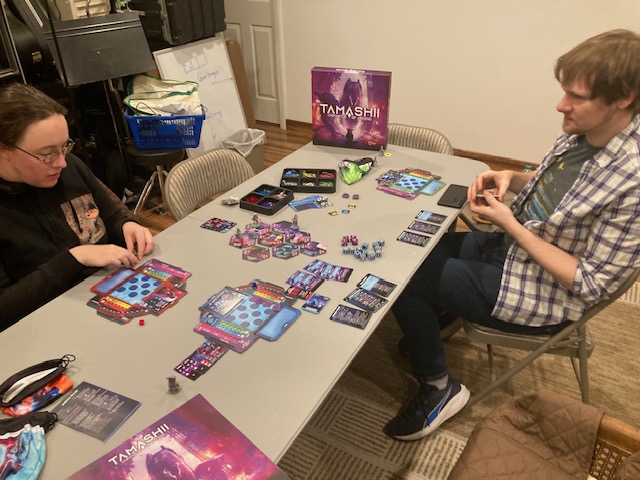
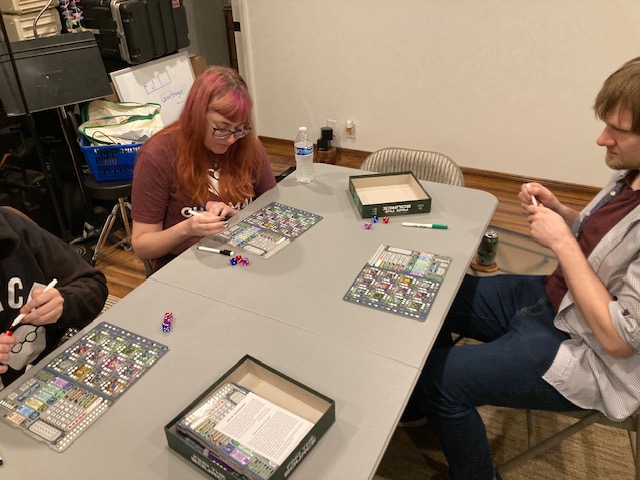
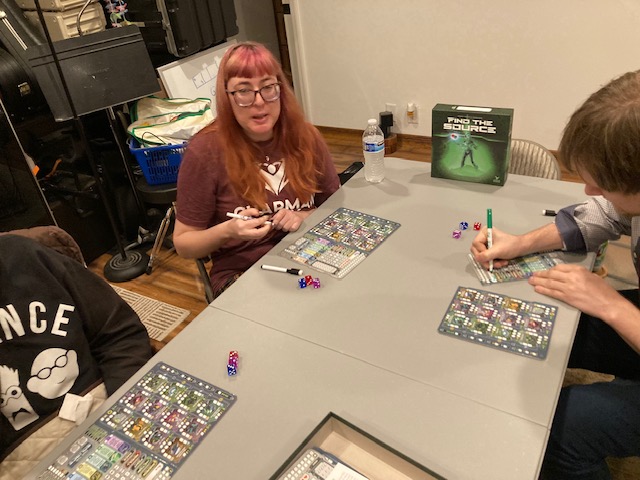
Cooperative Play

IMG_0475

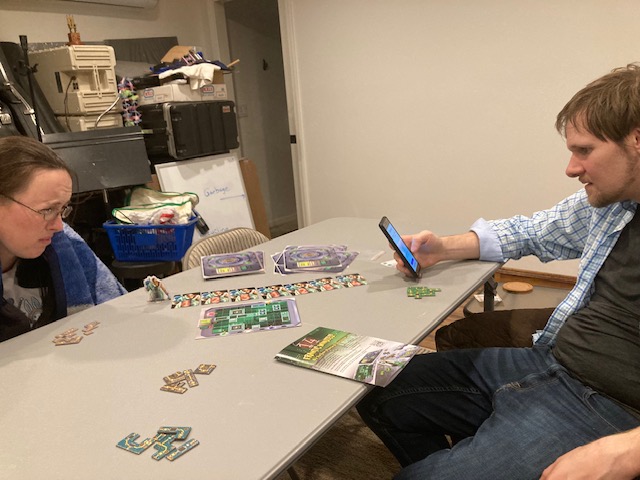
It was absolutely essential to play solo before teaching my friends. Even with me being familiar with the game, it still took 2.5 to 3 hours to teach and play the PROLOGUE with my friends.

IMG_0479

Andrew tends to be the most thinky of our group, and that definitely contributed to the length of the game, but I still am not convinced this game can be 90 minutes!

IMG_0490

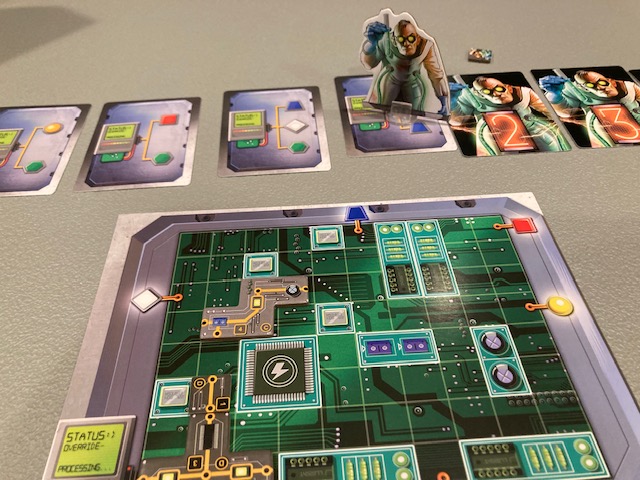
How did it work cooperatively? There aren’t that many mechanisms that allow players to share, at least in the PROLOGUE. So, the intro game felt like we were all kind of playing our own game without much interaction. There are no shared monsters, at least in the beginning! All monsters are fought in solitaire … at the beginning. In fact, we house ruled the game to do simultaneous play at most steps to move the game along quicker!

IMG_0481

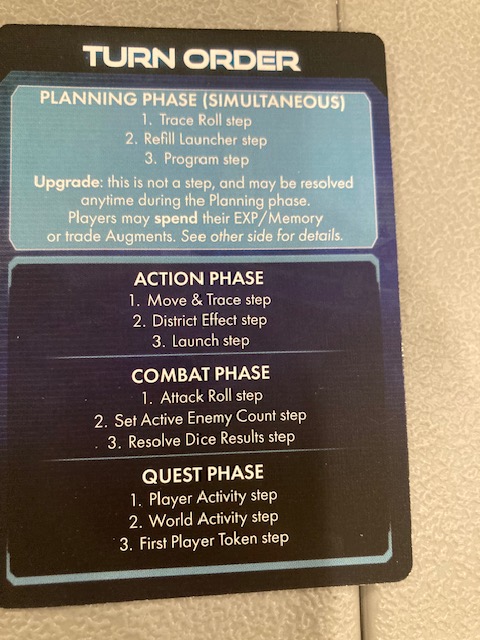
By default, the Planning Phase is Simultaneous (see the Turn Order card above), but after we played for about an hour, we realized that the Action and Combat steps could also be simulataneous! That really sped up the game!

IMG_0489

Now, at some point, we started getting AUGMENTS and skills which allowed us to help our neighbors, which should have made us stop play simultaneously. The “helps” for your neighbors were still simple enough that we could continue playing simultaneously, but we are all engineers and computer scientists! Engineering/Computer Science skills tend to embrace concurrency and recognize when there might be simultaneous-play collisions. At some point, unfortunately, I expect we will have to start playing serially again, which will slow down the game.

IMG_0478

My friends liked the game enough to play again. I think the choice to move to simultaneous play helped that: the game might hve been too long with out that decision.

Campaign

IMG_0511

So, this is a campaign game, but it may not be what you expect. As you complete scenarios in the game, you do not level-up your character, and you do not unlock new items for your character.  

IMG_0514

Instead, when you complete a scenario, you unlock items and make them “generally available”.  For example, at the end of the first PE0x283 scenario, I unlocked 5 new cards (new enemy) and some new Faction augments.  BUT NONE OF THE CHARACTERS GOT THEM immediately. These new cards are now “available” as part of the game: the new monsters “may” come out when you shuffle the enemy deck, and you “may” get the new faction Augments when you get to draw one, and so on.

IMG_0519

To be clear: your character starts from scratch at the beginning of each new scenario!  So, the only level ups you get are ones that you may see when you have to draw from a particular deck. Basically, the game gets more “stuff available” as you play, which you may or may not see depending on where you go/what you do.  

IMG_0503

Do, I like this?  I like that the game gets more and more stuff as you play, so there will be cool new stuff to see.  But, I didn’t love that your character doesn’t level up between scenarios.  I think I was expecting some kind of level up system, and I was a little disappointed that there wasn’t one.

This may just be setting your expectations for the game. Just be aware.

Level Ups During The Game

IMG_0456

Even though your character doesn’t progress as you play, there are still many opportunities to level-up as you play.  Whenever you kill an enemy, you get a EXP token: every two EXP allows you to do some cool upgrades. You can also spend BLUE (memory) to cull and add more tokens to you bag.

IMG_0439

And then there’s the LEVEL UP card which gives you some focus on some level up you can achieve.

IMG_0513

So, even though you don’t get the dopamine hit of “leveling up” at the end of each scenario, there still is leveling up as you play.

Traces

IMG_0517

By far my least favorite mechanism in the game is the Trace: there’s a pink trace to the left of your player board that shows where the trace roll is currently at: see above.

We didn’t talk about this in the Gameplay section, but the way enemies attach themselves to you is by rolling dice based on your current “trace” roll. Basically, the higher your Trace, the more dice you roll: every “o” you roll attaches an enemy to you!  In practice, it “feels like” you get about 2 enemies every 3 turns.  So, some turns you won’t have enemies attacking you (which frees you to actually explore and upgrade), but then other turns you may have 3 enemies on you!

IMG_0518

What I dislike about this is the randomness of it.  Every dice you roll gives you about  50-50 chance of getting an enemy.  You can mitigate this a little by using the rerolls, but you need to understand that the re-rolls are very scarce resources!! And even with a reroll, you may still get the enemies.   It was frustrating because the Trace elements “force” you to play as fast as you can: every time you move or stay still, you up your Trace rating.  In fact, you are encouraged not to sit in one place too long because your Trace score goes up faster.  Arguably, this is very thematic!  You are traipsing around the city being followed by the big bad AI, so you need to keep moving!

IMG_0486

But it was the least fun aspect of the game.  If you rolled poorly, you would get 1 enemy per turn.  And maybe you waste your rerolls to try to slow it down, but that just means you don’t get your rerolls for combat when you need them the most!

I found the Trace to be a little too random, and it forced the game to push forward a little too much.  I just wanted it scaled back just a little…

In one game, I was able to keep the Traces down so I only got a monster every 2 or 3 turns, and in one game I was inundated with monsters almost every turn!  And that’s very unbalancing, as you  have to “waste” your programming to fight, waste your rerolls to mitigate the rolls, and waste your time. Too many monsters was just not fun.

IMG_0515

I wish the Traces felt more balanced. What I saw: Roll badly on Traces and you lose the game. Roll well on the Traces and you win the game.  So, it doesn’t matter how great the rest of the game is, as the Trace rolls seem to define the game. And that frustrated the heck out of me.  It caused me to lower my score of  what’s a pretty good game otherwise.

(Half-formed idea for a house-rule: maybe you always get one free reroll? Or maybe you can spend a memory to just lower the Trace track?  Just give me something more so I can mitigate the Traces a little more).

And Yes, I know there’s a mechanism for eliminating an enemy with a program without getting EXP, and that does help to mitigate the enemies a little more, but it still consumes resources and may only work for a few times, depending on how many corruption tokens you get. Even with that, I still felt so under the gun all the time… I never felt like I could just “enjoy” the puzzles or enjoy this fairly cool world .. I just had to run around as fast I could. Tamashii is a cool world with cool art and cool ideas … but I couldn’t enjoy it as much.

House Rules

IMG_0477

Our experience is that the game is significantly longer than 90 minutes. So, in the cooperative mode, we strongly advise that you play each section simultaneously as much as you can.  Our beginning games seemed like it was pretty easy to play Planning, Movement, and Combat simulataenously without issue.  It made the game seem shorter and more engaging.  

At some point, you won’t be able to use simultaneous play, but  I think your cooperative game will be that much more enjoyable the more you enable it.

Error Bars

IMG_0399

I like this game and would give it a 7.  The randomness of the Traces and some of the scenarios brings that down for me.  But how much?

In a game where the rolling feels balanced or better, I will give this a 7, but in a game where a few rolls (especially on the Traces) completely screw up a two hour game, I will be much more feisty and want to give this a 5 or 6.

I feel like this game doesn’t deserve a 5: there’s too much to like! But it’s also doesn’t deserve a 6, it makes the game sounds too midling. But it also doesn’t deserve a 7: the randomness can really ruin a game.

So I will give it a range of 5-7:  that range indicates what the game can be when things are fairly balanced (a 7), but how awful it can be when the dice conspire against you.

To be clear: if this were a faster game with fewer rules, the randomness wouldn’t be so devastating.  But, after putting 2 hours into a game (with lots of rules) and having it ruined by a few bad Traces rolls… that is very frustrating because there’s so much investment.  

I think some minor rebalancing of the Traces or a slightly different mechanism for attaching enemies would easily make this game a strong 7.5/10.

Miscellaneous

IMG_0487

I really wish the minis were labelled somewhere in the game. I have absolutely no idea when to pull these out. Are these enemies? Bodies to inhabit? The Big Bad Guys? As we inhabited some new bodies in one game, we looked and looked and looked to see if any of the minis were it. Maybe? I remember that Tainted Grail did a pretty good job of labelling, so this was a little disappointing. I have all these great minis … and I am not sure when to use them!

IMG_0496

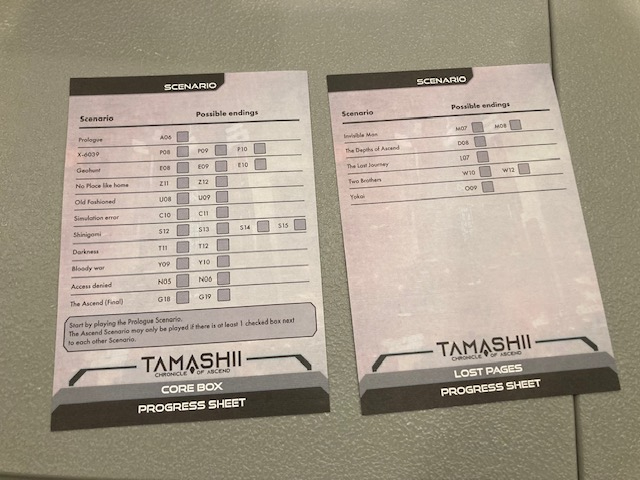
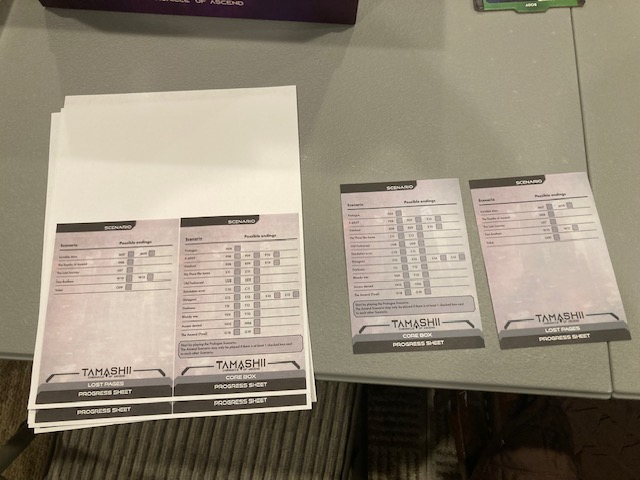
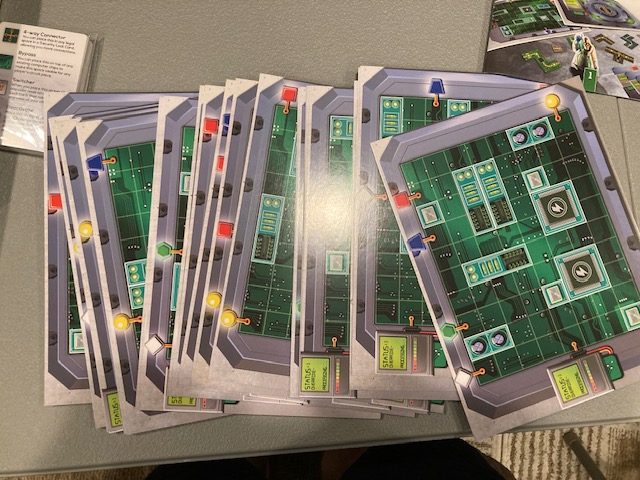
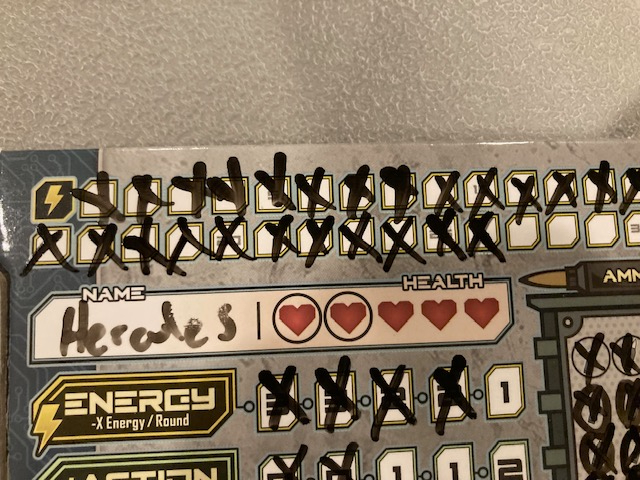
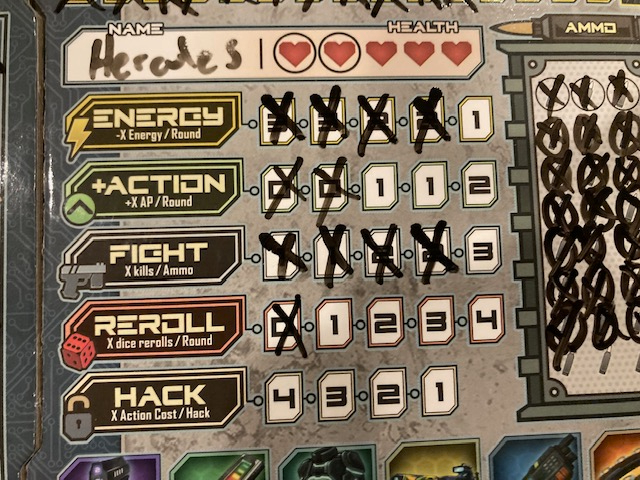
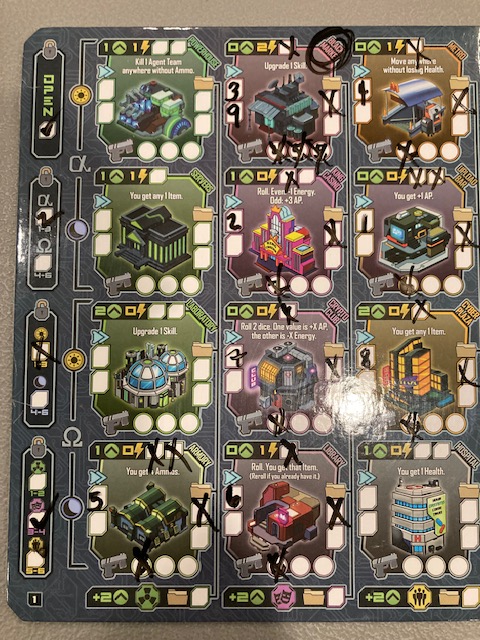
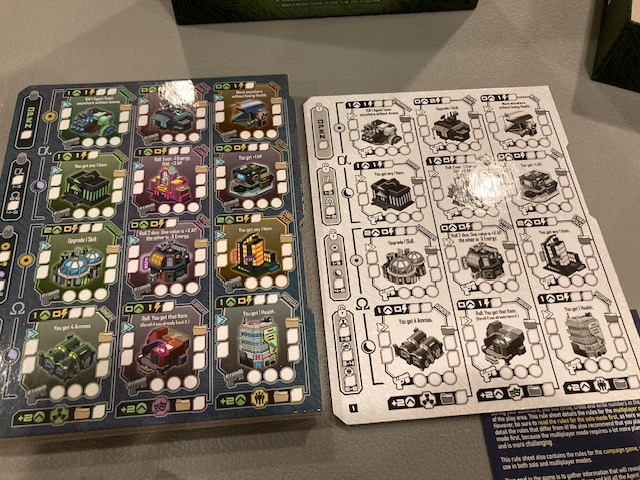
Since this is a ongoing campaign, there is a little checklist you use as you play (see above) to mark progress. . I strongly recommend either printing out a new copy or just photocopying these! I have at least two games going now, one solo and one cooperative, and I need multiple copies! See below.

IMG_0497

Programming

Is this game like what programming is really like in the real world? Not really.  Not at all, actually.  But the idea of using patterns to represent little programs was still fun.  There is some tie to computer science: a lot of times, especially in early computer science, people would study arrays of data looking for optimal ways to rearrange said data (sort it, heapify it, merge it, etc).  And the little programming in Tamashii of swap/move tokens “kinda” feels like trying to find the optimal moves in data.  So, ya, there’s an element of programming?  Maybe?

Conclusion

IMG_0504

I’ve played this mostly solo and I would give it a range value: 5-7 out of ten. When the randomness doesn’t bowl you over, this is a solid game which I like. When the dice and randomness of the game destroy you, it’s not so fun.

My friends (who haven’t played quite as much) would give the cooperative game:
Teresa: 7 and I want to play again
Andrew: 6 and I’ll play again if you want.

Tamashii is pretty good, but it may be a little long:  luckily, it’s easy to shorten by simply adding more simultaneous play in the cooperative game.  But I think the deciding factor will be if you like the extra “spicy” randomness of the Trace rolls.  That extra randomness of Trace rolls will either excite you or disgust you: decide for yourself.

A Review of 14 Frantic Minutes! (The game, not the 14 Minutes)

14 Frantic Minutes! is a cooperative real-time polyomino tiles (aka Tetris pieces) game that was on Kickstarter back in November 2022 and delivered to me in mid-July 2023. Considering that it promised delivery in November 2023, this is fantastic! We had a streak of 6-in-a-row of Kickstarters delivering on-time or early!

IMG_9434

This is a game for 1-4 players, Ages 8+, and an accurate gameplay length at 14 minutes … if you play real-time with the timer.

I backed this game for three reasons: (1) cooperative, (2) tile-laying, and (3) the art.  Call me a shallow gamer, but I really like the art-style for this game!  But, cooperative tile-laying games have been really tearing up the scene for us lately, with Race For The Raft being one of the best tile-laying games of the year (see out review here)!  Will 14 Frantic Minutes! make our Top 10 Cooperative Tile-Laying Games?   Stay with us until the conclusion to find out!

Unboxing

IMG_9487

14 Frantic Minutes! is a smaller box game than many games we have seen lately: see the box above with a can of Coke for reference.

IMG_9436

The box looks fairly empty, with no too many components.

IMG_9437

There’s a rulebook, some plastic bags, cards, a bunch of tiles, and some punchouts.

IMG_9448

I did say this is a polyomino tile-laying game, but there are surprisingly few polyomino tiles! See above.

IMG_9449

The majority of the heft in the box are the 30 Security Lock cards (which I think are poorly named and/or labelled). These are the playfields for the polyomino tiles.

There are also a small number of cards: they are not linen-finished.

IMG_9455

And that’s about it! The components look pretty nice, if a little repetitive (that Evil Guy on the cover is on a lot of cards and components).

Gameplay

IMG_9486

Gameplay is pretty straight-forward: there are 7 Challenge cards showing what connections need to be made (each card is a “room”).

IMG_9461

At the start of the game, you “flip” the first Challenge card (labelled “1” above: this is the difficulty of the connection) and start!

IMG_9452

Each connection card looks something like the above: it indicates what spaces need to connected to the main unit (the Switch). To be clear, all of the shown node symbols need to be connected to the Switch to move to the next room.

IMG_9482

See above as the white/yellow/green and blue nodes all connect to the main switch!

IMG_9476

Players each have a small supply of polyomino tiles, and are all working together to place them on the board to create the circuit! There is no turn order, as players just frantically place their tiles on the board! About the only rule constraining the players is that they can ONLY play their tiles (or the neutral player tiles in a 3-Player game). Other than that, players can talk, show tiles, and communicate as much as they want!

IMG_9487

This is a real-time game! You have 14 minutes (using supplied timer) to get through all 7 rooms!

IMG_9472

Every time you complete a circuit, you flip the next card and grab a new room (aka Security Lock Cards) and start the next circuit!

IMG_9480

The timer occasionally makes the evil bad guy “levil augh” and close a door: whenever that happens, he moves forward one room (at the top). If the badguy ever reaches your current circuit/room (at the top), players lose! If you can do all circuits before the bad guy reaches you, you win!

Solo Play

IMG_9460

So, this game follows Saunders’ Law and has a very viable solo mode. The rules do a very nice job of telling players how to set-up for 1 to 4 Players. Basically, there are 4 sets of 5 polyomino tiles for 4 players. In a solo game, the solitary player gets all 20 tiles! (In a 4-Player game, each player gets one set of 5 tiles). See the solo player above all set-up with all the polyomino tiles in the lower left!

IMG_9485

To get familiar with the pieces, I played my first game without the timer. I strongly recommend everyone do this! I think you need to get comfortable with the pieces to have any chance at this. It probably took me a half hour to do an “untimed” version of the first 7 circuits.

IMG_9483

My next game was timed using the app: and boy did I do terrible! I think I only got to room 4 before I lost. But that’s okay! This game is pretty quick to set-up and try again. Seriously 14 minutes for a game is easy to try again.

IMG_9479

I kind of enjoyed this without the timer as a relaxing puzzle. It sounds like it would be “too easy” when the timer isn’t goading you, but it’s really not! At least, not at first. I found myself looking forward to just relaxing and playing without the timer. I think once that gets too easy, then maybe the timer makes sense?

Cooperative Play

IMG_9602

Cooperative play started the same way as solo play: we ended up playing a full game without the timer. It took about 35 minutes. We had fun, it gave us a chance to learn the pieces .. and it was still hard! Sometimes 3 people end up getting in each others way!

IMG_9604

We did win the 3-Player game with the timer … we think. The problem is that the app stopped because Andrew’s phone shut off after 5 minutes. But we think we won?

IMG_9603

Generally we all liked the game, if we didn’t love it.

Problems

IMG_9438

The biggest problem with the game is the “app”. You can only download using the little Q-box on the front of the rulebook. (Alternately, you can use a timer that resets every 2 minutes). Andrew didn’t want to download it because it took him to a “sketchy” dropbox location. I downloaded without (I think) incident. The other problem was that the laugh and door close weren’t always clear: it seemed like we struggled trying to figure out what the noises meant and then sometimes didn’t hear them! “Is the laugh the next room, or is it the door close?” I think it’s the door close, but in frantic real-time, sometimes we didn’t hear it! It needed to be clearer … louder?

IMG_9439

There were some things that weren’t clear the first few times we played: some of the connections are unclear (when it leaves a colored Node, can it come off in any direction? After many plays, I think the answer is no). But these problem go away after a few full plays: you get familiar with the components and get a sense of how everything works.

Replayability

Even though this is a small box game, I think there is still a decent amount of replayability in here. You can make the game harder by varying the Challenge cards (higher numbers are harder), and the 30 Room Cards give lots of different layouts in which to build your circuits!

Conclusion

IMG_9605

We had fun playing. The game doesn’t really embrace the non-real-time option to play, but I personally think I had the most fun playing without the timer. I saw this is just a fun little puzzle.

IMG_9470

We wish the app were better, but with a little experience, we got it going.

IMG_9455

This feels like a fun little cooperative filler: you can guarantee it’s at most 14 minutes! It’s easy to set-up and easy to play. I can see this being a perfect convention game to play while you are waiting to get to your next game…

I liked it the most:

Rich: 7/10
Teresa: 6/10
Andrew: 5.5-6/10

I think this would make my Top 10 Cooperative Tile-Laying Games, just not near the top of the list.

A Review of Find The Source: A Solo/Cooperative Roll-And-Write

Find The Source is a solo and cooperative roll-and-write game from Kickstarter. This game was on Kickstarter from Dec. 13th 2022 to Jan. 12th, 2023 and it arrived at my house Oct 4th, 2023. It promised delivery June 2023, so it’s about 4 to 5 months late (depending on how you count it). I used to say “that’s pretty typically late for a Kickstarter game“, but recently games have been arriving a lot sooner Still, it’s not egregiously late, so it’s no big deal. (I still have Kickstarters that are years late, so 4 to 5 months is nothing).

IMG_0245

This is a game for 1 to 3 players. The game box says 15 minutes for play time, and wow does that feel wrong! The solo game might be 15 minutes once you know the game, but the cooperative game feels much longer, like 30 minutes to 60 minutes! So, this is still a quick game, just not as quick as the box might say.

IMG_0242

The 3-player upper limit is a bit odd, but this is mostly because the game only has a limited number of boards.

Let’s take a look!

Unboxing

IMG_0246

I paid extra from the Kickstarter to get the boxed version.  See the Fresca can above for scale.  Now, most people from the Kickstarter (2563/2733 backers) actually just did back the the print-and-play version for this: the print-and-play was only $5 (versus $39 for the actual physical version).  Recall that we tried print-and-play with The Legends of Storm City (another cooperative roll-and-write) at the start of the year, and our conclusion was the print-and-play was too much work and and too much money for us: we’d prefer the physical version.  So, we put our money where our mouth was and we got the physical version!

IMG_0247

There’s a nice intro from the developers just inside the box: the little touches help.

IMG_0248

There’s a built-in expansion (adding three different boards): the rules are in a teeny sheet at the top.

IMG_0249

The game is mostly dry-erase boards and dice: see above! The box is filled all the way to the top with boards.

IMG_0250

These are the cardboard boards for the expansions.

IMG_0251

The rulebooks are tri-fold pamphets?!? There’s two rulebooks actually! One for solo play (see above) and one for multiplayer play (see below).

IMG_0291 (1)
The multiplayer rulebook

IMG_0255 (1)

There are 9 player boards in 3 sets of 3 (labelled A, B, and C). When you play a multiplayer game, everyone in the group must get a board from the same set (we figured this out later: it wasn’t clear from the rules). The reason: each player board has a set of 6 items and they all have to be the same items so you can “give” items to each other (without having to read another board).

IMG_0281 (1)

Basically, the three sets give the players some variety: the items are different depending on which set you use.

IMG_0256 (1)

The other 9 boards are 3 sets of the 3 city tiles: like the player boards, when playing multiplayer, all players must get a tile from the same set (labelled 1,2,3). Each city has different locations with different abilities and layouts. Again, the three sets of cities are for variety.

IMG_0258 (1)

And then there’s 9 dice (3 for each player) and 3 dry-erase markers with cool looking erasers. Overall, this is why I paid $39 for this: I get nice dry-erase boards, nice dice, nice markers (well, OKAY dry-erase markers) and a nice package. I am totally glad I paid the $39 for a nice package, rather than trying to print everything myself and wasting time/energy when the printed version is nice!

Rulebook

IMG_0253 (1)

I don’t love that the rulebooks are trifold pamphlets.

IMG_0291 (1)
The multiplayer rulebook

I do like that the recommend way to play is to learn the game is to read the solo rulebook first and THEN play multiplayer. So, read the solo pamphlet first, play a game, and then you can teach your friends multiplayer!

I’d probably give this a C on the Chair Test! Why? Even though it fits well on the chair, the font is really tiny and impossible to read on the chair next to me. I had to have the rules pamphlet on the table as I played: that font is pretty small!

IMG_0252 (1)

Overall, the rules were okay. There were a few misses in explanations, but it did a good enough job teaching the game. I just wish the rulebook, pardon me, pamphlet, had bigger fonts and more of a rulebook presence.

Gameplay

IMG_0292 (1)

This is a roll-and-write game.

Every turn, every player rolls two dice (doubles are always rerolled) until you get two different values. You get the choose one of the dice to use: this is the number of Actions you get this turn. (Mark the actions on the third die and put it on your sheet: see below).

IMG_0270 (1)

Why would you not always choose the bigger number for number of Actions? For one, the bigger number costs an energy! Each player has a limited amount of energy at the top of the player sheet: if any player ever runs out, game over!

IMG_0279 (1)

The second reason is that if you choose the lower number of actions, you get to upgrade one of your five skills!

IMG_0280 (1)

Everytime you X a skill, you make it a little better. For example, I upped the REROLL skill and get 1 reroll of the dice per turn! Early in the game, it may make sense to take the lower number to up your skills.

IMG_0299 (1)

To the left of your player board is the city! See Above. Players use Actions to fight gangs, move, activate locations, and investigate! In case it wasn’t clear from the name of the game, the purpose of the game is to Find the Source!! The Source is a city location where the big bad hides out .. you have to find the Location of the Source, storm in there, and take out all Agent Teams at that Location! If you do that, you win! Players lose if they ever run out of energy or can’t manage to take down the Location of the Source.

Find the Source

IMG_0284 (1)

Locations have a little folder on them: to help find the Source, you have to spend an action to Investigate (put an X on the folder). Once enough Locations are investigated in a row, a player can HACK to find a portion of the Location (which column, or set of rows).

IMG_0277 (1)

Once you find the Source, you will populate it with Agent Teams, and all players will have to take out the Source on their board to win (the Source is the same on all player boards).

Solo Play

IMG_0265 (1)

It’s so interesting that the game has a separate rulesheet for solo mode! And in fact, it suggests that you play a solo game before expanding to the Multiplayer Game! So, this game absolutely follows Saunders’ Law! I would say this game was probably solo first, then the multiplayer tacked on: at least that’s what it feels like.

IMG_0283 (1)

Solo set-up is pretty easy! Find a player board and a city board and stick them together! There’s 3 different types of player boards (where the Items vary) and 3 different types of cities (where the Location abilities vary), so there’s some variety in the game! Note that the boards actually physically fit together very nicely: they are slotted.

IMG_0285 (1)

The solo game was pretty fun. My first game was a win, but I cheated: I forgot to pay energy costs when I used Locations. Later games were closer, but still fun.

IMG_0287 (1)

Overall, the game was longer than 15 minutes as the box says. I tend to ponder more, so I suspect my solo games going forward would be 20-30 minutes for the solo games.

IMG_0286 (1)

The game is really Find The Source to win, but there is also a notion of score, so you can try to do better on later games and “best” your high scores.

IMG_0288 (1)

As I played, I always felt engaged. I had to think ahead of what I wanted to do, choose when to take fewer actions to upgrade skills, but always balance energy and ammo. Honestly, the solo game worked pretty well. I can imagine playing this when I am waiting for someone to come over, or if I want to kill 20 minutes. It’s pretty easy to get going, the rules are simple (once you know them), and the game sets-up so quickly!

Cooperative Play

IMG_0294 (1)

The cooperative game is very similar to the solo game! Every player gets a board (making sure the player and city boards match), and does everything the solo player would do on their board only. The difference is that the investigate and HACK Actions are shared, so when any player investigates, ALL players mark information! The HACK Action becomes a lot harder, as more players have to investigate rows of the city to enable the HACK. So, players need to coordinate as they play: “I will investigate King Casino this turn! Someone else needs to investigate there too so we can HACK!”

IMG_0297 (1)

The other major difference is that players can use an Action to “share” Ammo, Health, and Items! If one player is lacking on a turn, players can “give”!

IMG_0301 (1)

Players all win or lose together: if any player runs out of energy, then all players lose! Once the Source has been discovered, it’s the same on all city boards! So, each player must “handle a different entrance” of the Source Location and take out the Agents! Players when when all players have handled the Agents at their entrance!

IMG_0286 (1)

Score still matters: if the players win, all players compute their individual scores and the LOWEST score is the score for the team! That’s why the “share” action is so important: if one player is rolling well and another is rolling poorly, there is a way to share the wealth to try to keep all scores up.

IMG_0295 (1)

This game felt “a little” like multi-player solitaire, as each player tends to concentrate on their own board. The shared Investigate/Hack actions did help elicit some cooperation (as did the share action). This isn’t a game where everyone is engaging in massive amounts of cooperation, but there is enough that you still will enjoy playing with your friends. And the Alpha Player seems to lay dormant, as everyone is too busy focusing on their own board…

Some Issues

IMG_0264 (1)

The erasers for the game are fantastic … they do work well! (I don’t think I’ve ever seen white dry erasers) But the included dry-erase markers have too “fat” of a marker: the writing on the board looks messy. Nowhere is that more obvious than the scoring section: it looks messy.

IMG_0286 (1)

We ended up using ultra-fine dry erase markers when we played again!

IMG_0296 (2)

These are a lot easier to read!

IMG_0300 (1)

Sara used the purple ultra-fine marker and it looked cleaner! Honestly, we’ve had this issue with “too fat” dry-erase markers with HexPloreIt (see our review here) and other games that use dry-erase markers. It would be nice if game used ultra-fine markers.

IMG_0282 (2)

Another issue we had was “where are we in the city???” The current city Location is the “highest number” to the left of the city, but as you go back and forth between city board and player board, it might be nice to have some kind of pawn to show where you were …

IMG_0324 (1)

So, even though the game doesn’t come with a pawn, we recommend getting one for your board: we stole that one out of Mechanical Beast (a cooperative tile game that’s not quite a tile laying game: see our Top 10 Cooperative Tile-Placement/Tile-Laying Games). It’s a minor thing, but it helps.

Cool Stuff

IMG_0264 (1)

The erasers on the pens are fantastic: I know I already said that, but they were some of the best dry-erase erasers I’ve seen! They worked really well!

IMG_0260 (1)

A Cool feature: The boards are two-sided! See above! One side is black-and-white, and one is color! So, if you find the color version too “busy”, you can use the black-and-white side instead! All my friends and me chose the color side, but I definitely admit the black-and-white side is much less busy.

IMG_0291 (1)
The multiplayer rulebook

There is a campaign to try: it basically just takes you though all the boards. I personally found that one game was “just right”, I’m not sure I need the campaign, but it’s cool that it is there.

It’s also cool there is some variety in the boards: it won’t be the same game everytime and it’s really easy to use different player and city boards.

Conclusion

IMG_0292 (1)

There aren’t a lot of cooperative roll-and-write games. We liked Escape: the Roll and Write Game (see review here), and The Legends of Storm City Roll and Write Game (see review here) was a bit of a miss for most of my group, but I think Find The Source may be our current favorite cooperative roll-and-write game! It’s got great components, it has solid rules, has interesting choices as you play, it’s easy to set-up, it’s easy to learn, it’s easy to play, it’s quick to tear-down, it’s quick, and it’s fun. It might be a little samey if you play too much, but it’s easy to pull this out occasionally and play in 20-60 minutes (depending on your player count). One caveat: You should probably get some ultra-fine markers, and a pawn or three.

I’d say this is a solid 7.5/10.